


uBoard Installation Guide (V4.1)
11 |
P a g e
upper side, keep 5 cm distance at least between them
.
When to place the Station on the upper or the right side of the projected
screen, please refer to section 3.4 or 4.4 in this manual depending on the
Operating system.
⑧
Press the station against the surface to adhere the station holder on the
whiteboard or wall. When you remove the station from it, you can see only the
station holder adhered to the surface.
(From next time, you can simply mount the station on the station holder after step
~
)
⑨
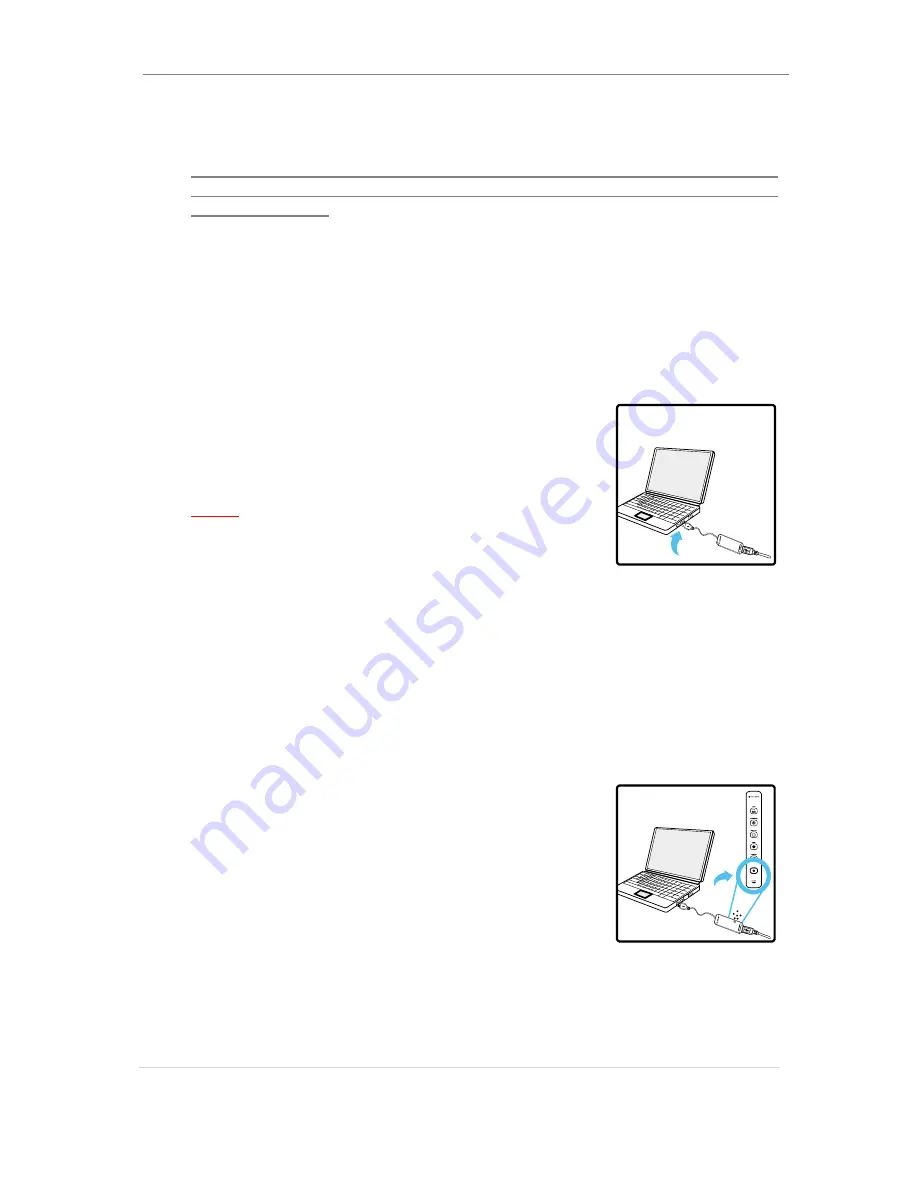
Connect the Active-link to the computer and USB cable to the Active-link in
order.
[For wireless model] Connect only the Active-link to
the computer.
Note:
Do not connect the USB cable to the Active-link or
to the USB port in the computer directly because
the wireless model doesn
’t require USB cable for communicating between
the station and the computer.
After SW installation to the computer, when to connect the USB cable to
the computer directly without using the Active-link, the wireless model will
communicate by using USB cable connection. Therefore, the Active-link
always needs to be connected to the computer for wireless
communication.
⑩
Press the power button on the Station. Then blue light is turned on.
[For wireless model] Wireless model is using
Bluetooth communication technology. As uBoard
wireless model adopted pre-pairing technology, it
never requires user intervention even in the case the
pairing was broken because it automatically recovers
the broken pairing.
When pairing is done successfully between the station
and active-link, the blue light on the station will be
turned on permanently from blinking status.
During annotation, when inking is not displayed, check the blue light status. If
it blinks, uBoard is under re-pairing process as the pairing was broken with
some reason.


