background image

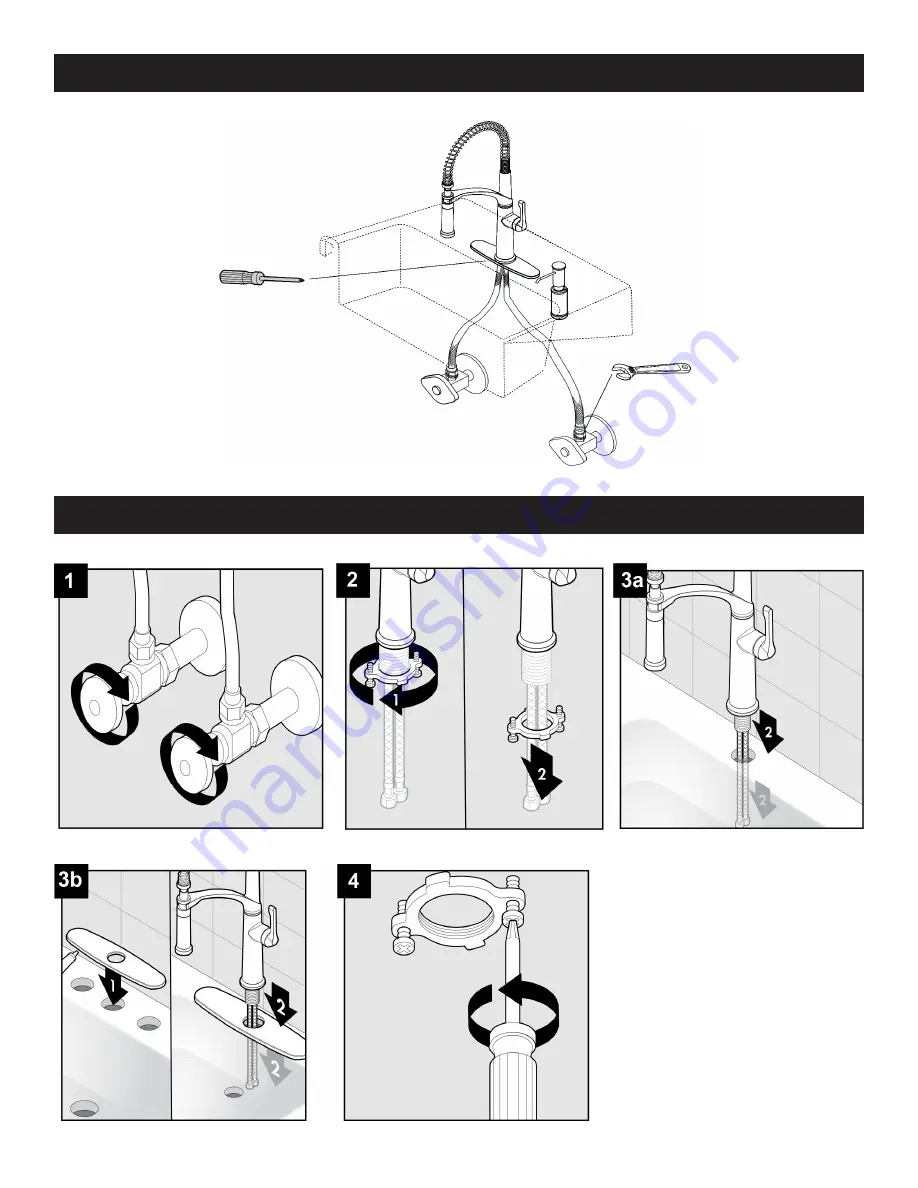
ASSEMBLY INSTRUCTIONS / INSTRUCCIONES DE ENSAMBLAJE

Unscrew the pre-assembled guide 

washer screws on guide washer 

until they are flush with the face of 

the guide washer.

Retire los tornillos preensamblados

en la arandela guía hasta que estén

al ras con la cara de la arandela 

guía.

HELPFUL TOOLS (NOT INCLUDED) / HERRAMIENTAS ÚTILES (NO SE INCLUYEN)

Содержание PWW230-B

Страница 1: ...or easy cleaning Includes finish matched stainless steel wire grid Includes finish matched stainless steel strainer drain This sink is intended only for under counter installations of solid surface composite or natural stone countertops It should never be installed in laminated countertops Thus specialized tools are required It is highly recommended that this product be installed by professionals ...

Страница 2: ... 10 21 All rights reserved Copyright Pelham White 2021 548 South Columbus Avenue Mount Vernon New York 10550 1 855 561 5222 www pelhamandwhite com Installation This sink is intended only for under counter installations of solid surface composite or natural stone countertops It should never be installed in laminated countertops Thus specialized tools are required It is highly recommended that this ...

Страница 3: ...a con Servicio al Cliente necesitará el modelo número de serie y código de fecha Por favor busque la etiqueta de identificación del producto y la etiqueta del número de serie Anote el número de serie y el código de fecha aquí ANTES DE INSTALAR Serial Number número de serie Please attach your receipt for proof of purchase Adjunte su recibo como prueba de compra Date Code Fecha Código BEFORE INSTALL...

Страница 4: ...embled guide washer screws on guide washer until they are flush with the face of the guide washer Retire los tornillos preensamblados en la arandela guía hasta que estén al ras con la cara de la arandela guía HELPFUL TOOLS NOT INCLUDED HERRAMIENTAS ÚTILES NO SE INCLUYEN ...

Страница 5: ...ASSEMBLY INSTRUCTIONS INSTRUCCIONES DE ENSAMBLAJE ...

Страница 6: ...y trim cap and locking nut Take out existing cartridge and discard Replace with new cartridge and reassemble Retire el ensamble de la manija la tapa para el reborde y la contratuerca Saque el cartucho existente y deséchelo Reemplácelo por un nuevo cartucho y vuelva a ensamblar CARE AND MAINTENANCE CUIDADO Y MANTENIMIENTO Clean periodically with a soft cloth Avoid abrasive cleaners steel wool and h...

Страница 7: ...his warranty supersedes all prior warranties El fabricante garantiza que este grifo no presenta defectos en la mano de obra ni en los materiales presentes en el momento del transporte desde la fábrica durante un período limitado de por vida a partir de la fecha de compra Esta garantía es válida sólo para el comprador original El fabricante acepta reparar dichos defectos sin cargo o según nuestro c...

Страница 8: ... Soap Dispenser Assembly Ensamblaje de dispensador de jabón 4 A104044 Locking Nut Contratuerca PART PIEZA DESCRIPTION DESCRIPCIÓN PART PIEZA 9 A010834N Seal Sello 11 A031000NI Hex Wrench H2 5 19 mm L 53 mm L Llave hexagonal 8 A663A19 Clip Assembly Ensamblaje de la presilla 10 A568004N Sprayer Manguera del rociador 12 A66F489 T Cover Plate Putty Plate Cubierta y placa de masilla REPLACEMENT PARTS L...

Отзывы: