background image

Owner’s manual

Owner’s manual

10

EN

11

EN

SAFETY INSTRUCTIONS

Read this instruction manual and keep it for future reference. Producer
does not take responsibility for damages caused by inappropriate
handling and use of the product.

• Protect this device from humidity, water and other liquid. Avoid using/

storing it in extreme temperatures. Do not expose it to direct sunlight
and other sources of heat.

• This appliance may be used by children who are above 8 years old and

by persons with reduced physical, sensory or mental capabilities, or lack
of experience and knowledge, if they are supervised and guided by a
person who is responsible for their safety in a cautious manner for all the
safety precautions being understood and followed. Children should be
supervised to ensure that they do not play with the appliance. Children
should not perform cleaning and servicing of the device unsupervised.

• Keep the device out of the reach of children.
• Use only authorized accessories.
• Always disconnect the product from the power source before cleaning.
• Clean this device with a soft, slightly damp cloth. Do not use any

chemical agents to clean this device.

• Do not attempt to repair this device yourself. In case of damage,

contact authorized service point for check-up or repair.

• Turn off the device before ejecting SD card. Otherwise, data on the SD

card may be damaged or removed.

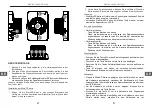
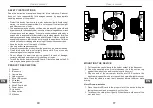
PRODUCT DESCRIPTION

1. Speaker
2. IR sensors
3. Camera lens
4. Holder socket
5. Micro USB socket
6. AV socket
7. Reset button
8. MicroSD card slot
9. Power button
10.Up button
11. Down button
12.M button

MOUNTING THE DEVICE

1. Put the suction cup holder into the holder socket in the dashcam.
2. Clean the mounting area (front windscreen), hold the suction cup

against the windscreen and lock the lever to secure it.

3. Plug one end of the car charger into the mini USB socket in the

dashcam, plug another end into the vehicle's cigarette lighter socket.

Note: Place the cable in a way, that it does not disturb the driver while
driving.

MicroSD card installation

1. Place the microSD card in the proper slot of the device (with pins

facing the screen) and press gently, until it clicks.

2. To take out the card, press it gently. When the card slides out of the

slot, take it out.

M

5

6

7

8

9

11

10

12

3

1

4

2

Содержание PY-DVR005

Страница 1: ...Car DVR PY DVR005 DE Bedienungsanleitung EN Owner s manual PL Instrukcja obs ugi RO Manual de utilizare...

Страница 2: ...herheitsanleitungen verstanden hat und befolgen wird Kinder sollten beaufsichtigt werden um sicherzustellen dass sie nicht mit dem Ger t spielen Kinder sollten das Ger t nicht unbeaufsichtigt reinigen...

Страница 3: ...Ger t einschalten Taste Ein Aus dr cken und halten Wenn die Bordkamera an der Buchse des Zigarettenanz nders angeschlossen ist schaltet sich die Kamera bei einschalten der Z ndung automatisch ein und...

Страница 4: ...tomatisches Ausschalten Einstellen der Zeit f r die automatische Abschaltung nach Inaktivit t gilt nicht f r Aufnahmen Tonaufnahme Tonaufnahme aktivieren oder desaktivieren Nach der Aktivierung ersche...

Страница 5: ...et Halterung mit Saugnapf Autoladeger t Bedienungsanleitung Deutsch Korrekte Entsorgung dieses Produkts Elektrom ll Anzuwenden in den L ndern der Europ ischen Union und anderen europ ischen L ndern mi...

Страница 6: ...before cleaning Clean this device with a soft slightly damp cloth Do not use any chemical agents to clean this device Do not attempt to repair this device yourself In case of damage contact authorize...

Страница 7: ...e photography mode press the power button Press the M button to change picture settings Browsing files Use the up and down buttons to switch between files To play the video file press the power button...

Страница 8: ...max 32 GB USB port mini USB Functions motion detection G Sensor taking photos parking monitor date stamp Battery capacity 150 mAh Li ion Charging voltage 5 V 1 A Microphone Built in speaker Weight 48...

Страница 9: ...dzenie nale y przechowywa w miejscu niedost pnym dla dzieci Nie nale y u ywa nieoryginalnych akcesori w Nale y ZAWSZE od czy urz dzenie od r d a zasilania przed czyszczeniem Urz dzenie nale y czy ci...

Страница 10: ...era rozpocz a nagrywanie przy wstrz sie podczas postoju nale y w czy funkcj Tryb parkingowy znajduj c si w opcjach nagrywania Nale y wybra odpowiedni czu o funkcji w menu G sensor Je eli do gniazda AV...

Страница 11: ...o si na urz dzeniu Pod czanie do komputera Po pod czeniu do komputera wy wietl si opcje Pami wewn trzna pozwala na przegl danie zawarto ci karty pami ci na komputerze Kamera internetowa system operacy...

Страница 12: ...SIGURAN A Citi i acest manual de utilizare i p stra i l pentru consult ri ulterioare Produc torul nu i asum responsabilitatea pentru daunele cauzate de manipularea i utilizarea necorespunz toare a pr...

Страница 13: ...a porni automat dup pornirea ma inii i va ncepe nregistrarea Pentru a opri dispozitivul Ap sa i i ine i ap sat butonul de alimentare Dac camera este conectat la bricheta ma inii dup oprirea motorului...

Страница 14: ...a i func ia de parcare n combina ie cu func ia Senzor G Dup oprire dac dispozitivul detecteaz o mi care se va porni i va ncepe nregistrarea Senzor G reglarea sensibilit ii func iei senzorului G Dac n...

Страница 15: ...ile locale pentru a primi informatii cu privire la locul si modul in care pot depozita acest produs in vederea reciclarii sale ecologice Utilizatorii institutionali sunt rugati s ia legatura cu furniz...

Страница 16: ......

Страница 17: ......

Отзывы: