


4 of 24
ISSUED: 08-09-10 SHEET #: 061-9058-4 10-18-10
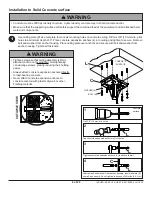
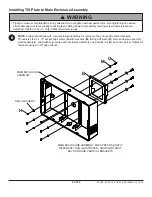
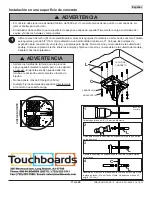
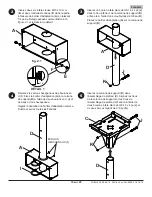
Use ceiling plate (
C
) as a template to mark six mounting holes on concrete ceiling. Drill six 3/8" (10 mm) dia. pilot
holes to a minimum depth of 3". Place concrete expansion anchors (
L
) into ceiling and tighten to secure. Remove
bolt and washer from anchor housing. Place ceiling plate over anchors and secure with bolt and washer from
anchor housing. Tighten all fasteners.
1
Installation to Solid Concrete surface
• Concrete must be 3000 psi density minimum. Lighter density concrete may not hold concrete anchor.
• Make sure that the supporting surface will safely support the combined load of the equipment and all attached hard-
ware and components.
WARNING
• Tighten screws so that ceiling assembly is fi rmly
attached, but do not overtighten. Overtightening
can damage screws, greatly reducing their holding
power.
• Always attach concrete expansion anchors directly
to load-bearing concrete.
• Never attach concrete expansion anchors to
concrete covered with plaster, drywall, or other
fi nishing material.
WARNING
CONCRETE
SURFACE
BOLT (
L
)
WASHER (
L
)
C
L
1
3
4
2
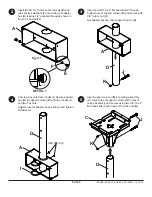
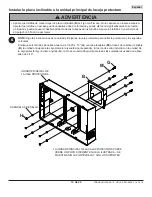
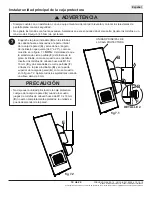
Drill 3/8" (10 mm) dia. holes.
Tap concrete expansion anchors (
L
) into holes.
Tighten concrete expansion anchors (
L
) to secure to wall.
Unscrew bolt and washer from anchor housing, level wall plate (
C
)
on wall, and secure.
Do not tighten in excess of 80 in•lbs (9.0 N.m.).
L
L
C
L
concrete
surface
CUT
A
W
A
Y
VIEW


