2
2019-11-15 #:146-9040-4 (2020-02-18)
Tools Needed for Assembly.
ENG
5/32"
(4mm)
3/8"
(10mm)
ENG - This product is designed to be installed on plywood walls. Hardware is included for plywood installation.
Before installing make sure the supporting surface will support the combined load of the equipment and
hardware. Screws must be tightly secured. Do not overtighten screws or damage can occur and product may fail.
Never exceed the Maximum Load Capacity. Always use an assistant or mechanical lifting equipment to safely lift
and position equipment. This product is intended for indoor use only. Use of this product outdoors could lead to
product failure or personal injury. Be careful not to pinch fingers when operating the mount. For support please
call customer care at 1-800-865-2112.
WARNING
Symbols
ENG
WARNING
ENG
Do not overtighten screws.
ENG
#
Skip to step.
ENG
Wear anti-static gloves.
ENG
1
2
ENG To properly tighten screws: Tighten until screw
head makes contact, then tighten another 1/2
turn. Do not overtighten screws.
4
+1/2
3
Содержание DS-LEDFLAAF-3X3
Страница 1: ...1 2019 11 15 146 9040 4 2020 02 18 ENG DS LEDFLAAF 3X3 ...
Страница 13: ...13 2019 11 15 146 9040 4 2020 02 18 4 Remove vertical spacers C ENG 3 8 10mm C 3 ...
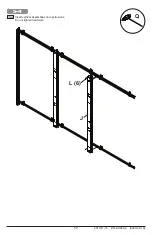
Страница 15: ...15 2019 11 15 146 9040 4 2020 02 18 5 2 Attach vertical assemblies Do not tighten hardware ENG L 12 J K K Q ...
Страница 16: ...16 2019 11 15 146 9040 4 2020 02 18 5 3 Space vertical assemblies then tighten hardware ENG B 2 Q ...
Страница 18: ...18 2019 11 15 146 9040 4 2020 02 18 5 5 Space vertical assemblies then tighten hardware ENG B 2 Q ...
Страница 20: ...20 2019 11 15 146 9040 4 2020 02 18 5 7 Space vertical assemblies then tighten hardware ENG B 2 Q ...
Страница 24: ...24 2019 11 15 146 9040 4 2020 02 18 6 4 Check adaptor spacing after making adjustments ENG Q ...
Страница 25: ...25 2019 11 15 146 9040 4 2020 02 18 7 E 4 ...
Страница 26: ...26 2019 11 15 146 9040 4 2020 02 18 M 4 D 2 8 ...


