background image


22 

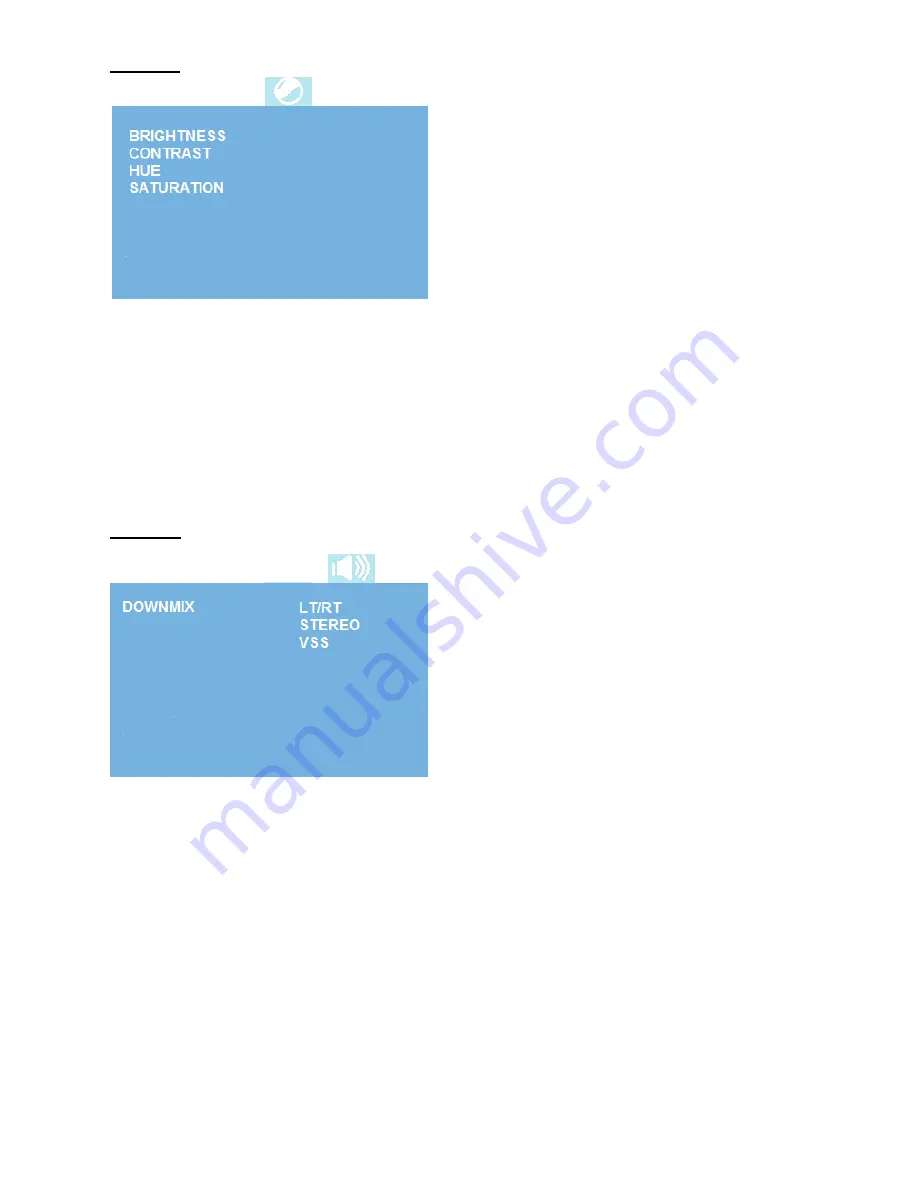
Picture 


The items included on this menu are shown 

at left. 

Press 



 to highlight this item. 

Press 

 to enter. 

Press 



  button  to  choose  the proper 

selection. 

Press OK to confirm and press 

 to exit.


Brightness 


Contrast 


Hue 


Saturation 


Speaker 


The items included on this menu are shown 

at left. 

Press 



 to highlight this item. 

Press 

 to enter. 

Press 



  button  to  choose  the proper 

selection. 

Press OK to confirm and press 

 to exit. 


Speaker Setup (Downmix) 


LT/RT: Output mixed audio in the format provided by Dolby. 


Stereo: Output stereo signal. 


VSS: Surround sound 


Содержание PDI-DVD-SH

Страница 1: ...PDI DVD SH Healthcare Grade DVD Player Document Number PD196 160R2 ...

Страница 2: ...the obsolete outlet 10 Protect the power cord from being walked on or pinched particularly at plugs convenience receptacles and the point where they exit from the apparatus 11 Only use attachments accessories specified by the manufacturer 12 Use only with the cart stand tripod bracket or table specified by the manufacturer or sold with the apparatus When a cart is used use caution when moving the ...

Страница 3: ...cle 820 40 of the NEC that provides guidelines for proper grounding and in particular specifies that the cable ground shall be connected to the grounding system of the building as close to the point of cable entry into the room as practical FCC Compliance This device complies with part 15 of the FCC Rules Operation is subject to the following two conditions This device may not cause harmful interf...

Страница 4: ...r is designed for mounting to PDi manufactured mounts ordered separately and not supplied with player Alternately the player can be placed on a table or shelf near the TV The following mounting options are available from PDi PD168 028 thin mounting bracket bracket version wall or table mount PD181 682 thin mounting bracket plate version wall mount PD168 043 100mm TV mount PD168 044 200mm TV mount ...

Страница 5: ...onnecting to a TV using an RF Coax Cable 9 Connecting to a TV using the Component YPbPr 10 Connecting to a TV using the HDMI Input 10 Connecting to a TV using the AV Output 11 Notes on Discs 11 Compatible Disc Formats 11 Care of Discs 12 Holding Discs 12 Cleaning 12 Playback Operation 12 Video DVD Playback 13 CD Playback 15 JPEG Playback 16 USB and SD MS MMC Card Function 18 Setup 19 ...

Страница 6: ...neral Setup Page 19 Language 21 Audio 21 Picture 22 Speaker 22 Dolby Digital Setup 23 Definitions 24 Letterbox screen 24 Pan Scan screen 24 Title Chapter DVD 24 JPEG 24 Troubleshooting 25 Specifications 27 ...

Страница 7: ...Button Press to confirm selection or start playback 3 Pause Button Press to pause the playback Press PLAY button to resume normal playback 4 FR Press it to play backward 5 FF Press it to play forward 6 EJECT button Press to eject the disc 7 Power Button Press to turn the unit On or Off 8 Disc Tray Door ...

Страница 8: ...Cable Output RF cable TV signal input 2 CH4 CH3 Modulate RF channel 3 or 4 selector switch 3 R F Cable Output Modulated RF cable TV singal 4 L R AV Output Jacks Connect L R AV signal source 5 Y Pb Pr Y Cb Cr Jacks Connecting for the Y Pb Pr output 6 HDMI Output Jack Connecting for HDMI sig Remove the top cover towards the direction to show the connected ports of external signal cables ...

Страница 9: ...button 2 EJECT button 3 TITLE button 4 PBC Menu Play 5 Menu 6 Random 7 0 9 Number buttons 8 GOTO button 9 P N TV type 10 Enter buttons 11 Cursor buttons 12 Default 13 R L 14 Rev Fwd buttons 15 װ Play sPause 16 Stop 17 Vol Vol 18 PREV NEXT 19 Return 20 Mute 21 Slow 22 Repeat 23 A B button 24 Resume 25 Subtitle 26 Language 27 Angle 28 Mode 29 Prog 30 Clear 31 Zoom 32 OSD ...

Страница 10: ...out obstacles between remote control and remote sensor System Connections Do not connect the power supply until all connections have been made Observe color code when connecting audio and video cables Connecting to a TV using an RF Coax Cable Follow the drawing below to connect the DVD player to TV s Audio Video input with RF coax cable ...

Страница 11: ... or Component 2 is enabled in the Source Setup menu of external AV source NOTE The Y Pb Pr jacks on your DVD player are sometimes labeled Y Cb Cr or Y B Y R Y If so connect the cables to like colors Connecting to a TV using the HDMI Input Follow the figure below to connect an HDMI cable not supplied to the HDMI jack on the rear panel of the TV Verify that the corresponding mode e g HDMI 1 or HDMI ...

Страница 12: ...he corresponding e g COMPOSITE VIDEO mode is enabled in the Source Setup menu of the television Notes on Discs Compatible Disc Formats DISC LOGO DIAMETER PLAYBACK TIME PLAYABLE SIDES DVD 12cm 1 3 3 m i n S S S L 2 4 2 m i n S S D L 2 6 6 m i n D S S L 4 8 4 m i n D S D L 8cm 41 min SS SL 75 min SS DL 82 min DS SL 150 min DS DL CD 12cm 74 min 8cm 20 min JPEG 12cm Please follow Disc s instructions ...

Страница 13: ...control 6 To turn the player off press Power button again AV Output Playback in the AV mode is the same for Composite HDMI or Component YPbPr Please refer to the following instructions for these modes Note the corresponding input must first be selected on the TV for proper display of the signal Hold the Disc by the edges as shown when loading or removing from the player Fingerprints or stains on t...

Страница 14: ...button once to go to the beginng of the current chapter and press it again to go to the previous chapter press to go to next chapter Fast Playback During playback press button to start fast backward playback press button to start fast forward playback Press Play to return to normal playback during fast playback ZOOM During playback press ZOOM button repeatedly to shift among 2x 3x 4x 1 2 1 3 1 4 n...

Страница 15: ...unction AUDIO Press to select the program s audio language if the disc supports multi lingual languages SUBTITLE Press to select the subtitle language or to turn off subtitles if active Note the disc must contain multi subtitle languages INFO Press to open or close display of the detailed information of current playback GOTO During playback press the GOTO button to enter the menu to select desired...

Страница 16: ... to go to next track Fast Playback During playback press button to start fast backward playback press button to start fast forward playback During fast playback press Play button button to return to normal playback REPEAT Press it repeatedly to repeat a Track All or cancel repeat in sequence INFO Press INFO button to open or close display of the detailed information of current playback AUDIO Press...

Страница 17: ...ay Previous and Next During playback press button to go to the previous picture press button to go to next picture ZOOM During playback press ZOOM button first and then press button to zoom in the picture as follows 50 200 press button to zoom out the picture as follows 200 50 MENU During playback press MENU button to return to folder mode Press OK button to resume normal playback REPEAT Press it ...

Страница 18: ...ture clockwise During playback press the button to rotate the current picture counterclockwise During playback press the button to flip the current picture horizontally During playback press the button to flip the current picture vertically Note Some picture CD discs are restricted and picture zooming rotation and flipping may not function ...

Страница 19: ...o select USB memory playback or MCR for the SD MS MMC playback and press Enter button to start Please see the figure below 6 Press the button to select the folder and press OK button to enter 7 Press the button to select the desired track Then press PLAY button to start playback 8 Press STOP button to stop playback Press PLAY button to start playing from the beginning of the current track Press th...

Страница 20: ...80p You can change the default settings of this unit to customize its performance to your own preference Note Set up the system while playing is stopped or there is no disk in the player To set up your system 1 Press the SETUP button on the remote control 2 The setup menu will appear on the screen It includes General Setup Language Audio Picture Speaker and Dolby You can exit from the setup menu b...

Страница 21: ...0 is the super password 7 RATING You must enter the password before setting the rating on the DVD player Allows parental control of movies according to rating 8 DEFAULT This item is used to reset the unit to factory presets Press button to highlight this item Press to select the Restore Press OK to restore all settings to default status Note Some discs may not support these functions ...

Страница 22: ... proper selection Press OK to confirm and press to exit The OSD will support 5 languages Audio Subtitle and Menu will support 6 languages Audio The items included on this menu are shown at left Press to highlight this item Press to enter Press button to choose the proper selection Press OK to confirm and press to exit Audio Out Key ...

Страница 23: ...irm and press to exit Brightness Contrast Hue Saturation Speaker The items included on this menu are shown at left Press to highlight this item Press to enter Press button to choose the proper selection Press OK to confirm and press to exit Speaker Setup Downmix LT RT Output mixed audio in the format provided by Dolby Stereo Output stereo signal VSS Surround sound ...

Страница 24: ...on Press OK to confirm and press to exit 1 OP Mode Line Out RF Remod 2 Dynamic Range Used to adjust the linear dynamic compression rates for different compression effects Only active during Dolby digital sound 3 Dual Mono Stereo Outputs the stereo sound L Mono Outputs Left channel sound only R Mono Outputs Right channel sound only Mix Mono Outputs Mono sound ...

Страница 25: ...d into some large sections titles or some small sections chapters Each section is numbered these numbers are called Title number or Chapter number Track CD CDs are divided into some sections tracks Each section is numbered these numbers are called Track number Track 1 Track 2 Track 3 JPEG JPEG is a common picture format that has small file size and low quality loss rate of picture Hundreds of pict...

Страница 26: ...ve The disc may not be put in in the right way Put the disc in with the label side up The disc may be dirty or warped Clean or change the disc The player s region code may not as the same as the region code of DVD disc Make sure the player s region code is the same as the region code of DVD disc There may be water on the lens Remove the disc and keep the player being powered off for at least two h...

Страница 27: ...ode The system connection may be not correct Connect the system correctly The unit may be not in AV out mode Switch AV IN OUT on the right panel to OUT Poor AV performance The disc may be dirty or warped Clean or change the disc The remote control does not work There may be some obstructions between the remote control and the player Remove the obstruction between the remote control and the player ...

Страница 28: ... 2 1 0 Load 10kΩ Video Out Out Level 1VP P 0 2 Load 75Ω Unbalanced Negative Power 120V AC 60 Hz 8Watts Dimensions 11 5 292mm x 7 6 192mm x 2 0 51mm Weight Approximate 2 5 lbs 1 12 Kg DESIGN AND SPECIFICATIONS ARE SUBJECT TO CHANGE WITHOUT NOTICE Manufactured under license from Dolby Laboratories Dolby and the double D symbol are trademarks of Dolby Laboratories Confidential unpublished works 1992 ...

Отзывы: