Paxton Proximity LCD reader Скачать руководство пользователя страница 4

PAGE

4

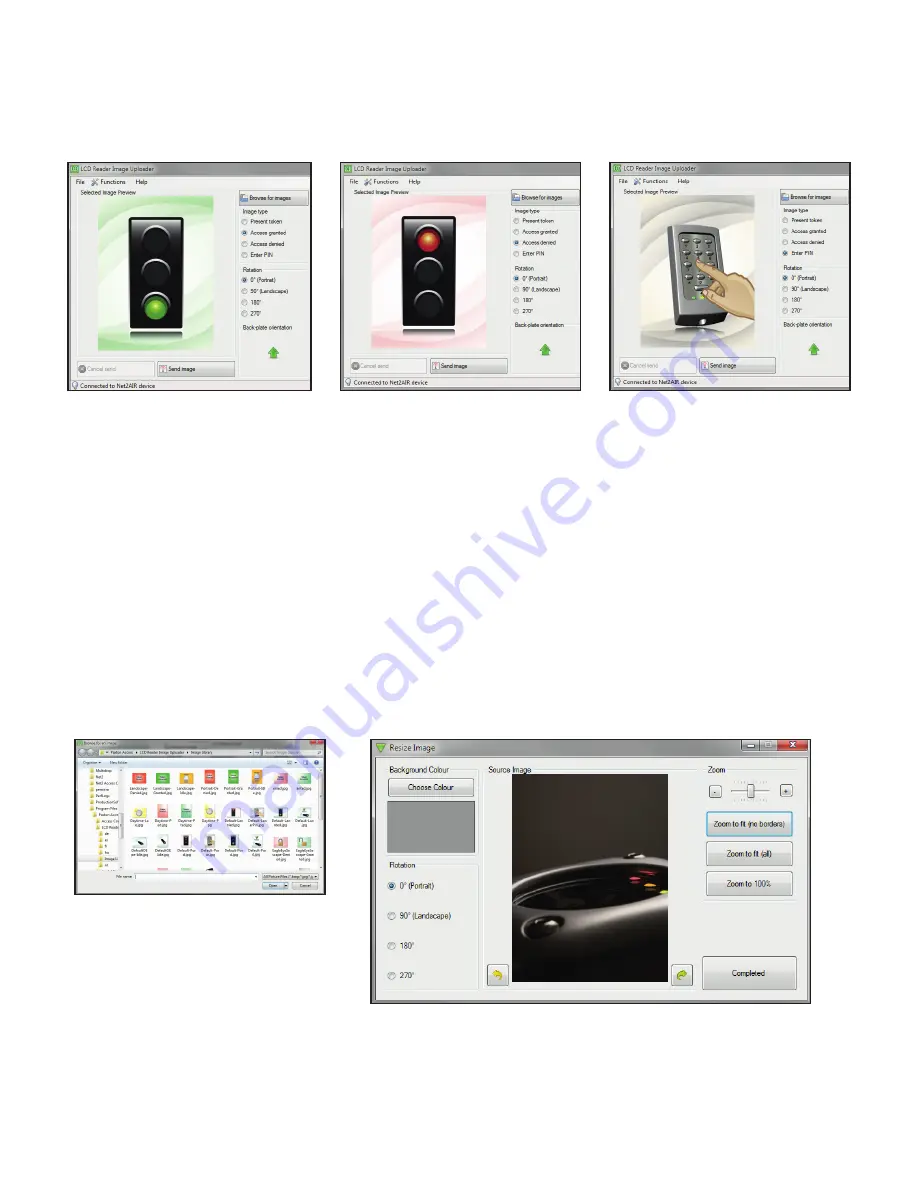
The LCD reader will hold 4 images.  These are selected automatically by the reader's LED control wires.  The 

'Present token' image will display unless one of the three LED wires (Brown, Amber or Green) is individually 

active (0v). In that case the corresponding image (Access Granted, Access Denied or Enter PIN) will display.  The 

supplied images are shown below.

Changing the reader name

The name is stored within the reader.  Select the reader, click the 'Change LCD reader name' button and you will 

then need to enter the password (if set).  The reader name can then be changed.

Changing the reader password

The password is stored within the reader itself. Select the unit, click the 'Change LCD reader password ' button.  

You will be asked to enter the old password and the new password.

You can rotate or refresh any of the four images or produce your own customized versions. 

From the main screen, click on 'Browse for images'.  Select the required image and click 'Open'. The image will 

zoom to fill the display area.

Customised Images

Image selection 

The image can be further zoomed to any size using the controls and can also be dragged around the 

screen by clicking on the image and holding down the mouse button.

The display area should be rotated to match the reader orientation (See page 3).   The image can also be 

rotated using the arrow buttons.

Содержание Proximity LCD reader

Страница 1: ...plate so that the slots pass over the side tabs in the plate Slide the reader down the plate until the retaining pin clicks into position A tool is provided with the reader to depress this pin should the reader ever need to be removed The full color backlit LCD screen can be configured to display images of the customer s choice For example an image using a company name logo could be used as the de...

Страница 2: ...vide a connection point for the reader RJ45 plug The terminals on the module are then wired color for color to the controller Alternatively the reader can be wired directly into the screw terminals of the control unit by first cutting off the RJ45 plug and stripping back the wires in the cable Reader Port Module 325 030 US This module may be purchased separately to speed up the installing and repl...

Страница 3: ...m the website at http paxton info 1521 NOTE This is an uploader utility and does not display the current image that is displayed on any particular reader LCD Reader image uploader Image orientation check Close down any other Net2 applications including the Net2 server to avoid any USB program conflicts Run the LCD reader image uploader and it will detect the USB Net2Air device connected to the PC ...

Страница 4: ...nged Changing the reader password The password is stored within the reader itself Select the unit click the Change LCD reader password button You will be asked to enter the old password and the new password You can rotate or refresh any of the four images or produce your own customized versions From the main screen click on Browse for images Select the required image and click Open The image will ...

Страница 5: ...s work as follows Zoom to fit all will ensure that the whole picture will display on screen by adopting a letter box style The background colour can be set as required Zoom to 100 will display the image in a pixel to pixel relationship This allows the image or logo to be displayed with perfect clarity when produced from commercial artwork Once you have the correct image displayed click on Complete...

Страница 6: ...data bit period Silent operation feature Yes Outdoor Use Factory reset The reader can be reset to a factory default state by carrying out the following operation 1 Connect together the yellow and green wires reset link 2 Connect power to the reader 3 The reader will beep 3 times to confirm the reset sequence 4 Remove the power and remove the reset link This factory reset sequence results in the LC...

Отзывы: