background image

Chapter 4 
How to Do Transaction                                                                                                         

NOTE: This document is CONFIDENTIAL and must be used exclusively for the operation of PAX programs.    It may not be 
duplicated, published, or disclosed without PAX prior written permission.                                                                                     

84


4.5.4


Cash Void Return 


Note


A  RETURN  transaction  processed  in  error  can  be  VOIDED  if  the 
RETURN  has  not  been  batched  out.  This  will  nullify  the  RETURN 
previously done in the same batch.   


Example: 

X bought a cellphone from Y

’s shop in the previous day. But 

he found that cellphone does not work well. So he went to Y

’s shop to 

return the cellphone and wanted Y to return his money. He should do a 
Cash Return to return money to X. Y process a Cash Return transaction. 
But  X  changes  his  mind  that  he  wants  the  cellphone.  So  X  gives  his 
cash  to  Y  and  Y  does  a  Cash  Void  Return  on  S90  POS  terminal.  X 
takes cellphone, then goes home. 


X-Credit card holder; Y-Merchant of shop 


S

TEP

  A

CTION


D

ISPLAY


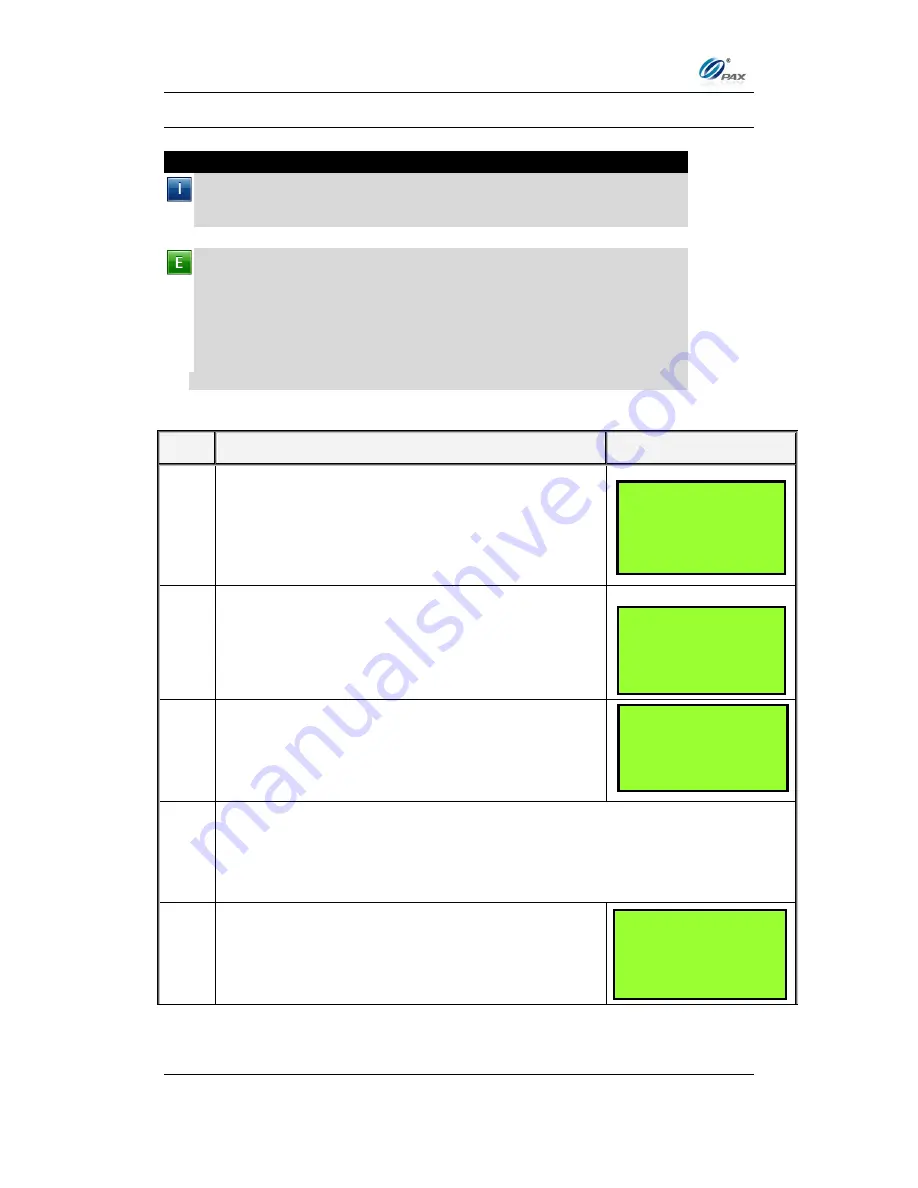
1. 


From the idle prompt press the

[SHORTCUT] 

button to scroll through the list of available EDC 
types to select the CASH prompt. Use the 

[UP/DOWN]

 or 

[SHORTCUT]

 button until 

V/RTRN displays. 


1.1  3 

If Void Return is password protected, the terminal 
will prompt for the manager password. When 
prompted, enter the password and then press 

[ENTER]

.   


2. 

 Input the transaction # to be voided.


3. 


The terminal searches the database for a Return transaction that matches 
the criteria. Once found, confirm the transaction and press

 [ENTER]

If the terminal does not find the transaction, it displays 

TRANS NOT 

FOUND!

” and backs to idle screen.


4. 


View the transaction on the display to verify it is 
the correct transaction then   

Press

 [ENTER] 


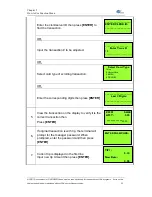
ENTER PASSWORD: 

____________________ 

Enter Trans #: 

12


______________________ 


#0001              RTRN       

AMT:                    2.00 


INPUT ACCOUNT   

CASH 

V/RTRN


Содержание S90

Страница 1: ...General Information PAX Technology Inc All Rights Reserved S90 Portable Terminal User Manual V1 00 01 ...

Страница 2: ...ot warranted to be error free Except as may be expressly permitted in your license agreement for these Programs no part of these Programs may be reproduced or transmitted in any form or by any means electronic or mechanical for any purpose Security Notice No part of this publication may be copied distributed stored in a retrieval system translated into any human or computer language transmitted in...

Страница 3: ...2 Credit Return 15 Sample of Credit Return receipt 17 4 1 3 Credit Auth 18 Sample of Credit Auth receipt 21 4 1 4 Credit PostAuth 22 Sample of Credit PostAuth receipt 25 4 1 5 Credit Forced 26 Sample of Credit Forced receipt 29 4 1 6 Credit Void Sale 30 Sample of Credit Void Sale receipt 32 4 1 7 Credit Void Return 33 Sample of Credit Void Return receipt 35 4 1 8 Credit Void Post Auth 36 Sample of...

Страница 4: ... 89 5 2 1 Batch Close 89 5 2 2 Force Batch 92 5 3 REVIEW 94 5 4 FIND 95 5 5 COUNTER TIP 96 Sample of Counter Tip receipt 97 5 6 TIP ADJUST 98 5 6 1 Credit RESTAURANT Adjust Tip 98 5 7 REPRINT 101 6 MENU OPTION 103 6 1 ACCESSING THE MAIN MENU 103 6 2 MAIN MENU OPTIONS 104 6 3 REPORTS 105 6 3 1 Default Report 106 6 3 2 Current Report 107 6 3 3 History Report 114 6 3 4 Display Transactions 117 6 3 5 ...

Страница 5: ... Batch Number 173 6 7 3 Working Mode 174 6 7 3 1 Tip Options 175 6 7 3 2 Fraud Control Option 182 6 7 3 3 Local Dup Check 189 6 7 4 Pre Dial Call 190 6 7 5 Database 191 6 7 5 1 Void191 6 7 5 2 Post Auth 193 6 7 5 3 Clear Database 194 6 7 6 4 Clear Reversal 195 6 7 6 Pin Pad Settings 196 6 7 7 Keys Injection 197 6 7 8 Application Management 198 6 7 8 1 Activate 199 6 7 8 2 App Update 200 6 7 8 3 Co...

Страница 6: ...closed without PAX prior written permission iv A 3 EBT Card Receipts Template 224 A 4 Gift Card Receipts Template 227 A 5 Cash Receipts Template 230 APPENDIX B TROUBLESHOOTING 232 B 1 General Troubleshooting 232 B 2 Communication Errors 237 B 3 Printer Troubleshooting 238 B 4 GPRS Troubleshooting 239 B 5 Download Troubleshooting 240 APPENDIX C GLOSSARY 241 ...

Страница 7: ... and must be used exclusively for the operation of PAX programs It may not be duplicated published or disclosed without PAX prior written permission v Revision History Date Version By Description of Change Contact 1 7 2013 1 00 01 B McDonald Re Release ...

Страница 8: ... the detailed description for all user functions which can be performed on the POS terminal Please note that some features are dependent upon the host supporting them as a result not all features are available on all applications The document is intended for use by the Software Engineers developing and maintaining the Payment Application design for the US Payment Card Industry also for use by cust...

Страница 9: ... to the POS terminal device or other equipment Note Helpful hints and other important information about the use of the POS terminal device CHART FOR STEP Due to keyboard differences actions will differ with from one POS terminal model to another Make sure to match the action with the correct model of the POS terminal being used Denotes a definition or explanation about the User Function in the ste...

Страница 10: ...uces general information of BroadPOS Terminal Application for S90 secondly it focuses on BroadPOS Terminal Application for S90 USPOSCore thirdly it introduces the glossary This manual contains the following sections Chapter 1 General Information Chapter 2 PAX S90 POS Terminal Overview Chapter 3 How to Load Application Chapter 4 How to Do Transaction Chapter 5 Function Option Chapter 6 Menu Option ...

Страница 11: ...ess explicitly stated otherwise all content included on this document such as but not limited to text images logos and slogans is the property of PAX and is protected by U S and international copyright laws Any other use including the reproduction modification display or distribution of the content on this system is strictly prohibited No portion of this system may be reproduced duplicated copied ...

Страница 12: ...TE This document is CONFIDENTIAL and must be used exclusively for the operation of PAX programs It may not be duplicated published or disclosed without PAX prior written permission 5 1 5 Document Reference NO Title Date Version 1 2 3 ...

Страница 13: ...een representations shown in this manual are general screens The following is an example of the idle and Main Menu screens for each of the different LCD Display types A standard screen and font format should accommodate 21 characters per line and up to 5 lines of text Screen Display Idle Prompt Screen Main Menu Screen Function Menu Screen INPUT ACCOUNT CREDIT SALE MAIN MENU 1 Reports 2 Merchant Se...

Страница 14: ...he operation of PAX programs It may not be duplicated published or disclosed without PAX prior written permission 7 2 2 POS Terminal Communication Options The following chart summarizes the information regarding the different POS terminal model communication options MODEL LAND LINE GPRS CDMA ETHERNET WI FI S90 ...

Страница 15: ...ypes SALE RETURN VOID AUTH and FORCED etc ALPHA When entering data changes the number to one of the alpha characters on the key Up Down Arrow Keys In main screen scroll through available transaction types SALE RETURN VOID AUTH and FORCED etc When in a menu scrolls up and down through the menu choices FUNC FUNC key is used in key combinations i e FUNC ENTER Single FUNC makes terminal enter the FUNC...

Страница 16: ...rams It may not be duplicated published or disclosed without PAX prior written permission 9 2 3 2 Key Assignments Note Use the table below to identify the keys on your POS Terminal model 2 3 3 Keypad Layout Note Below are examples of the keypad layout of the S90 POS terminals S90 ON OFF FUNC 0 9 Alpha Menu Cancel Clear Enter Shortcut ...

Страница 17: ...Credit Sale Note A Credit Card Sale can be performed either by swiping or by manually entering the account number and expiration date embossed on the front of the card Bank rates should be checked before manually entering transactions Example X goes to Y s shop to buy a cellphone After X finishes his shopping he goes to Y to pay for the cellphone X delivers his credit card to Y and Y processes a C...

Страница 18: ...the Secure Card When prompted enter the corresponding digits then press ENTER 5 Input the dollar amount of the transaction then press ENTER 6 This is a feature of the Invoice Mode When prompted enter the invoice No then press ENTER 7 This is a feature of the Clerk Server ID Mode When prompted enter the clerk server ID then press ENTER 8 This is a feature of the Table Mode When prompted enter the t...

Страница 19: ...Press 2 if the card is not present 13 Enter the V code from the back of the credit card then press ENTER 14 Enter the street address then press ENTER i e If billing address is 123 Main St enter 123 15 Enter the ZIP Code then press ENTER i e If billing address ZIP code is 12345 0123 enter 12345 16 This is a feature of the Commercial Cards Enter the additional information for commercial card then pr...

Страница 20: ...al contacts the Host Processor for an approval and prints one receipt OR Approve this transaction offline and prints one receipt 19 Press any key for the second receipt to be printed If a second receipt is not wanted press CANCEL 20 Press ENTER for no receipt OR Press CANCEL to print the second receipt 21 Stop CARD TYPE CVC CODE CVV CODE CID CODE VISA MasterCard AMEX Discover ARE YOU SURE ENTR YES...

Страница 21: ...t Name 123 MAIN ST ANYTOWN NY 11111 WWW PAX US 02 03 2011 11 11 19 Sale Transaction 1 Card Type Visa Account 6789 Entry Swiped Invoice 1 Amount 119 00 Auth Code 123456 Response Approved I AGREE TO PAY ABOVE TOTAL AMOUNT ACCORDING TO CARD ISSURE AGREEMENT MERCHANT AGREEMENT IF CREDIT VOUCHER X CARDHOLDER NAME MERCHANT COPY THANK YOU Please visit us Again soon 1 800 555 1234 Merchant Name 123 MAIN S...

Страница 22: ...ard account X deliver his credit card to Y Y process a Credit Return transaction Then X gives the cellphone back to Y and Y give the credit card to X X Credit card holder Y Merchant of shop STEP ACTION DISPLAY 1 From the Idle prompt use the UP DOWN or SHORTCUT button until RETURN displays 2 Swipe the credit card or key in the account number and expiration date manually 3 If the security for Card M...

Страница 23: ...en press ENTER 11 This is a feature of the Guest No Mode When prompted enter the number of guests then press ENTER 12 This is a feature of the Commercial Cards Enter the additional information for commercial card then press ENTER 13 When prompted enter the TAX Amount then press ENTER 14 Press any key for the second receipt to be printed If a second receipt is not wanted press CANCEL 15 Press ENTER...

Страница 24: ...Y 11111 WWW PAX US 02 03 2011 11 11 19 Refund Record 8 Card Type VISA Account 6789 Entry Manual Amount 119 00 Auth Code 123456 Response Approved I AGREE TO PAY ABOVE TOTAL AMOUNT ACCORDING TO CARD ISSURE AGREEMENT MERCHANT AGREEMENT IF CREDIT VOUCHER X CARDHOLDER NAME MERCHANT COPY THANK YOU Please visit us Again soon 1 800 555 1234 Merchant Name 123 MAIN ST ANYTOWN NY 11111 WWW PAX US C O P Y 02 ...

Страница 25: ...the hotel clerk The clerk do Credit Pre Auth with the S90 POS terminal X has booked a room in the hotel and prepared to go on his travel X Credit card holder STEP ACTION DISPLAY 1 From the Idle prompt press UP DOWN or SHORTCUT button until AUTH displays 2 Swipe the credit card or key in the account number and expiration date manually 3 If the security for Card Manually Entry is on the terminal wil...

Страница 26: ...sts then press ENTER 12 If the account number was manually entered the terminal will ask if the card is present Depending on the user s response the terminal will prompt for V code and other AVS settings Dependent upon Fraud Control settings 13 Press 1 if the card is present OR Press 2 if the card is not present 14 Enter the V code from the back of the credit card then press ENTER 15 Enter the str...

Страница 27: ...NTER i e If billing address ZIP code is 12345 0123 enter 12345 17 The terminal will contact the Host Processor for an approval and print one receipt 18 Press any key for the second receipt to be printed If a second receipt is not wanted press CANCEL 19 Press ENTER for no receipt OR Press CANCEL to print the second receipt 20 Stop _________________ Enter Zip Code _________________ _________________...

Страница 28: ... 1 800 555 1234 Merchant Name 123 MAIN ST ANYTOWN NY 11111 WWW PAX US 02 03 2011 11 11 19 Pre Auth Transaction 8 Card Type VISA Account 6789 Entry Swiped Amount 119 00 Auth Code 123456 Response Approved MERCHANT COPY THANK YOU Please visit us Again soon 1 800 555 1234 Merchant Name 123 MAIN ST ANYTOWN NY 11111 WWW PAX US C O P Y 02 03 2011 11 11 19 Pre Auth Transaction 8 Card Type VISA Account 678...

Страница 29: ...ter the transaction the clerk gives the key to X and leads X to his room X Credit card holder STEP ACTION DISPLAY 1 From the Idle prompt use UP DOWN or SHORTCUT button until POSTAUTH displays 2 Swipe the credit card or key in the account number and expiration date manually 3 If the security for Card Manually Entry is on the terminal will prompt for the manager password When prompted enter the pass...

Страница 30: ...Mode When prompted enter the invoice No then press ENTER 11 This is a feature of the Clerk Server ID Mode When prompted enter the clerk server ID then press ENTER 12 This is a feature of the Tip Option Input the amount for tip on the Keypad then press ENTER 13 This is a feature of the Card Present Mode Press 1 if the card is present OR Press 2 if the card is not present 14 This is a feature of the...

Страница 31: ...or disclosed without PAX prior written permission 24 15 When prompted enter the TAX Amount then press ENTER 16 Press any key for the second receipt to be printed If a second receipt is not wanted press CANCEL 17 Press ENTER for no receipt OR Press CANCEL to print the second receipt 18 Stop TAX Amount AMOUNT 0 00 TEAR SLIP Press any Key ARE YOU SURE ENTR YES CANC NO ...

Страница 32: ...WWW PAX US 02 03 2011 11 11 19 Post Auth Transaction 8 Card Type VISA Account 6789 Entry Swiped Amount 119 00 Auth Code 123456 Response Approved I AGREE TO PAY ABOVE TOTAL AMOUNT ACCORDING TO CARD ISSURE AGREEMENT MERCHANT AGREEMENT IF CREDIT VOUCHER X CARDHOLDER NAME MERCHANT COPY THANK YOU Please visit us Again soon 1 800 555 1234 Merchant Name 123 MAIN ST ANYTOWN NY 11111 WWW PAX US C O P Y 02 ...

Страница 33: ...tion After the transaction the clerk gives the key to X and leads X to his room X Credit card holder STEP ACTION DISPLAY 1 From the Idle prompt use UP DOWN or SHORTCUT button until FORCED displays 2 Swipe the credit card or key in the account number and expiration date manually 3 If the security for Card Manually Entry is on the terminal will prompt for the manager password When prompted enter the...

Страница 34: ...ver ID then press ENTER 11 This is a feature of the Tip Option Input the amount for tip on the Keypad then press ENTER 12 This is a feature of the Card Present Mode Press 1 if the card is present OR Press 2 if the card is not present 13 This is a feature of the Commercial Cards Enter the additional information for commercial card then press ENTER 14 When prompted enter the TAX Amount then press EN...

Страница 35: ... PAX prior written permission 28 15 Depending upon the Processor the terminal may or may not contact the Credit Host The first receipt will be printed 16 Press any key for the second receipt to be printed If a second receipt is not wanted press CANCEL 17 Press ENTER for no receipt OR Press CANCEL to print the second receipt 18 Stop TEAR SLIP Press any Key ARE YOU SURE ENTR YES CANC NO ...

Страница 36: ...11 19 Forced Transaction 8 Card Type VISA Account 6789 Entry Swiped Amount 119 00 Auth Code 123456 Response Approved I AGREE TO PAY ABOVE TOTAL AMOUNT ACCORDING TO CARD ISSURE AGREEMENT MERCHANT AGREEMENT IF CREDIT VOUCHER X CARDHOLDER NAME MERCHANT COPY THANK YOU Please visit us Again soon 1 800 555 1234 Merchant Name 123 MAIN ST ANYTOWN NY 11111 WWW PAX US C O P Y 02 03 2011 11 11 19 Forced Tran...

Страница 37: ...s a Credit Void Sale transaction Then X gives the cellphone back to Y and Y give the credit card to X X Credit card holder Y Merchant of shop STEP ACTION DISPLAY 1 From the Idle prompt use the UP DOWN or SHORTCUT button until V SALE displays 1 1 3 If Void Sale is password protected the terminal will prompt for the manager password When prompted enter the password and then press ENTER 2 Swipe the c...

Страница 38: ...al does not find the transaction it displays TRANS NOT FOUND and backs to idle screen 5 View the transaction on the display to verify it is the correct transaction then Press ENTER 6 This is a feature of the Clerk Server ID Mode When prompted enter the clerk server ID then press ENTER 7 Press any key for the second receipt to be printed If a second receipt is not wanted press CANCEL 8 Press ENTER ...

Страница 39: ...00 555 1234 Merchant Name 123 MAIN ST ANYTOWN NY 11111 WWW PAX US 02 03 2011 11 11 19 Void Sale Record 6 Card Type VISA Account 6789 Entry Swiped Amount 119 00 Auth Code 123456 Response Approved X CARDHOLDER NAME MERCHANT COPY THANK YOU Please visit us Again soon 1 800 555 1234 Merchant Name 123 MAIN ST ANYTOWN NY 11111 WWW PAX US C O P Y 02 03 2011 11 11 19 Void Sale Record 6 Card Type VISA Accou...

Страница 40: ...his mind that he wants the cellphone So X gives his card to Y and Y does a Credit Void Return on S90 POS terminal Y returns the credit card to X X takes the card and cellphone then goes home X Credit card holder Y Merchant of shop STEP ACTION DISPLAY 1 From the Idle prompt use the UP DOWN or SHORTCUT button until V RTRN displays 1 1 3 If Void Return is password protected the terminal will prompt f...

Страница 41: ...ENTER If the terminal does not find the transaction it displays TRANS NOT FOUND and backs to idle screen 5 View the transaction on the display to verify it is the correct transaction then Press ENTER 6 This is a feature of the Clerk Server ID Mode When prompted enter the clerk server ID then press ENTER 7 Press any key for the second receipt to be printed If a second receipt is not wanted press CA...

Страница 42: ...34 Merchant Name 123 MAIN ST ANYTOWN NY 11111 WWW PAX US 02 03 2011 11 11 19 Void Refund Transaction 3 Card Type VISA Account 6789 Entry Swiped Amount 119 00 Auth Code 123456 Response APPROVE OFFLINE X CARDHOLDER NAME MERCHANT COPY THANK YOU Please visit us Again soon 1 800 555 1234 Merchant Name 123 MAIN ST ANYTOWN NY 11111 WWW PAX US C O P Y 02 03 2011 11 11 19 Void Refund Transaction 3 Card Typ...

Страница 43: ...e room He requires the clerk to return the money Then the clerk does a Credit Void Post Auth transaction to return the money to X s credit account Then X goes back to US STEP ACTION DISPLAY 1 From the Idle prompt use the UP DOWN or SHORTCUT button until V FRCD displays 1 1 3 If Void Forced is password protected the terminal will prompt for the manager password When prompted enter the password and ...

Страница 44: ...ENTER If the terminal does not find the transaction it displays TRANS NOT FOUND and backs to idle screen 5 View the transaction on the display to verify it is the correct transaction then Press ENTER 6 This is a feature of the Clerk Server ID Mode When prompted enter the clerk server ID then press ENTER 7 Press any key for the second receipt to be printed If a second receipt is not wanted press CA...

Страница 45: ...h 1 800 555 1234 Merchant Name 123 MAIN ST ANYTOWN NY 11111 WWW PAX US 02 03 2011 11 11 19 Void Post Auth Record 8 Card Type VISA Account 6789 Entry Swiped Amount 119 00 Auth Code 123456 Response VOIDED X CARDHOLDER NAME MERCHANT COPY THANK YOU Please visit us Again soon 1 800 555 1234 Merchant Name 123 MAIN ST ANYTOWN NY 11111 WWW PAX US C O P Y 02 03 2011 11 11 19 Void Post Auth Record 8 Card Ty...

Страница 46: ...quires the clerk to return the money Then the clerk does a Credit Void Forced transaction to return the money to X s credit account Then X goes back to US STEP ACTION DISPLAY 1 From the Idle prompt use the UP DOWN or SHORTCUT button until V FRCD displays 1 1 3 If Void Forced is password protected the terminal will prompt for the manager password When prompted enter the password and then press ENTE...

Страница 47: ...ENTER If the terminal does not find the transaction it displays TRANS NOT FOUND and backs to idle screen 5 View the transaction on the display to verify it is the correct transaction then Press ENTER 6 This is a feature of the Clerk Server ID Mode When prompted enter the clerk server ID then press ENTER 7 Press any key for the second receipt to be printed If a second receipt is not wanted press CA...

Страница 48: ... 800 555 1234 Merchant Name 123 MAIN ST ANYTOWN NY 11111 WWW PAX US 02 03 2011 11 11 19 Void Forced Record 8 Card Type VISA Account 6789 Entry Swiped Amount 119 00 Auth Code 123456 Response VOIDED X CARDHOLDER NAME MERCHANT COPY THANK YOU Please visit us Again soon 1 800 555 1234 Merchant Name 123 MAIN ST ANYTOWN NY 11111 WWW PAX US C O P Y 02 03 2011 11 11 19 Void Forced Record 8 Card Type VISA A...

Страница 49: ...d to X X takes the card and cellphone then goes home X Debit card holder Y Merchant of shop STEP ACTION DISPLAY 1 From the idle prompt press the SHORTCUT button to scroll through the list of available EDC types to select the DEBIT prompt 2 Swipe the debit card Debit cards cannot be keyed in manually they must be swiped 3 Input the dollar amount of the transaction then press ENTER 4 This is a featu...

Страница 50: ...ess ENTER 9 This is a feature of the CashBack Prompt Input the amount for cash back on the Keypad then press ENTER 10 Input the PIN on the Keypad then press ENTER 11 The terminal contacts the Host Processor for an approval and prints one receipt 12 Press any key for the second receipt to be printed If a second receipt is not wanted press CANCEL 13 Press ENTER for no receipt OR Press CANCEL to prin...

Страница 51: ...00 555 1234 Merchant Name 123 MAIN ST ANYTOWN NY 11111 WWW PAX US 02 03 2011 11 11 19 DEBIT SALE Transaction 1 Account 6789 Entry Swiped Amount 100 Tip 10 Cash Back 20 Total 131 50 Reference No 342199994321 Auth Code 123456 Response Approved MERCHANT COPY THANK YOU Please visit us Again soon 1 800 555 1234 Merchant Name 123 MAIN ST ANYTOWN NY 11111 WWW PAX US C O P Y 02 03 2011 11 11 19 DEBIT SALE...

Страница 52: ...ne back to Y and Y gives the debit card to X X Debit card holder Y Merchant of shop STEP ACTION DISPLAY 1 From the Idle prompt use the SHORTCUT button until DEBIT is displayed then press UP DOWN or SHORTCUT button until RETURN is displayed 2 Swipe the debit card 3 Input the amount of the Return then press ENTER If the original transaction includes a tip amount then the total amount should be enter...

Страница 53: ... the number of guests then press ENTER 8 Input the PIN on the Keypad then press ENTER 9 The terminal contacts the Host Processor for an approval and prints one receipt 10 Press any key for the second receipt to be printed If a second receipt is not wanted press CANCEL 11 Press ENTER for no receipt OR Press CANCEL to print the second receipt 12 Stop TEAR SLIP Press any Key ARE YOU SURE ENTR YES CAN...

Страница 54: ...hant Name 123 MAIN ST ANYTOWN NY 11111 WWW PAX US 02 03 2011 11 11 19 Debit Refund Transaction 8 Account 6789 Entry Swiped Amount 119 00 Reference No 342199994321 Auth Code 123456 Response Approved CARDHOLDER NAME MERCHANT COPY THANK YOU Please visit us Again soon 1 800 555 1234 Merchant Name 123 MAIN ST ANYTOWN NY 11111 WWW PAX US C O P Y 02 03 2011 11 11 19 Debit Refund Transaction 8 Account 678...

Страница 55: ...es a EBT Sale transaction on the S90 POS terminal When the transaction is complete Y returns the EBT card to X X takes the card and cellphone then goes home X EBT card holder Y Merchant of shop STEP ACTION DISPLAY 1 From the idle prompt press the SHORTCUT button to scroll through the list of available EDC types to select the EBT prompt 2 Swipe the EBT card or manually enter the account number 2 1 ...

Страница 56: ...Food Stamp Proceed to 9 then skip to step 12 Cash Benefit Proceed to 8 9 then skip to 12 Voucher Skip to step 10 8 The terminal will now Prompt you to enter a Cash Back amount or press ENTER to bypass 9 Input the PIN on the Keypad then press ENTER 10 Enter the Voucher number then press ENTER 11 Enter the Authorization number then press ENTER 12 The terminal contacts the Host Processor for an appro...

Страница 57: ...ams It may not be duplicated published or disclosed without PAX prior written permission 50 13 Press any key for the second receipt to be printed If a second receipt is not wanted press CANCEL 14 Press ENTER for no receipt OR Press CANCEL to print the second receipt 15 Stop TEAR SLIP Press any Key ARE YOU SURE ENTR YES CANC NO ...

Страница 58: ...555 1234 Merchant Name 123 MAIN ST ANYTOWN NY 11111 WWW PAX US 02 03 2011 11 11 19 EBT Sale Cash Benefit Transaction 1 Account 6789 Entry Swiped Bse Amt 100 Cash Back 20 Total 120 00 Reference No 342199994321 Response Approved Balance 20 MERCHANT COPY THANK YOU Please visit us Again soon 1 800 555 1234 Merchant Name 123 MAIN ST ANYTOWN NY 11111 WWW PAX US C O P Y 02 03 2011 11 11 19 EBT Sale Cash ...

Страница 59: ...d Y gives the EBT card to X X EBT card holder Y Merchant of shop STEP ACTION DISPLAY 1 From the Idle prompt use the SHORTCUT button until EBT is displayed then press UP DOWN or SHORTCUT button until RETURN is displayed 2 Swipe the EBT card or manually enter the account number 3 If the security for Card Manual Entry is on the terminal will prompt for the manager password When prompted enter the pas...

Страница 60: ...enter the clerk server ID then press ENTER 6 Input the PIN on the Keypad then press ENTER 8 The terminal contacts the Host Processor for an approval and prints one receipt 9 Press any key for the second receipt to be printed If a second receipt is not wanted press CANCEL 10 Press ENTER for no receipt OR Press CANCEL to print the second receipt 11 Stop TEAR SLIP Press any Key ARE YOU SURE ENTR YES ...

Страница 61: ...3 MAIN ST ANYTOWN NY 11111 WWW PAX US 02 03 2011 11 11 19 Debit Refund Food Stamps Transaction 8 Account 6789 Entry Swiped Amount 119 00 Reference No 342199994321 Auth Code 123456 Response Approved CARDHOLDER NAME MERCHANT COPY THANK YOU Please visit us Again soon 1 800 555 1234 Merchant Name 123 MAIN ST ANYTOWN NY 11111 WWW PAX US C O P Y 02 03 2011 11 11 19 Debit Refund Food Stamps Transaction 8...

Страница 62: ...AY 1 From the Idle prompt use the SHORTCUT button until EBT is displayed then press UP DOWN or SHORTCUT button until BALANCE displays 2 Swipe the EBT card or key in the account number manually 3 If the security for Card Manual Entry is on the terminal will prompt for the manager password When prompted enter the password and then press ENTER 4 Manually keying the full account number then press ENTE...

Страница 63: ...disclosed without PAX prior written permission 56 8 The terminal will contact the Host Processor for an approval and print one receipt 9 Press any key for the second receipt to be printed If a second receipt is not wanted press CANCEL 10 Press ENTER for no receipt OR Press CANCEL to print the second receipt 11 Stop ARE YOU SURE ENTR YES CANC NO TEAR SLIP Press any Key ...

Страница 64: ... prior written permission 57 Sample of EBT Balance Inquiry receipt Note Please review the following sample of an EBT Balance Inquiry receipt 1 800 555 1234 Merchant Name 123 MAIN ST ANYTOWN NY 11111 WWW PAX US 02 03 2011 11 11 19 EBT Balance Account 6789 Entry Swiped Response APPROVED Food Stamps Balance 119 00 Cash Benefit Balance 118 00 MERCHANT COPY THANK YOU Please visit us Again soon ...

Страница 65: ...on the S90 POS terminal When the transaction is complete Y returns the gift card to X X takes the card and apples then goes home X Gift card holder Y Merchant of shop STEP ACTION DISPLAY 1 From the idle prompt press the SHORTCUT button to scroll through the list of available EDC types to select the GIFT prompt 2 Swipe the GIFT card or manually enter the account number if required enter the securit...

Страница 66: ...e When prompted enter the clerk server ID then press ENTER 7 This is a feature of the Tip Option Input the amount for tip on the Keypad then press ENTER 8 The terminal contacts the Host Processor for an approval and prints one receipt 9 Press any key for the second receipt to be printed If a second receipt is not wanted press CANCEL 10 Press ENTER for no receipt OR Press CANCEL to print the second...

Страница 67: ...y and the Customer s copy 1 800 555 1234 Merchant Name 123 MAIN ST ANYTOWN NY 11111 WWW PAX US 02 03 2011 11 11 19 Gift Sale Transaction 1 Account 6789 Entry Swiped Amount 120 00 Auth Code 000000 Response Approved Gift Balance 231 00 MERCHANT COPY THANK YOU Please visit us Again soon 1 800 555 1234 Merchant Name 123 MAIN ST ANYTOWN NY 11111 WWW PAX US C O P Y 02 03 2011 11 11 19 Gift Sale Transact...

Страница 68: ...Y and Y gives the gift card to X X Gift card holder Y Merchant of shop STEP ACTION DISPLAY 1 From the Idle prompt use the SHORTCUT button until DEBIT is displayed then press UP DOWN or SHORTCUT button until RETURN is displayed 2 Swipe the gift card or key in the account number manually 3 Input the amount of the Return then press ENTER If the original transaction includes a tip amount then the tota...

Страница 69: ...rams It may not be duplicated published or disclosed without PAX prior written permission 62 7 Press any key for the second receipt to be printed If a second receipt is not wanted press CANCEL 8 Press ENTER for no receipt OR Press CANCEL to print the second receipt 9 Stop TEAR SLIP Press any Key ARE YOU SURE ENTR YES CANC NO ...

Страница 70: ...4 Merchant Name 123 MAIN ST ANYTOWN NY 11111 WWW PAX US 02 03 2011 11 11 19 Gift Refund Transaction 8 Account 6789 Entry Swiped Amount 119 00 Auth Code 123456 Response Approved Gift Balance 231 00 CARDHOLDER NAME MERCHANT COPY THANK YOU Please visit us Again soon 1 800 555 1234 Merchant Name 123 MAIN ST ANYTOWN NY 11111 WWW PAX US C O P Y 02 03 2011 11 11 19 Gift Refund Transaction 8 Account 6789 ...

Страница 71: ...TEP ACTION DISPLAY 1 From the Idle prompt use the SHORTCUT button until GIFT is displayed then press UP DOWN or SHORTCUT button until ADD is displayed 2 Swipe the gift card or key in the account number manually 3 Input the dollar amount of the transaction then press ENTER 4 This is a feature of the Invoice Mode When prompted enter the invoice No then press ENTER 5 This is a feature of the Clerk Se...

Страница 72: ...IAL and must be used exclusively for the operation of PAX programs It may not be duplicated published or disclosed without PAX prior written permission 65 8 Press ENTER for no receipt OR Press CANCEL to print the second receipt 9 Stop ARE YOU SURE ENTR YES CANC NO ...

Страница 73: ...Merchant Name 123 MAIN ST ANYTOWN NY 11111 WWW PAX US 02 03 2011 11 11 19 Gift Add Value Transaction 8 Account 6789 Entry Swiped Amount 119 00 Auth Code 123456 Response Approved Gift Balance 231 00 CARDHOLDER NAME MERCHANT COPY THANK YOU Please visit us Again soon 1 800 555 1234 Merchant Name 123 MAIN ST ANYTOWN NY 11111 WWW PAX US C O P Y 02 03 2011 11 11 19 Gift Add Value Transaction 8 Account 6...

Страница 74: ...layed then press UP DOWN or SHORTCUT button until ISSUE is displayed Swipe the gift card or key in the account number manually Input the dollar amount of the transaction then press ENTER This is a feature of the Invoice Mode When prompted enter the invoice No then press ENTER This is a feature of the Clerk Server ID Mode When prompted enter the clerk server ID then press ENTER The terminal will co...

Страница 75: ...NTIAL and must be used exclusively for the operation of PAX programs It may not be duplicated published or disclosed without PAX prior written permission 68 Press ENTER for no receipt OR Press CANCEL to print the second receipt Stop ARE YOU SURE ENTR YES CANC NO ...

Страница 76: ...Merchant Name 123 MAIN ST ANYTOWN NY 11111 WWW PAX US 02 03 2011 11 11 19 Gift Issue Transaction 8 Account 6789 Entry Swiped Amount 119 00 Auth Code 123456 Response Approved Gift Balance 119 00 CARDHOLDER NAME MERCHANT COPY THANK YOU Please visit us Again soon 1 800 555 1234 Merchant Name 123 MAIN ST ANYTOWN NY 11111 WWW PAX US C O P Y 02 03 2011 11 11 19 Gift Issue Transaction 8 Account 6789 Entr...

Страница 77: ... 1 From the Idle prompt use the SHORTCUT button until GIFT is displayed then press UP DOWN or SHORTCUT button until DEACT is displayed 2 Swipe the gift card or key in the account number manually 3 Input the transaction to be voided 4 The terminal searches the database for a Sale transaction that matches the criteria Once found confirm the transaction and press ENTER If the terminal does not find t...

Страница 78: ...rams It may not be duplicated published or disclosed without PAX prior written permission 71 7 Press any key for the second receipt to be printed If a second receipt is not wanted press CANCEL 8 Press ENTER for no receipt OR Press CANCEL to print the second receipt 9 Stop TEAR SLIP Press any Key ARE YOU SURE ENTR YES CANC NO ...

Страница 79: ...234 Merchant Name 123 MAIN ST ANYTOWN NY 11111 WWW PAX US 02 03 2011 11 11 19 Gift Void Sale Record 6 Account 6789 Entry Swiped Amount 119 00 Auth Code 123456 Response Voided Gift Balance 119 00 CARDHOLDER NAME MERCHANT COPY THANK YOU Please visit us Again soon 1 800 555 1234 Merchant Name 123 MAIN ST ANYTOWN NY 11111 WWW PAX US C O P Y 02 03 2011 11 11 19 Gift Void Sale Record 6 Account 6789 Entr...

Страница 80: ...card X Gift card holder Y Merchant of shop STEP ACTION DISPLAY 1 From the Idle prompt use the SHORTCUT button until GIFT is displayed then press UP DOWN or SHORTCUT button until BALANCE displays 2 Swipe the gift card or key in the account number manually 3 This is a feature of the Clerk Server ID Mode When prompted enter the clerk server ID then press ENTER 4 The terminal will contact the Host Pro...

Страница 81: ...sclosed without PAX prior written permission 74 Sample of Gift Balance Inquiry receipt Note Please review the following sample of a Gift Balance Inquiry receipt 1 800 555 1234 Merchant Name 123 MAIN ST ANYTOWN NY 11111 WWW PAX US 02 03 2011 11 11 19 GIFT Balance Account 6789 Entry Swiped Response Approved Balance 119 00 MERCHANT COPY THANK YOU Please visit us Again soon ...

Страница 82: ...ers his cash to Y and Y processes a Cash Sale transaction on the S90 POS terminal X takes the cellphone then goes home X Cash holder Y Merchant of shop STEP ACTION DISPLAY 1 From the idle prompt press the SHORTCUT button to scroll through the list of available EDC types to select the CASH prompt is displayed 2 Press ENTER and input the dollar amount of the transaction then press ENTER 3 This is a ...

Страница 83: ...rams It may not be duplicated published or disclosed without PAX prior written permission 76 7 Press any key for the second receipt to be printed If a second receipt is not wanted press CANCEL 8 Press ENTER for no receipt OR Press CANCEL to print the second receipt 9 Stop TEAR SLIP Press any Key ARE YOU SURE ENTR YES CANC NO ...

Страница 84: ...es Cash receipts 1 800 555 1234 Merchant Name 123 MAIN ST ANYTOWN NY 11111 WWW PAX US 02 03 2011 11 11 19 Cash Sale Transaction 8 Paid Cash Amount 100 Tip 20 Total 120 00 Response APPROVED OFFLINE MERCHANT COPY THANK YOU Please visit us Again soon 1 800 555 1234 Merchant Name 123 MAIN ST ANYTOWN NY 11111 WWW PAX US C O P Y 02 03 2011 11 11 19 Cash Sale Transaction 8 Paid Cash Amount 100 Tip 20 Tot...

Страница 85: ...turn his money Y process a Cash Return transaction Then X gives the apples back to Y and Y gives the money back to X X Cash Y Merchant of shop STEP ACTION DISPLAY 1 From the idle prompt press the SHORTCUT button to scroll through the list of available EDC types to select the CASH prompt is displayed 2 Press ENTER and input the dollar amount of the transaction then press ENTER 3 This is a feature o...

Страница 86: ...rams It may not be duplicated published or disclosed without PAX prior written permission 79 7 Press any key for the second receipt to be printed If a second receipt is not wanted press CANCEL 8 Press ENTER for no receipt OR Press CANCEL to print the second receipt 9 Stop TEAR SLIP Press any Key ARE YOU SURE ENTR YES CANC NO ...

Страница 87: ...following samples Cash Return receipts 1 800 555 1234 Merchant Name 123 MAIN ST ANYTOWN NY 11111 WWW PAX US 02 03 2011 11 11 19 Cash Refund Transaction 1 Paid Cash Amount 100 Response APPROVED OFFLINE MERCHANT COPY THANK YOU Please visit us Again soon 1 800 555 1234 Merchant Name 123 MAIN ST ANYTOWN NY 11111 WWW PAX US C O P Y 02 03 2011 11 11 19 Cash Refund Transaction 1 Paid Cash Amount 100 Resp...

Страница 88: ...ss a Cash Void Sale transaction Then X gives the cellphone back to Y and Y give the cash back to X X Cash holder Y Merchant of shop STEP ACTION DISPLAY 1 From the idle prompt press the SHORTCUT button to scroll through the list of available EDC types to select the CASH prompt Use the UP DOWN or SHORTCUT button until V SALE displays 1 1 3 If Void Sale is password protected the terminal will prompt ...

Страница 89: ...ermission 82 5 This is a feature of the Clerk Server ID Mode When prompted enter the clerk server ID then press ENTER 6 Press any key for the second receipt to be printed If a second receipt is not wanted press CANCEL 7 Press ENTER for no receipt OR Press CANCEL to print the second receipt 8 Stop TEAR SLIP Press any Key ARE YOU SURE ENTR YES CANC NO ___________________ ENTER CLERK ID _____________...

Страница 90: ...h void sale receipts 1 800 555 1234 Merchant Name 123 MAIN ST ANYTOWN NY 11111 WWW PAX US 02 03 2011 11 11 19 Cash Void Sale Transaction 8 Paid Cash Amount 100 Tip 20 Total 120 00 Response APPROVED OFFLINE MERCHANT COPY THANK YOU Please visit us Again soon 1 800 555 1234 Merchant Name 123 MAIN ST ANYTOWN NY 11111 WWW PAX US C O P Y 02 03 2011 11 11 19 Cash Void Sale Transaction 8 Paid Cash Amount ...

Страница 91: ... Y does a Cash Void Return on S90 POS terminal X takes cellphone then goes home X Credit card holder Y Merchant of shop STEP ACTION DISPLAY 1 From the idle prompt press the SHORTCUT button to scroll through the list of available EDC types to select the CASH prompt Use the UP DOWN or SHORTCUT button until V RTRN displays 1 1 3 If Void Return is password protected the terminal will prompt for the ma...

Страница 92: ...ermission 85 5 This is a feature of the Clerk Server ID Mode When prompted enter the clerk server ID then press ENTER 6 Press any key for the second receipt to be printed If a second receipt is not wanted press CANCEL 7 Press ENTER for no receipt OR Press CANCEL to print the second receipt 8 Stop ARE YOU SURE ENTR YES CANC NO TEAR SLIP Press any Key ___________________ ENTER CLERK ID _____________...

Страница 93: ...of receipts for a void return 1 800 555 1234 Merchant Name 123 MAIN ST ANYTOWN NY 11111 WWW PAX US 02 03 2011 11 11 19 CASH Void Refund Transaction 3 Paid Cash Amount 119 00 Response APPROVED OFFLINE CARDHOLDER NAME MERCHANT COPY THANK YOU Please visit us Again soon 1 800 555 1234 Merchant Name 123 MAIN ST ANYTOWN NY 11111 WWW PAX US C O P Y 02 03 2011 11 11 19 CASH Void Refund Transaction 3 Paid ...

Страница 94: ...ually key in the account number and expiration date 3 Input the dollar amount of the transaction then ENTER 4 If the account number was manually entered the terminal will ask if the card is present Depending on the user s response the terminal will prompt for V code and other AVS settings Enter the information for all AVS and V Code prompts 5 Enter the Customer Code then press ENTER OR Press ENTER...

Страница 95: ...al will display the warning 8 Enter the correct tax amount then press ENTER OR Press CANCEL to cancel transaction OR Press ENTER to bypass 9 The terminal contacts the Host Processor for an approval and prints one receipt 10 Press any key for the second receipt to be printed If a second receipt is not wanted press CANCEL 11 Press ENTER for no receipt OR Press CANCEL to print the second receipt 12 S...

Страница 96: ...ou can access your terminal s menu by pressing the FUNC button 5 1 Report Note The terminal will print the Default Report For details of how to set Default Report Please refer to 6 3 Reports STEP ACTION DISPLAY 1 From the idle prompt press FUNC to access via the Function Menu 2 Use the keys to scroll through the options then press ENTER to select OR Press 2 to print the default report 3 Input the ...

Страница 97: ...nt Host Note If you have multiple Hosts they will all display 4 Press 1 to close the batch Note The selections in the Batch Menu will vary with the Host Processor With some there are a number of different choices but others start the batch process immediately 5 The terminal will contact the host processor and print a batch report 6 Stop Note If a terminal is programmed for auto batch the host will...

Страница 98: ...riginated as store n forward on reports 1 800 555 1234 Merchant Name 123 MAIN ST ANYTOWN NY 11111 WWW PAX US Batch Report 02 03 2011 11 11 19 Term Number 1000934017 EDC CREDIT Trn Crd Tp Acct Amount 1 VIS SL 1234 70 00 2 VIS SL 2345 45 00 3 M C RT 4567 10 55 4 VIS VS 1234 70 00 CREDIT Records 4 CREDIT Total 34 45 TOTAL OF TRANSACTIONS WITHOUT TIPS 34 45 EDC DEBIT Trn Tp Acct Amount 1 SL 4321 22 50...

Страница 99: ...d record STEP ACTION DISPLAY 1 From the idle prompt press FUNC then CLEAR to access or press FUNC to access via the Function Menu 2 Press 3 to batch to host 3 Select Host 4 Press 2 to close the batch Note The selections in the Batch Menu will vary with the Host Processor With some there are a number of different choices but others start the batch process immediately 5 The terminal will contact the...

Страница 100: ...ut PAX prior written permission 93 Sample of Batch receipt Note Please review the following sample of a force batch report Star to transactions originated as store n forward on reports 1 800 555 1234 Merchant Name 123 MAIN ST ANYTOWN NY 11111 WWW PAX US Batch Report 02 03 2011 11 11 19 Terminal Number 1000934017 EDC ALL Batch Number 1234 Total Records 75 Overall 30080 00 End of Report ...

Страница 101: ...DISPLAY 1 From the idle prompt press FUNC to access via the Function Menu 2 Use the keys to scroll through the options then press ENTER to select OR Press 4 to print the default report 3 Input the Password and press ENTER 4 Scroll through the EDC Type options then press ENTER to select OR Press the number corresponding with your selection 5 View details of transactions Use the keys to scroll diffe...

Страница 102: ...d by Last 4 Digits of card STEP ACTION DISPLAY 1 From the idle prompt press FUNC to access via the Function Menu 2 Use the keys to scroll through the options then press ENTER to select OR Press 5 to print the default report 3 Input the Password and press ENTER 4 Input Last 4 Digits of the card the user wants to trace 5 View details of transactions Use the keys to scroll different transaction 6 Pre...

Страница 103: ...tip amount on the receipt and return the receipt along with their card to the cashier for processing The Counter Tip function can be access via a Hot Key must be programmed in the POS Terminal Management System before the terminal file is downloaded or via the Function Menu STEP ACTION DISPLAY 1 From the idle prompt press FUNC then 6 to access Counter Tip via the Function Menu 2 Enter the base amo...

Страница 104: ...f PAX programs It may not be duplicated published or disclosed without PAX prior written permission 97 Sample of Counter Tip receipt 1 800 555 1234 Merchant Name 123 MAIN ST ANYTOWN NY 11111 WWW PAX US 02 03 2011 11 11 19 Sale Bse Amount 100 00 Tip _______ ___ Total Amt _______ ___ THANK YOU Please visit us Again soon ...

Страница 105: ...t in current batch If transaction cannot be adjusted CANNOT ADJUST ALREADY VOIDED is displayed STEP ACTION DISPLAY 1 From the idle prompt press FUNC then 7 to access Tip Tab Menu via the Function Menu 2 Select 1 Add Tips 3 Select type of finding transaction 4 Scroll untipped Use the keys to scroll through the displayed transactions then press ENTER to select OR Enter the invoice No then press ENTE...

Страница 106: ...ress ENTER 5 View the transaction on the display to verify it is the correct transaction then Press ENTER 6 If original transaction is with tip the terminal will prompt for the manager password When prompted enter the password and then press ENTER 7 Current tip is displayed in the first line Input new tip Amount then press ENTER ___________________ ENTER CLERK ID ___________________ ______________...

Страница 107: ...sed exclusively for the operation of PAX programs It may not be duplicated published or disclosed without PAX prior written permission 100 8 This is a feature of the Edit Confirm Option Press ENTER for accept tip OR Press CANCEL to cancel transaction 9 Stop TIP1 0 20 ENTR YES CANC NO ...

Страница 108: ...y of the Customer s receipt using the Receipt Copy function STEP ACTION DISPLAY 1 From the Reports Menu press 5 to select Receipt Copy 2 Press 1 to print a copy of the Last Customer Receipt OR Press 2 choose the EDC type then enter the transaction number to print a copy of Any Receipt If No last Receipt option is available then Any Receipt option is selected automatically 3 If Any Receipt was sele...

Страница 109: ...cated published or disclosed without PAX prior written permission 102 5 Choose Copy Type Press 1 for Customer OR Press 2 for Merchant Receipt Copy Continued STEP ACTION DISPLAY 6 If the terminal does not find the transaction it displays TRANS NOT FOUND and backs to Step 2 7 The requested receipt will print 8 Stop Choose Copy Type 1 Customer 2 Merchant ...

Страница 110: ... terminal to work best for your business The menus are divided into main menu options which have submenu options You can access your terminal s menu by pressing the MENU button 6 1 Accessing the Main Menu STEP ACTION DISPLAY 1 From the Idle Prompt press MENU 2 Use the keys to scroll through the options then press ENTER to select OR Press the number on the keypad that corresponds with your selectio...

Страница 111: ...re NO NAME DESCRIPTION 1 Reports Configure report settings and print various reports 2 Merchant Settings Set security authorization receipt header and trailer etc 3 Operation Settings Set receipt printing options settings connected peripherals etc 4 Hosts Settings View or modify merchant and terminal IDs authorization and batch phone numbers print EDC Report 5 System Settings Time Date PIN Pad opt...

Страница 112: ...ort sub menu to choose a report type When the setting is saved at the end of the Current Report process the Report Type specified is the type of report printed for a Default Report and a Batch Report Below is a list of report types and their definitions REPORT DEFINITION Condensed Report This type of report will print the transaction number card type transaction type last four digits of the accoun...

Страница 113: ...urrent Report is described on the next page Example I print out a current report every time there is a change in shifts To print this report quickly and easily I set it as my default report STEP ACTION DISPLAY 1 From the Main Menu press ENTER OR Press 1 to access the Reports Menu 2 Input the Password and press ENTER 3 From the Reports Menu press ENTER OR Press 1 to select Default Report 4 Stop REP...

Страница 114: ...CANCEL Example I want a one time report of Void transactions only so I printed a current report selecting VOID as the transaction type I did not want to save it as my default report so I pressed CANCEL when prompted STEP ACTION DISPLAY 1 From the Reports menu press 2 to select Current Report 2 Use the keys to scroll through the Report Type options then press ENTER to select OR Press the number cor...

Страница 115: ... specific clerk server is selected terminal prompts for clerk server ID Otherwise skip to Step 5 Enter clerk server ID then press ENTER 7 If clerk server mode is not enabled By Clerk Server will not be a choice Scroll through Sorting Options then press ENTER to select OR Press the number corresponding with your selection 8 Transaction types include All Sale Forced Return Void Sale Void return and ...

Страница 116: ...e used exclusively for the operation of PAX programs It may not be duplicated published or disclosed without PAX prior written permission 109 9 TO THEN Save this as your default report Press ENTER Keep your current default setting Press CANCEL 10 Stop Set Cur Defaults ENTR YES CANC NO ...

Страница 117: ...closed without PAX prior written permission 110 Transaction types on Report Note The Condensed Report will list the different transaction types with 2 letter designations The following table explains the transaction designators DESIGNATOR TRANSACTION TYPE SL Sale RT Return VE Verify TK Forced VS Void Sale VR Void Return VF Void Forced OP Open Tab TB Closed Tab CT Continue Tab ...

Страница 118: ...11 12 00 4 VIS SL1234 122 78 5 M C RT2345 15 50 6 AMX SL3456 88 20 7 DSN SL4567 9 00 8 VIS VE5678 300 00 9 M C TK6789 272 00 CREDIT Records 9 CREDIT Total 522 13 EDC DEBIT Trn Tp Acct Amount 1 SL 7890 12 00 2 SL 8901 67 00 DEBIT Records 2 DEBIT TOTAL 79 00 Incl Cash Back 10 00 Records 11 Overall 601 13 End of Report Current Report 02 03 2011 11 11 19 Term Number 1000123456 EDC CREDIT Batch Number ...

Страница 119: ...port 02 03 2011 11 11 19 Term Number 1000123456 EDC CREDIT Batch Number 1 Sale 12 00 Transaction 1 Trans Date 02 01 11 Trans Time 09 10 00 Entry Swiped Account 6789 Exp Date Response 123456 Sale 45 65 Transaction 2 Trans Date 02 01 11 Trans Time 11 11 19 Entry Swiped Account 6789 Exp Date Response 123456 DEBIT Records 2 DEBIT TOTAL 79 00 Inc Cash Back 10 00 Records 11 Overall 601 13 End of Report ...

Страница 120: ...DIT Total 122 78 Records 4 Overall 122 78 End of Report Current Report 02 03 2011 11 11 19 Term Number 1000123456 Server ALICE EDC CREDIT Batch Number 1 Trn Tp Tip Amount 1 SL 20 00 120 00 3 SL 17 00 105 50 5 SL 15 00 90 00 8 SL 30 00 200 00 CREDIT Records 4 CREDIT Total 515 50 Tip 82 00 Total Tips 82 00 Disnt Tips 80 50 Server FLO EDC CREDIT Batch Number 1 Trn Tp Tip Amount 2 SL 54 00 330 00 4 SL...

Страница 121: ...onth s statement Print a History report starting with the first day of last month and ending with the last day Select the Per Batch option for the individual batch totals and the overall total STEP ACTION DISPLAY 1 From the Reports menu press 3 to select History Report 2 Using the numeric keypad input the batch date you would like the report to begin with then press ENTER 3 Using the numeric keypa...

Страница 122: ...PLAY 5 Scroll through the Card Type options then press ENTER to select OR Press the number corresponding with your selection 6 Transaction types include All Totals Only Sale Forced Verify Return Void Sale Void return and Void Forced Scroll through the Transaction Type options then press ENTER to select OR Press the number corresponding with your selection 7 Stop SELECT TRAN TYPE 1 ALL 2 TOTALS ONL...

Страница 123: ...or the same time period History Report 02 03 2011 11 11 19 Trans Type ALL 02 01 11 to 02 14 11 EDC CREDIT Overall 429 5823 50 EDC DEBIT Overall 261 2018 87 Incl Cash Back 470 00 End of Report History Report 02 03 2011 11 11 19 Trans Type ALL 02 01 11 to 02 14 11 EDC CREDIT 02 01 11 Batch Number 1 VISA Sale 2 134 78 Verified 1 300 00 Void Sale 1 12 00 Total 4 122 78 EDC DEBIT 02 01 11 Batch Number ...

Страница 124: ...t transaction use the description below STEP ACTION DISPLAY 1 From the Reports menu press 4 to select Display Transaction 2 The searching method includes Scroll All By Invoice Number By Clerk Server ID By Transaction Number By Card Type and By Card Number By Invoice Number and By Clerk Server ID only appears when corresponding feature is enabled Use the keys to scroll through the view methods then...

Страница 125: ...h all transaction The first transaction will show on the display You selected to view by Invoice Number You will be prompted to input the Invoice Number You selected to view by Clerk Server ID You will be prompted to input the Clerk Server ID You selected to view by Transaction You will be prompted to input the Transaction You selected to view by Card Type You will be prompted to select a card typ...

Страница 126: ...s enabled terminal prompts All or Specific clerk server Otherwise skip to Step 4 Press 1 for all servers OR Press 2 for a specific server 3 If a specific clerk server is selected terminal prompts for clerk server ID Otherwise skip to Step 4 Enter clerk server ID then press ENTER 4 Use the keys to scroll through the EDC Type options then press ENTER to select OR Press the number corresponding with ...

Страница 127: ...tion of PAX programs It may not be duplicated published or disclosed without PAX prior written permission 120 Tip Report Continued STEP ACTION DISPLAY 6 TO THEN Save this as your default report Press ENTER Keep your current default setting Press CANCEL 7 The report will print 8 Stop Set Cur Defaults ENTR YES CANC NO ...

Страница 128: ...lished or disclosed without PAX prior written permission 121 Sample of Tip Report receipt Note Please review the following sample of Tip Report receipt TIP REPORT 02 03 2011 11 11 19 Term Number 1000731686 Clerk ID ALL EDC CREDIT Batch Number 4 TOTAL SALES 200 50 Tip 40 00 GRAND TOTAL 240 50 Records 3 Overall 240 50 CASH TIPS ____ __ TIP OUTS ____ __ End of Report ...

Страница 129: ...rt 2 The File System Report will be printed 3 Stop Sample of File System Report receipt Note The values displayed in the sample reports are reflective of one POS Terminal model Reports printed from other models will reflect the memory capacity of that model REPORTS 3 History Report 4 Display Trans 5 Tip Report 6 FileSys Report FILE SYSTEM REPORT 02 03 2011 11 11 19 Free Space 1495040 EDC R Sz Recs...

Страница 130: ...ay not be duplicated published or disclosed without PAX prior written permission 123 6 4 Merchant Settings This menu contains eight different functions that can be changed manually if necessary They are MENU DESCRIPTION Authorizations Security Setting Edit Header Edit Trailer Set Batch Time Additional Prompts Set Cash EDC Clerk Server Name ...

Страница 131: ...word protected Some transaction types are disabled by the Host and cannot be enabled Example As the Manager of the store I don t want anyone to process a Void or Return but me Set the Void and Return functions to Manager Only The password will then be required to process those transactions Remember the password is either the default current date MMDDYYYY or the user specified 8 digit password STEP...

Страница 132: ...ss the number corresponding with your selection 6 Scroll to select the Transaction Type then press ENTER OR Press the number corresponding with your selection Information in the parenthesis is the current setting EN Always Enabled DIS Disabled MGR Password Protected 7 Scroll to select Enable Disable or Manager Only for the Transaction Type then press ENTER OR Press the number corresponding with yo...

Страница 133: ...error as soon as the card is swiped STEP ACTION DISPLAY 1 From the Merchant Settings menu press 1 to access Authorizations 2 Input the Password and press ENTER 3 Press 2 to edit authorization for Card Types 4 Use the keys to select the Card Type then press ENTER OR Press the number corresponding with your selection 5 Scroll to select Enable or Disable for Card Type then press ENTER OR Press the nu...

Страница 134: ...d is swiped It will only prompt the user to make a selection when the payment type is CREDIT STEP ACTION DISPLAY 1 From the Merchant Settings menu press 1 to access Authorizations 2 Input the Password and press ENTER 3 Press 3 to select Debit Prompt 4 Current setting is displayed in the first line Press 1 to turn Debit Prompt OFF OR Press 2 to turn Debit Prompt ON 5 Stop MERCHANT PARAMS 1 Authoriz...

Страница 135: ...nd to be compared with the account number swiped Display Account Account number swiped is displayed on screen and to be compared against the embossed account number by the user Last 4 Digits Display Account Manually enter last four digits of account number to be compared with the last four digits swiped and Account number swiped is displayed on screen and to be compared against the embossed accoun...

Страница 136: ...he new User Password is forgotten download the Parameters to re establish the default password STEP ACTION DISPLAY 1 From the Merchant Settings menu press 2 for Security Settings 2 Press 1 for User Password 3 Press ENTER to change the password 4 The password is anything other than the default password MMDDYYYY enter the OLD password then press ENTER 5 Enter the NEW password then press ENTER Note T...

Страница 137: ...e that no one closes the batch but me Set the Batch function to be password protected STEP ACTION DISPLAY 1 From the Merchant Settings menu press 2 to access Security Settings 2 Press 2 to secure the Batch function 3 Enter the password then press ENTER 4 1 6 Press 1 for Always Enabled OR Press 2 for Password Protected 5 Stop MERCHANT PARAMS 1 Authorizations 2 Security Settings 3 Edit Header 4 Edit...

Страница 138: ...ow to Set the POS terminal NOTE This document is CONFIDENTIAL and must be used exclusively for the operation of PAX programs It may not be duplicated published or disclosed without PAX prior written permission 131 ...

Страница 139: ...ount number swiped matches the number on the front of the card STEP ACTION DISPLAY 1 From the Merchant Settings menu press 2 to access Security Settings 2 Press 3 for Secure Card 3 The current setting is displayed in the first line Scroll to select the option then press ENTER 4 Stop MERCHANT PARAMS 1 Authorizations 2 Security Settings 3 Edit Header 4 Edit Trailer SECURITY SWITCH 1 User Password 2 ...

Страница 140: ...nsaction STEP ACTION DISPLAY 1 From the Merchant Settings menu press 2 to access Security Settings 2 Press 4 for Card manual Entry 3 Press 1 for all EDC types OR Select the specific EDC type 4 Enter the password then press ENTER 5 Scroll to select the option then press ENTER 6 Stop MERCHANT PARAMS 1 Authorizations 2 Security Settings 3 Edit Header 4 Edit Trailer SECURITY SWITCH 2 Batch 3 Secure Ca...

Страница 141: ... that you want printed out on the receipt See instructions below 5 To change the letters first press the number key that has the letter engraved on the top then press the ALPHA key to cycle through the other characters also on that key For example The 2 key on the keypad also has the letters A B and C printed on it When you first press this key the display will show the number 2 by pressing the AL...

Страница 142: ...actions are cleared from memory with the first transaction of the new batch Example The AutoBatch report is printing in the middle of the day I accessed the Set Batch Time function and changed the time Now the report prints after we have closed for the day STEP ACTION DISPLAY 1 From the Merchant Settings menu press 5 to set the batch time 2 Input the Password and press ENTER 3 Scroll to select the...

Страница 143: ... used exclusively for the operation of PAX programs It may not be duplicated published or disclosed without PAX prior written permission 136 6 Input the desired time in military 24 hour time and press ENTER 7 Auto Batch is not supported by Host 8 Stop SET BATCH TIME 05 30 NO AUTOBATCH ...

Страница 144: ... restaurant server and retail clerk applications You can also designate up to one hundred 100 server clerk name ID combinations starting from ID 1 up to ID 100 For Retail this display name is Clerk and for Restaurant display name is Server Example I would like the receipts to list the clerk who made the sale Enable Clerk mode and enter all of the clerk s names starting with Clerk ID 1 STEP ACTION ...

Страница 145: ... 1 to disable Clerk ID mode OR Press 2 to enable Clerk ID Mode 5 Enter the first clerk number name designation to be saved then press ENTER System defaults to clerk number 1 6 Enter the clerk name using the same method as editing the header information maximum 19 characters Press ENTER when name is complete 7 When all of the clerk names have been entered press CANCEL to accept the entered names 8 ...

Страница 146: ... the open batch The message BATCH OUT PLEASE is displayed If there are failed Offline transactions the message MUST UPLOAD OR DELETE FAILED TRN is displayed when the invoice mode feature is selected STEP ACTION DISPLAY 1 From the Merchant Settings menu press 7 for Additional Prompts 2 Input the Password and press ENTER 3 If there is no transaction in the terminal database press 2 for Invoice Mode ...

Страница 147: ...EP ACTION DISPLAY 5 The defaulting setting is OFF Press 1 to disable Invoice Mode OR Press 2 to enable Invoice Mode terminal will prompt for invoice number when processing transaction OR Press 3 for automatic numbering terminal will increment invoice number with each transaction 6 If Auto was selected enter the starting invoice number then press ENTER 7 Stop _____________________ ENTER INVOICE ___...

Страница 148: ...ount STEP ACTION DISPLAY 1 From the Merchant Settings menu press 7 for Additional Prompts 2 Input the Password and press ENTER 3 If there is no transaction in the terminal database press 4 for CashBack Prompt 4 The defaulting setting is OFF Press 1 to disable CashBack Prompt OR Press 2 to enable CashBack Prompt 5 Stop Additional Prmpt 1 Clerk ID Mode 2 Invoice Mode 3 Cashback Prompt 4 Table Mode E...

Страница 149: ...y applicable for RESTANRANT STEP ACTION DISPLAY 6 From the Merchant Settings menu press 7 for Additional Prompts 7 Input the Password and press ENTER 8 If there is no transaction in the terminal database press 4 for Table Mode 9 The defaulting setting is OFF Press 1 to disable Table Mode OR Press 2 to enable Table Mode 10 Stop Additional Prmpt 1 Clerk ID Mode 2 Invoice Mode 3 Cashback Prompt 4 Tab...

Страница 150: ...licable for RESTAURANT STEP ACTION DISPLAY 11 From the Merchant Settings menu press 7 for Additional Prompts 12 Input the Password and press ENTER 13 If there is no transaction in the terminal database press 5 for Guest No Mode 14 The defaulting setting is OFF Press 1 to disable Guest No Mode OR Press 2 to enable Guest No Mode 15 Stop Additional Prmpt 2 Invoice Mode 3 Cashback Prompt 4 Table Mode ...

Страница 151: ... POS Terminal to a craft show this weekend Is there any way I can use the terminal to keep track of my cash transactions Yes Enable Cash EDC and change the payment mode to Cash for every cash sale This will help you to keep track and give you a receipt with your business information for the customer STEP ACTION DISPLAY 1 From the Merchant Settings menu press 8 to Set Cash EDC 2 Input the Password ...

Страница 152: ...me Note Change the clerk and server name STEP ACTION DISPLAY 1 From the Merchant Settings menu press 9 to access Clerk Server Name 2 Input the Password and Press ENTER 3 Clear the previous ones or not 4 Enter the new Clerk ID then press ENTER 5 Stop CLEAR CURRENT ENTER YES CANC NO _____________________ ENTER CLERK ID 1 _____________________ MERCHANT PARAMS 6 Set Batch Time 7 Additional Prompts 8 C...

Страница 153: ...y not be duplicated published or disclosed without PAX prior written permission 146 6 5 Operation Settings This Menu has nine options that can be enabled or disabled manually through the terminal They are MENU DESCRIPTION No Paper Mode Buzzer Setup Operation Mode Battery Saver Disclaimer Setup Halo Setup Print Setup Receipt Print Peripherals ...

Страница 154: ...ead of arrow 0 64 cmExample 1 I need to process a few Forced transactions and I don t need receipts for them so I will put the terminal in No Paper Mode This way I will not waste any paper Example 2 The screen is flashing NPM This means that the terminal is in No Paper Mode I will verify that there is paper and disable NPM STEP ACTION DISPLAY 1 From the Operation Settings menu press 1 to access No...

Страница 155: ...zer which sounds a tone when specific functions are performed or buttons pressed Example I would like to know when the Menu button is pressed so I enabled the Buzzer function The terminal now beeps whenever the Menu button is pressed STEP ACTION DISPLAY 1 From the Operation Settings menu press 2 for Buzzer Setup 2 Default setting is ON Press 1 to disable the buzzer OR Press 2 to enable the buzzer ...

Страница 156: ...s Example I have a new employee that needs to be trained on the POS Terminal I ll put the terminal in Demo Mode That way the new employee can be trained without interfering with business STEP ACTION DISPLAY 1 From the Operation Settings menu press 3 for Operation Mode 2 Input the Password and press ENTER 3 The defaulting setting is Normal Mode Use the keys to make your selection and then press ENT...

Страница 157: ...p Battery OFF Battery Saver is OFF Wireless Back up Battery Auto Off Only Terminal is off wireless modem stays on Wireless Radio Auto Off Terminal and modem are off STEP ACTION DISPLAY 1 From the Operation Settings menu press 4 for Battery Saver 2 The default setting is Auto Off Only The current setting is displayed in the first line Use the keys to make your selection and then press ENTER OR Pres...

Страница 158: ...er at the bottom of every credit card transaction Disclaimer I AGREE TO PAY ABOVE TOTAL AMOUNT ACCORDING TO CARD ISSUER AGREEMENT MERCHANT AGREEMENT IF CREDIT VOUCHER STEP ACTION DISPLAY 1 From the Operation Settings menu press 5 for Print Disclaimer 2 The default setting is ON Scroll to make your selection and then press ENTER OR Press the number corresponding with your selection 3 Stop Prt Dscl ...

Страница 159: ...be able to give back an amount greater than 20 in error STEP ACTION DISPLAY 1 From the Operation Settings menu press 6 to Set Halo values 2 Input the Password and press ENTER 3 The default setting is OFF Press the number corresponding with your selection If the Halo was disabled continue with step 5 4 The current HALO is displayed in the first line Input the new maximum amount for a sale then pres...

Страница 160: ... is displayed in the first line Input the new maximum amount for a return then press ENTER 7 The default setting is OFF Use the keys to find your selection and then press ENTER OR Press the number corresponding with your selection 8 The current HALO is displayed in the first line Input the new maximum amount for cash back then press ENTER 9 Stop HALO for Return 0 00 New Rate 0 00 Cash Back HALO 1 ...

Страница 161: ... of all the terminal options Example 1 How do I know what my Fraud Control options are set to Print a Setup Report Example 2 I just changed the address in the receipt header I want to see what it looks like when printed so I will print a Setup Report STEP ACTION DISPLAY 1 From the Operation Settings menu press 7 to print a Setup Report 2 Input the Password and press ENTER 3 The terminal prints out...

Страница 162: ...ERIFY RETURN VOID SALE VOID RTRN VOID FRCD Sample of Print Setup receipt Note Please review the following sample of Print Setup receipt This area reflects the Application currently loaded in the terminal Individual Merchant Header Trailer and Comment Line information is listed in this area A plus indicates the Credit Card is supported A minus indicates the card is not supported This area of the Se...

Страница 163: ...P Version 02 41 00 Working Key 1234567890ABCDEF MasterKeyLocation 0 With Cash Server Mode OFF Table Mode OFF Guest Mode OFF Invoice Mode OFF CashBack Prompt ON Print Credit Discl Yes Menu Type Manual Scroll Default Report Condensed Rprt Detail Recs ALL Sorted by Trans Gn AutoBatchTime 5 30 HALO for sale No Limit HALO for refund No Limit Cash Back HALO 20 00 FPS Mode OFF Visa MCC 5814 Limit for aut...

Страница 164: ...ad VISA AVS On Swipe None AVS OnCardPrsn Zip AVS onCrdNotPr Addr Zip Card Present Ask In Man V Code On Man Ent MasterCard AVS On Swipe None AVS OnCardPrsn Zip AVS onCrdNotPr Addr Zip Card Present Ask In Man V Code On Man Ent AMEX AVS On Swipe None AVS OnCardPrsn Zip AVS onCrdNotPr Addr Zip Card Present Ask In Man V Code On Man Ent TIP Setup CREDIT DEBIT CASH TIP 1 Mode In Tip Menu Name Tip Discoun...

Страница 165: ...ant to disable preprint Receipt Print Setup STEP ACTION DISPLAY 1 From the Operation Settings menu press 8 to print a Setup Report 2 Input the Password and press ENTER 3 Select functions 4 If Then Customer Copy is selected Proceed to 5 6 then skip to 8 Preprint is selected skip to 7 5 Scroll through the EDC Type options then press ENTER to select OR Press the number corresponding with your selecti...

Страница 166: ...ams It may not be duplicated published or disclosed without PAX prior written permission 159 6 The defaulting setting is ON Press 1 to disable Customer Copy OR Press 2 to enable Customer Copy 7 The defaulting setting is ON Press 1 to disable PrePrint OR Press 2 to enable PrePrint 8 Stop Customer Copy 1 OFF 2 ON PrePrint 2 1 OFF 2 ON ...

Страница 167: ...t a external devices i e card reader STEP ACTION DISPLAY 1 From the Operation Settings menu use the key to scroll to 10 Peripherals then press ENTER 2 Input the Password and press ENTER 3 Press 1 to select external card reader 4 The defaulting setting is OFF Press 1 to disable External Card Reader OR Press 2 to enable External Card Reader 5 Stop OPER SETTINGS 7 Print Setup 8 Receipt Print 9 Store ...

Страница 168: ...not be duplicated published or disclosed without PAX prior written permission 161 6 6 Host Settings This menu allows you to view edit the Host Parameter and Phones prints an EDC Setup Report view the Protocol versions and set the Auto Dial parameters MENU DESCRIPTION Hosts Parameters Hosts Phones Print EDC Setup Host URL Params AutoDial Setup ...

Страница 169: ...gs menu press 1 to enter Host parameters 3 Scroll to select the host then press ENTER 4 Use the keys to find your selection and then press ENTER Or Press the number corresponding with your selection 5 Input the Merchant ID if 1 is selected in Step 4 6 Input the Bank ID if 2 is selected in Step 4 7 Input the Bank ID if 3 is selected in Step 4 8 Stop HOST PARAMS 1 Host Parameters 2 Host Phones 3 Pri...

Страница 170: ...o select the host then press ENTER 4 Use the keys to find your selection and then press ENTER Or Press the number corresponding with your selection 5 Use the keys to find your selection and then press ENTER Or Press the number corresponding with your selection 6 Use the keys to find your selection and then press ENTER Or Press the number corresponding with your selection HOST PARAMS 1 Host Paramet...

Страница 171: ... operation of PAX programs It may not be duplicated published or disclosed without PAX prior written permission 164 6 6 2 1 Phone Number Note This function sets the phone number STEP ACTION DISPLAY 1 Press 1 2 Input the phone number and press ENTER 3 Stop Phone Number 123456 PHONE SETTINGS 1 Number 2 Baud Rate ...

Страница 172: ...licated published or disclosed without PAX prior written permission 165 6 6 2 2 Baud Rate Note This function sets the baud rate STEP ACTION DISPLAY 1 Press 2 2 Use the keys to find your selection and then press ENTER Or Press the number corresponding with your selection 3 Stop Baud Rate 2400 1 300 2 1200 3 2400 4 4800 PHONE SETTINGS 1 Number 2 Baud Rate ...

Страница 173: ...ant parameters authorization and batch phone numbers and AutoDial settings is printed with the Print EDC Setup function Example I need to see what the Capture types of all of the EDC Hosts are to know if manual batching is required STEP ACTION DISPLAY 1 When prompted input the Password and press ENTER 2 From the Hosts Settings menu press 3 to print an EDC Setup Report 3 The terminal prints EDC Set...

Страница 174: ... Params Same as CREDIT Auth Phones Phone1 18005554567 Baud Rate 1200 7E Phone2 18005555678 Baud Rate 1200 7E Phone 3 18005556789 Baud Rate 1200 7E of tries 1 DBT BATCH THROUGH CREDIT Host Name 21 4B CHECK HOST BASE AUTOBATCH Client_Number 123456 Auth Phones Phone1 18005554321 Baud Rate 1200 7E Phone2 18005555432 Baud Rate 1200 7E Phone 3 18005556543 Baud Rate 1200 7E of tries 1 Host Name 4 41A EBT...

Страница 175: ...ER 4 Use the keys to find your selection and then press ENTER Or Press the number corresponding with your selection 5 Use the keys to find your selection and then press ENTER Or Press the number corresponding with your selection 6 Use the keys to find your selection and then press ENTER Or Press the number corresponding with your selection 7 Input the desired URL address or port number then press ...

Страница 176: ...iness day I set the AutoDial time to automatically batch out an hour after the store closes STEP ACTION DISPLAY 1 Input the Password and press ENTER 2 From the Hosts Settings menu press 5 to enter connection settings 3 Scroll to select the host then press ENTER 4 Use the keys to find your selection and then press ENTER Or Press the number corresponding with your selection 5 If 1 is selected in ste...

Страница 177: ...sed exclusively for the operation of PAX programs It may not be duplicated published or disclosed without PAX prior written permission 170 7 Enter the AutoDial time interval then press ENTER The interval is usually 5 minutes 8 Stop _____________________ AD INTERVAL _____________________ ...

Страница 178: ...f PAX programs It may not be duplicated published or disclosed without PAX prior written permission 171 6 7 System Settings This menu consists of different functions that can be changed manually MENU DESCRIPTION Date Time Setup Batch Number Working Mode Pre Dial Call Database PIN Pad Settings Keys Injection App Management ...

Страница 179: ...s function sets the internal clock STEP ACTION DISPLAY 1 From the Main Menu press 5 to access System Settings 2 Press ENTER 3 Verify the current Date and or Time is incorrect Input the correct date using MM DD YY format Input the correct hour and minutes using Military 24 hour Format 4 Verify the time is now correct and press CANCEL OR Press ENTER to save the modified time 5 Stop SYSTEM OPTIONS 1 ...

Страница 180: ...ing this function Verify the current or last closed batch number with the Host Processor before changing STEP ACTION DISPLAY 1 From the System Settings menu press 2 to set batch number 2 Input the Password and press ENTER 3 Select the EDC host 4 Terminal displays the current batch No Input the New Batch and press ENTER 5 Press ENTER to complete OR Press CANCEL to cancel 6 Stop ENTER PASSWORD SYSTE...

Страница 181: ...ENTIAL and must be used exclusively for the operation of PAX programs It may not be duplicated published or disclosed without PAX prior written permission 174 6 7 3 Working Mode This sub menu has three options MENU DESCRIPTION Tip Options Fraud Control Local Dup Check ...

Страница 182: ...ograms It may not be duplicated published or disclosed without PAX prior written permission 175 6 7 3 1 Tip Options Note These features listed below provide the user with multiple Tip options The following sub menu options can be found in the Tip Options menu MENU DESCRIPTION EDC Tip Tip 1 Tip 2 Tip 3 Edit Confirm Print TIP Setup ...

Страница 183: ...ettings menu press 3 for Working Mode 2 Press ENTER 3 Input the Password and press ENTER 4 Press ENTER for EDC Tips 5 Select the EDC type 6 Current setting is displayed in the first line Press 1 to disable tips for the selected EDC type OR Press 2 to enable tips for the selected EDC type 7 Stop WORKING MODE 1 Tip Options 2 Fraud Control 3 Comment Opt ENTER PASSWORD TIP OPTIONS 1 EDC Tip 2 Tip 1 OF...

Страница 184: ...ault amount set in the Tip Options in Working Mode STEP ACTION DISPLAY 1 From the Tip Options menu use the to select the tip you wish to edit then press ENTER OR Press the number corresponding with your selection The current Tip status is displayed in parenthesis 2 Press 1 to disable the tip or 2 to enable the tip After turning a tip option ON you will then be prompted to Edit the Tip name To chan...

Страница 185: ...e the Transaction Total after the Tip amount is entered OR Press 2 to have the terminal calculate the Tip amount after the Transaction Total is entered 4 If in Step 3 Calculate Total is selected enter the default tip amount then press ENTER OR Press ENTER to bypass Note Current rate is displayed in the first line The defaule tip amount will automatically be added to all transactions 5 Stop TIP Ent...

Страница 186: ...onfirm will cause the terminal to prompt the user to press ENTER to accept the tip amount or press CANCEL to prompt for a new tip amount Edit confirm is supported in Restaurant only STEP ACTION DISPLAY 1 From the Tip Options menu press 5 for Edit Confirm 2 The current setting is displayed in the first line Press 1 to disable Edit Confirm OR Press 2 to enable Edit Confirm 3 Stop TIP OPTIONS 2 Tip 1...

Страница 187: ...ot be duplicated published or disclosed without PAX prior written permission 180 6 7 3 1 4 Print Tip Setup Note This function prints a report listing the terminal s tip configuration STEP ACTION DISPLAY 1 From the Tip Options menu press 7 to print the Tip Setup report 2 Stop TIP OPTIONS 4 Tip 3 OFF 5 Tab Option 6 Edit Confirm 7 Print TIP Setup ...

Страница 188: ...of PAX programs It may not be duplicated published or disclosed without PAX prior written permission 181 Sample of Tip Setup Report TIP Setup CREDIT DEBIT CHECK EBT CASH TIP 1 Mode In Transaction Name Tip Entry Calculate Total TIP 2 Mode In Transaction Name Delivery Preset Amount 5 00 Tip 3 Mode OFF Tip Edit Confirm OFF ...

Страница 189: ...or disclosed without PAX prior written permission 182 6 7 3 2 Fraud Control Option Note These features listed below provide the user with multiple options when setting the parameters for individual card types The following sub menu options can be found in the Fraud Control menu MENU DESCRIPTION AVS On Swipe AVS On Card Present AVS on Card Not Present Card Present V Code ...

Страница 190: ...nt any AVS prompts when the card is swiped The AVS On Swipe setting will be changed to None This will disable the AVS prompts on swiped transactions OPTION DEFINITION None There will be no AVS prompts default Address AVS will prompt for address only Zip AVS will prompt for zip code only Address Zip AVS will prompt for address and zip code STEP ACTION DISPLAY 1 From the Main Menu press 5 for System...

Страница 191: ... Fraud Control 4 Input the Password and press ENTER 5 Press 1 to set the AVS On Swipe 6 Select the card type you wish to modify or press 1 for all card types 7 Press the number that corresponds to the desired AVS Prompt 8 Stop AVS On Swipe 1 None 2 Address 3 Zip 4 Address Zip Select Card Type 1 ALL 2 Visa 3 MasterCard 4 AMEX ENTER PASSWORD Fraud Control 1 AVS On Swipe 2 AVS On CardPrsnt 3 AVS OnCa...

Страница 192: ...l card types OPTION DEFINITION None There will be no AVS prompts default Address AVS will prompt for address only Zip AVS will prompt for zip code only Address Zip AVS will prompt for address and zip code STEP ACTION DISPLAY 1 From the Fraud Control menu press 2 to set AVS On Card Present 2 Select the card type you wish to modify or press 1 for all card types 3 Press the number that corresponds to...

Страница 193: ...or Address and Zip on all manual entries where the card is not present should be enabled OPTION DEFINITION None There will be no AVS prompts default Address AVS will prompt for address only Zip AVS will prompt for zip code only Address Zip AVS will prompt for address and zip code STEP ACTION DISPLAY 1 From the Fraud Control menu press 3 to set AVS On Card Not Present 2 Select the card type you wis...

Страница 194: ...d Present option to No If manual OPTION DEFINITION No If manual It is assumed that the card is NOT present on all manual entry transactions Always Yes It is assumed that the card is always present default Ask If manual The terminal will ask if the card is present on all manual entry transactions STEP ACTION DISPLAY 1 From the Fraud Control menu press 4 to set the Card Present options 2 Select the ...

Страница 195: ...Off Will not prompt for Code default On if Manual Will prompt for Code on manual entry transactions On if Manual Card not Present Will prompt for Code if card is not present On Always Will always prompt for Code STEP ACTION DISPLAY 1 From the Fraud Control menu press 5 for V Code 2 Select the card type you wish to modify or press 1 for all card types 3 Press the number that corresponds to the desi...

Страница 196: ...same account number STEP ACTION DISPLAY 1 From the Main Menu press 5 for System Settings 2 Press 3 for Working Mode 3 Press 3 for Local Dup Check 4 Input the password and then press ENTER 5 The default setting is OFF Press 1 to disable Dup Check OR Press 2 to enable Dup Check 6 STOP SYSTEM OPTIONS 1 Date Time Setup 2 Batch Number 3 Working Mode 4 Pre Dial Call MAIN MENU 2 Merchant Settings 3 Opera...

Страница 197: ...enabled terminal will make a pre dial call to the host STEP ACTION DISPLAY 1 From the System Settings menu press 5 for Pre Dial Call 2 Scroll through the EDC Type options then press ENTER to select OR Press the number corresponding with your selection 3 Use the keys to find your selection and then press ENTER Or Press the number corresponding with your selection 4 Stop PreDial Call 1 Predial OFF 2...

Страница 198: ...eed to void transactions 1 through 14 This can be done quickly by using the Edit Database function If it is not necessary to have a Void Receipt for all of the transactions put the terminal in No Paper Mode Remember to disable NPM after all of the transactions have been voided STEP ACTION DISPLAY 1 From the System Settings menu press 6 for Edit Database 2 Input the Password and Press ENTER 3 Press...

Страница 199: ...ublished or disclosed without PAX prior written permission 192 5 Input the transaction to be voided 6 View the transaction on the display to verify it is the correct transaction then Press ENTER 7 Press ENTER to complete OR Press CANCEL to cancel 8 Stop ____________________ Enter Trans 12 ______________________ 0001 SALE AMT 2 00 4996 Void 0001 ENTR YES CANC NO ...

Страница 200: ...l of the transactions put the terminal in No Paper Mode Remember to disable NPM after all of the transactions have been completed STEP ACTION DISPLAY 1 From the System Settings menu press 6 for Edit Database 2 Input the Password and Press ENTER 3 Press 2 for Post Auth transactions 4 Input the transaction to be completed 5 View the transaction on the display to verify it is the correct transaction ...

Страница 201: ...the transactions If necessary run a Journal Report STEP ACTION DISPLAY 1 From the System Settings menu press 6 for Edit Database 2 Input the Password and press ENTER 3 Press 3 for Clear Database 4 Press ENTER to continue OR Press CANCEL to cancel 5 Select EDC type you wish to clear the database for then press ENTER OR Press ENTER to clear all databases 6 A short report listing the cleared database...

Страница 202: ...t in that no more transaction can be processed To avoid this situation you can clear the reversal flag in this menu so that the terminal will not try the reversal anymore Note that the original transaction may already be approved in host so the total transactions may not match while Batch Close STEP ACTION DISPLAY 1 From the System Settings menu press 5 for Edit Database 2 Input the Password and p...

Страница 203: ...r written permission 196 6 7 6 Pin Pad Settings Note Use this function to modify the Key Pinpad Settings STEP ACTION DISPLAY 1 From the System Settings menu press 7 to Select the Key Location 2 Input the Password and press ENTER 3 Press 1 to select the Internal PIN pad 4 Stop ENTER PASSWORD PIN Pad Type 1 1 Internal PIN pad SYSTEM OPTIONS 3 Working Mode 4 Pre Dial Call 5 Database 6 Pin Pad Setting...

Страница 204: ... Input the Password and press ENTER 3 Press 1 or 2 to enter the function 1 for start Key Injection process proceed to step 4 then skip to step 7 2 for set baud rate skip to step 5 4 Session Started 5 Use the keys to find your selection and then press ENTER Or Press the number corresponding with your selection 6 After setup the baud rate then start session to communication 7 Stop SYSTEM OPTIONS 4 P...

Страница 205: ... Use this function to enter the App Load sub application STEP ACTION DISPLAY 8 From the System Settings menu press 9 to Select the AppManagement 9 Input the Password and press ENTER 10 Use the keys to find your selection and then press ENTER Or Press the number corresponding with your selection 11 Stop SYSTEM OPTIONS 5 Database 6 Pin Pad Settings 7 Keys Injection 8 App Management APP LOAD 1 Activa...

Страница 206: ...TION DISPLAY 1 From the System Settings menu press 9 to Select the App Management 2 Input the Password and press ENTER 3 Press 1 to activate App Load 4 Press 1 for activate online and POS terminal connects to the LCS server to communicate Then POS terminal displays communication messages Activated or error messages 5 Stop ACTIVATE 1 Online SYSTEM OPTIONS 6 Database 7 Pin Pad Settings 8 Keys Inject...

Страница 207: ...s 9 to Select the App Management 2 Input the Password and press ENTER 3 Press 2 for App Update 4 If Terminal prompt Please do batch close at first so do batch close first then back to this menu If there is no this prompt skip to Step 5 5 Terminal displays Checking while checking if there are available applications on the ADS 6 If there is no available download the Terminal displays No Available Do...

Страница 208: ...rams It may not be duplicated published or disclosed without PAX prior written permission 201 7 If there are available the Terminal automatic starts the download process and displays Downloading with the download progress percentage After finish downloading the terminal displays Success and lists the downloaded applications 8 Stop ...

Страница 209: ...POS Terminal Server STEP ACTION DISPLAY 1 From the System Settings menu press 9 to Select the App Management 2 Input the Password and press ENTER 3 Press 3 for Configuration 4 Press 1 to set Server URL and skip to Step 5 Press 2 to set Server Port and skip to Step 6 Press 3 for Phone Settings Please refer to Host Phones 5 Set Server URL and press ENTER 6 Set Server Port and press ENTER 7 Stop SERV...

Страница 210: ...te This function displays the SN and other information of the terminal STEP ACTION DISPLAY 1 From the System Settings menu press 9 to Select the App Management 2 Input the Password and press ENTER 3 Press 4 for Terminal SN 4 Screen displays the SN and other information of the terminal 5 Stop SYSTEM OPTIONS 6 Database 7 Pin Pad Settings 8 Keys Injection 9 App Management APP LOAD 1 Activate 2 App Up...

Страница 211: ...e This function displays the App Info of each application STEP ACTION DISPLAY 1 From the System Settings menu press 9 to Select the App Management 2 Input the Password and press ENTER 3 Press 5 for App Info 4 Screen displays the App Info of each application Press ENTER to go forward 5 Stop SYSTEM OPTIONS 6 Database 7 Pin Pad Settings 8 Keys Injection 9 App Management APP LOAD 2 App Update 3 Config...

Страница 212: ...omm Maximum Tries Connect Timeout Receive Timeout Dial Parameters Wireless Parameters for Terminal with Wireless Module WiFi Parameters for Terminal with WiFi Module 6 7 1 Main Communication Note Use this feature to set the main method of communication If a method of communication not supported by the terminal is selected the error message NOT AVAILABLE is displayed STEP ACTION DISPLAY 1 From the ...

Страница 213: ...tion If a method of communication not supported by the terminal is selected the error message NOT AVAILABLE is displayed STEP ACTION DISPLAY 1 From the Communication Options menu press 2 for Backup Communication 2 Default setting is 2 None Use the keys to select the primary communication type Note If in Main Communication menu Wireless is selected then in this menu the first option is Dial 3 Stop ...

Страница 214: ...ior written permission 207 6 7 3 Maximum Tries Note Use this feature to set the maximum tries for communication STEP ACTION DISPLAY 1 From the Communication Options menu press 3 for Maximum Tries 2 Terminal displays the current tries setting Input the New tries and press ENTER 3 Stop COMM OPTIONS 1 Main Communication 2 Backup Comm 3 Maximum Tries 4 Connect Timeout _____________________ Max Tries 1...

Страница 215: ...written permission 208 6 7 4 Connect Timeout Note Use this feature to set the timeout for connection STEP ACTION DISPLAY 4 From the Communication Options menu press 4 for Connect Timeout 5 Terminal displays the current timeout setting Input the New timeout and press ENTER 6 Stop COMM OPTIONS 1 Main Communication 2 Backup Comm 3 Maximum Tries 4 Connect Timeout _____________________ Connect Timeout ...

Страница 216: ... permission 209 6 7 5 Receive Timeout Note Use this feature to set the timeout for receiving messages from host STEP ACTION DISPLAY 7 From the Communication Options menu press 5 for Receive Timeout 8 Terminal displays the current timeout setting Input the New timeout and press ENTER 9 Stop COMM OPTIONS 2 Backup Comm 3 Maximum Tries 4 Connect Timeout 5 Receive Timeout _____________________ Receive ...

Страница 217: ... From the Communication Options menu press 6 for Dial Parameters 2 Press 1 to enter the Dial Type menu OR Press 2 for Dialing Prefix 3 If in Step 2 1 Dial Type is selected the Dial Type menu will be displayed Use the keys to find your selection and then press ENTER Or Press the number corresponding with your selection 4 If in Step 2 2 Dialing Prefix is selected enter the Dialing Prefix 5 Stop Comm...

Страница 218: ...reless GPRS CDMA communication are sub menus under the Wireless Parameters menu 6 8 7 1 APN Note This menu sets the APN for Wireless Connection STEP ACTION DISPLAY 1 From the Communication Options menu press 8 for Wireless Parameters 2 Use the keys or Press 1 to enter the APN menu 3 Input the desired value then press ENTER 4 Stop Comm Options 4 Connect Timeout 5 Receive Timeout 6 LAN Parameters 7 ...

Страница 219: ...ser Name Note This menu sets the username for Wireless Connection STEP ACTION DISPLAY 1 From the Communication Options menu press 8 for Wireless Parameters 2 Use the keys or Press 2 to enter the User Name menu 3 Input the desired value then press ENTER 4 Stop Comm Options 4 Connect Timeout 5 Receive Timeout 6 LAN Parameters 7 Wireless Parameters Wireless Params 1 APN 2 User Name 3 Password 4 Provi...

Страница 220: ...Password Note This menu sets the password for Wireless Connection STEP ACTION DISPLAY 1 From the Communication Options menu press 8 for Wireless Parameters 2 Use the keys or Press 3 to enter the Password menu 3 Input the desired value then press ENTER 4 Stop Comm Options 4 Connect Timeout 5 Receive Timeout 6 LAN Parameters 7 Wireless Parameters Wireless Params 1 APN 2 User Name 3 Password 4 Provis...

Страница 221: ...CDMA network STEP ACTION DISPLAY 1 From the Communication Options menu press 8 for Wireless Parameters 2 Use the keys or Press 4 to enter the Provision menu 3 The screen will display Provisioning 4 The Screen will display Programming completed successfully 5 Stop Comm Options 4 Connect Timeout 5 Receive Timeout 6 LAN Parameters 7 Wireless Parameters Wireless Params 1 APN 2 User Name 3 Password 4 P...

Страница 222: ...iFi communication are sub menus under the WiFi Parameters menu 6 8 8 1 Security Note This menu sets the username for WiFi Connection STEP ACTION DISPLAY 1 From the Communication Options menu press 7 for WiFi Parameters 2 Use the keys or Press 1 to enter the Security menu 3 Use the keys or Press number keys to set the security type 4 Stop Security Type 1 1 WAP TKIP 2 WAP2 AES Comm Options 4 Connect...

Страница 223: ...sion 216 6 8 8 2 Password Note This menu sets the password for WiFi Connection STEP ACTION DISPLAY 6 From the Communication Options menu press 7 for WiFi Parameters 7 Use the keys or Press 2 to enter the Password menu 8 Input the desired value then press ENTER 9 Stop _____________________ Password Comm Options 4 Connect Timeout 5 Receive Timeout 6 Dial Parameters 7 WiFi Parameters WiFi Params 1 Se...

Страница 224: ... Exp Date 1214 Expiration Date Entry Manual Entry Swiped Manual Contactless Server 132 Lily Server ID and name Merchant Settings Additional Prompts Server ID Mode Void trans don t require Invoice 31492 Invoice Merchant Settings Additional Prompts Invoice Mode Table No 2 Number of table Only supported in Restaurant Industry Merchant Settings Additional Prompts Table Mode No of Guests 5 Number of Gu...

Страница 225: ...ssage from the host Response APPROVED OFFLINE Print APPROVED OFFLINE in demo mode Detailed Information Print the detailed information from the host Merchant Receipt Data Print the merchant receipt data from the host APP DUPE Print this line if it is a duplicated transaction I AGREE TO PAY ABOVE TOTAL Disclaimer Operation Settings Disclaimer AMOUNT ACCORDING TO CARD ISSUER AGREEMENT MERCHANT AGREEM...

Страница 226: ...hould be printed to replace Tip 1 In Restaurant industry Tip 1 is always on When In Tip Menu is selected or In Transaction is bypassed it will display ______ __ for the cardholder to write tip amount When Auto Percent is selected it will display high amount percent low amount and ______ __ ____________ Halving line Total 201 00 Base amount and tip In Transaction It is a reference for the merchant ...

Страница 227: ...OVED OFFLINE Print APPROVED OFFLINE in demo mode Detailed Information Print the detailed information from the host Customer Receipt Data Print the customer receipt data from the host APP DUPE Print this line if it is a duplicated transaction CUSTOMER COPY Trailer Line 1 Editable Merchant Settings Edit Trailer Trailer Text 1 Trailer Line 2 Editable Merchant Settings Edit Trailer Trailer Text 2 Trai...

Страница 228: ...t 4393 Card Number Entry Swiped Entry Swiped Server 132 Lily Server ID and name Merchant Settings Additional Prompts Server ID Mode Void trans don t require Invoice 31492 Invoice Merchant Settings Additional Prompts Invoice Mode Table No 2 Number of table Only supported in Restaurant Industry Merchant Settings Additional Prompts Table Mode No of Guests 5 Number of Guests Only supported in Restaura...

Страница 229: ...Terminal ID value should be blank if POS terminal is in Demo Mode 04 09 2011 13 54 08 Print the current date and time Debit Sale Legal Value Debit Sale Debit Refund Transaction 24 Transaction Number is incremental do not print if it is a duplicated transaction Account 4393 Card Number Entry Swiped Entry Swiped Server 132 Lily Server ID and name Merchant Settings Additional Prompts Server ID Mode V...

Страница 230: ...23 Trailer Line 1 Editable Merchant Settings Edit Trailer Trailer Text 1 Trailer Line 2 Editable Merchant Settings Edit Trailer Trailer Text 2 Trailer Line 3 Editable Merchant Settings Edit Trailer Trailer Text 3 Trailer Line 4 Editable Merchant Settings Edit Trailer Trailer Text 4 Trailer Line 5 Editable Merchant Settings Edit Trailer Trailer Text 5 Advertisement 1 Advertisement 2 Advertisement 3...

Страница 231: ...ber Entry Swiped Entry Swiped Manual Contactless Server 132 Lily Server ID and name Merchant Settings Additional Prompts Server ID Mode Void trans don t require Invoice 31492 Invoice Merchant Settings Additional Prompts Invoice Mode Voucher No 1234567 Voucher number Only printed in voucher transaction Amount 200 00 Base transaction amount balance receipt doesn t have this field Tip 1 1 00 Amount o...

Страница 232: ...S terminal is in Demo Mode 04 09 2011 13 54 08 Print the current date and time EBT Sale EDC Type Transaction Type Here are the definitions of legal transactions Food Stamps Account Type Food Stamps Cash Benefit Voucher Transaction 24 Transaction Number is incremental Do not print on balance receipt do not print if it is a duplicated transaction Account 4393 Card Number Entry Swiped Entry Swiped Ma...

Страница 233: ... provides VERBIAGE 2 Message available only when host provides VERBIAGE 3 Message available only when host provides APP DUPE Print this line if it is a duplicated transaction CUSTOMER COPY Trailer Line 1 Editable Merchant Settings Edit Trailer Trailer Text 1 Trailer Line 2 Editable Merchant Settings Edit Trailer Trailer Text 2 Trailer Line 3 Editable Merchant Settings Edit Trailer Trailer Text 3 T...

Страница 234: ...nce receipt do not print if it is a duplicated transaction Account 4393 Card Number Replace Merge transactions requires new card only Issue Virtual requires full card number Exp Date 1214 Expiration Date Entry Swiped Entry Swiped Manual Server 132 Lily Server ID and name Merchant Settings Additional Prompts Server ID Mode Void trans don t require Invoice 31492 Invoice Merchant Settings Additional ...

Страница 235: ...t if multi merchant mode is on Terminal ID 7777777 Terminal ID of the POS terminal Terminal ID value should be blank if POS terminal is in Demo Mode 04 09 2011 13 54 08 Print the current date and time Gift Redemption EDC Type Trans Types Here are the definitions of legal transactions Transaction 24 Transaction Number is incremental Do not print on balance receipt do not print if it is a duplicated...

Страница 236: ... detailed information from the host Customer Receipt Data Print the customer receipt data from the host APP DUPE Print this line if it is a duplicated transaction CUSTOMER COPY Trailer Line 1 Editable Merchant Settings Edit Trailer Trailer Text 1 Trailer Line 2 Editable Merchant Settings Edit Trailer Trailer Text 2 Trailer Line 3 Editable Merchant Settings Edit Trailer Trailer Text 3 Trailer Line ...

Страница 237: ...oid Sale Cash Void Return Transaction 24 Transaction Number is incremental do not print if it is a duplicated transaction Server 132 Lily Server ID and name Merchant Settings Additional Prompts Server ID Mode Void trans don t require Invoice 31492 Invoice Merchant Settings Additional Prompts Invoice Mode Paid Cash The way of the payment is cash Amount 200 00 Base transaction amount Tip 1 1 00 Amou...

Страница 238: ...s from broad pos server DEMO MODE Print this mark only when the POS terminal is in DEMO MODE DO NOT CASH 04 09 2011 13 54 08 Print the current date and time Cash Refund Transaction Type Transaction 24 Transaction Number is incremental do not print if it is a duplicated transaction Server 132 Lily Server ID and name Merchant Settings Additional Prompts Server ID Mode Void trans don t require Invoic...

Страница 239: ... located There is a white label on the underside of the terminal the serial number is under the bar code on this label The serial number begins with S N and is composed of followed by 8 digits The terminal seems to have no power Check the connections of the AC electrical power adapter The electrical plug should be fully plugged into the electrical wall outlet and the power adapter s barrel connect...

Страница 240: ... application and parameters and close the batch Load the new application again If there are no open batches press ENTER to complete the new load Application Error In Parameters An error occurred while reading the protocol parameters Re load the terminal s parameters EDC ERROR Perform a file system Rebuild from Monitor Menu with the PC LOADER WARNING a file system Rebuild erases all transaction dat...

Страница 241: ...HIS CARD The card type VISA for example has been disabled Not relevant in this application A menu selection not supported by the terminal type was accessed I e Radio Parameters was selected in a landline only terminal Invalid Date A month greater than 12 or a date greater than the number of days in the month was entered in the date field Invalid Time An hour greater than 24 was entered as the curr...

Страница 242: ...o the monitor menu Invalid Terminal ID or Invalid Merchant ID This is usually displayed when trying to authorize a transaction directly after a download Verify all of the Parameters for the Host Processor One or more of the parameters are most likely incorrect Bad Credit Batch Bad Credit Batch or Bad Debit Batch is a system message that is displayed and printed when an EDC batch will not close Thi...

Страница 243: ...format was not correct must be 5 or 9 digits long Incorrect ZIP Try Again ZIP code must be 5 or 9 digits only The incorrect number of digits was entered three times when the Zip code was requested Try the transaction again enter either 5 or 9 digits when the ZIP code is requested The terminal appears to be locked up pressing the MENU key does nothing Terminal needs to be reset Remove power source ...

Страница 244: ...ne It should not be connected to a splitter or to a rollover telephone system An exchange prefix may be required Make sure terminal has correct settings for an exchange prefix Disconnect the terminal from the phone line and connect the phone line to a telephone Verify that the phone has a dial tone If a phone or fax machine is daisy chained to the terminal disconnect the second device If a digital...

Страница 245: ...arge the battery or put the terminal on the power adapter Verify that the paper is not jammed or damaged 1 Try ejecting the jammed paper with the FEED function if applicable 2 Slowly and carefully pull the paper backward through the feed mechanism If printer continues working even though the paper has been used up check that the end of paper detector in the printer mechanism is not blocked by debr...

Страница 246: ...minal REGISTER message not updated to next message while processing Invalid or Bad SIM card 98 1 message is not updated with next message while processing There is an error in the terminal setup in the POS Terminal Management system the APN name is missing or incorrect Heavy traffic could be peak voice transmission time Try again later OPENNG message is not updated with next message while processi...

Страница 247: ...erchant the file might still load into the terminal Always verify the information loaded after a DL completes NO LINE or no connection when attempting a download Check that the telephone RJ 11 connector is securely inserted into the connector labeled LINE on the terminal s rear connections panel and into the telephone wall outlet The POS Terminal was designed to use a dedicated telephone line It s...

Страница 248: ...fication Number 4 to 16 digit confidential code used by cardholders to identify themselves as the proper users of a credit or debit card to the Host computer PIN Pad A small terminal used for entering Personal Identification Numbers PINs PIN Pads can encrypt PINs before sending them to a terminal or other controller Some PIN Pads are equipped with built in magnetic stripe card readers or are built...

Страница 249: ...rograms It may not be duplicated published or disclosed without PAX prior written permission 242 V V Code A unique 3 4 digit value printed on the back front for AmericanExpress of a card to validate card information during the authorization process CID American Express and Discover Card CVC MasterCard CVV Visa ...

Страница 250: ..._V1 00 00 User Manual NOTE This document is CONFIDENTIAL and must be used exclusively for the operation of PAX programs It may not be duplicated published or disclosed without PAX prior written permission 243 ...

Отзывы: