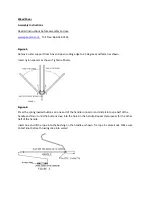
Operating
Instructions
The
Weed
Shear
is
easy
to
operate
but
must
be
used
properly
for
a
safe
and
effective
method
of
controlling
underwater
weeds.
Use
the
Weed
Shear
whenever
weeds
become
a
problem.
The
Weed
Shear
will
cut
a
path
through
your
weeds
approximately
48”
wide.
Always
use
caution
because
the
blades
are
sharp.
Step
1.
Test
the
strength
of
the
knot
that
was
made
during
assembly.
See
Figure
2.
Step
2.
With
the
rope
securely
in
your
hand
or
tied
to
a
solid
surface.
Throw
the
rake
out
into
the
water.
(If
you
are
on
a
dock,
tie
the
rope
to
a
post
so
you
don’t
throw
too
far).
Step
2.
Use
the
rope
to
pull
it
back
in.
Use
a
short
hard
jerking
motion.
Step
3.
Inspect.
If
the
cutting
edges
comes
back
with
an
abundance
of
weeds
on
it,
you
may
need
to
sharpen
the
cutting
blade.
See
the
instructions
below.
Other
Tips
and
instructions:
Cut
weeds
on
a
day
when
the
wind
is
blowing
towards
the
shore.
This
will
make
picking
them
up
easier.
The
Weed
Shear
is
designed
for
cutting
underwater
vegetation.
Care
must
be
taken
in
the
assembly,
operation,
and
usage
of
the
Weed
Shear.
Neither
the
manufacturer
nor
the
seller
assumes
any
responsibility
for
the
misuse
of
the
Weed
Shear.
The
Weed
Shear
is
not
designed
to
cut
heavy
cattails,
bulrushes
or
highly
fibrous
plants.
Doing
so
may
bend
or
damage
the
blades.
Follow
all
applicable
laws
related
to
cutting
and
harvesting
underwater
vegetation.
Store
the
Weed
Shear
in
a
safe
place.
Keep
away
from
children.
Thank
You
for
purchasing
the
Weed
Shear
Safety
Instructions
1.
Leave
covers
on
the
cutting
edges
when
not
in
use.
2.
Do
not
use
when
swimmers
are
present.
3.
Avoid
areas
with
underwater
structures.
4.
Check
all
bolts,
connections
and
ropes
before
use.
5.
When
not
in
use
store
in
a
safe
location
out
of
the
reach
of
children.
6.
Do
not
place
or
use
near
electrical
cords
or
cables.
Blade
Sharpening
1.
Stand
the
assembled
Weed
Shear
up.
Blades
should
be
downward
and
handle
pointing
up.


