background image

25

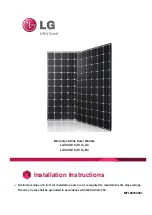
Solar panels available

Two sizes of solar panel kit are available as accessories:

40 W solar panel and panel bracket 

65 W solar panel and panel bracket

Case bracket

(to attach the solar panel to the lid of the energizer).

List of components

40 W solar panel (Ref. 144250)

65 W solar panel (Ref. 144450)

1x 40 W solar panel

1x 65 W solar panel

1x 40 W panel bracket

1x 65 W panel bracket

1x case bracket

1x case bracket

1x fasteners kit

1x fasteners kit

Содержание 144250

Страница 1: ... solaire 40 W 65 W avec support pour MaxiBox Solar panel 40 W 65 W with mounting bracket for MaxiBox Zonnepaneel 40 W 65 W met houder voor MaxiBox Módulo solare 40 W 65 W con soporte para MaxiBox Ref 144250 144450 Solarmodul 40 W 65 W mit Halter für MaxiBox 0049 9372 9474 0 Zonnepaneel 40 W 65 W met houder voor MaxiBox Módulo solare 40 W 65 W con soporte para MaxiBox 0049 9372 9474 0 ...

Страница 2: ...contenu de la livraison 13 Montage du module 17 Maintenance et garantie 22 ENGLISH General information and scope of delivery 23 Mounting the module 27 Maintenance and warranty 32 NEDERLANDS Algemene informatie en leveringsomvang 33 Montage van de module 37 Onderhoud en garantie 42 ESPAÑOL Información general y Contenido 43 Montaje del módulo 47 Mantenimiento y Garantía 52 Montage und Bedienungsanl...

Страница 3: ...e Montage und Bedienungsanleitung zeigt wie das Modul auf das Gerät montiert wird Gerätemodelle und das jeweils empfohlene Solarmodul Gerätemodell Empfohlenes Solarmodul Leistung in W P 250 40 W Ref 144250 P 350 40 W Ref 144250 P 450 65 W Ref 144450 Wir empfehlen das große 65 W Solarmodul zusätzlich mit einem Eisen oder Kunststoffpfahl abzustützen der bis zur Trittstufe im Boden verankert wird 1 S...

Страница 4: ...Sie bevor Sie mit der Installation beginnen ob alle Teile vorhanden sind und halten Sie die unten aufgeführten Werkzeuge bereit 40 W Solarmodul 65 W Solarmodul 10 mm Schraubenschlüssel 10 mm Schraubenschlüssel 1x Eisen oder Plastikpfahl Kabelbinder um Solarmodul mit dem Pfahl zu verbinden 2 3 4 Installation des Elektrozaungerätes Errichtung eines Elektrozaunes Checkliste Montage und Bedienungsanle...

Страница 5: ...5 W Solarmodul mit Halter Montagewinkel um das Solarmodul auf dem Oberteil des Gerätes zu befestigen Lieferumfang 40 W Solarmodul Ref 144250 65 W Solarmodul Ref 144450 1x 40 W Solarmodul 1x 65 W Solarmodul 1x 40 W Solarmodulhalter 1x 65 W Solarmodulhalter 1x Montagewinkel 1x Montagewinkel 1x Befestigungsset 1x Befestigungsset ...

Страница 6: ... Die größte Menge an Sonnenenergie wird gewonnen wenn das Solarmodul genau nach Süden nördliche Hemisphäre ausgerichtet ist Mit Hilfe eines Kompasses können Sie diese optimale Ausrichtung herausfinden 5 Installation des Solarmoduls Montage und Bedienungsanleitung Es ist wichtig das Solarmodul an einem Standort zu installieren der der Sonne zugewandt und ganzjährig schattenfrei ist In der nördliche...

Страница 7: ...ls 1 Platzieren Sie den Montagewinkel genau über den Löchern auf der Oberseite des Weidezaungerätes Montagelöcher für Halter Solarmodul Solaranschluss Solaranschluss 6 Montage des Solarmoduls Sie müssen das Oberteil für die Montage des Solarmoduls nicht vom Gerät abnehmen ...

Страница 8: ...berseite des Gerätes Ziehen Sie die Schrauben in den im Gehäuse eingegossenen Muttern fest 4 Nehmen Sie das Solarmodul und platzieren Sie den Solarmodulhalter auf der Rückseite des Solarmoduls und richten es über die 4 Löcher aus 40 W Solarmodul mit Halter 65 W Solarmodul mit Halter Montage und Bedienungsanleitung Keine Elektro Werkzeuge verwenden Es wird empfohlen die Schrauben per Hand anzuziehe...

Страница 9: ...hraube mit Beilagscheibe durch das Loch am Solarmodulhalter stecken und festziehen 40 W Solarmodul mit Halter 65 W Solarmodul mit Halter Positionieren Sie die Anschlusskabel auf der Rückseite des Solarmoduls wie gezeigt Positionieren Sie die Anschlusskabel wie gezeigt auf der Rückseite des Solarmoduls der Kabelanschluss befindet sich oben auf der Abbildung verdeckt durch den Solarmodulhalter S o l...

Страница 10: ... Montagewinkels auf dem Weidezaungerät 7 Sichern Sie das Solarmodul indem Sie eine Flügelmutter beidseits auf den oberen Gewindebolzen aufschrauben und anziehen Montage und Bedienungsanleitung Beispiel zeigt das 65 W Modul Beispiel zeigt das 65 W Modul ...

Страница 11: ... anziehen Gilt nur für das 65 W Solarmodul Es wird empfohlen das Solarmodul zusätzlich mit einem Eisen oder Kunststoffpfahl abzustützen der bis zur Trittstufe in den Boden eingetreten wird Zum Anbringen des Pfahls 1 Treten Sie den Pfahl in den Boden direkt an der Stelle an der Sie planen das Gerät zu platzieren 2 Benutzen Sie einen Kabelbinder um den Pfahl mit dem Solarmodul zu verbinden und dadur...

Страница 12: ...önnen die vollen Reparaturkosten zu Lasten des Eigentümers anfallen 8 9 Wartung Garantie Montage und Bedienungsanleitung Überprüfen Sie Ihr Solarmodul einmal pro Monat dass sich kein Vogelkot auf dem Modul festgesetzt hat Benutzen Sie ggf einen Plastikschaber um alle Anhaftungen zu beseitigen Reinigen Sie das Solarmodul bei Bedarf mit warmem Seifenwasser und einem Schwamm Dies sorgt dafür dass das...

Страница 13: ...ctions pour le montage du module solaire sur l électrificateur Module solaire recommandé selon le type de l appareil Type d appareil Module solaire recommandé puissance en Watt P 250 40 W Ref 144250 P 350 40 W Ref 144250 P 450 65 W Ref 144450 Nous vous recommandons de soutenir le grand module solaire de 65 W avec un piquet en fer ou en plastique ancré dans le sol jusqu au niveau de la bêche 1 Modu...

Страница 14: ...ifiez le contenu de la livraison avant de commencer l installation et munissez vous des outils mentionnés ci dessous Module solaire 40 W Module solaire 65 W clé de 10 mm clé de 10 mm 1x piquet en fer ou en plastique Collier de serrage pour relier le panneau solaire au piquet 2 3 4 Installation de l électrificateur Mise en place d une clôture électrique Check list Instructions de montage et d utili...

Страница 15: ...montage pour la fixation du module solaire sur la partie supérieure de l appareil Contenu de la livraison Module solaire 40 W réf 144250 Module solaire 65 W réf 144450 1x module solaire 40 W 1x module solaire 65 W 1x support pour module solaire 40 W 1x support pour module solaire 65 W 1x equerre de montage 1x equerre de montage 1x kit de fixation 1x kit de fixation ...

Страница 16: ...dable Choix d un emplacement approprié pour l installation Détermination de l orientation sud La plus grande quantité d énergie solaire est obtenue lorsque le panneau solaire est orienté plein sud hémisphère nord Vous pouvez déterminer cette orientation optimale à l aide d une boussole 5 Installation du panneau solaire Il est important d orienter le module solaire face au soleil Dans l hémisphère ...

Страница 17: ...équerre de montage exactement au dessus des orifices de la partie supérieure de l électrificateur Orifices de montage pour le support Raccordement solaire Raccordement solaire 6 Montage du module solaire Il n est pas nécessaire de démonter la partie supérieure de l électrificateur ...

Страница 18: ...les orifices sur le dessus de l électrificateur Resserrez les vis dans les écrous scellés sous le couvercle de l électrificateur 4 Placez le support de module solaire à l arrière du panneau solaire en l alignant sur les 4 trous Module solaire 40 W Module solaire 65 W Ne pas utiliser d outils électriques Il est recommandé de serrer les vis à la main Instructions de montage et d utilisation ...

Страница 19: ...lle à travers l orifice du support du module solaire et fixez la vis Module solaire 40 W Module solaire 65 W Positionnez les câbles de raccordement sur le côté arrière du module solaire comme indiqué sur le schéma Positionnez les câbles de raccordement sur la partie supérieure du côté arrière du module solaire masqué par le support du module solaire S u p p o r t d u m o d u l e s o l a i r e P a ...

Страница 20: ... la fente de l équerre de montage sur l électrificateur 7 Sécurisez le module solaire en plaçant une vis papillon des deux côtés sur le boulon supérieur et fixez la Instructions de montage et d utilisation L exemple montre le module 65 W ...

Страница 21: ...nt solaire et serrez bien le bouton rotatif Valable uniquement pour le module solaire 65 W Il est recommandé de soutenir le module solaire à l aide d un piquet supplémentaire en fer ou en plastique qui doit être enfoncé dans le sol jusqu au niveau de la bêche Pour fixer le piquet 1 Enfoncez le piquet dans le sol directement à l endroit où vous prévoyez de placer l appareil 2 Utilisez un collier de...

Страница 22: ... frais de réparation peut être à la charge du propriétaire 8 9 Entretien Garantie Inspectez votre panneau solaire une fois par mois pour vous assurer qu aucune fiente d oiseau ne s est accumulée sur le panneau utilisez si nécessaire un grattoir en plastique pour éliminer toute adhérence Si nécessaire nettoyez le module solaire avec de l eau chaude savonneuse et une éponge Ainsi le module solaire f...

Страница 23: ... installation guide explains how to install a solar panel kit onto this energizer Energizer models and their recommended solar panel kit Energizer Recommended solar panel kit power in W P 250 40 W Ref 144250 P 350 40 W Ref 144250 P 450 65 W Ref 144450 We recommend the larger 65 W solar panel is further supported with an attached steel or plastic post driven foot pressed into the ground 1 Solar pan...

Страница 24: ...anel kit Check that you have all the components and the tools shown below before you start the installation 40 W solar panel 65 W solar panel 10 mm spanners 10 mm spanners 1x steel or plastic post Cable ties to secure post to the solar panel 2 3 4 Installing your energizer Building an electric fence Checklist The solar panel contains glass and is fragile Handle with care and do not place objects u...

Страница 25: ...W solar panel and panel bracket Case bracket to attach the solar panel to the lid of the energizer List of components 40 W solar panel Ref 144250 65 W solar panel Ref 144450 1x 40 W solar panel 1x 65 W solar panel 1x 40 W panel bracket 1x 65 W panel bracket 1x case bracket 1x case bracket 1x fasteners kit 1x fasteners kit ...

Страница 26: ... will be obtained when the solar panel faces true south northern hemisphere You will need a compass to help you find this optimal true direction 5 Installing your solar panel It is critical to install the solar panel in a sun facing location that is free of shadows all year This direction will be south in the northern hemisphere In winter the sun sits very low on the horizon and shadows may be cas...

Страница 27: ...r solar panel 1 Place the case bracket over the solar panel bracket holes on the topside of the energizer solar panel bracket holes solar connector solar connector 6 Attaching the solar panel No need to remove the lid from the energizer when attaching the solar panel ...

Страница 28: ... in the top side of the energizer Tighten them into the built in nuts on the underside of the energizer lid 4 Take the solar panel and place the panel bracket onto the back of the underside of the panel and over the four bolt holes 40 W solar panel 65 W solar panel No power tools required Use of a hand tool is recommended for securing the bolts Installation and mounting Instructions ...

Страница 29: ...tening a washer and bolt into place through the panel bracket hole 40 W solar panel and panel bracket 65 W solar panel and panel bracket On the back of the solar panel position the regulator cables as shown On the back of the solar panel position the regulator cables at the top of the panel hidden by the panel bracket as shown s o l a r p a n e l h o l d e r s o l a r p a n e l ...

Страница 30: ... 6 Slot the solar panel onto the energizer 7 Secure into place by tightening a wingnut onto the top threaded studs on both sides Installation and mounting Instructions Example showing 65 W panel attached ...

Страница 31: ...onnector under the Solar connector knob and turn it to secure tight For the 65 W solar panel only it is recommended that it is further supported with an attached steel plastic post driven foot pressed into the ground To attach the post 1 Using your foot push the post down into the ground adjacent to where the energizer is going to be positioned 2 Use a cable tie to join the post to the solar panel...
Страница 32: ...e 8 9 Maintenance Warranty Installation and mounting Instructions Check your solar panel once a month to ensure no bird excreta is caked on and covering the panel a plastic scraping device should be used to clear any build up Clean the solar panel regularly with a soft cloth using glass cleaner or a mild solution of detergent and water This will ensure that the solar panel functions efficiently Wh...

Страница 33: ...aanwijzing laat zien hoe het paneel op het apparaat gemonteerd wordt Apparaatmodellen en de betreffende zonnepaneelsets die ervoor worden aanbevolen Apparaatmodel Aanbevolen zonnepaneelset vermogen in watt P 250 40 W Ref 144250 P 350 40 W Ref 144250 P 450 65 W Ref 144450 We raden aan om het grote zonnepaneel van 65 W te ondersteunen met een ijzeren of kunststof paal die tot aan de trede in de gron...

Страница 34: ...voordat u met de installatie begint of u over alle onderdelen beschikt en dat u onderstaande gereedschappen bij de hand heeft 40 W zonnepaneel 65 W zonnepaneel Steeksleutel 10 mm Steeksleutel 10 mm 1x ijzeren of kunststof paal Kabelbinders om het zonnepaneel aan de paal te bevestigen 2 3 4 Installatie van het schrikdraadapparaat Het plaatsen van een elektrische afrastering Checklist Montage en bed...

Страница 35: ...l met houder Montagebeugel om het zonnepaneel aan de bovenzijde van het apparaat te bevestigen Leveringsomvang 40 W zonnepaneel Ref 144250 65 W zonnepaneel Ref 144450 1x 40 W zonnepaneel 1x 65 W zonnepaneel 1x 40 W zonnepaneelhouder 1x 65 W zonnepaneelhouder 1x montagebeugel 1x montagebeugel 1x montageset 1x montageset ...

Страница 36: ...doriëntatie De grootste hoeveelheid zonne energie wordt verkregen als het zonnepaneel op het zuiden noordelijk halfrond is gericht U kunt voor optimale oriëntatie een kompas gebruiken 5 Plaatsen van het zonnepaneel Het is belangrijk dat het zonnepaneel geplaatst wordt op een plek die naar de zon is gericht en het hele jaar schaduwvrij is Op het noordelijk halfrond is dit het zuiden In de winter st...

Страница 37: ...ebeugel precies boven de gaten in de bovenzijde van het schrikdraadapparaat Montagegaten voor zonnepaneel houder Zonne energie aansluiting Zonne energie aansluiting 6 Het zonnepaneel monteren Het is niet nodig om voor het monteren van de zonnepanelen het bovenste deel van het apparaat af te halen ...

Страница 38: ...e bovenzijde van het apparaat Draai de schroeven vast in de moeren die in de behuizing zijn gegoten 4 Plaats de zonnepaneelhouder op de achterkant van het zonnepaneel en lijn hem uit met behulp van de 4 gaten 40 W zonnepaneel 65 W zonnepaneel Gebruik geen elektrisch gereedschap Het wordt aanbevolen om de schroeven met de hand aan te draaien behuizing zijn gegoten Montage en bedieningshandleiding ...

Страница 39: ...n schroef voorzien van een ring door het gat in de zonnepaneelhouder te steken en vast te draaien 40 W zonnepaneel 65 W zonnepaneel Plaats de aansluitkabels op de achterzijde van het zonnepaneel zoals afgebeeld Plaats de aansluitkabels zoals afgebeeld bovenaan op de achterzijde van het zonnepaneel afgedekt door de zonnepaneelhouder Z o n n e p a n e e l h o u d e r Z o n n e p a n e e l ...

Страница 40: ...f van de montagebeugel op het schrikdraadapparaat 7 Zet het zonnepaneel vast door aan beide zijden een vleugelmoer op de bovenste draadbout te schroeven en vast te draaien Montage en bedieningshandleiding Het voorbeeld toont het 65 W paneel ...

Страница 41: ... te plaatsen en de draaiknop stevig vast te draaien Geldt alleen voor het 65 W zonnepaneel er wordt aanbevolen om het zonnepaneel extra te ondersteunen met een ijzeren of kunststof paal die een stap diep in de grond wordt geplaatst Om de paal te bevestigen 1 Sla de paal in de grond op de plaats waar u het apparaat wilt neerzetten 2 Gebruik een kabelbinder om het zonnepaneel aan de paal vast te mak...

Страница 42: ... klacht in een ander land kunnen de reparatiekosten volledig bij de eigenaar in rekening worden gebracht 8 9 Onderhoud Garantie Controleer één keer per maand of er geen vogelpoep op het zonnepaneel zit Zo ja gebruik dan een plastic schraper om eventuele aanslag te verwijderen Maak het zonnepaneel indien nodig schoon met warm zeepsop en een spons Dit zorgt ervoor dat het zonnepaneel maximaal rendem...

Страница 43: ... manual de instrucciones indica cómo fijar el módulo al energizador Pastores con módulo solar recomendado Energizador Módulo solar recomendado potencia en vatios P 250 40 W Ref 144250 P 350 40 W Ref 144250 P 450 65 W Ref 144450 Recomendamos apoyar adicionalmente el panel solar grande de 65 W con una estaca de hierro o plástico anclada en el suelo hasta el escalón 1 Módulos solares para MaxiBox 12 ...

Страница 44: ...olar con cuidado Antes de comenzar con la instalación compruebe que todas las piezas estén presentes y tenga preparadas las herramientas que se indican a continuación Módulo solar 40 W Módulo solar 65 W Llave de 10 mm Llave de 10 mm 1x estaca de hierro o plástico Bridas para unir el módulo solar al poste 2 3 4 Instalación del energizador Instalación del cercado eléctrico Lista de control El módulo...

Страница 45: ...azadera de montaje para fijar el módulo solar a la tapa del pastor Contenido Módulo solar 40 W Ref 144250 Módulo solar 65 W Ref 144450 1x Módulo solar 40 W 1x Módulo solar 65 W 1x Soporte para módulo solar 40 W 1x Soporte para módulo solar 65 W 1x Abrazadera de montaje 1x Abrazadera de montaje 1x Accesorios de fijación 1x Accesorios de fijación ...

Страница 46: ...ión Determinación de la orientación al sur La mayor cantidad de energía solar se obtiene cuando el módulo solar está orientado exactamente al sur hemisferio norte Puede utilizar una brújula para encontrar la orientación óptima 5 Instalación del módulo solar Es importante instalar el módulo solar en un lugar orientado al sol y sin sombra durante todo el año En el hemisferio norte esta dirección es ...

Страница 47: ...olar 1 Coloque la abrazadera de montaje exactamente sobre los agujeros de la tapa del energizador Agujeros de montaje del módulo solar Conexión solar Conexión solar 6 Montaje del módulo solar No es necesario retirar la tapa del energizador para montar el módulo solar ...

Страница 48: ... a través de la abrazadera de montaje en los agujeros de la tapa del energizador Apriete los tornillos en las tuercas de la carcasa 4 Coloque el soporte del panel solar en la parte posterior del panel solar y alinéelo sobre los 4 agujeros Módulo solar 40 W Módulo solar 65 W No utilice herramientas eléctricas Se recomienda apretar los tornillos a mano Instrucciones de montaje y de uso ...

Страница 49: ...o introduciendo un tornillo con arandela por el agujero del soporte del módulo solar y apriétalo Módulo solar 40 W Módulo solar 65 W Coloque los cables de conexión en la parte posterior del módulo solar como se indica Coloque los cables de conexión en la parte posterior del módulo solar ocultos por el soporte del módulo solar tal como se indica S o p o r t e m ó d u l o s o l a r M ó d u l o s o l...

Страница 50: ...en la ranura del soporte de montaje del energizador 7 Asegure el módulo solar atornillando una tuerca de mariposa a ambos lados del perno roscado superior y apriételo Instrucciones de montaje y de uso Ejemplo del módulo solar 65 W ...

Страница 51: ...solar y apriete el pomo Sólo se aplica al módulo solar 65 W Se recomienda apoyar adicionalmente el módulo solar con una estaca de hierro o plástico que se clava en el suelo hasta el escalón Para instalar la estaca 1 Clave la estaca en el suelo directamente en el lugar donde piensa colocar el energizador 2 Utiliza una brida para conectar la estaca al panel solar para obtener un soporte adicional 7 ...

Страница 52: ...aros utilice un rascador de plástico para eliminar cualquier acumulación Si es necesario limpie el módulo solar con agua tibia y jabón y una esponja De este modo se garantiza que el módulo solar funcione con la máxima eficiencia Proteja el módulo solar durante el transporte para evitar que se dañe la superficie de cristal Este producto está garantizado contra defectos de materiales y mano de obra ...

Отзывы: