PaloSanto Solutions
Patton SN4524 Server Setup Guide
12
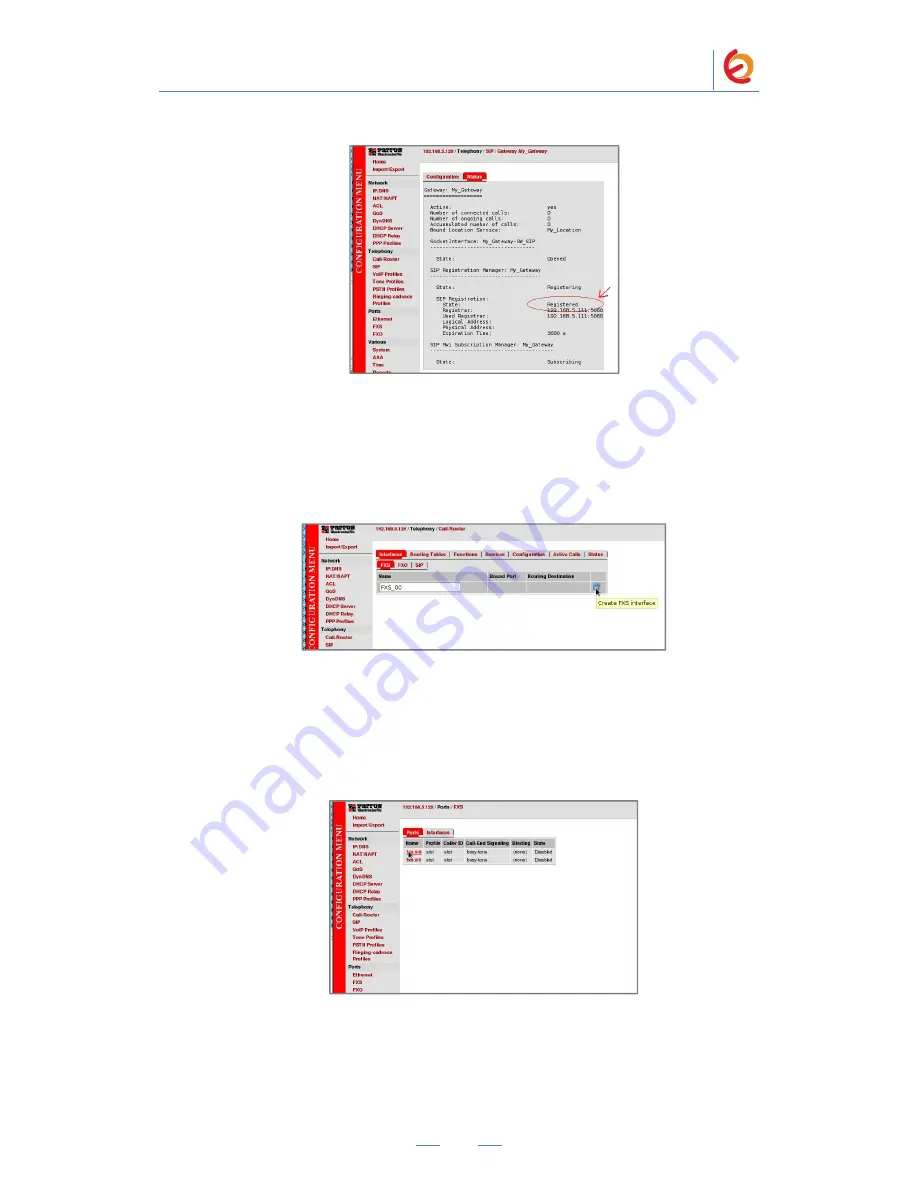
Figure 4-17
21
. Once it’s registered, we’ll add the interfaces to get it ready for calls. Go to
“Telephony =>
Call-
Router”. Go to “Interfaces => FXS” tab and write a name for
an
FXS interface
(“FXS_00” in this example). Click on “Create FXS interface” when
finish. (Figure 4-18)
Figure 4-18. FXS Interface
22. Now we have to bind the just created FXS interface to a FXS Port in the gateway.
For this, in the main menu, go to “Ports => FXS”
(Figure 4-17). You have to choose the
port you are using for the analog phone. In this example we have it connected on “fxs
0/0” port. It’ll take
you to a configuration page.
Figure 4-19. FXS Ports
23. In the configuration page set the following (Figure 4-20):
Port State: Enable


