


SmartNode 2290 Series Quick Start Guide
7
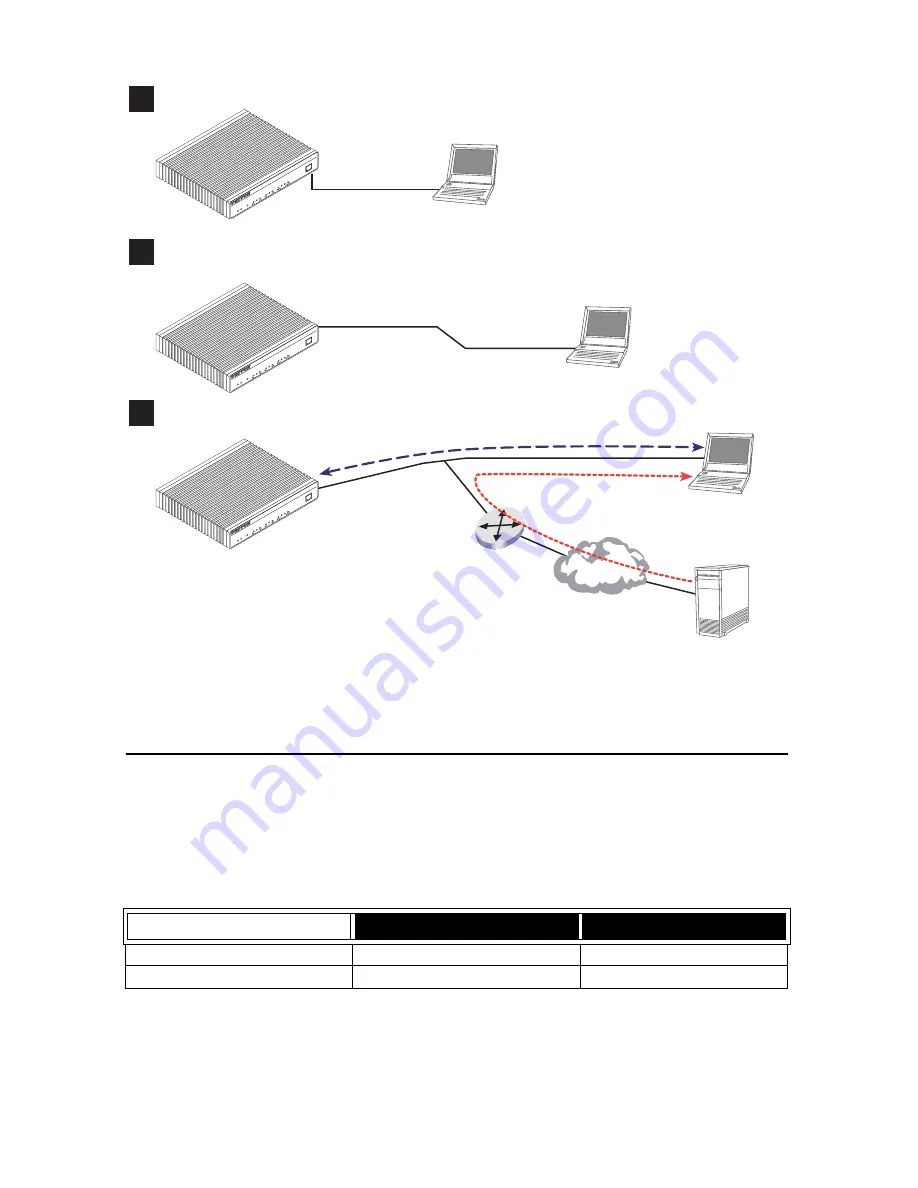
Figure 7.
Steps for setting up a new SmartNode
2.1 Configure the IP address
Power connection and default configuration
First the SmartNode must be connected to the mains power supply with the power cable. Wait until the 'Run' LED
stops blinking and lights constantly. Now the SmartNode is ready.
The factory default configuration for the Ethernet interface IP addresses and network masks are listed in
table 3
.
Both Ethernet interfaces are activated upon power-up.
Table 3.
Factory default IP address and network mask configuration
IP Address
Network Mask
Interface Ethernet 0 (ETH0)
DHCP
DHCP
Interface Ethernet 1 (ETH1)
192.168.1.1
255.255.255.0
1
Configure IP address
2
Connect the SmartNode to the network
3
Load configuration
Console port
Serial
interface
PC or workstation
with VT-100
emulation terminal
Ethernet interface
ETH0
PC or workstation
or VT-100 emulation
terminal
2. Modify configuration
Internet
3. Load configuration
1. Download configuration example
Patton Web server
with configuration examples
Note
You can manually configure the
SmartNode. You
do not
have to load a
configuration file.
Link
100M
Activity
0/0
0/1
0/2
0/3
En
et
0
Po
rts
Power
Console
Leased-Line Extender Over IP
SmartNode 2294
Run
V
o
IP
Link
Link
100M
Activity
En
et
1
Link
100M
Activity
0/0
0/1
0/2
0/3
En
et
0
Po
rts
Power
Con
sole
Leased-Line Extender Over IP
SmartNode 2294
Run
V
oIP
Link
Link
100M
Activity
En
et
1
Link
100M
Activity
0/0
0/1
0/2
0/3
En
et
0
Po
rts
Power
Console
Leased-Line Extender Over IP
SmartNode 2294
Run
V
oIP
Link
Link
100M
Activity
En
et
1


