background image

12

GB

The value of the vibrations emitted by the handle
amounts to 2.5 m/s² and was determined in
compliance with EN 786.

5. Assembling the housing

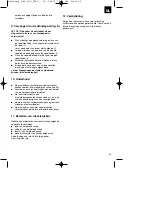
Plug the housing parts together as shown in Figure A.
Make sure when doing so that the cable is not
jammed.

6.  Assembling the guard hood 

(Figure C)

Plug the guard hood (4) onto the motor head (2) over
the line spool (3) as shown, turn it anticlockwise as far
as the stop (bayonet lock) and secure with the
supplied screw (1). 

NOTE:

When turning the guard hood, make sure that

it rests horizontally on the grass trimmer housing.

7.  Proper use

The trimmer is designed for cutting lawns and small
areas of grass in private and hobby gardens.
Tools for private and hobby gardens are not suitable
for use in public facilities, parks and sport centers,
along roadways, on farms or in the forestry sector. 
For the tool to be used properly it is imperative to
follow the instructions set out in the manufacturer’s
directions for use.

Important! It is prohibited to use the tool to chop
material for composting because of the potential
danger to persons and property.

8. Starting up

The grass trimmer is designed only to cut grass.
A short or worn down nylon line leads to poor cutting
quality.

IMPORTANT! Prior to starting up the equipment
for the first time, remove the guard from the
blade for regulating the line length (Figure A/8).
IMPORTANT! Make sure that you pull out the
power plug before adjusting the line length!

The nylon line must be pulled out with force when
starting up for the first time. To do this, press the
pushbutton (Figure E) and pull the line out to the edge
of the guard hood. The line will be cut to the correct
length when the cutting head starts up again. A short
or worn down nylon line leads to poor cutting quality.

To restore the correct length of line, press the grass
trimmer to the ground while the cutting head is
running. This enables the line length to adjust itself
(Figure D).

To obtain maximum performance from your
grass trimmer, please follow the instructions
given below:

Never use the grass trimmer without the guard.

Do not mow grass when it is wet. The best results
are achieved with dry grass.

Connect the power cable to the extension cable
and attach it in the handle (Figure B).

To switch on your grass trimmer, press the
ON/OFF switch (Figure A/3).

To switch off your grass trimmer, let go of the
ON/OFF switch (Figure A/3).

Do not allow the grass trimmer near the grass
until the switch is pressed, i.e. the grass trimmer
is in operation.

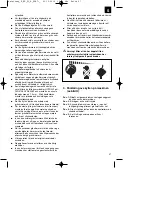
To cut properly, swing the machine sideways
while moving forwards. In doing so, keep the
grass trimmer inclined at an angle of
approximately 15° (Figure G). 

If the grass is long, the grass must be cut shorter
in stages, starting from the tip (Figure F).

To avoid unnecessary wear on the line, keep the
grass trimmer away from hard objects.

9. Changing the line spool (Figure E)

IMPORTANT! Make sure that you pull out the
power plug before exchanging the line spool!

Press the sides of the spool cover (2) as shown
and remove it with the spool (3).
Make sure that you do not lose the spring.

Thread the ends of the line on the new spool
through the eyelets on the spool mounting (1).

Fit the spool cover and spool back into the spool
mounting.

Press the pushbutton and pull the line out to the
edge of the guard hood.

The line will be cut to the correct length when the
cutting head starts up again.

Important. Bits of the nylon line could cause
injury when flung out.

Anleitung_E_RT_25_D_SPK7:_  01.12.2010  12:34 Uhr  Seite 12

Содержание 34.014.49

Страница 1: ...ali per tosaerba a filo N Originele handleiding voor grastrimmer U Original bruksanvisning f r gr strimmer Q Instruc iuni de utilizare originale motocositoare pentru gazon j Origin ln n vod k obsluze...

Страница 2: ...e le avvertenze di sicurezza V r ingebruikneming de handleiding en de veiligheidsvoorschriften lezen en in acht nemen L s igenom och beakta bruksanvisningen och s kerhetsanvisningarna f re anv ndning...

Страница 3: ...3 Anleitung_E_RT_25_D_SPK7 _ 01 12 2010 12 34 Uhr Seite 3...

Страница 4: ...4 Anleitung_E_RT_25_D_SPK7 _ 01 12 2010 12 34 Uhr Seite 4...

Страница 5: ...5 H Anleitung_E_RT_25_D_SPK7 _ 01 12 2010 12 34 Uhr Seite 5...

Страница 6: ...ich zu begeben schalten Sie das Ger t w hrend Sie sich dorthin begeben unbedingt ab Ben tzen Sie das Ger t nie bei Regen oder in feuchter nasser Umgebung Sch tzen Sie Ihr Ger t vor Feuchtigkeit und Re...

Страница 7: ...inwandfrei ist Die verwendeten Anschlussleitungen d rfen nicht leichter als leichte Gummischlauch leitungen HO7RN F nach DIN 57282 VDE 0282 sein und einen Mindestdurchmesser von 1 5 mm2 aufweisen Die...

Страница 8: ...t 7 Ordnungsgem er Gebrauch Das Ger t ist zum Schneiden von Rasen kleinen Grasfl chen im privaten Haus und Hobbygarten be stimmt Als Ger te f r den privaten Haus und Hobbygarten werden solche angesehe...

Страница 9: ...Sie die Fadenenden der neuen Spule durch die sen der Spulenaufnahme 1 Setzen Sie die Spulenabdeckung mit der Spule wieder in die Spulenaufnahme ein Druckknopf dr cken und Faden bis zum Rand der Schutz...

Страница 10: ...ect the grass trimmer from the damp and rain Before you switch on the grass trimmer make sure that there are no stones or other objects touching the nylon line Always wear suitable clothing to protect...

Страница 11: ...when using the grass trimmer This is imperative to avoid causing injury to the user and damage to the trimmer Use only original replacement parts for repair and maintenance purposes Have repairs carri...

Страница 12: ...orrect length when the cutting head starts up again A short or worn down nylon line leads to poor cutting quality To restore the correct length of line press the grass trimmer to the ground while the...

Страница 13: ...into the trimmer at all cost 11 Ordering replacement parts The following information should be given when ordering replacement parts Model type of the equipment Art No of the equipment ID No of the e...

Страница 14: ...re zone de travail il est imp ratif de mettre auparavant l appareil hors circuit N utilisez pas votre appareil par temps de pluie ou dans un environnement humide ou tremp Pr servez votre appareil de l...

Страница 15: ...jours les surfaces couper sans c ble ou tout autre objet Lorsqu il est n cessaire de soulever l appareil pour le transporter arr tez le moteur et attendez l arr t de l outil Si vous vous loignez de l...

Страница 16: ...loi mis disposition par le producteur sert de condition pr alable un emploi de l appareil conforme aux r gles de l ordre Attention En raison de risques pour les personnes et de risques d endommagement...

Страница 17: ...n Au premier d marrage de la t te de coupe le fil est coup la bonne longueur Attention Des objets ject s par le fil de nylon peuvent provoquer des blessures 10 Maintenance et entretien Avant de ranger...

Страница 18: ...spegnete assolutamente l utensile prima di allontanarvi Non usate mai l utensile in caso di pioggia o in un ambiente bagnato o umido Proteggete l utensile dall umidit e dalla pioggia Prima di accende...

Страница 19: ...sso di ruotare Prima di allontanarsi dall apparecchio spegnete il motore e staccate la spina dalla presa di corrente Prima di inserire la spina di alimentazione assicuratevi che gli elementi rotanti n...

Страница 20: ...parecchio Attenzione In considerazione del pericolo per persone e cose l apparecchio non deve essere usato per sminuzzare rifiuti organici per il compostaggio 8 Messa in esercizio Il tosaerba a filo c...

Страница 21: ...a di taglio si mette in moto il filo viene tagliato nella lunghezza giusta Attenzione Le parti del filo di nylon scagliate all intorno possono causare lesioni 10 Manutenzione e cura Spegnete il tosaer...

Страница 22: ...nderbreken teneinde naar een andere werkplaats te gaan zet dan het toestel zeker uit voordat u er naartoe gaat Gebruik het toestel nooit bij regen of in vochtige natte omgeving Bescherm uw toestel teg...

Страница 23: ...andere voorwerpen Indien het toestel moet worden opgeheven om het te transporteren dient u de motor stop te zetten en te wachten tot het gereedschap stilstaat Voordat u het toestel verlaat moet de mo...

Страница 24: ...Inbedrijfstelling De gazontrimmer is enkel bedoeld om er het gazon mee te snijden Een korte of versleten nylondraad vermindert het snijvermogen LET OP De bescherming van het mes voor het bijregelen v...

Страница 25: ...akelen en de netstekker trekken voordat u hem opbergt en schoonmaakt Grasresten en verontreinigingen met een borstel van de beschermkap verwijderen Het kunststoflichaam en de kunststofcomponenten scho...

Страница 26: ...nd aldrig gr strimmern vid regn eller i fuktig eller v t omgivning Skydda gr strimmern mot fukt och regn Innan du kopplar in gr strimmern m ste du vertyga dig om att nylontr den inte r r vid stenar el...

Страница 27: ...har varvat ner helt Innan du l mnar gr strimmern m ste du stoppa motorn och dra ut stickkontakten Innan du ansluter gr strimmern till n tet ska du f rs kra dig om att inga av de roterande delarna r sk...

Страница 28: ...En kort eller sliten nylontr d ger d liga trimningsresultat OBS Innan maskinen anv nds f r f rsta g ngen m ste skyddet tas av fr n kniven som anv nds till att reglera tr dl ngden bild A 8 OBS Dra all...

Страница 29: ...stickkontakten innan du st ller undan och reng r maskinen Ta bort avlagringar p skyddsk pan med en borste Plastk pan och de vriga plastdelarna kan reng ras med ett svagt hush llsreng ringsmedel och e...

Страница 30: ...n de lucru deconecta i neap rat aparatul n timp ce l deplasa i n noua zon de lucru Nu utiliza i niciodat aparatul pe timp de ploaie sau ntr un mediu umed Proteja i aparatul mpotriva umezelii i a preci...

Страница 31: ...oprit i trebuie s a tepta i p n c nd toate componentele n mi care sunt oprite nainte de a p r si aparatul motorul trebuie oprit i techerul trebuie scos din priz nainte de a conecta aparatul la re eau...

Страница 32: ...e baz pentru utilizarea conform a aparatului Aten ie Din cauza pericolului de accidente i daune materiale aparatul nu poate fi utilizat pentru tocarea materialului vegetal n vederea compost rii 8 Pune...

Страница 33: ...afar p n la marginea m tii de protec ie La prima pornire a capului cu fir t ietor firul este scurtat la lungimea corect Aten ie Capetele aruncate ale firului de nylon pot duce la r niri 10 ntre inere...

Страница 34: ...se nylonov struna nedot k kamen nebo jin ch p edm t Pracujte v dy v p im en m oble en aby se zabr nilo zran n m hlavy rukou nohou K t mto el m noste p ilbu ochrann br le nebo ochrann t t vysok hol nk...

Страница 35: ...r n te zran n m obsluhy a kod m na stroji P i dr b pou vat pouze origin ln n hradn d ly Opravy sm prov d t pouze elektroodborn k P ed uveden m stroje do provozu a po jak mkoliv n razu p ekontrolujte s...

Страница 36: ...v struna vede k n zk mu sekac mu v konu Aby se op t nastavila spr vn d lka struny p itla it strunovou seka ku s rozb hnutou sekac hlavou na zem T mto zp sobem se sama reguluje d lka struny obr D Abyst...

Страница 37: ...dy neost k vat vodou Bezpodm ne n se vyh bejte vniknut vody do p stroje 11 Objedn n n hradn ch d l P i objedn vce n hradn ch d l je t eba uv st n sleduj c daje Typ p stroje slo artiklu p stroje Identi...

Страница 38: ...vlhkom prostred Chr te v pr stroj pred vlhkom a da d om Predt m ako pr stroj zapnete presved te sa i sa nyl nov vl kno nem e dotkn t nejak ch kame ov alebo in ch predmetov V dy pracujte v adekv tnom o...

Страница 39: ...e nadvihn t vypnite motor a po kajte k m sa celkom nezastav Ak chcete od pr stroja od st mus te motor vypn t a vytiahnut elektrick k bel zo z suvky Predt m ako pr stroj napoj te na elektrick siet ubez...

Страница 40: ...zniku vecn ch k d sa nesmie pr stroj pou vat na rozdrobovanie v zmysle kompostovania 8 Uvedenie do prev dzky Strunov kosa ka je ur en len na kosenie tr vy Kr tke alebo opotrebovan nylonov vl kno zapr...

Страница 41: ...kno odre e na spr vnu d ku Pozor Odvrhnut asti nyl nov ho vl kna m u vies k poraneniam 10 dr ba a starostlivost Pred odstaven m a isten m vypnite kosa ku a vytiahnite nap jac k bel z elektrickej siete...

Страница 42: ...tandartiem G apib dina atitikim EU reikalavimams ir prek s normoms Q declar urm toarea conformitate conform directivei UE i normelor pentru articolul z B potvr uje sljede u uskla enost prema smjernica...

Страница 43: ...As an alternative to returning the electrical device the owner is obliged to cooperate in ensuring that the device is properly recycled if ownership is relinquished This can also be done by handing ov...

Страница 44: ...oebehoorstukken en hulpmiddelen zonder elektrische componenten die bij de afgedankte toestellen zijn bijgevoegd U Endast f r EU l nder Kasta inte elverktyg i hush llssoporna Enligt det europeiska dire...

Страница 45: ...h Toto neplat pro ke star m p stroj m p ilo en sti p slu enstv a pomocn prost edky bez elektrick ch sou st W Len pre krajiny E Neodstra ujte elektrick pr stroje ako domov odpad Pod a Eur pskej smernic...

Страница 46: ...icita autorizzazione da parte della ISC GmbH Nadruk of andere reproductie van documentatie en geleidepapieren van de producten geheel of gedeeltelijk enkel toegestaan mits uitdrukkelijke toestemming v...

Страница 47: ...de modifications Con riserva di apportare modifiche tecniche Technische wijzigingen voorbehouden F rbeh ll f r tekniska f r ndringar Se rezerv dreptul la modific ri tehnice j Technick zm ny vyhrazeny...

Страница 48: ...48 Anleitung_E_RT_25_D_SPK7 _ 01 12 2010 12 35 Uhr Seite 48...

Страница 49: ...49 Anleitung_E_RT_25_D_SPK7 _ 01 12 2010 12 35 Uhr Seite 49...

Страница 50: ...50 Anleitung_E_RT_25_D_SPK7 _ 01 12 2010 12 35 Uhr Seite 50...

Страница 51: ...d stones or dust effects of force or external influences e g damage caused by the device being dropped and normal wear resulting from proper operation of the device This applies in particular to recha...

Страница 52: ...l ou encore l emploi d accessoires non homologu s le non respect des prescriptions de maintenance et de s curit l infiltration de corps trangers dans l appareil comme par exemple du sable des pierres...

Страница 53: ...o o utilizzo di utensili o accessori non consentiti dalla mancata osservanza delle norme di sicurezza e di manutenzione dalla penetrazione di corpi estranei nell apparecchio come per es sabbia pietre...
Страница 54: ...ebehoren niet naleving van de onderhouds en veiligheidsbepalingen binnendringen van vreemde voorwerpen in het apparaat zoals b v zand stenen of stof gebruikmaking van geweld of invloeden van buitenaf...

Страница 55: ...ga anv ndningar t ex verbelastning av produkten eller anv ndning av ej godk nda insatsverktyg eller tillbeh r sidosatta underh lls och s kerhetsbest mmelser fr mmande partiklar som har tr ngt in i pro...

Страница 56: ...als utilizarea abuziv sau improprie cum ar fi suprasolicitarea aparatului sau folosirea uneltelor ata abile sau auxiliarilor neadmi i nelu rii n considerare a prescrip iilor referitoare la lucr rile d...

Страница 57: ...n jako nap p et en p stroje nebo pou it neschv len ch vlo n ch n stroj nebo p slu enstv nedodr ov n pokyn pro dr bu a bezpe nostn ch pokyn vniknut ciz ch t les do p stroje jako nap p sek kameny nebo...

Страница 58: ...an m ako napr pre a enie pr stroja alebo pou itie nepr pustn ch pracovn ch n strojov alebo pr slu enstva nedodr an m pokynov pre dr bu a bezpe nostn ch pokynov vniknut m cudz ch telies do pr stroja ak...

Страница 59: ...rkzeugen oder Zubeh r Nichtbeachtung der Wartungs und Sicherheitsbestimmungen Ein dringen von Fremdk rpern in das Ger t wie z B Sand Steine oder Staub Gewaltanwendung oder Fremdeinwirkungen wie z B Sc...

Страница 60: ...n wir f r Sie Ihre Reklamation schneller bearbeiten und Ihnen schneller helfen Eine zu ungenaue Beschreibung mit Begriffen wie Ger t funktioniert nicht oder Ger t defekt verz gert hingegen die Bearbei...

Отзывы: