background image

18

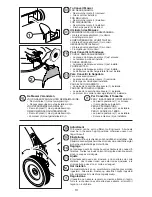
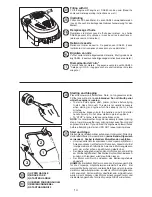
Regularly

Stop the engine and unscrew the dipstick.  The level should be 
between FULL and ADD.  

NOTE:

 the dipstick must be screwed 

all the way down in order to indicate correct oil level.  Avoid 
fi lling with too much oil.

Regelmässig

Stellen Sie den Motor ab und schrauben Sie den Ölpeilstab heraus.  
De Ölstand soll swischen FULL and ADD liegen.  

ACHTUNG: 

der Ölpeilstab muss vollständig hineingeschraubt sein, damit 
der richtige Ölstand angezeigt werden kann.  Vermeiden Sie 
zu viel Öl einzufüllen. 

Régulièrement

Arrêter le moteur et vérifi er la jauge à julie.  Le niveau doit être 
situé entre FULL (plein) et ADD (ajoutez).  

ATTENTION:

 il faut 

que la jauge soit vissé à fond pour obtenir un résultat correct.  
Evitez de mettre trop d'huile.

Periódicamente

Parar el motor para controlar el nivel de aceite del motor.  Debe 
estar entre FULL y ADD.  

AVISO:

 la tapa tiene que estar bien 

puesta para que la indicación del nivel de aceite de la varilla sea 
correcta.  Evitar relleno excesivo de aceite.

Regelmatig

Kontroleer het oliepeil bij voorkeur bij een koude motor.  Het 
niveau moet tussen FULL en ADD staan.  Nooit beneden de 
ADD mar ook nooit boven FULL.  

N.B.

 De peilstok moet geheel 

ingedraaid worden voor dejuiste meting.  Niet teveel olie bijvullen.

Periodicamente

Arrestare il motore e controllare l'asta dell'olio.  Ll livello deve 
trovarsi fra FULL e ADD.  

ATTENZIONE:

  l'asta dell'olio deve 

essere avvitata fi no in fondo per vedere il livello correctto dell'olio.  
Evitare di versare troppo olio.

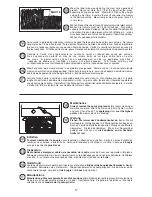
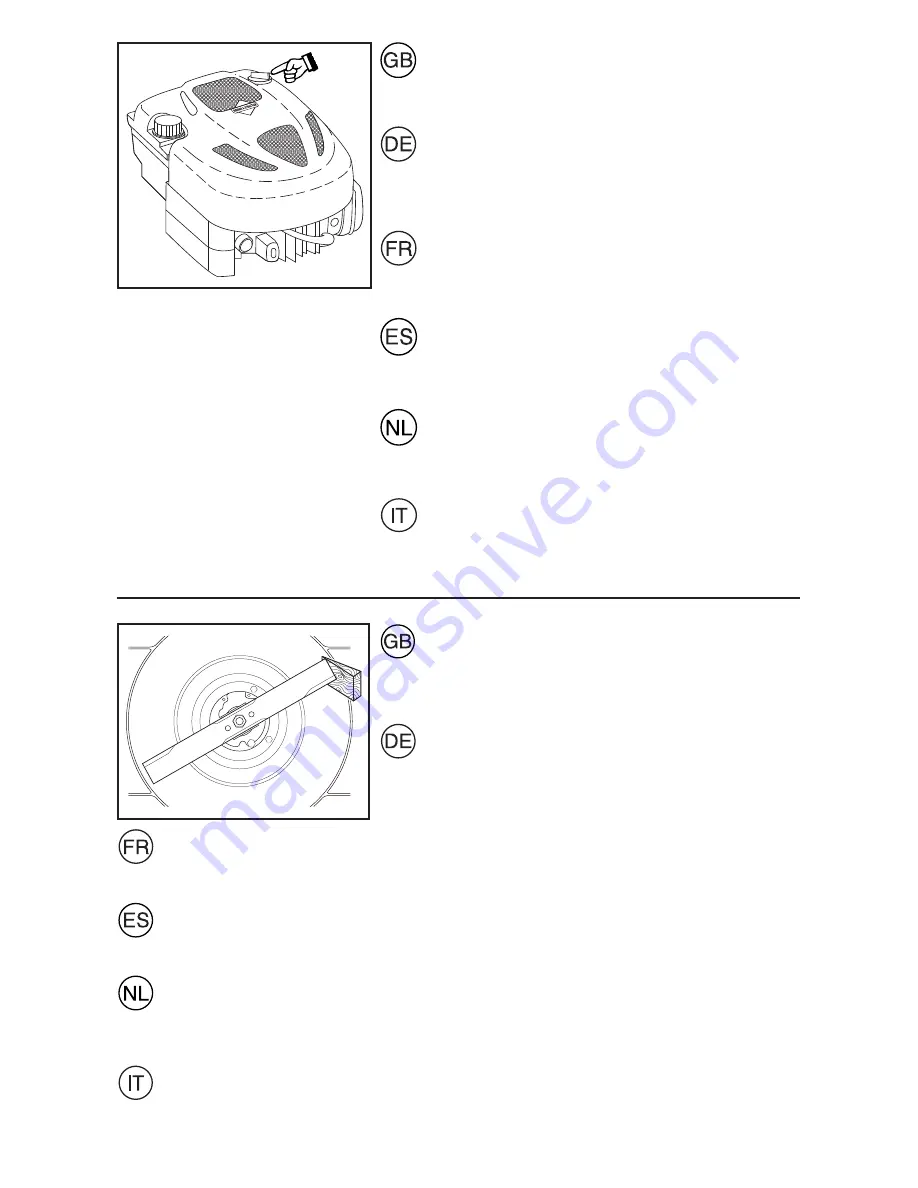
Annually (After end of season)

Grinding and balancing the cutter blade.  

Remove the spark 

plug lead.

  Fitting and removing the blade require the use of 

protective gloves.  Unscrew the cutter blade and deliver it to a 
service workshop for grinding and balancing.  Tighten the screw 
properly when re as sem bling (35–40 ft. lbs.).

Jährlich (nach Beendigung der Saison)

Schleifen und Auswuchten des Messers.  

Abstellen und das 

Zündkerzenkabel abziehen.  

Die Klinge nur mit Schutzhand-

schuhen einsetzen und entfernen. Schrauben Sie das Messer ab 
und bringen dieses in eine Service-Werkstatt.  Bei der Montage 
die Schrauben richtig anziehen (35–40 ft. lbs.).

Annuellement (à fi n de la saison)

Aiguisage et équilibrage de la lame.  

Debrancher la bougie.  

Enfi lez des gants de protection avant de mettre 

en place ou d’enlever la lame. La démonter et la donner à aiguiser à une station-service.  Bien resserer la 
vis après remontage (35–40 ft. lbs.).

Revisión anual (Al terminar la estación)

Afi lado y equilibrado de la cuchilla.  

Se desconecta el cable del encendido de la bujía.  

El ajuste y la 

sustitución de la hoja requiere el uso de guantes protectores. Se desmonta leugo la cuchilla que es entrega 
a un taller mecánico para su afi lado y equilibrado.  Apriétese bien la tuerca al volver a montar (35–40 ft. lbs.).

Jarlijks (na einde van het seizoen)

Slijpen en balanceren van het maaimes.  

De bougiekabel losmaken.  

Bij het afstellen en verwijderen van 

het mes moeten altijd beschermende handschoenen worden gedragen. Schroef het mes er af en breng 
het naar de werkplaats voor slijpen en balanceren.  Bij het weer aanbrengen de schroef goed vastdraaien 
(35–40 ft. lbs.).

Controllo annuale (All fi ne della stagione)

Rettifi ca e bilanciamento della lama.

  Rimuovere il cavo di accensione.

  Inserire e rimuovere la lama 

solamente indossando guanti di protezione. Smontare la lama e consegnarla ad una offi cina di servizio per 
la rettifi ca ed il bilanciamento.  Stringere bene le viti nel rimontaggio (35–40 ft. lbs.).

Содержание P53-625D

Страница 1: ...e sure you understand them before using this machine Anleitungshandbuch Bitte lesen Sie diese Anleitungen sorg fältig durch und vergewissern Sie sich daß Sie diese verstehen bevor Sie die Maschine in Betrieb nehmen Instructieboekje Lees deze instructies aandachtig en zorg dat u ze begrijpt voordat u deze machine gebruikt Manuale di istruzioni Prima di utilizzare la macchina leggete queste istruzio...

Страница 2: ...ONTAGGIO 11 12 REGOLAZIONE 13 AVVIAMENTO ED ARRESTO 14 15 USO DELLA FALCIATRICE 16 MANUTENZIONE 17 19 INFORMAZIONE GENERICHE 20 CONTENTS SAFETY RULES PAGE 3 8 TECHNICAL DATA 9 OVERVIEW 10 ASSEMBLY 11 12 ADJUSTMENTS 13 START AND STOP 14 15 USE 16 MAINTENANCE 17 19 GENERAL INFORMATION 20 INHALTSVERZEICHNIS SICHERHEITSREGELN SEITE 3 8 TECHNISCHE DATEN 9 ÜBERSICHT 10 MONTIEREN 11 12 EINSTELLUNG 13 STA...

Страница 3: ... injury Disengage all blade and drive clutches before starting the engine Start the engine or switch on the motor carefully ac cording to instructions and with feet well away from the blade Do not tilt the lawnmower when starting the engine or switching on the motor except if the lawnmower has to be tilted for starting In this case do not tilt more than absolutely necessary and lift only the part ...

Страница 4: ...n der Maschine alle Blockierungen der Klingen und des Antriebs lösen Beim Starten der Maschine und Einschalten des Motors vorsichtig vorgehen Halten Sie sich an die Gebrauchsan leitung und achten Sie darauf dass Ihre Füße weit genug von der Klinge entfernt sind Kippen Sie den Rasenmäher nicht während des Starts oder Einschalten des Motors es sei denn dass dies für den Start erforderlich ist Kippen...

Страница 5: ...be en place Conserverlerégimederotationdumoteuretnejamais le faire fonctionner au dessus de son régime nominal car cela peut être dangereux Débrayer toutes les lames et actionner l embrayage avant de mettre le moteur en marche Mettez le moteur en marche ou mettez le contact avec soin selon les instructions les pieds éloignés des lames N inclinez pas la tondeuse à gazon lors de la mise en marche ou...

Страница 6: ... el silenciador el comportamiento de la batería limpios de césped hojas y de demasiado grasa Verifique frecuentemente el recogedor del césped para ver si hay uso o deterioración Para la seguridad reemplace las partes que estén usadas o dañadas Si el tanque del combustible debe ser vaciado hágalo afuera I Instrucción Lea todas las instrucciones cuidadosamente Famil iarícese completamente con los co...

Страница 7: ... een overmaat aan smeervet Controleerdeopvangzakvaakopslijtageofverwering Vervang versleten of beschadigde onderdelen om veiligheidsredenen Als de brandstoftank afgetapt moet worden moet dit buiten worden gedaan I Training Lees de instructies aandachtig Zorg dat u vertrouwd bentmetdebedieningselementenenhetjuistegebruik van de machine Laat kinderen of mensen die niet bekend zijn met de instructies...

Страница 8: ...tte le lame e le frizioni prima di avviare il motore Avviare o accendere il motore ponendo molta at tenzione attenendosi alle istruzioni e con i piedi ben lontani della lame Non inclinare mai la macchina avviando o accen dendo il motore con la sola eccezione dei casi in cui questo sia assolutamente necessario In questo caso comunque non inclinarla mai oltre quanto sia stret tamente necessario e so...

Страница 9: ...es publications fournies avec le produit Ap prenez à comprendre la signification de ces symboles Estos símbolos pueden aparecer sobre su unidad o en la literatura proporcionada con el producto Aprenda y comprenda sus significados Deze symbolen kunnen op uw machine of in de bij het produkt geleverde documentatie aanwezig zijn Lees en begrijp de betekenis Simboli utilizzati sull apparato di taglio o...

Страница 10: ...10 5 2 3 1 9 4 7 6 ...

Страница 11: ... DE HIERBA 2 GANCHOS DE PLASTICO 3 ABERTURA DEL MARCO 1 FRAME VOOR GRASVERGAARBAK 2 PLASTIC HAKEN 3 FRAME OPENING 1 TELAIO DEL CESTELLO 2 AGGANCI DI PLASTICA 3 APERTURA DEL TELAIO To Assemble Grass Catcher Put grass catcher frame into grass bag with stiff part of bag on the bottom Slip vinyl bindings over frame Zusammensetzung des Grasfangbeutels Den Rahmen in den Grasfangbeutel einsetzen der stei...

Страница 12: ...rmita que el recogedor sea arrastrado cuando lo vacié puede ocasionarse daños Legen van de grasvergaarbak Schakel de motor uit door de bedieningshendel los te laten Til het achterluik op en verwijder met behulp van het handvat de grasvergaarbak Laat de grasvergaarbak niet over het gras slepen wanneer u hem leegt Dit kan onnodige slijtage van het weefsel van de verzamelzak veroorzaken Vuotatura del...

Страница 13: ...zijn VOOR VERSPREIDEN VAN MULCH De mulchplaat 1 moet geïnstalleerd zijn OMBOUWEN NAAR ACHTERUITWORP De mulchplaat 1 moet geïnstalleerd zijn Voorplaat 2 moet geïnstalleerd zijn Per Convertire il Tosaerba PER L INSACCAMENTO POSTERIORE La piastra posteriore 1 va rimossa Il raccoglierba va installato PER LA PACCIAMATURA La piastra posteriore 1 va installata PER LO SCARICO A TERRA La piastra posteriore...

Страница 14: ...ich has already run for a few minutes Hold engine brake yoke to the handle and pull on starter handle quickly Do not allow starter rope to snap back To STOP engine release engine brake yoke NOTE In cooler weather it may be necessary to repeat priming steps In warmer weather over priming may cause flooding and engine will not start If you do flood the engine wait a few minutes before attempting to ...

Страница 15: ... del cebado Starten en Stoppen Zet de maaier op een vlakke ondergrond Niet op een grind pad of iets dergelijks Vul de benzinetank met benzine geen oliemengsel Nooitbenzinetankvullenterwijldemotordraait Om een koude motor te starten duwt u 3 keer op het voo rinspuitpompie voordat u gaat starten Druk stevig Deze stap is gewoonlijk niet nodig wanneer u een motor srart die reeds enkele minuten gelopen...

Страница 16: ...t In solchen Fällen können Schmierungsprobleme im Motor auftreten Utilisation La tondeuse ne doit pas être utilisée sur un terrain dont la pente dépasse 15 Il pourrait se produire des problèmes avec le graissage du moteur Aplicacion Para evitar problemas de engrase se recomienda no usar el cortacéspedenterrenosdeinclinacionesmayoresde15 grados Gebruik De grasmaaier niet gebruiken op hellingen of t...

Страница 17: ...cutting height setting the first time Examine the result and lower the mower to the desired setting Mow slowly or mow the grass twice if it is very long MähenSiedasGrasbeistarkemWachstumzweimalwöchentlich Mähen Sie niemals mehr als 1 3 der Graslänge Dies gilt be sonders für trockene Perioden Mähen Sie danach das Resultat und stellen Sie dann die erwuunschte Schnitthöhe ein lst das Grasbesondershoc...

Страница 18: ...protective gloves Unscrew the cutter blade and deliver it to a service workshop for grinding and balancing Tighten the screw properly when reassembling 35 40 ft lbs Jährlich nach Beendigung der Saison Schleifen und Auswuchten des Messers Abstellen und das Zündkerzenkabel abziehen Die Klinge nur mit Schutzhand schuhen einsetzen und entfernen Schrauben Sie das Messer ab und bringen dieses in eine Se...

Страница 19: ...u mow in very dusty dirty conditions Refer to engine manual Reinigung des Luftfilters Schrauben lösen Deckel abnehmen und Filtereinsatz herausnehmen Wird ein schmutziger Luftfilter verwendet kann Ihre Maschine nicht richtig betrieben werden es kann zu Beschädigungen kommen Luftfilter jedes Jahr aus tauschen Austausch öfter vornehmen wenn unter besonders staubigen schmutzigen Bedingungen gemäht wir...

Страница 20: ... Débranchez la bougie Videz le réservoir d essence En cas de transport par un service public il faut vider et l essence et l huile INFORMACIONES GENERALES Transporte Desconexión del cable de bujía Vacíese el depósito de gasolina y si se trata de transporte público también el de aceite ALGEMENE NFORMATIE Vervoer Debougiekabellosmaken Ledigdebenzinetank Bijopenbaar vervoer dienen zowel olie als benz...

Отзывы: