


3
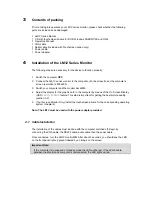
Contents of packing
Prior to taking into operation your
LM12
series
monitor, please check whether the following
parts are included and undamaged:
1
LM12 Series
Monitor
1 CD with touchscreen drivers for DOS, Windows 95/98/NT/2K and OS/2
1 Operator's Manual
1 VGA cable
1 Serial cable (Included with Touchscreen option only)
1 Power cable
1 Power adapter
4
Installation of the LM12 Series Monitor
The following steps are necessary for the device to function properly:
1
Switch the computer
OFF
.
2
Connect the
LM-12 series
monitor to the computer. (For best results, set the computers
screen resolution to 800x600).
3
Switch your computer and the monitor back
ON
.
4
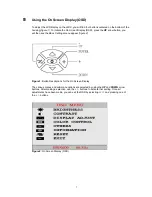
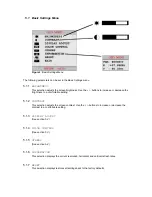
Adjust the display for the graphic card in the computer by means of the On Screen Display
(OSD)
AUTO TUNING
feature. This step is important for getting the best picture quality.
(
section 5.2
)
5
(Touchscreen Monitor Only)
Install the touchscreen drivers for the corresponding operating
system (chapter 4).
Note: The LM12 must be used with the power adapter provided.
4.1 Cable Installation
The installation of the cables must be done
with the computer switched off
.
Begin by
connecting the VGA cable, the RS232 cable, audio cable then the power cable.
Once connected, turn the LM12 monitor
ON
. After about 3 seconds, you should see the LED
on the front panel light up green followed by an image on the screen.
Important Note:
If the computer is in suspend or standby mode the LED will be red. If the SVGA cable
between the Monitor and computer is disconnected, the LED lights up red.
Содержание LM12 Series
Страница 1: ...LM12 Series LCD Monitor User Manual ...


