background image

2.2

System Settings:

As the right photo for last page, you may set up the parameters as below:
Devices Info.:
Address: DVR IP address or DDNS
Port   : Mobile Port [

6003

 by default]

DeviceName:   Description of this DVR
User Name:  Login User Name

Admin

by default

Password:  Password [888888 by default]

Click

 after setting to connect, or click 

 to choose other DVR that ever 

connected.

2.3

The main display screen:

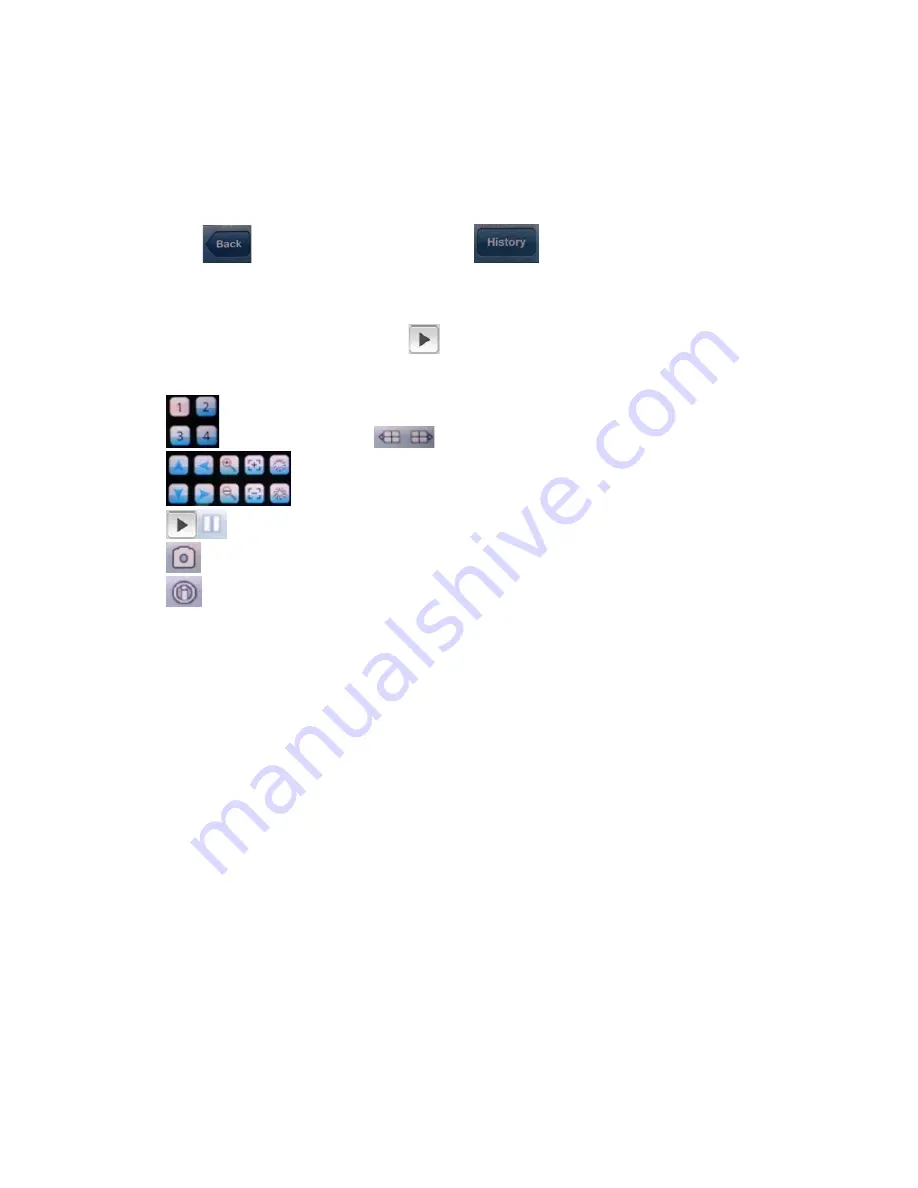
As the left photo for last page, click

icon to connect DVR immediately, after login DVR 

successfully, user can watch the remote video from mobile phone; the other icon functions are 
as follows:

switch channel

click 

 to show another 4 channel list

Control PTZ camera direction, Zoom, Iris and Focus.

Play

 / 

Stop

 button 

Picture Snapshot.

This software information

79

Содержание ADM-44U

Страница 1: ...Dual Streaming H 264 Multiplex 4CH 8CH Network DVR Support 3G 3 5G mobile phone PDA Symbian Windows Mobile iPhone iPad Blackberry Android Support 2xSATA User Manual V1 2 ...

Страница 2: ...ROL 26 5 DVR SETTING 29 5 1 MENU TREE OPERATE 29 5 2 SYSTEM SETTING 31 5 2 1 Language 31 5 2 2 Video Standard 31 5 2 3 VGA Setting 31 5 2 4 Time Fomat 31 5 2 5 Time Setting 31 5 2 6 Password Setting and what if forgotten 32 5 2 7 Hard Disk Overwrite 32 5 2 8 Create Delete User Account assign authorities setup SEQ Display Preview Cruise and Lock Cameras 32 5 2 9 Resource Management 35 5 3 RECORD SE...

Страница 3: ... 8 3 Restore defaults 53 5 8 4 Logout 53 6 WEB BROWSER OPERATION IE BROWSER ONLY 54 6 1 ENABLE DOWNLOAD UN SINGED ACTIVEX CONTROL IF NECESSARY 54 6 2 TURN OFF UAC FOR WINDOWS 7 AND VISTA 54 6 3 WEB BROWSER MAIN SCREEN 55 6 4 ALARM NOTIFICATION 56 6 5 DEVICE PARAMETERS SETTINGS 57 6 6 VIDEO FILES PLAYBACK DOWNLOAD 62 6 6 1 Video Files Playback 62 6 6 2 Download Video Files 63 6 6 3 Device Log 63 6 ...

Страница 4: ...egulations WARNING TO PREVENT FIRE OR ELECTRIC SHOCK HAZARD DO NOT EXPOSE THIS APPLIANCE TO RAIN OR MOISTURE CAUTION TO REDUCE THE RISK OF ELECTRIC SHOCK DO NOT REMOVE COVER NO USER SERVICEABLE PARTS INSIDE PLEASE REFER SERVICING TO QUALIFIED SERVICE PERSONNEL LIMITATION OF LIABILITY This users manual is supplied as is with no warranties be it expressed or implied including but not limited to the ...

Страница 5: ...he unit To avoid shock and vibration damage to the internal hard drive do not move the unit while it is plugged in Protect hard disk drives from static electricity Do not stack hard disk drives or keep them upright Do not use an electric or magnetic screwdriver to fix hard disk drives Do not place the unit in an enclosed area where the cooling vents are blocked or impede the flow of air through th...

Страница 6: ...o collect and recycle electrical and electronic waste items Contact your local authorities for information about practices established for your region COPYRIGHT STATEMENT All rights reserved No part of this publication may be reproduced in any form or by any means transcribed translated into any language or computer language transformed in any other way stored in a retrieval system or transmitted ...

Страница 7: ...ay of Recording HDD Access and Alarm Status Live Resolution PAL 704x576 D1 Horizontal 450 Vertical 450 Lock Camera Users can not see the cameras being locked locally and remotely Record Normal Record Motion Detection Record Alarm Trigger Record Record Quality Bit Rate and Resolution can configure by each individual channel When HDD Storage is Full DVR Gradually Overwrite Oldest Video Automatically...

Страница 8: ... D1 25fps_PAL 30fps_NTSC Please refer to Chapter 5 2 9 Resource Management Encode Bit Rate 256 2048kbps Playback Resolution PAL 352x288 CIF 704 x 288 HD1 704x576 D1 NTSC 352x240 CIF 704 x 240 HD1 704x480 D1 Playback Function 1CH 2CH 4CH 8CH Audio video playback at the same time 16x 16 Fast Forward and Single Step Forward Audio Audio ADPCM Sample Rate 8KHz Audio Channel Mono Sample 16 Bits Storage ...

Страница 9: ...eplate or remote control to switch to TV mode please refer to Chapter 4 2 Main Menu Please login the system Chapter 4 and then physically format the HDDs Chapter 4 3 Please note that the HDDs cannot be used for recording if they are not formatted yet Please refer to Chapter 4 for all basic operations Please refer to Chapter 5 2 to setup the system correctly esp for NTSC PAL Record Resolution Time ...

Страница 10: ... H264 DVR Utility V1 6 1 MP4Player for back up MPEG4 files USB DVDRW Internet playback in PC 2 WebOcxClean dat to delete the old Active X components from the PC used to remote access this DVR which upgraded by new software please close IE before run it 3 Windows mobile software for 5 0 6 0 6 1 Windows PDA KWeyesetup CAB in the Mobile Phone software Windows Mobile 4 Symbian S60 3rd mobile software ...

Страница 11: ...ecord Chapter 4 5 Video Playback or 5 4 6 Motion 5 4 7 Privacy Mask setting Mosaic setting or 5 3 2 Record Schedule 5 6 4 Alarm Schedule setting 2 MENU Press this button to display the main menu 3 ESC Exit window or switch the tool bar main menu and status bar 4 REC Start or Stop manual record function 5 Backup Open video search and backup menu 6 Play Pause Open video search and playback menu pres...

Страница 12: ...VR 1 x SATA or 2 x SATA 8CH DVR 2 SATA HDD with DVDRW or HDD removable Rack Key buttons 2 12 are same as 4CH DVR except 1 1 8 Direct switch to single channel window or 9 camera windows Start and Stop time setting of playback or back up in schedule record Chapter 4 5 Video Playback or 5 4 6 Motion 5 4 7 Privacy Mask setting Mosaic setting or 5 3 2 Record Schedule 5 6 4 Alarm Schedule setting 12 ...

Страница 13: ...1 Complex keys CH1 CH5 CH2 CH6 CH3 CH7 CH4 CH8 Channel 1 Channel 5 Channel 2 Channel6 Channel 3 Channle 7 Channel 4 Channel 8 toggle switch button and also button switch between 1 9 camera windows Start and Stop time setting of playback or back up in schedule record Chapter 4 5 Video Playback or 5 4 6 Motion 5 4 7 Privacy Mask setting Mosaic setting or 5 3 2 Record Schedule 5 6 4 Alarm Schedule se...

Страница 14: ...H Audio Input 1CH Audio Output 5 Video Input Connectors 1 4 1 8 4 or 8 channel video input BNC 1Vp p 75Ω 6 Video Main Output Connector DVR system screen output BNC 1Vp p 75Ω 7 Ethernet Connector RJ 45 10 100 Base T Ethernet network 8 VGA Connector optional for 4CH Connect VGA LCD monitor 9 Alarm Input Connectors ALARM IN 1 4 5 6 Ground Connect to external sensor device Alarm Output Connectors ALAR...

Страница 15: ...ness Button Adjust image brightness up down 6 Stop Button Press this button to stop the playback 7 Play Pause Button Press this button to search and play the recorded images or pause the playback 8 Fast Forward Button Press this button for fast forward playback 9 Fast Backward Button Press this button for fast backward playback 10 Function Key FN Start time and Stop time setting of playback or bac...

Страница 16: ...to RCA connector to work with Audio Video RCA cable Power Use adapter come along with DVR plug 12VDC output connector into the power socket Alarm Input output Please refer to Chapter 5 6 2 Ethernet Connect the Ethernet connector to a standard twisted pair Ethernet cable for remote access via LAN or internet USB 2 0 Support Mouse USB Flash Drive USB portable HDD USB portable DVD Burner Only support...

Страница 17: ... For the internal fixed HDD installation there is no HDD bay for it there are 4 screw holes underneath housing bottoms where you can secure them as below 3 3 PTZ Control Connections Connect the PTZ control interface to RS485 TX and TX interfaces of rear panel and IDs 17 Data Cable Power Cable Data Cable Power Cable ...

Страница 18: ...y side default is VGA you may press ESC 1 ESC continuously from faceplate or remote control to switch to TV mode First window will request to select user account and password to operate DVR system Status Bar Tools Bar DVR system status bar at the bottom of the screen Right click mouse key or press Enter at front panel will open Tools Bar for system setting and operating 18 Default password of Admi...

Страница 19: ...splayed on the right upper corner of each split screen The details are as follows Indicates motion detection Blue indicates common recording Green indicates motion detection triggered recording Red indicates alarm triggered recording Grey indicates manual recording Peripheral alarm input alarm output HDD Network display Indication will be displayed on system status bar The four icons indicate the ...

Страница 20: ...tch the OSD control between TV and VGA monitor also can be done by pressing ESC 1 ESC continuously from faceplate or remote control To adjust the screen 8 pixels per unit can be adjusted as follows To reduce or increase screen in vertical direction To reduce or increase screen in horizontal direction To move the screen up down left right To zoom out the screen to largest and show in central 4 3 Fo...

Страница 21: ...le If the record schedule is conflict with manual record the manual record will be processed firstly until the manual record being canceled Record types include common recording alarm triggered recording motion detection triggered recording alarm motion detection triggered recording the following indications will be displayed on the right upper corner of each split screen Blue indicates common rec...

Страница 22: ...art stop recording manually The video recorded manually is named common recording Schedule Record Please select Tool Bar Setting Record Record Schedule to set The setting screen is shown as the figure below 1 The current recording channel number 2 The record schedule 3 Description of record type System provides a recording option for 24 hours every day and Sunday through Saturday 22 ...

Страница 23: ... Detection Settings for details When alarm recording is selected the alarm triggering settings should be set ahead Please refer to 5 6 3 Event Handling for details 4 5 Video Playback Specify the date time and channel number by selecting Tool Bar Record Search The searching results will be list on the screen in responding different colors so as to distinguish different record types Date time search...

Страница 24: ...he setup by or button of faceplate to select start stop time as FN above The available recordings will be represented by differently colored bars on the time line depending on the type of the recording Blue common recording Green motion detection triggered recording Red alarm triggered recording Grey manually made recording After all settings move highlight icon to Play using buttons and press Ent...

Страница 25: ...ame Click to switch from single camera to 4 9 camera 4 6 Video Backup Select Tool Bar Record Search to search backup and playback the specific record files you needs Set the start time and stop time as describe in 4 5 Video Playback 25 ...

Страница 26: ...p Video on PC For MPEG4 video format playback you must install decoder component for Windows Media Player User can find the compressed files WMP_MediaFilter rar inside the backup devices Uncompressed the WMP_MediaFilter rar and execute InstallFilter bat to install the decoder component you can playback MPEG4 file by Windows Media Player Please note you don t have to install this component for play...

Страница 27: ...oom in zoom out it is disabled for cameras with automatic focus Iris Click to make the image brighter or darker it is disabled for cameras with automatic iris adjustment Focus Click to focus in and focus out it is disabled for cameras with automatic focus Auxiliary Open close auxiliaries Click to open and click to close and use arrow keys to choose Different functions respond to different protocol...

Страница 28: ...e is a running route of camera that passes through multiple presets Set sequence 1 Select preset number you want to call 2 Click on set button 3 Repeat step 1 and 2 to add the other presets till finishing 4 Click on run button Clear sequence Click on button to clear sequence Track Track is a continuous running route of camera Set track 1 Click on to start setting 2 Move camera as the track and sta...

Страница 29: ...5 DVR Setting 5 1 Menu Tree Operate 29 ...

Страница 30: ...d using button and press Enter button to confirm selection or press ESC to return to upper menu Menu Operation Use to move highlight for configure items Press button to change parameter Use mouse to input via on screen keyboard or input value from remote controller Press open sub menu and ESC return upper menu Save Exit User can click button on the right upper corner or single right click mouse or...

Страница 31: ...4x768 60Hz 1280x1024 60Hz 1440x900 60Hz if wrong VGA resolution to make the LCD display distorted please press ESC 2 ESC continuously not over 3 second of front panel remote control to restore the display resolution to be 800x 600 5 2 4 Time Fomat Switch time format between 12 Hours or 24 Hours Take effect immediately 5 2 5 Time Setting Select time display way and adjust date time of DVR you can c...

Страница 32: ...and hold it until beep sound heard it will return back to default password of Admin and User account 5 2 7 Hard Disk Overwrite Set up hard disk full action over write ON or stop recording OFF 5 2 8 Create Delete User Account assign authorities setup SEQ Display Preview Cruise and Lock Cameras Click Advanced Setting of System enter the following setup 32 Default password of Admin is 888888 User is ...

Страница 33: ... Add User Account Enter ADD USER to add user account most 7 users accounts can be produced and there will be warning message if exceed Delete User account Enter DEL USER to delete user account 33 ...

Страница 34: ...nt and assign its authorities SEQ Display Preview Cruise Set up the SEQ display Cruise Way for 4CH 1 4CH and 8CH 1 4 9CH and the time interval Cruise Way in seconds between them also choose the channels for Preview Cruise DVR ID NUMBER It is future growth to set up the same ID number with RS422 Keyboard if you want to control DVR from keyboard Lock Cameras Cover Cameras Administrator Admin can cov...

Страница 35: ...h channel Set up Mode Record and Playback mode Function Note 4 Channel D1 4 Channel D1 Encode 4 Channel D1 Playback Any channel can Record Playback maximum NTSC 15Fps D1 30FPS HD1 CIF PAL 12Fps D1 25FPS HD1 CIF Just press OK to finish set up no need click channel no 4 Channel CIF 4 Channel CIF Encode 4 Channel CIF Playback Any channel can Record Playback maximum NTSC 30FPS CIF PAL 25FPS CIF can no...

Страница 36: ...k Any channel can Record Playback maximum NTSC 30FPS CIF PAL 25FPS CIF can not set up D1 HD1 in 5 3 7 Record Resolution Just press OK to finish set up no need click channel no 8 Channel HD1 8 Channel HD1 Encode 8 Channel HD1 Playback Any channel can Record Playback maximum NTSC 15FPS HD1 30FPS CIF PAL 12 5FPS HD1 25FPS CIF can not set up D1 in 5 3 7 Record Resolution Just press OK to finish set up...

Страница 37: ... 5 3 1 Video Channel Select channel number for apply record setting Select ALL for apply to all channels 5 3 2 Record Schedule 1 The current recording channel number 2 The record schedule 3 Description of record type 37 ...

Страница 38: ...t OK to confirm settings The settings will take effect after being saved When motion detection alarm recording is selected the motion detection sensitivity and area should be set ahead Please refer to 5 4 6 Motion Detection Settings for details When alarm recording is selected the alarm triggering settings should be set ahead Please refer to 5 6 3 Event Handling for details the recording time woul...

Страница 39: ...352 x 288 2 Half D1 704 x 240 or 704 x 288 3 D1 704 x 480 or 704 x 576 Please note 4CIF 2 Half D1 D1 so that Record Frame Rate would be reduced automatically even you set up as Full for D1 and Half D1 5 3 8 Dual Streaming for Network Record Advanced Setting SUB CODE By default DVR use recording streaming for IE Browser viewer and mobile streaming Enable sub code can customize the frame rate and bi...

Страница 40: ...sung SYYT TD500 Tiandy VIDO VTS YAAN Yiboer and etc 5 4 3 PTZ Baud Rate Select PTZ device baud rate Support 1200 2400 4800 9600 5 4 4 PTZ ID Select PTZ device ID From 0 255 5 4 5 Color Setting Adjust camera color attribute by default the value is 8 Brightness 1 16 Contrast 1 16 Hue 1 16 Saturation 1 16 5 4 6 Motion Detection Setting Enable this function and click the of the Motion Detection you ca...

Страница 41: ...mera can define multiple regions for privacy protection Click open sub windows By single mouse left click or press or faceplate button or press FN remote control and define the single cell by Enter faceplate or remote control button or you may define multiple cell areas by clicking mouse or pressing button on one cell and dragging the selection in the desired direction press Enter faceplate or rem...

Страница 42: ... list Record Start record immediately for selected channels Alarm Zoom Out display channels when motion happened please refer to 5 6 4 Alarm Out Set the Alarm output enable Buzzer Set the internal Buzzer enable E mail Send E mail with Snapshot picture please refer to 5 5 6 E mail Server about how to set up the E mail address list UPLOAD upload these events message to IE or CMS server to be display...

Страница 43: ...number 5 5 3 Command Port By default is port 5050 user can specify different port number 5 5 4 Media Port By default is port 6050 user can specify different port number If DVR installed behind a Router to share a single public IP address Be sure to configure the Port Forwarding or Virtual Server for those three network port and Mobile surveillance Port 7050 you may surf http portforward com for mo...

Страница 44: ...Setting Click to open sub window and input ADSL account and password from Internet Service Provider DDNS Click to open sub window and input DDNS account and password from DDNS Service Provider User must apply DDNS service account at first 44 ...

Страница 45: ...add this DVR in CMS server manually File Sharing Check to activate files sharing function then able to visit video files in DVR HDD via network neighborhood How to visit shared files Double click network neighborhood input ftp IP address such as ftp 192 168 10 220 to enter the login page type in the super authority Admin and password the shared files can be accessible now click into folder of vide...

Страница 46: ... make sure that they are communicated please remember the server information and Email From information must be corrected and DVR must be internet connected before TEST 5 5 7 UPnP and Mobile port 3 rd page in Net Setting Go to Net Next page Next page you can see following UPnP Enable UPnP function if it connected UPnP router no need to open the ports port forwarding port mapping inside the router ...

Страница 47: ...ing status message and you will find the following screen shot if successful in UPnP mapping Mobile PORT By default is port 7050 user can specify different port number please refer to Chapter 7 3G 3 5G Mobile Phone PDA Support for details 47 ...

Страница 48: ...t type sensor to connect alarm input interface Sensor device output POSITIVE pin connect to DVR s input pin 1 4 pin Sensor device output GROUND pin connect to DVR s G pin 5 6 pin N O Normally open Sensor must constant output low level voltage If output voltage change from Low level to High level then DVR will be triggered N C Normally connected Sensor must constant output High level voltage If out...

Страница 49: ...ail address list Note1 if user wants to set alarm triggered record please set the record schedule first at Record Schedule Note2 if user wants to set alarm triggered PTZ please select the channel number first and then to set only preset 1 can be selected Note3 Event handling sound report to alarm center need to be set in IE explorer Please refer to Chapter 6 3 5 6 4 Alarm Setting Schedule Zoom Out...

Страница 50: ... out display while alarmed Motion and Sensor Hard Disk Full actions Alarm Out Set the Alarm output enabled Buzzer Set the internal Buzzer enable Upload upload these events message to IE or CMS server to be displayed at the top right corner E mail Send E mail with Snapshot picture please refer to 5 5 6 E mail Server about how to set up the E mail address list 50 ...

Страница 51: ...the time scope to be searched it will display AM PM if select correct Time Display format 3 Click Search to display the detail information of log Note The maximum number of logs supported currently is 3000 The storage mode adopts overwrite mode continuously overwrite the oldest data when the database is full 51 ...

Страница 52: ...tory We suggest to use fresh USB Flash Disk for upgrade to prevent crash Please follow the prompts to operate After accomplishing upgrade press confirm button to restart 5 7 3 HDD Manage HDD must be formatted by DVR before start recording audio video Click to open sub window and format the HDD by DVR HDD information will display on the windows if DVR detection HDD correctly Click Formatting to sta...

Страница 53: ...rrent software release date 5 8 Save Setting 5 8 1 Save Exit Save all setting and exit menu 5 8 2 Exit Exit menu without save setting 5 8 3 Restore defaults Reset all configuration to factory default The system language time camera PAL NTSC system and network settings IP address subnet mask gateway HTTP port will not be recovered by restoring to factory defaults 5 8 4 Logout Save all setting and e...

Страница 54: ... must be able to log on with or provide the credentials of a member of the local Administrators group Important Turning off UAC reduces the security of your computer and may expose you to increased risk from malicious software We do not recommend leaving UAC disabled To turn off UAC 1 Click Start and then click Control Panel 2 In Control Panel click User Accounts 3 In the User Accounts window clic...

Страница 55: ...ow Full Screen 1 camera 4 cameras 8 cameras 9 cameras B Camera view is previewing C Camera view tools Adjust image contrast up down Adjust brightness up down Start stop voice monitoring Chapter 5 3 5 The icon will turn to green when recording Start stop recording The icon will turn to green when recording Click to snapshot Stop preview the will turn to on the E Available Camera list 55 ...

Страница 56: ...emotely Clear alarm G PTZ Control Please refer to 4 8 PTZ Control H Open All Close All open or close all the channel preview 6 4 Alarm Notification When network connection is broken or abnormal the alarm notification of No heartbeat of device please check the network will be displayed in the right up side of the main screen After recovery of network the preview will be displayed automatically When...

Страница 57: ... the right up side of the main screen 6 5 Device Parameters Settings Click the Device Parameters will appear please refer to Chapter 5 DVR Settings as well After settings please click Confirm and Save Parameters to be effective for each setting window Server Network setting video system please refer to Chapter 5 5 Net Setting as well for please refer to 5 2 9 Resource Management 57 ...

Страница 58: ... Channel Camera setting Record setting please refer to 5 3 Record Setting and 5 4 Video Setting as well 58 ...

Страница 59: ...aming for Network Record Advanced Setting as well For limited upload bandwidth of internet that DVRs connect or limited streaming capability of some mobile phone PDA you have to adjust bandwidth of DVR to internet Enable Subcode Sub Bitstream Video Bitrate Serial PTZ Setting 59 ...

Страница 60: ... Alarm alarm input output setting and HDD full action Device Firmware upgrade time synchronize and E mail Notify setup 60 ...

Страница 61: ... User User account and authority setting State HDD capacity Channel and Network status 61 ...

Страница 62: ...e and end time there Then click to start searching The result will list on the table Specify the files in the table list and click on the playing control button or download button to do the relevant operations Video File Playback The play control screen is on the left side of the screen It includes image display area play control bar and channel information Click the record files selected will be ...

Страница 63: ... storage directory can be set on the pop up screen by clicking The information of the record file selected will be displayed in the area shown as the figure below It includes device s IP address current play speed channel number and start end time of the record file 6 6 2 Download Video Files Click to set the storage directory of the video file Click to start downloading the format is MPEG4 or AVI...

Страница 64: ...Chapter 6 6 2 Download Video Files or USB back up from local DVR Chapter 4 6 Video Backup Click to verify it then it will shown following if watermarked 6 7 Channels allocation in Camera view window When display some certain Camera view windows like you can disable some channels display by clicking and you can see it turns to be pink from camera list left side move the green cursor to the fixed ch...

Страница 65: ... For limited upload bandwidth of internet that DVRs connect or limited streaming capability of some mobile phone PDA you have to adjust bandwidth of DVR to internet please refer to 5 3 8 Dual Streaming for Network Record Advanced Setting or 6 5 Device Parameters Settings Channel Camera setting Sub Bitstream Subcode from IE for more details 7 1 Windows Mobile Find KWeyesetup CAB in the Mobile Phone...

Страница 66: ...in the MM DD YYYY HH MM SS format Channel name resolution and status of the camera The menu bar contains the following controls Directional buttons for controlling the direction of the PTZ camera view Zoom in out Focus Iris Snapshot 7 2 Nokia Samsung LG Symbian S60 3rd S60 5th Phones Open accessory CD and find the KWeye_JH_3rd_1222 sisx or KWeye_JH_5th1222 sisx mobile surveillance software accordi...

Страница 67: ...67 ...

Страница 68: ...first status tag indicates the name for the selected functional button in the below control bar in the illustration it is Setting The second tag word denotes the current status of the program in the illustration it is Playing Control buttons 68 IP address line Camera info Camera view Status information line Control buttons Functional buttons Play Stop Snap Next Full Mode Setting Exit ...

Страница 69: ...en Next Group Toggling between other available 4 channel views 1 4 and 5 8 or 9 12 13 16 Exit KWeye In order to start working with the CCTV feed on your Symbian mobile phone you will have to configure the program by entering the preferred network access point IP address or DDNS of the DVR mobile phone port username and password Click the icon to enter the setup window In the Setting screen enter t...

Страница 70: ... S60 3rd_INIT 10 Feb 07 Nokia E62 S60 3rd_INIT 09 Sep 06 Nokia E63 S60 3rd_FP1 12 Nov 08 Nokia E65 S60 3rd_INIT 09 Feb 07 Nokia E66 S60 3rd_FP1 16 Jun 08 Nokia E70 S60 3rd_INIT 09 Oct 05 Nokia E71 S60 3rd_FP1 16 Jun 08 Nokia E75 S60 3rd_FP2 16 Feb 09 Nokia E90 S60 3rd_FP1 11 Feb 07 Nokia N71 S60 3rd_INIT 09 Nov 05 Nokia N73 S60 3rd_INIT 09 Apr 06 Nokia N75 S60 3rd_INIT 27 Sep 06 Nokia N76 S60 3rd_...

Страница 71: ...wnloaded directly from the iPhone iPad AppStore 1 Open Apple iTunes 2 Search for KWeye from our third party supplier It will be a free application 3 Download and install onto iPhone as per iPhone installation procedures 4 Please locate the icon and click on it to open the application 5 You will see following screen 6 To set up the connection to the DVR please first click icon to enter settings men...

Страница 72: ...ly user can watch the remote video from mobile phone the other icons function are as follows switch channel click show another 4 channel list Control PTZ camera direction Zoom Iris and Focus Play Stop button Picture Snapshot Full Screen This software information 72 ...

Страница 73: ...herwise the phone cannot establish the connection with the PC 3 Connect your BlackBerry mobile phone to your computer via the USB cable that came with it or any USB cable that fits Start the DM 4 Before the installation open the BlackBerry Desktop Manager Shown as the red sign on the following pictures which means the phone has been connected to the PC 5 Click on Application Loader to enter into i...

Страница 74: ...and locate where you saved the application files Make sure you saved both the alx file and cod file in the same folder After finding the KWeye alx file for the application highlight it and click open 8 You will now return to the Application Loader screen From here you should see KWeye now listed with Install under the Action column shown as follows if the installation is successful 74 ...

Страница 75: ...on that you want to clear from your device When the option Action is Remove it means the program will be clear from your device 2 System explanations KWeye phone port has the following capabilities and functions live video surveillance channel switch full screen display PTZ control including zoon focus iris image capture save as favorite and exit function 75 ...

Страница 76: ... page System setting To set up the connection to the DVR please first click icon to enter settings menu as below right screenshot Server Info Name Description of this DVR Address DVR IP address or DDNS Port Mobile Port 6003 by default User Info User ID Login User Name Admin by default Password Password 888888 by default 76 ...

Страница 77: ...nction are as follows Play Stop button Full Screen Picture Snapshot DVR settings This software information Click to choose channel list Control PTZ camera direction Zoom Iris and Focus 7 5 Android Mobile Google Phone compatible 1 Software Installation 1 1 Please go to Andord sofwtare market to search KWeye as below click to enter and start to Install or copy the software KWeye apk from the CD Mobi...

Страница 78: ...2 Software Operation 2 1 After the installation click the KWeye icon in the All appas to run it will show the main page as left phot click the Settings it will show the right photo 78 ...

Страница 79: ... by default Click after setting to connect or click to choose other DVR that ever connected 2 3 The main display screen As the left photo for last page click icon to connect DVR immediately after login DVR successfully user can watch the remote video from mobile phone the other icon functions are as follows switch channel click to show another 4 channel list Control PTZ camera direction Zoom Iris ...

Страница 80: ...or 25 CIF 15 or 12 5 Half D1 7 5 or 6 D1 500GB 15 8 7 9 3 9 High 640Kbps 19 0 9 5 4 8 Middle 512Kb ps 23 7 11 9 5 9 Low 384Kbps 31 6 15 8 7 9 Best 768Kbps 750GB 23 7 11 9 5 9 High 640Kbps 28 4 14 2 7 1 Middle 512Kb ps 35 6 17 8 8 9 Low 384Kbps 47 4 23 7 11 8 Best 768Kbps 1000GB 31 6 15 8 7 9 High 640Kbps 37 9 19 0 9 5 Middle 512Kb ps 47 4 23 7 11 9 Low 384Kbps 63 2 31 6 15 8 Best 768Kbps 2000GB 63...

Страница 81: ...TA HITACHI HDS722020AL330 2000 SATA Maxtor 6V16010 160 SATA Seagate ST3250310SV 250 SATA Seagate ST3500320SV ST3500320AS ST3500418AS 500 SATA Seagate ST31000528AS ST31000520AS 1000 SATA Seagate ST31500341AS 1500 SATA Seagate ST32000542AS ST32000641AS 2000 SATA Samsung HD161HJ 160 SATA Samsung HD501LJ 500 SATA Appendix C Compatible USB portable DVD Burner List The other brand or model please test b...

Страница 82: ... OUT work C Page 13 2 2 Back Panel modify 4 Audio Input Connectors AUDIO IN 1 4 1 8 as below 4 Audio Input Connectors AUDIO IN 1 4 1 8 only A IN1 A IN4 A OUT work 4 channel audio input RCA 2Vp p 600Ω for 4CH H264 DVR or connector for 8CH H264 DVR to connect Audio cable 4CH Audio Input 1CH Audio Output D Page 37 5 3 5 Record Source Modify Two type selection of recording Video with audio or Video on...

Отзывы: