Tutorials, FAQS,
spare parts,
support:
parrot.com/help/airborne-cargo
Quick Start Guide
Guide de démarrage
Guía de inicio rápido
Kurzanleitung
Guida di avvio rapdia
Quick start gids
Guia de início rápid
o
έλΗΧϣϟϡΩΧΗγϣϟϝϳϟΩ
AIRBORNE CARGO DRONE
Here we go!
Tutorials, FAQS,
t
A
B
C
D
F
E
QUICK START GUIDE
This MiniDrone quick start guide gives you just
the main instructions. You will find full documenta-
tion on our Website
www.parrot.com/uk/support/
airborne-cargo-drone
.
C
HARGING
THE
BATTERY
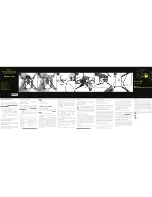
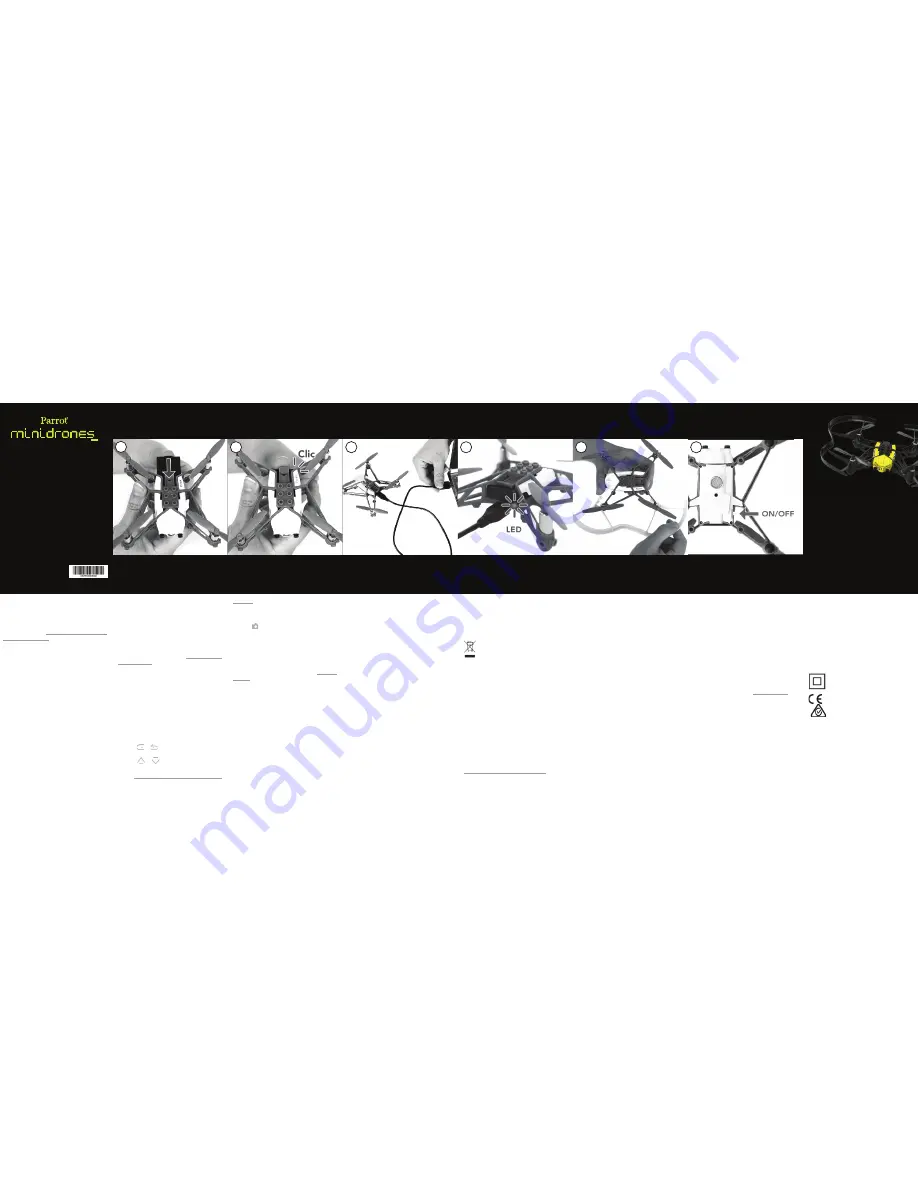
1. Insert the battery into the appropriate com-
parment (photos A and B).
2. Connect the MiniDrone (photos C and D):
• To a 2.4 A minimum charger (not provided).
The charging time is approximately 25 mi-
nutes.
• To your computer using the USB. The char-
ging time is approximately 1 hour and 30
minutes.
To remove the battery, lift the black part located
above the battery and slide it backwards.
D
OWNLOADING
THE
APPLICATION
Connect to the App Store
SM
or on Google Play
TM
and download the FreeFlight3 app free of charge.
A
TTACHING
THE
S
HIELDS
The shields protect the MiniDrone in the event
of a collision with another object. Clip the shields
under each propeller (photo E).
S
WITCHING
ON
THE
M
INI
D
RONE
The On/Off button is located under the Mini-
Drone (photo F).
C
ONNECTING
A
S
MARTPHONE
You need a smartphone or a tablet which supports
Bluetooth
®
4.0 to be able to use the MiniDrone.
Check the compatibility with your smartphone on
the support page of our website
www.parrot.com/
uk/compatibility
.
1. Activate the
Bluetooth
®
function on your
smartphone.
2. Launch the FreeFlight3 app. The MiniDrone
will automatically connect to your smart-
phone.
F
LYING
Press on
Take Off
for the MiniDrone to take off.
Press on the right joystick while tilting your smart-
phone forwards or backwards to fly your Mini-
Drone forwards or backwards, and towards the
left or right to make it turn left or right.
Press on
or
to rotate the MiniDrone to the
right or left.
Press on
or
to fly the MiniDrone upwards
or downards.
Go to
www.parrot.com/uk/support/airborne-car-
To use your MiniDrone indoors, use the shields
to protect the MiniDrone in case it collides with
another object.
In flight, the propellers of the MiniDrone can
cause injury to people and property. Don’t touch
the MiniDrone while it’s flying! Wait until the pro-
pellers have completely stopped before handling
the MiniDrone.
Only use accessories specified by the manufac-
turer.
If sand or dust gets into the MiniDrone, irrever-
sible damage may be caused and it will not be
able to operate properly.
Do not use the MiniDrone in adverse meteoro-
logical conditions (rain, strong wind, snow) or in
poor visibility conditions (at night).
Keep the MiniDrone away from high voltage
power lines, buildings or any other potentially
dangerous areas.
Do not use this device close to any liquid subs-
tances. Do not land the MiniDrone on water nor
on any damp surface, it might cause irreversible
damage.
Avoid subjecting the MiniDrone to any sudden
significant changes in altitude.
Do not leave the MiniDrone in direct sunlight.
W
ARRANTY
For the warranty conditions please refer to the
retailer’s General Conditions of Sale where you
purchased your MiniDrone.
R
ECYCLING
THIS
PRODUCT
The symbol on this product and on its literature
shows that at the end of its life, it is not to be dis-
posed of with household waste. The uncontrolled
disposal of waste is harmful to the environment:
please separate this from other types of waste and dis-
pose of responsibly. Private individuals are invited to
contact the retailer who sold them the product or to ask
advice from their local authority to find out how and where
it can be recycled.
D
ECLARATION
OF
C
ONFORMITY
Parrot SA, 174 quai de Jemmapes, 75010 Paris,
France, declares under their sole responsibility
that the product described in this user guide
complies with EN 301489-17, EN300328, EN71-
1, EN71-2, EN62115 technical standards fol-
lowing the provision of the Radio Equipment,
Telecommunication Equipment directive (1999/5/
EC R&TTE), and of the General Safety directive
(2001/95/EC).
The Declaration of Conformity is available on our
website:
www.parrot.com/uk/ce/?airborne-cargo-drone
R
EGISTERED
TRADEMARKS
Parrot, Parrot MiniDrones and the Parrot logo are trade-
marks of PARROT SA.
App Store is a service mark of Apple Inc.
Google Play is a trademark of Google Inc.
The
Bluetooth
®
word mark and logos are registered trade-
marks owned by Bluetooth SIG, Inc. and any use of such
marks by Parrot SA is under license.
All other trademarks mentioned in this guide are protec-
ted and are the property of their respective owners.
FCC
AND
IC C
OMPLIANCE
C
ERTIFICATION
This equipment has been tested and found to comply with
the limits for a Class B Digital Device, pursuant to Part 15
of the FCC Rules / with Industry Canada Licence-exempt
RSS standard(s). These limits are designed to provide rea-
sonable protection against harmful interference in a re-
sidential installation. This equipment generates, uses and
can radiate radio frequency energy and, if not installed
and used in accordance with the instructions, may cause
harmful interference to radio communications. However,
there is no guarantee that interference will not occur in a
particular installation. If this equipment does cause harm-
ful interference to radio or television reception, which can
be determined by turning the equipment off and on, the
user is encouraged to try to correct the interference by
one or more of the following measures:
Reorient or relocate the receiving antenna.
Increase the distance between the equipment and recei-
ver.
Connect the equipment to an outlet on a circuit different
from that to which the receiver is connected.
Consult the dealer or an experienced radio/TV technician
for help.
This equipment complies with Part 15 of the FCC Rules
/ with Industry Canada Licence-exempt RSS standard(s).
Operation is subject to the following two conditions:
This equipment may not cause harmful interference.
This equipment must accept any interference received, in-
cluding interference that may cause undesired operation.
Modifications not authorized by the manufacturer may
void the user’s authority to operate this device.
C
AUTION
:
EXPOSURE
TO
RADIO
FREQUENCY
RADIATION
The installer of this radio equipment must ensure
that the antenna is located or pointed such that it does
not permit RF field in excess of Health Canada limits for
the general population; consult Safety Code 6, obtainable
from Health Canada’s website at
www.hc-sc.gc.ca.
The user is required to apply for localized Radio-communi-
cation Station Licence in Singapore. Applicants can apply
online for the localized Radio-communication Station Li-
cence through www.business.gov.sg/licences.
N
OTICE
REGARDING
THE
RIGHT
TO
PRIVACY
Recording and circulating the image of a person without
their authorisation could constitute an infringement of
their image and privacy rights and incur your liability. Ask
for authorisation before filming individuals, particularly if
you want to keep your recordings and/or circulate them
on the Internet. Do not circulate any degrading images
or which could undermine the reputation or dignity of an
individual.
B
ATTERY
Failure to comply with instructions may cause permanent
damage to the battery, its environment and may cause in-
jury. Always use a LiPo battery charger. Never charge via a
discharge lead. Never trickle charge or below 2.5 V. Never
allow the battery temperature to exceed 60°C (140°F). Ne-
ver disassemble or modify the wiring in the battery pack or
puncture the battery cell. Never place the battery on top
of combustible materials or leave it unattended during
charging. Always charge in a fireproof location. Always
make sure that the charger output voltage corresponds to
the battery voltage. Always keep out of the reach of child-
ren. Incorrect use of the battery can cause fires, explosions
or other damage.
The battery terminals should not be allowed to
short-circuit. The product should be connected
only to class II appliances which display the
symbol.
go-drone
to watch the piloting tutorials for the
MiniDrone.
T
AKING
A
PICTURE
Press on
to take a picture.
GENERAL INFORMATION
A
CCESSORIES
AND
SPARE
PARTS
Accessories and spare parts are available from
your Parrot retailer or from our website
store.par-
rot.com
.
P
RECAUTIONS
FOR
USE
AND
MAINTENANCE
The MiniDrone is not suitable for children under
14 years of age.
The MiniDrone is a model aircraft designed for
recreational and leisure purposes. The pilot must
always maintain direct visual contact with the Mi-
niDrone and monitor its trajectory. The MiniDrone
must be used in accordance with the civil avia-
tion rules in your country. You should only use it
in open spaces so you are always able to ensure
the safety of person, animals and property. There
are some public places (stations, airports etc.) and
roads where you may not be permitted to use
your MiniDrone.
Содержание TRAVIS
Страница 1: ...Airborne Night Drone TRAVIS MARS User Guide...
Страница 22: ...Parrot nLnLdrones...

