background image


9


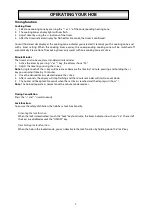
Timing function  

Cooking Timer  

1.


Select one cooking zone by pressing the “-” or “+” of the corresponding heating zone. 

2.


The cooking zones display light will now flash. 

3.


Adjust timer by using the +/- buttons of the timer. 

4.


After the timer indicator display has flashed for 5 seconds, the timer is confirmed.  

 
You will find a red dot display at the cooking zone indicator you selected. It reminds you this cooking zone is set 
with  a  timer  setting.  When  the  cooking  timer  expires,  the  corresponding  cooking  zone  will  be  switched  off 
automatically. Please Note: The cooking timer only works with one cooking zone at a time.  
 

Minute Minder  

The timer can also be used as a standard minute minder.  
1.


Active the timer by pressing “+”or ”-” key, the display shows "00". 

2.


Adjust the timer by pressing the +/-key. 

Note

: A single touch of the +/-key will increase or decrease the time by 1 minute, pressing and holding the +/-

key you can adjust time by 10 minutes.  
3.


Once the desired time is selected release the +/-key. 

4.


After 5 seconds, the display will stop flashing and the minute reminder will start to count down.  

5.


The buzzer will beep for 30 seconds when the set time is reached and the display will show "--". 

Note

: The hob will operate as normal once the minute minder expires.  


Timing Cancellation


Press the "+" and "-" simultaneously. 
 

Lock function: 

To ensure the safety of children, the hob has a lock functionality. 


Activating the lock function: 

When the lock is deactivated, touch the “Lock” key to activate, the timer indicator now shows “Lo”. The rest of 
the keys are disabled except the "ON/OFF" key. 


Deactivating the lock function:


When the hob in the locked mode, you can deactivate the lock function by holding down the “lock” key.  


OPERATING YOUR HOB 

Содержание HO-4-77NF-CER-T

Страница 1: ...Installation and Operating Instructions Models HO 4 77NF CER T For your convenience we recommend to attach the serial number label HERE 727626032017 ...

Страница 2: ...d by spills when cooking Any breakage or damage of glass items Any damage caused by non recommended product used for cleaning maintaining lubricating or similar Any aspect relating to the installation of the product or damage caused during installation including blocked access for repair Any third party including reseller or consequential loss or damage direct or indirect however arising New Zeala...

Страница 3: ...ote of all detailed technical information and installation instructions It is essential that you only allow a qualified technician to install this appliance to ensure the safety and reliability of this appliance Furthermore not using appropiate personnel to install this appliance may affect any future warranty claims lodged so please check with Parmco Appliances before any installation is carried ...

Страница 4: ...onal injury 10 We suggest that you should periodically check that there are no objects glass paper etc that could obstruct the ventilation inlets under your induction hotplate 11 Metallic objects such as knives forks spoons and lids should not be placed on the hotplate since they will get hot 12 If the surface is cracked switch off the appliance and contact Parmco Appliances To avoid the possibili...

Страница 5: ...cialised personnel after first disconnecting the appliance from the main power supply Incorrect repair may put users in serious danger Always contact a specialised personnel for all repairs If any components should deteriorate replace them only with original components Never introduce solvents into the hob as they may cause explosions Some of the packing materials eg plastic bags polystyrene can b...

Страница 6: ...thorised persons The installation must comply with all the appropriate New Zealand Standards and Regulatory Requirements with particular reference to the New Zealand Electrical Standards Any attempt to install this or any other Parmco product without an authorised person could result in damage to the product and a possible health hazard Not having an authorised person install this appliance may re...

Страница 7: ...Heat Protection Sensors mounted in the hob itself monitor temperature on each hotplate Should excessive heat occur under any circumstances then your ceramic hob will automatically disconnect the elements and cease the power supply Residual Heat Indicators After you have used the hob residual heat will remain for sometime as the hob cools during this time an Auto shut down protection If the hob rea...

Страница 8: ...se select heat resistant surface material to avoid deformation caused by the heat As shown in Figure 1 2 Ensure the ceramic hob is well ventilated and the air inlet and outlet are not blocked Ensure the ceramic hob is in good working state As shown in Figure 2 3 Fix the hob on the table by screw four brackets on the bottom of hob see picture after installation Adjust the bracket position to suit f...

Страница 9: ...0 C must be installed underneath with minimum clearance of 25mm The 5mm air exit gap in the front of the cabinetry refer fig 2 is required 6 The adult should supervise children to make sure children can not play with the appliance 7 This appliance is not intended for use by persons including children with reduced physical sensory or mental capabilities or lack of experience and knowledge unless th...

Страница 10: ...ss the or to decrease or increase the power level If the power level returns to 0 the zone switches off Note 1 In standby working mode press the ON OFF key the hob will switch off 2 Press the On Off key if there is no any other action within 1 minute the hob will switch off 3 Every heating zone is independent of each other Double loop function If you want to use bigger heating zone press the Doubl...

Страница 11: ...t the timer by pressing the key Note A single touch of the key will increase or decrease the time by 1 minute pressing and holding the key you can adjust time by 10 minutes 3 Once the desired time is selected release the key 4 After 5 seconds the display will stop flashing and the minute reminder will start to count down 5 The buzzer will beep for 30 seconds when the set time is reached and the di...

Страница 12: ... pots or pans as they may damage the ceramic surface If the surface is damaged cease using immediately and seek a qualified technician Never wash the hob directly with water Never run the hob without cooking pots on it as this may affect the hob s performance After extended use residual heat will remain on the corresponding heating zone Treat with care and caution Keep this electrical appliance ou...

Страница 13: ...cles used for cleaning Light Clean with hot water and damp sponge Cleaning sponge Accumulation of dirt Clean with hot water and abrasive sponge Special cleaning sponge for ceramic glass Rings and lime scale Apply white vinegar to the polluted zone and then wipe it dry with soft cloth Special cleaning agent for ceramic glass Cleaning Maintenance ...

Отзывы: