PFS 710 D3
GB
│
MT
│
35
■
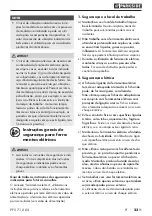
Appliancespecific safety instructions
for sabre saws
To avoid the risk of injury or fire as well as
health risks:
■
Hold the power tool by the insulated
handles if carrying out work during which
the power tool may come into contact with
concealed power cables or its own power
cable.
Contact with a live wire may electrify
exposed metal parts of the power tool and
could give the operator an electric shock .
■
Wear a dust mask!
Original accessories/auxiliary
equipment
■
Use only the accessories and additional
equipment that are specified in the operat-
ing instructions and are compatible with
the appliance.
Using attachments or acces-
sory tools other than those recommended in
the operating instructions can lead to a risk of
injury .
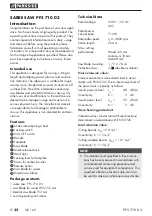
Information on saw blades
You can use any saw blade provided it is fitted with
a suitable mount – 1/2" (12 .7 mm) universal shaft .
Saw blades optimised for your sabre saw are
available from retail stores in different lengths for
various purposes .
NOTE
►
TPI = teeth per inch = the number of teeth per
2 .54 cm
Wood saw blade :
Dimensions: 152 x 1 .25 mm, 6 TPI
Ideal for: sawing construction wood, chipboard,
panels and plywood, and also plunge cuts .
Bimetal saw blade :
Dimensions: 152 mm, 18 TPI
Ideal for: for sawing sheet metal, profiles and pipes
– flexible and break-resistant .
Before use
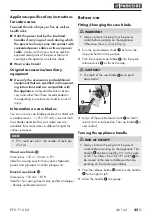
Fitting/changing the saw blade
WARNING!
►
Always remove the plug from the power
socket before working on the appliance .
Otherwise, there is a risk of injury .
♦
Turn the quick-release chuck as far as the
stop and hold it in this position .
♦
Push the required saw blade into the quick-
release chuck as far as the stop .
CAUTION!
►
The teeth of the saw blade must point
downwards!
♦
Let go of the quick-release chuck so that it
returns to its initial position . The saw blade is
now locked .
Turning the appliance handle
RISK OF INJURY!
►
Always remove the plug from the power
socket before working on the appliance . The
handle can be turned by 90° to the right
or left . This allows the ON/OFF switch to
be moved to the most suitable position de-
pending on the working conditions .
♦
Press the release button and turn the handle
to the right or left .
♦
Allow the handle to engage .
Содержание PFS 710 D3
Страница 3: ......


