


6 GB/CY
Introduction
Double bench grinder PDOS 200 A1
For grinding and sharpening metal tools
Introduction
Please make sure you familiarise your-
self fully with the way the device works
before you use it for the first time and
that you understand how to handle electrical power
tools correctly. To help you do this please read the
accompanying operating instructions. Keep these
instructions in a safe place. If you pass the device
on to anyone else, please ensure that you also pass
on all the documentation.
Proper use
The double grinding machine is intended for grind-
ing and sharpening metal tools such as drills, chisels
etc. and metal items. The device is not intended for
commercial use. Any other use or modification to
the device shall be considered as improper use
and could give rise to considerable dangers.
The manufacturer will not accept liability for loss or
damage arising from improper use.
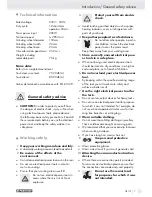
Features and equipment
1
Magnifying glass
2
Eye guard mount
3
Eye guard
4
Grinding wheel
5
Workpiece / tool rest
6
Adjuster screw for workpiece / tool rest
7
Wheel guard cover
8
Mounting holes
9
ON / OFF switch
10
Machine-side flange
11
Left-hand thread
12
Outside flange
13
Nut
14
Fastening screw
Included items
Check that all the items and accessories
are present immediately after unpacking
the device:
1 Double bench grinder PDOS 200 A1 with
- 2 x eye guard mounts / eye guards
- 2 x workpiece / tool rests / adjuster screws
1 Operating instructions
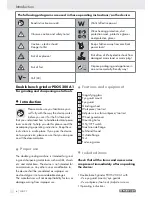
The following pictograms are used in these operating instructions / on the device:
Read instruction manual!
W
Watts (effective power)
Observe caution and safety notes!
Wear hearing protection, dust
protection mask, protective glasses
and protective gloves.
Caution – electric shock!
Danger to life!
Keep children away from electrical
power tools!
Risk of explosion!
Risk of loss of life by electric shock from
damaged mains lead or mains plug!
Risk of fire!
Dispose packaging and appliance in
an environmentally-friendly way!
V~
Volt (AC)
Содержание PDOS 200 A1 - 7
Страница 3: ...A B E F C D 11 10 12 13 1 2 3 5 4 8 9 14 6 7...
Страница 4: ...N G H I K 2 2 M 7 L 5 7 14 2 2 3 3 6 5 6 O 7...
Страница 29: ...29 BG C 30 C 30 C 30 C 31 C 31 C 33 C 34 C 34 C 34 C 35 C 35 C 35 C 35 C 36 C 36 C 36 C 37...
Страница 30: ...30 BG PDOS 200 A1 1 2 3 4 5 6 7 8 9 10 11 12 13 14 1 PDOS 200 A1 2x 2x 1 W W V...
Страница 32: ...32 BG 10 11 12 13 14 15 16 17 18 19 20 21 22...
Страница 33: ...33 BG FI 30mA 30 4 2 3...
Страница 34: ...34 BG 1 2 7 G H 2 3 2 I K 3 5 7 L M 8 C 5 3 2 4 1 6 2 5 4 4 5 2mm 3 6 4 1 14 2 2 4 4 2 2mm 3 14 4 4 5 2 9 I 9 0...
Страница 35: ...35 BG A80M A36M 5 4 4 D E F 1 7 N O 2 13 12 3 11 13 20mm...
Страница 36: ...36 BG 3 BG Kompernass Service Bulgaria 02 4917478 support bg kompernass com 2002 96 EC...
Страница 38: ...38...
Страница 39: ...39 GR CY 40 40 41 41 41 43 44 44 45 45 45 46 46 46 46 47 47...
Страница 40: ...40 GR CY E PDOS 200 A1 1 2 3 4 5 6 7 8 9 10 11 12 13 14 W Watt V Volt...
Страница 42: ...42 GR CY 9 10 11 12 13 14 15 16 17 18 19 20...
Страница 43: ...43 GR CY 21 22 FI 30 mA 30 4 2 3...
Страница 44: ...44 GR CY 1 2 7 G H 2 3 2 I K 3 5 7 L M 8 C 5 3 2 4 1 6 2 5 4 4 5 2 mm 3 6 4 1 14 2 4 4...
Страница 45: ...45 GR CY 2 2mm 3 14 4 4 5 2 9 I 9 0 A80M A36M 5 4 4 D E F 1 7 3 N O 2 13 12 3 11 13 20mm...
Страница 46: ...46 GR CY 3...
Страница 48: ...48...


