INSTALLATION
1.
PARTS REQUIRED
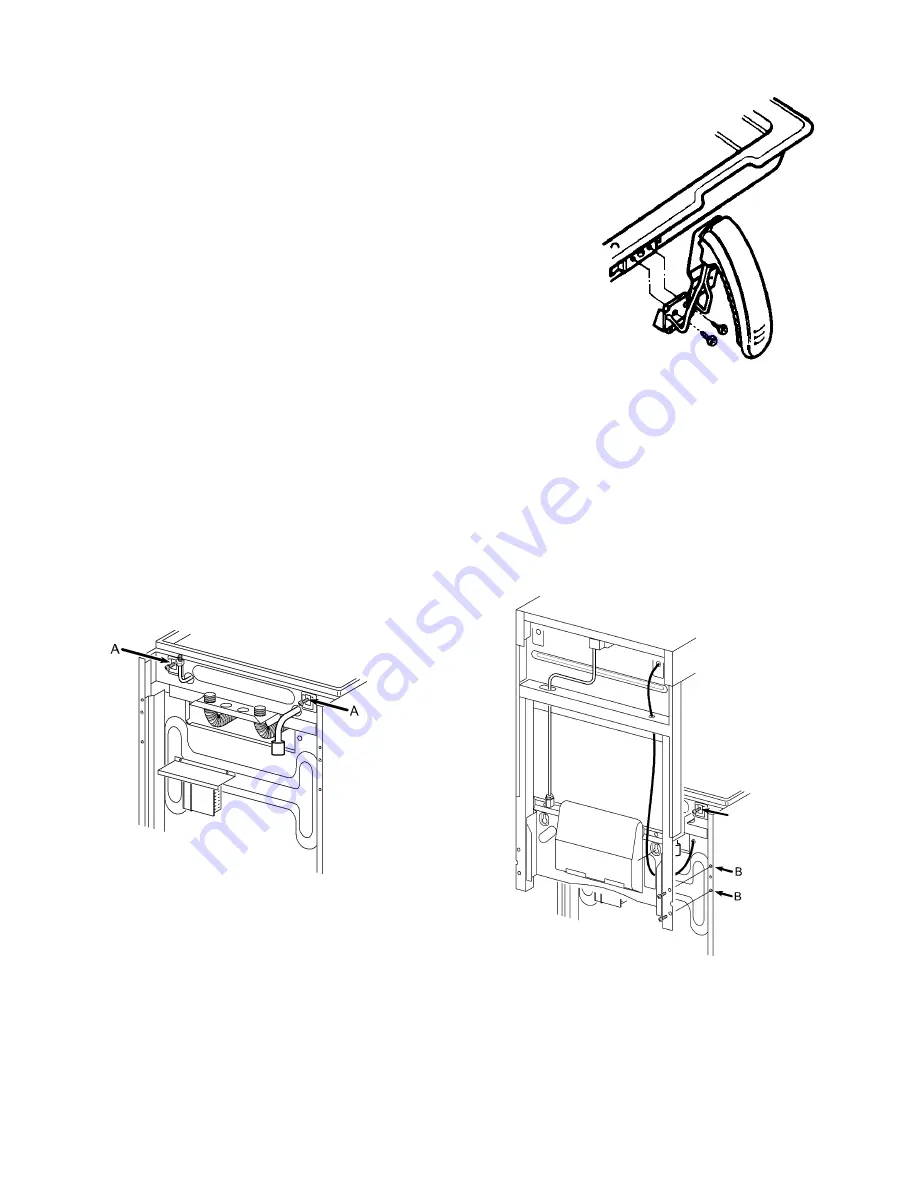
The loose hotplate parts are packed in the polystyrene fitment on the
top of the hotplate. The grill pan, grill pan handle, fixing screws and
splashplate fixing screws can be found in the furniture pack which is
located in the oven. The grill pan requires assembly before use (see
Fig. 1).
2.
GRILL ASSEMBLY
The two splashplate screws marked A (see Fig. 1a) should be
screwed into the back of the appliance about halfway in. Engage the
keyhole slots in the splashback behind the two screws taking care not
to trap the H.T. wire (see Fig. 1b).
Insert the four splashplate screws marked B (see Fig. 1b).
Tighten 6 off splashplate screws (see Fig. 1b).
Connect the grill supply union at the back of the appliance and pull the
grill H.T. lead through the opening in the splashplate. Feed lead through the hole in the top right hand side of
the splashplate and connect on to the grill electrode. (see Fig. 1b).
30
Fig.1a
Fig.1b
Grill Pan Handle Assembly:
Assemble grill pan (see Fig.1)
and secure two screws provided.
Fig
.
1
Содержание LIBRA 3
Страница 1: ...LIBRA 3 Operating and Installation Instructions...
Страница 34: ...34 N O T E S LIBRA 311676800...


