background image

39

Parker Hannifi n Corporation

Hydraulic Pump/Motor Division
Greeneville, Tennessee  USA

Service Manual

HP2 Series Hydrostatic Tandem Pumps

HY13-1521-M1/US

Assembly

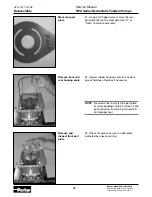
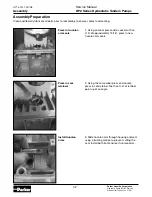
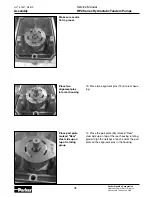
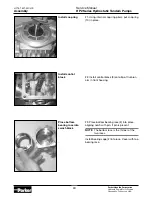
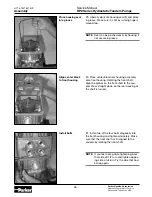
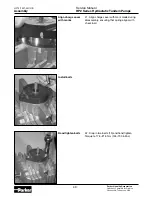
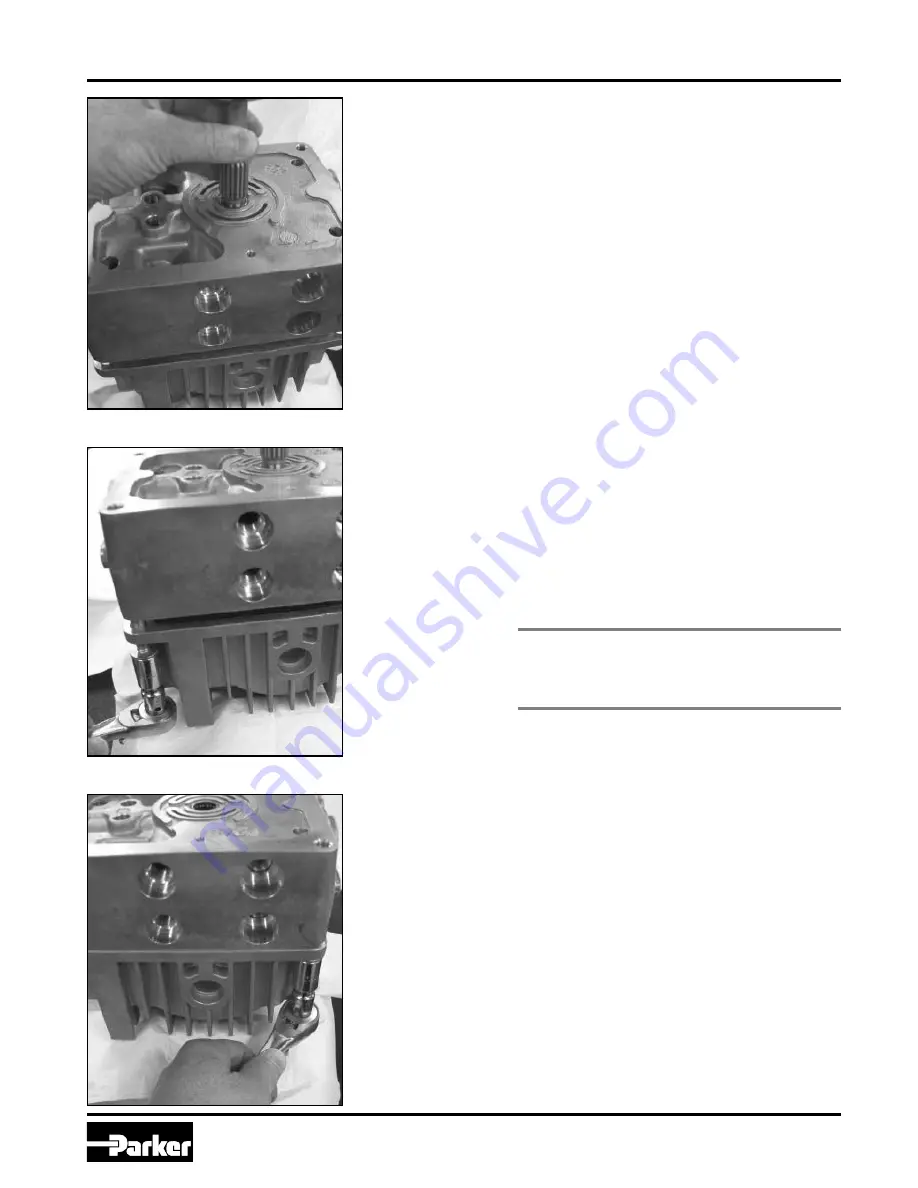
Align center block 
to rear housing

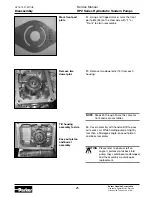
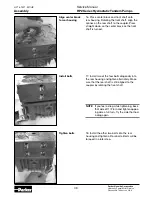
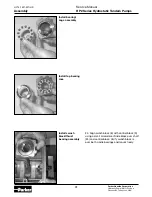
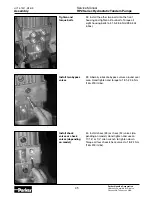
Install bolts

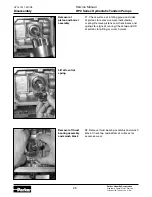
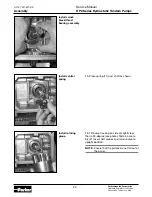
Tighten bolts

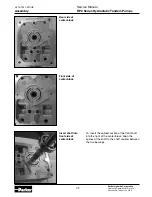
16. Place center block and front shaft onto 
rear housing. Rotating the front shaft, align the 
splines on the rear shaft to the coupler. Press 
straight down on the center block as the front 
shaft is turned.

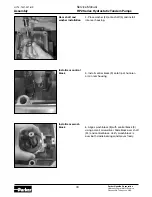
17. Install two of the four bolts diagonally into 
the rear housing and tighten alternately. Make 
sure that the rear shaft is still aligned to the 
coupler by rotating the front shaft.

NOTE  

If you feel a drag while tightening, back 
that side off 1/2 turn and tighten oppos-
ing side a full turn. Try the side that had 
a drag again.

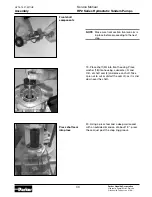
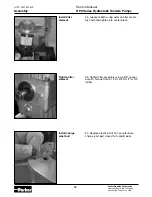
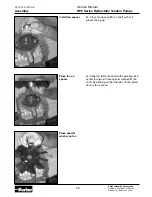
18. Install the other two bolts into the rear 
housing and tighten all four bolts. Bolts will be 
torqued in a later step.

38

Содержание HP2 Series

Страница 1: ...HP2 Series Hydrostatic Tandem Pump Service Procedure HY13 1521 M1 US Parker Hydrostatic Tandem Pumps Effective March 2009 ...

Страница 2: ...portant that you analyze all aspects of your application and review the information concerning the product or system in the current product catalog Due to the variety of operating conditions and applications for these products or systems the user through his her own analysis and testing is solely responsible for making the final selection of the products and systems and assuring that all performan...

Страница 3: ...equired for Servicing 8 Exploded Views 9 12 Section 2 Reseal Repair Disassembly 13 32 Assembly 33 51 Section 3 Maintenance System Maintenance Tips 52 Hydraulic Fluids 53 Filtration 53 Oil Temperature 53 3 3 General Information Definitions Disclaimer 4 Introduction Design Features 5 Troubleshooting Guide 6 Troubleshooting Checklist 7 Tools Materials Required for Servicing 8 Exploded Views 10 11 Res...

Страница 4: ... abnormal wear or damage to the HP2 Tandem Pump or if you en counter circumstances not covered in the Manual STOP CONSULT THE EQUIPMENT MANUFACTURER S SERVICE MANUAL AND WARRANTY DO NOT TRY TO REPAIR OR SERVICE A HP2 TANDEM PUMP WHICH HAS BEEN DAMAGED OR INCLUDES ANY PART THAT SHOWS EXCESSIVE WEAR UNLESS THE DAMAGED AND WORN PARTS ARE REPLACED WITH ORIGINAL PARKER REPLACEMENT AND SERVICE PARTS AND...

Страница 5: ...er approved distributor Servicing the HP2 Tandem Pump should be safe and productive Visit our web site at www parker com pumpmotor HP2 SERIES VARIABLE DISPLACEMENT CLOSED LOOP DUAL PISTON PUMP Large area cooling fins result in a cooler running system Center block and housings are sturdy lightweight aluminum excellent at dispersing heat resulting in an overall cooler system Replaceable bi metal por...

Страница 6: ...efficient hydraulic system Consult the manuals published by equipment and or component manufacturers for maxi mum allowable temperatures and hydraulic tests that may be necessary to run on the performance of the hydraulic components The HP2 Tandem pump is not recommended for hydraulic systems with maximum temperatures above 230 F 110 C Troubleshooting Guide NOTE Before troubleshooting any system p...

Страница 7: ...an Fill or change oil and filter Reduce vehicle load Purge per instructions Check all external connections to inlet 1 Engine speed low 2 Oil level low or contaminated 3 Bypass loose 4 Excessive loading 5 Air trapped in system 6 Inlet leak 7 Clogged inlet filter 8 Suspect internal damage Adjust setting Fill or change oil and filter Tighten Reduce vehicle load Purge per instructions Check all extern...

Страница 8: ...t screwdriver Grease pencil or paint pen Small gear puller 3 8 torque wrench 155 190 in lbs 282 342 in lbs 90 110 in lbs 160 200 in lbs Sockets 3 8 drive ratchet 5 8 9 16 and 13mm 11 16 1 4 Allen 5 16 Allen Allen wrenches 1 4 and 5 16 Combination wrenches 9 16 for fan part only Vise grip pliers Internal snap ring pliers Clean corrosion resistant grease Recommended grease is Mobil Mobilith SHC 460 ...

Страница 9: ...This page intentionally left blank 9 ...

Страница 10: ...INER 22 NUT INSERT NYLON 23 HUB FAN 24 THRUST WASHER 25 PISTON BARREL ASSEMBLY 26 PORT PLATE PUMP 1 27 PORT PLATE PUMP 2 28 HOUSING ASSEMBLY PUMP 1 CRADLE BEARING 29 CENTER BLOCK ASSEMBLY 30 HOUSING ASSEMBLY PUMP 2 CRADLE BEARING 31 SHAFT ASSEMBLY PUMP 1 32 NOT AVAILABLE 33 CHECK VALVE ASSEMBLY 34 FILTER TANDEM TRANSMISSION 35 VALVE BYPASS 36 BACKUP RING 37 O RING 38 TRUNNION ARM 39 SEAL TRUNNION ...

Страница 11: ...4 3 2 2 8 9 5 24 3 17 6 9 33 33 1 14 30 15 19 23 22 21 19 17 16 17 17 11 25 13 27 33 33 20 13 25 11 8 17 17 17 10 18 31 17 28 13 26 29 13 INSTALL FAN WITH PART NUMBER TOWARDS PUMP 2X TORQUE 17 5 21 5 N m 155 190 in lbs 4X TORQUE 18 1 22 6 N m 160 200 in lbs 8X TORQUE 31 9 38 6 N m 282 342 in lbs 2X TORQUE 9 0 11 3 N m 80 100 in lbs 34 37 36 35 35 40 39 38 40 39 38 PARKER HP2 TANDEM PUMP 7 41 Seal ...

Страница 12: ...e HP2 Tandem pump from the system drain it of fluid and take it to a clean work surface Clean and dry the HP2 Tandem pump before you start to disassemble the unit As you disassemble the HP2 Tandem pump clean all parts except seals in clean OSHA approved solvent and air blow them dry WARNING Since they are flammable be extremely careful when using any solvent Even a small explosion or fire could ca...

Страница 13: ...g only mounting flange to prevent damage while servicing NOTE Before troubleshooting any system problem check service literature published by the equipment and or component manufacturers Follow their instructions if given for checking any component other than the HP2 Tandem pump 2 Place an alignment mark on the side of the fan assembly and onto the top of the charge pump cover This will make reass...

Страница 14: ...nessee USA Service Manual HP2 Series Hydrostatic Tandem Pumps HY13 1521 M1 US Disassembly Remove washer Remove fan Remove fan spacer 4 Due to the taper in shaft use an open end wrench to pry fan spacer from one side to the other until loosened or use a small gear puller 13 14 ...

Страница 15: ...ssee USA Service Manual HP2 Series Hydrostatic Tandem Pumps HY13 1521 M1 US Disassembly Remove fan spacer Remove fan spacer Mark charge pump cover to housing 5 Place an alignment mark on the side of the charge pump cover to housing assembly This will make reassembly easier 14 15 ...

Страница 16: ...Motor Division Greeneville Tennessee USA Service Manual HP2 Series Hydrostatic Tandem Pumps HY13 1521 M1 US Disassembly Remove bolts Remove bolts Removal of charge cover 6 Remove two M8 x 1 25 bolts 19 on charge end cover using a 13mm socket 15 16 ...

Страница 17: ...atching for a loose ball and spring lift off charge pump end cover The O ring 16 should be inside the base of the cover Remove and inspect for damage 8 Remove spring 14 and tip pump to remove plastic ball 15 in check valve 9 Lift off the rotor set stator rotor CAUTION Be very careful to not scratch or damage the charge surface on the rear housing as this will result in lower efficiency of charge p...

Страница 18: ...e Manual HP2 Series Hydrostatic Tandem Pumps HY13 1521 M1 US Disassembly Lift off charge pump rotor set Ball removal Remove filter 10 Using a small amount of grease remove check ball 15 from rear housing 11 Using a 5 8 socket remove filter Replace later during reassembly with a new filter 17 18 ...

Страница 19: ...ve shock 33 or check 34 valves on either side of the center block You will use 1 4 wrench insert for check valve 11 16 socket on shock valves NOTE Replace any valve that may have heavy wear marks on the seat area NOTE Lift out valve assembly and check for wear on valve seating surface and re place if necessary Using a light source check seats in center block for wear heavy pitting marks on check v...

Страница 20: ... Greeneville Tennessee USA Service Manual HP2 Series Hydrostatic Tandem Pumps HY13 1521 M1 US Disassembly Check shock valve removal Bypass valve removal Remove bypass valves Mark center block to rear housing 13 Using a 5 8 socket remove the bypass valves 19 20 ...

Страница 21: ...bolts from fan side adjacent to each other Loosen two remaining bolts at fan side housing DO NOT remove Remove four 10mm bolts from front housing 14 Using a 13mm socket remove two of the four bolts from the fan side housing block 15 Loosen slightly the two remaining bolts at the fan side housing block 16 Using a 13mm socket remove all four bolts from the front housing block 20 21 ...

Страница 22: ...e bolts from rear housing and center block 17 Using a gentle rocking motion ease center block assembly 31 off shaft Piston barrel as sembly should be left in the housing NOTE The center block and rear housing as sembly will still be bolted together Turn upside down to finish unbolting CAUTION Take care not to damage the charge rotor area of the housing 18 Using a 13mm socket remove the two loos en...

Страница 23: ...entle rocking motion ease center block assembly 31 off shaft Piston barrel as sembly should be left in the housing 20 Remove rear port plate Dowel pins 13 may remain either inside the housing or come off with the center block The port plate may stick to the housing or center block NOTE Be careful not to scratch the port plate or corresponding contact surface on the pump housing Scratching will res...

Страница 24: ... inspect front port plate 21 Using a felt tipped marker mark the rear port plate 26 on the steel side with R or Rear to aid in reassembly 22 Inspect rubber housing seals for any dam age or hardness Replace if necessary NOTE Be careful not to scratch the port plate or corresponding contact surface on the pump housing Scratching will result in an improper seal 23 Check for excessive wear on port pla...

Страница 25: ... mark the front port plate 26 on the steel side with F or Front to aid in reassembly 25 Remove two dowel pins 13 from each housing NOTE Steps 25 through 30 are the same for front and rear assemblies 26 Cover assembly with hand and tilt to pour out excess oil While holding pump at slightly less than a 90 degree angle ease out piston and barrel assembly CAUTION Please refer to photo at left on angle...

Страница 26: ...bly Lift off central spring Removal of thrust bearing assembly and swash block 27 Check surface of rotating group and sides of pistons for excessive wear indicated by scoring Remove pistons and check bores and springs for signs of scoring Check top and OD of pistons for pitting or scratch marks 28 Remove thrust bearing assembly and swash block Check top and bottom of surfaces for excessive wear 26...

Страница 27: ...Disassembly Removal of thrust bearing assembly and swash block Remove thrust bearing assembly Remove bearing cage and bottom race 29 Remove top washer of bearing race 30 Carefully remove bearing cage and bottom race and check both the race and bearing cage for wear and damage NOTE Check for spalling or galling on the balls and the cage for any damage 27 ...

Страница 28: ...d check for wear Removal of control block Remove seal retaining ring 31 Inspect lower thrust washer for any spalling galling or heavy wear on the bearing race 32 Remove control block from trunnion arm NOTE Remove only if you detect a trunnion or shaft seal leak or for seal replacement 33 To remove the retaining ring holding the seal in place use internal snap ring pliers 28 ...

Страница 29: ...and seal washer 34 Remove pump assembly from vise and hold with shaft approximately two to four inches above work table surface Tap top of shaft with a soft mallet to loosen Keep assembly as level as possible so as not to damage shaft and housing When shaft is free from assembly the washer and seal will fall away 35 Replace shaft seal 4 and seal washer 18 if necessary due to seal leak 29 ...

Страница 30: ...ar housing assembly 36 Remove shaft 5 from rear housing Shaft washer 24 should come out with shaft 37 Pop out trunnion arm from front and rear housings by applying pressure from outside the pump housing 38 To remove the retaining ring holding the trunnion seal in place use a small flat head screwdriver to pop out the ring Pry out the seal and discard NOTE Small bore will be scored from removing th...

Страница 31: ...ssembly Inspection of cradle bearing Removal of cradle bearings NOTE Bearing strips are in the bottom of each housing assembly Bearing strips are removable but if not damaged can be reused and would not require removal 39 Remove cradle bearings only if necessary Cradle bearings can be removed using either a strong magnet or a small flat head screwdriver 31 ...

Страница 32: ...or press and a socket with an O D of approximately 15 16 press in new trunnion arm seals 2 Using the same arbor press and socket press in seal retainer Teeth on O D of retainer point up at an angle 3 Slide trunnion arm through housing and seal using a twisting motion to prevent cutting the seal Install both front and rear trunnion arms Assembly Preparation Clean and liberally lubricate all parts p...

Страница 33: ...asher installation Install rear control block Install rear swash block 4 Place washer 24 onto shaft 5 and install into rear housing 5 Install control block 9 onto tip of trunnion arm in rear housing 6 Align swash block 8 with control block 9 using a small screwdriver Slide block over shaft 24 and control block Verify swash block is over both cradle bearings and moves freely 33 ...

Страница 34: ...dem Pumps HY13 1521 M1 US Assembly Place bottom bearing race into place Install bearing cage assembly Install top bearing race 8 Place bottom bearing race 2 into place aligning notch with pin if pin is present NOTE The bottom race is the thinner of the two races 9 Install bearing cage 2 into race Cover with top bearing race 34 ...

Страница 35: ...al into groove 10 Place spring 11 over rear shaft as shown 11 Tilt pump housing on side at slightly less than a 90 degree angle see photo Slide in as sembly 21 over shaft splines and return pump to upright position NOTE Ensure that the pistons do not fall out of the barrel 12 Liberally lubricate housing seal 3 and place in groove Make sure it is flat by running fingers around top see photo NOTE Se...

Страница 36: ...ure seal is flat in groove Place two alignment pins into rear housing Place port plate marked Rear steel side up on top of rotating group 13 Place two alignment pins 13 into rear hous ing 14 Place the port plate 26 marked Rear steel side up on top of the rear housing rotating group Align the notches at each end of the port plate on the alignment pins in the housing 36 ...

Страница 37: ... Hydrostatic Tandem Pumps HY13 1521 M1 US Assembly Rear side of center block Front side of center block Insert shaft into front side of center block 15 Insert the splined section of the front shaft into the front of the center block Align the splines of the shaft to the shaft coupler between the two bearings 37 ...

Страница 38: ...r shaft to the coupler Press straight down on the center block as the front shaft is turned 17 Install two of the four bolts diagonally into the rear housing and tighten alternately Make sure that the rear shaft is still aligned to the coupler by rotating the front shaft NOTE If you feel a drag while tightening back that side off 1 2 turn and tighten oppos ing side a full turn Try the side that ha...

Страница 39: ... Make sure front section trunnion arm is in place before proceeding to the next step 19 Place shaft 30 into front housing Place washer 18 into housing Lubricate I D and O D of shaft seal 4 and place on shaft Take care not to cut or distort the seal I D as it is slid down over the shaft 20 Using a press tool and a deep well socket with an outside dimension of about 1 9 press the seal just past the ...

Страница 40: ... control block Place bottom bearing race into swash block 21 Using internal snap ring pliers put snap ring 10 in place 22 Install control block 9 onto tip of trunnion arm in front housing 23 Place bottom bearing race 2 into place aligning notch with pin if pin is present NOTE The bottom race is the thinner of the two races Install bearing cage 2 into race Cover with top bearing race 40 ...

Страница 41: ...tic Tandem Pumps HY13 1521 M1 US Assembly Install bearing cage assembly Install top bearing race Install swash block thrust bearing assembly 24 Align swash block 8 with control block 9 using a small screwdriver Slide block over shaft 24 and control block Verify swash block is over both cradle bearings and moves freely 41 ...

Страница 42: ...US Assembly Install swash block thrust bearing assembly Install central spring Install rotating group 25 Place spring 11 over shaft as shown 26 Tilt pump housing on side at slightly less than a 90 degree see photo Slide in assem bly 21 over shaft splines and return pump to upright position NOTE Ensure that the pistons do not fall out of the barrel 42 ...

Страница 43: ...1 M1 US Assembly Installed rotating group Place pins in front housing Place port plate marked Front on top of rotating group 27 Place two alignment pins 13 into front housing 28 Place the port plate 26 marked Front steel side up on top of the front housing rotating group Align the notches of the port plate on the alignment pins in the housing 43 ...

Страница 44: ...ed easily by housing if not secure in groove 30 Place center block rear housing assembly onto front housing Rotating the front shaft align the splines on the front shaft to the cou pler Press straight down on the rear housing as the shaft is turned 31 Install two of the four bolts diagonally into the front housing and tighten alternately Make sure that the front shaft is still aligned to the coupl...

Страница 45: ...nding on model 32 Install the other two bolts into the front housing and tighten all four bolts Torque all eight housing bolts to 31 9 38 6 Nm 282 342 in lbs 33 Liberally lubricate bypass valves around seal area Hand tighten and torque to 18 1 22 6 Nm 160 200 in lbs 34 Install shock 33 or check 34 valves de pending on model Hand tighten and use an 11 16 or 1 4 allen wrench to tighten down Torque a...

Страница 46: ... Assembly Install filter element Tighten filter element Install charge relief ball 35 Lubricate both o ring seals on filter assem bly and hand tighten into center block 36 Tighten filter assembly using a 5 8 socket wrench Torque filter to 12 4 15 8 Nm 110 140 in lbs 37 Replace plastic ball 15 in counter bore charge relief port closest to A and B ports 46 ...

Страница 47: ...charge rotor set Charge rotor set installed Install o ring and spring in charge cover 38 Place rotor and stator over the shaft aligned with the splines of shaft 39 Install new o ring 16 in charge cover 40 Use a small amount of grease to retain the spring 14 and place in charge relief hole in the charge cover corresponding to the charge relief ball in the rear housing 47 ...

Страница 48: ...P2 Series Hydrostatic Tandem Pumps HY13 1521 M1 US Assembly Align charge cover with marks Install bolts Hand tighten bolts 41 Align charge cover with mark made during disassembly ensuring that spring aligns with check ball 42 Drop in two bolts 19 and hand tighten Torque to 17 5 21 5 Nm 155 190 in lbs 48 ...

Страница 49: ...ndem Pumps HY13 1521 M1 US Assembly Install fan spacer Place fan on spacer Place special washer on fan 43 Place fan spacer 23 on shaft with mill groove facing up 44 Slide fan 32 onto shaft with code imprint in center facing up Place special washer 21 on shaft positioning so that the tabs fit into inden tions in fan s center 49 ...

Страница 50: ... USA Service Manual HP2 Series Hydrostatic Tandem Pumps HY13 1521 M1 US Assembly Place nut on shaft and tighten 45 Fasten one 3 8 24 nylon insert nut 22 on the shaft and tighten 10 8 Nm 100 in lbs with 9 16 wrench Replace nylon nut if damaged Nylon insert should be fully engaged 50 ...

Страница 51: ...vestigate and correct any external leak in the hydraulic system no matter how minor the leak Comply with manufacturer s specifications for cleaning or replacing the filter CAUTION Do not weld braze solder or in any way alter any HP2 Tandem pump component CAUTION Maximum operating pressure must not exceed recommended HP2 Tandem pump pressure capacity CAUTION Always carefully inspect any system comp...

Страница 52: ...pump Hydraulic Fluids Keep the hydraulic system filled with one of the following 10W40 SE or SF or manufacturer s suggested oil Hydraulic fluid as recommended by equipment manufacturer but the viscosity should not drop below 50 SUS or contain less than 125 zinc anti wear additives CAUTION Do not mix oil types Any mixture or an unapproved oil could deteriorate the seals Maintain the proper fluid le...

Страница 53: ...54 Parker Hannifin Corporation Hydraulic Pump Motor Division Greeneville Tennessee USA Service Manual HP2 Series Hydrostatic Tandem Pumps HY13 1521 M1 US Notes 53 ...

Страница 54: ......

Страница 55: ......

Страница 56: ...Parker Hannifin Corporation Hydraulic Pump Motor Division 2745 Snapps Ferry Road Greeneville TN 37745 USA Tel 423 639 8151 FAX 423 787 2418 www parker com pumpmotor ...

Отзывы: