10
4.3 Electrical connections
4.3.1 Connecting the electrical Supply
The dryer is supplied with a C14 IEC wireable inlet socket. This socket
should be wired using 1.0mm
2
Tri rated cable. We recommend that
the cable be no longer than 2m in length.
Check the rating plate for the correct supply voltage and frequency.
Connect the electrical power cable, supplied with the equipment, to
the IEC320 socket and engage the wire retaining clip. Connect the
plug directly to the electrical supply, do not use an extension cord.
Note.
The IEC socket has an integral fuse fitted, replacement fuses
should be of the type detailed in the technical specification.
4.3.2 Auxiliary Connections
The dryer can be connected to external control and alarm circuits
using the dedicated terminals on the timer board located inside of the
control box.
Fault Relay Output
This provides a 24Vdc drive for an optional relay (24Vdc 1W max) for
remote indication of a fault condition. Under fault conditions this signal
is removed.
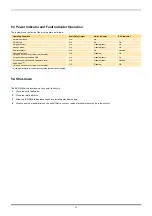
Refer to “Power Indicator and Fault Indicator Operation” on page 14
for operating status of these relays.
Stop / Start (Standby)
The operation of the dryer can be controlled remotely. Applying a
24Vdc signal to this input will put the dryer into standby mode.
External Dewpoint Sensor
The DDS and Dewpoint Alarm Inputs provide the interface with
external dewpoint sensor. Please contact dhFNS for advice.
A fully qualified electrical engineer must undertake all field wiring and electrical work in accordance with local regulations.
#1
#1
1
IEC 60320 - C14 Socket
2
Facia screws
3
Facia
4
Grommet
5
Cable glands
6
Timer board
7
Digital Outputs (O/P)
8
Digital Inputs (I/P)
N
E
L
N E L


