www.paramondo.de
31
Wandmontage • Wall assembly
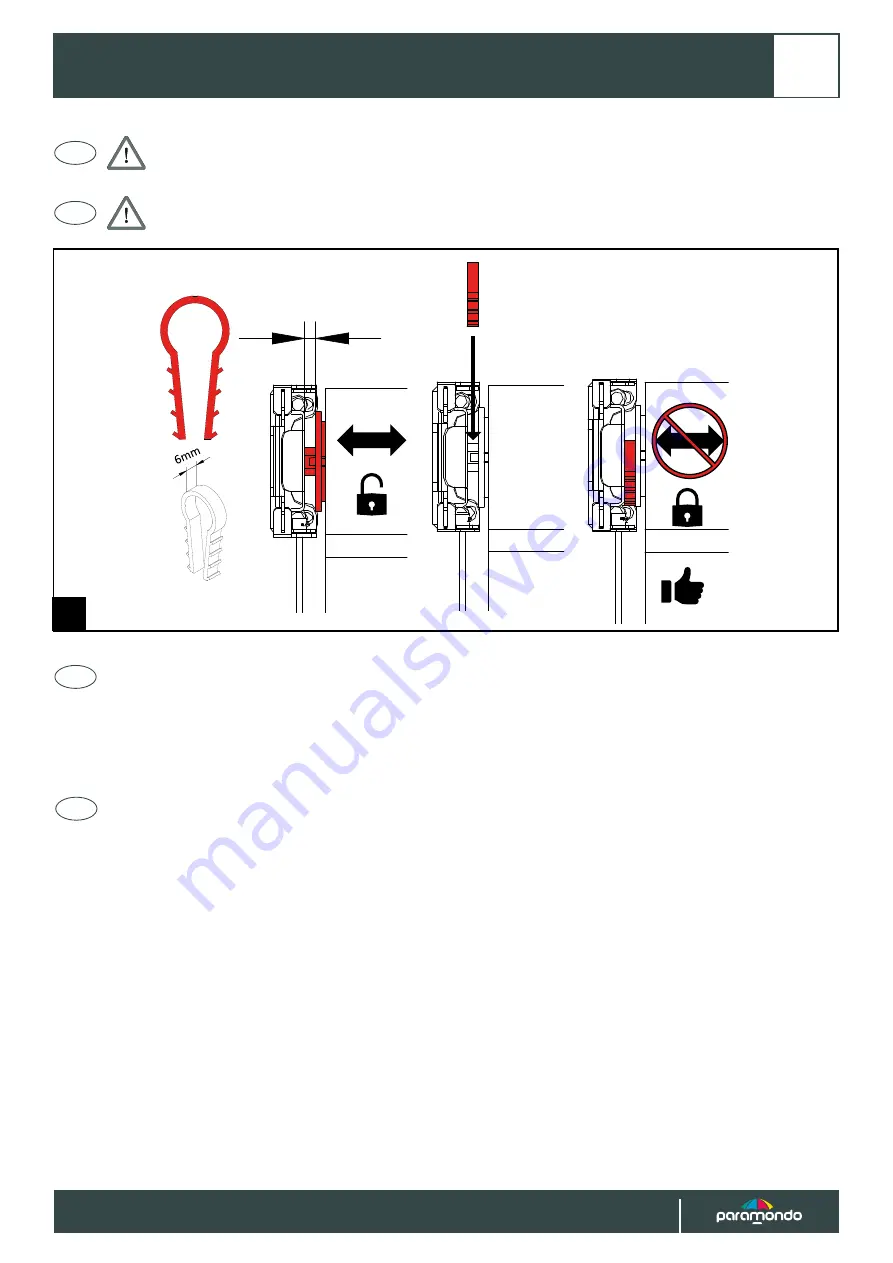
Achtung! Sollte der Abstand zwischen den Haltern zu klein oder zu groß sein,
lösen Sie die Befestigungsschrauben eines Halters und stellen Sie den Versatz ein.
Attention! If the distance between the holders is too small or too large, loosen the fastening
screws of a holder and adjust the offset.
DE
EN
6mm < Z < 8mm
A B C
DE
Sollten Sie sich für die Bedienung mittels B2 Kardan-Kurbelgelenk entschieden haben, fahren Sie
bitte mit den nächsten Seiten dieser Montageanleitung fort.
Für die Montageanleitung zu den Bedienungen mittels A Motor, B1 Kurbel-Gelenk und C Kugelkette
blättern Sie bitte vor bis Seite 42.
EN
If you have decided to use the cardan joint, please continue with the next pages of the assembly
instruction.
The assembly instructions for operation using the A motor, B1 crank joint and C ball chain, please
scroll down to page 42 at this point.
8
Содержание 1000017267
Страница 27: ...www paramondo de 27 Wandmontage Wall assembly A B C O O 4 ...
Страница 28: ...28 www paramondo de Wandmontage Wall assembly A B C Check 5 ...
Страница 30: ...30 www paramondo de Wandmontage Wall assembly A B C 7 ...
Страница 41: ...www paramondo de 41 Wandmontage Wall assembly Setzen Sie die Sicherung ein DE Insert the safety pin EN 20 ...
Страница 43: ...www paramondo de 43 Wandmontage Wall assembly CLICK OR A B C 23 ...
Страница 45: ...www paramondo de 45 Wandmontage Wall assembly A B C A B C 25 ...
Страница 46: ...46 www paramondo de O O Ø 6 mm 6 Wandmontage Wall assembly Bestellhöhe Ordering Height A B C 26 ...
Страница 47: ...www paramondo de 47 Wandmontage Wall assembly O O Ø 2mm Ø 4 9 mm 4 9 mm A B C Bestellhöhe Ordering Height 27 ...
Страница 48: ...48 www paramondo de 2mm 2mm Bestellhöhe Ordering Height A B C Wandmontage Wall assembly 28 ...
Страница 49: ...www paramondo de 49 Wandmontage Wall assembly A B C A B C 29 ...
Страница 50: ...50 www paramondo de Wandmontage Wall assembly O O Ø 4 mm Ø 4 mm B 30 ...
Страница 51: ...www paramondo de 51 Wandmontage Wall assembly Ø 4 mm O O Ø 4 mm C 30 ...
Страница 52: ...52 www paramondo de Wandmontage Wall assembly A B C ...
Страница 58: ...58 www paramondo de Deckenmontage Ceiling Installation O O A B C 5 ...
Страница 59: ...www paramondo de 59 Deckenmontage Ceiling Installation A B C Check 6 ...
Страница 61: ...www paramondo de 61 Deckenmontage Ceiling Installation A B C 8 ...
Страница 63: ...www paramondo de 63 Deckenmontage Ceiling Installation CLICK A B C 10 ...
Страница 65: ...www paramondo de 65 Deckenmontage Ceiling Installation A B C A B C 12 ...
Страница 66: ...66 www paramondo de Deckenmontage Ceiling Installation O O Ø 6 mm 6 Bestellhöhe Ordering Height A B C 13 ...
Страница 68: ...68 www paramondo de Deckenmontage Ceiling Installation 2mm 2mm A B C 15 ...
Страница 69: ...www paramondo de 69 Deckenmontage Ceiling Installation A B C A B C 16 ...
Страница 70: ...70 www paramondo de Deckenmontage Ceiling Installation O O Ø 4 mm Ø 4 mm B 17 ...
Страница 71: ...www paramondo de 71 Deckenmontage Ceiling Installation Ø 4 mm O O Ø 4 mm C 17 ...
Страница 72: ...72 www paramondo de Deckenmontage Ceiling Installation A B C ...
Страница 75: ...www paramondo de 75 Notizen Notes ...


