


February 2003
3-31
1010-A2-GN21-00
3. Solaris Environment
Network NAT
Process Example
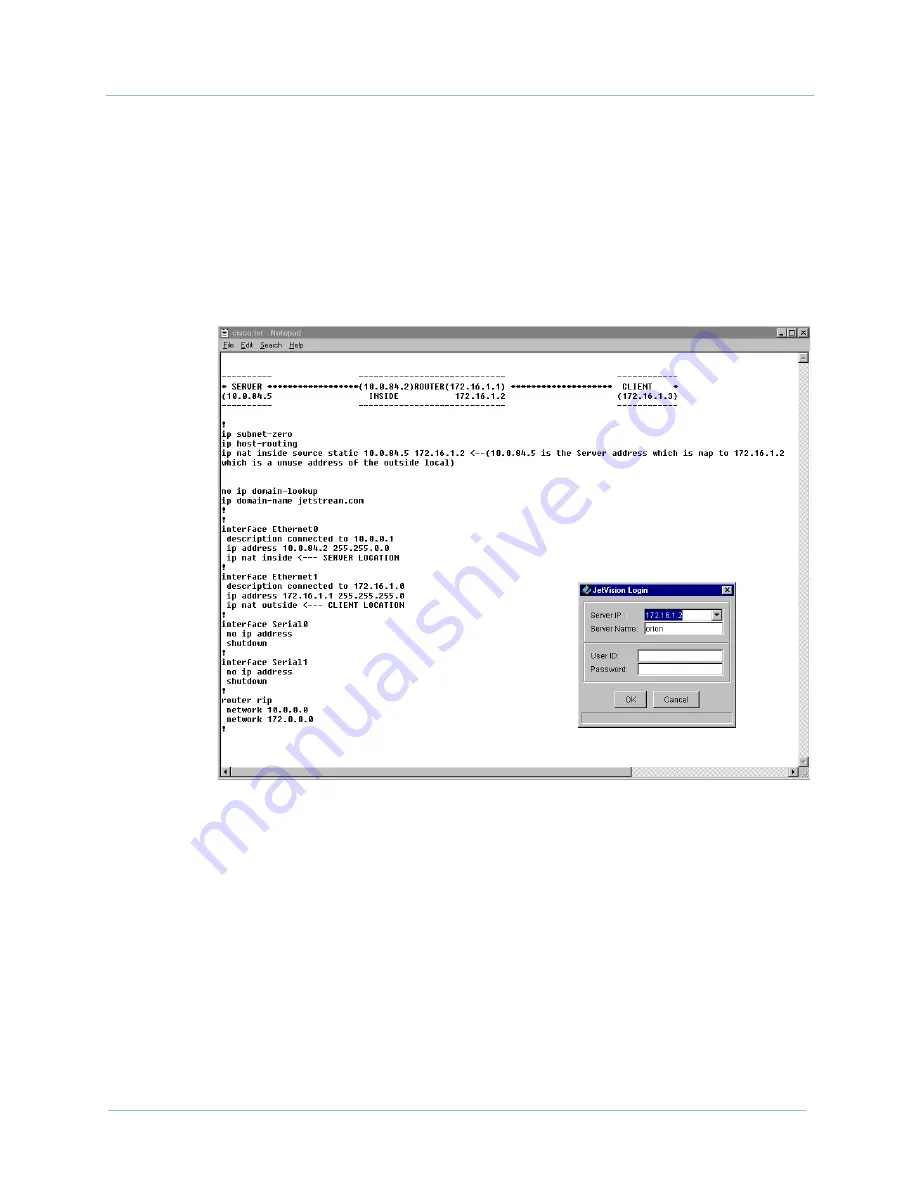
Figure 3–38
shows the IP translation process among JetVision
Server, a router, and JetVision Client. It also shows the proper login
server name and the server IP.
The login address is the one that associates with the outside of the
NAT network; it is an unused address that is local to the NAT
subnet. In this example, the server IP is
172.16.1.2
, and the
server name is
orion
.
Figure 3–38. NAT Process
orion
Содержание Jetstream CPX-1000
Страница 1: ...Jetstream JetVision Installation Guide Release 2 5 Document No 1010 A2 GN21 00 February 2003...
Страница 6: ...E February 2003 1010 A2 GN21 00...
Страница 50: ...2 Windows Environment 1010 A2 GN21 00 2 36 February 2003...
Страница 90: ...3 Solaris Environment 1010 A2 GN21 00 3 40 February 2003...


