background image

BitStorm

™ 

2600

IP DSLAM

Installation Guide

Document No. 2600-A2-GN20-10

January 2004

All manuals and user guides at all-guides.com

all-guides.com

Содержание BitStorm 2600

Страница 1: ...BitStorm 2600 IP DSLAM Installation Guide Document No 2600 A2 GN20 10 January 2004 All manuals and user guides at all guides com a l l g u i d e s c o m...

Страница 2: ...ibutor directly for any help needed For additional information concerning warranty sales service repair installation documentation training distributor locations or Paradyne worldwide office locations...

Страница 3: ...uthorities to ensure compliance 8 A rare phenomenon can create a voltage potential between the earth grounds of two or more buildings If products installed in separate buildings are interconnected the...

Страница 4: ...the equipment includes a ferrite choke or chokes they must be installed per the installation instructions CANADA EMI NOTICE This Class A digital apparatus meets all requirements of the Canadian inter...

Страница 5: ...d of the Voluntary Control Council for interference by Information Technology Equipment VCCI If this equipment is used in a domestic environment radio disturbance may arise When such trouble occurs th...

Страница 6: ...E January 2004 2600 A2 GN20 10 All manuals and user guides at all guides com a l l g u i d e s c o m...

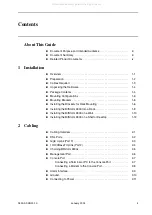
Страница 7: ...ets for Rack Mounting 1 6 Installing the BitStorm 2600 Into a Rack 1 8 Installing the BitStorm 2600 on a Wall 1 10 Installing the BitStorm 2600 on a Shelf or Desktop 1 12 2 Cabling Cabling Overview 2...

Страница 8: ...Management Modes 4 4 Startup Procedure for Inband Management 4 5 Startup Procedure for Out of Band Management 4 5 Using the Web Interface 4 6 System Users 4 7 Configuration Management SNMP 4 7 A Conne...

Страница 9: ...ibes how to install all cables for the BitStorm 2600 Chapter 3 LEDs Explains the meaning and usage of the front panel LEDs Chapter 4 Configuration Describes the minimal configuration steps required to...

Страница 10: ...sentative please call 727 530 2000 Document Number Document Title 2600 A2 GB21 BitStorm 2600 and GranDSLAM 4200 IP DSLAM Command Line Interface Reference 2600 A2 GB22 BitStorm 2600 and GranDSLAM 4200...

Страница 11: ...DSL Model 2621 is interoperable with the Hotwire 6381 ADSL R modem as well as any standard ADSL CPE A Command Line Interface CLI and a web browser interface are provided The unit also may be managed u...

Страница 12: ...BitStorm 2600 units may be mounted in a standard rack as there are 1 75 inch 44 45 mm spaces in the rack so long as adequate cooling is provided Mounted vertically against a wall The standard mounting...

Страница 13: ...g and 8 wire Category 5 or better unshielded twisted pair UTP cable Port 2 10 100BT 8 position modular plug and 8 wire Category 5 or better unshielded twisted pair UTP cable Port 1 10 100BT 8 position...

Страница 14: ...its shipping container and check for physical damage If the unit shows signs of shipping damage notify your sales representative Package Contents In addition to this installation guide the BitStorm 2...

Страница 15: ...nut for racks without threaded holes 4 Dress screw 12 24 x 1 2 for use with self retaining nuts 4 Machine screw with captive starwasher 10 32 x 1 2 for use with racks with threaded holes 4 Captive pa...

Страница 16: ...ith Paradyne Part Number 868 6282 0020 are shipped with the unit Two brackets suitable for a 21 inch 535 mm rack marked ETSI are available from Paradyne as a separate feature see Appendix B Equipment...

Страница 17: ...h racks provided with the mounting brackets in the hardware kit 4 Attach the brackets appropriate to your rack size Tighten all screws firmly 02 17324 23 inch 584 mm EIA and Bay Networks Rack Mount 21...

Страница 18: ...hreaded screw holes Procedure To install the BitStorm 2600 into a rack 1 Determine where in the rack you will mount the BitStorm 2600 If your rack does not have threaded screw holes slip self retainin...

Страница 19: ...T2 10 100BT PORT3 LINK ACT GigE STATUS ALARM TEST ALARM 1 2 23 DSL PORTS 1 24 1000BT 24 3 4 5 6 7 8 9 10 11 12 13 14 15 16 17 18 19 20 21 22 POTS 1 24 PORT1 10 100BT CONSOLE PORT2 10 100BT PORT3 LINK...

Страница 20: ...2600 on a wall 1 Identify the flat head screws provided in the hardware kit and the brackets suitable for a 19 inch rack Two screws are required for each bracket 2 Orient the unit so that the bottom i...

Страница 21: ...them so their heads are about 1 4 inch 6 mm from the wall 7 Hang the unit from the wood screws to verify that the screws are properly placed The screws should freely slide into the top of the key slot...

Страница 22: ...t in the hardware kit provided with the unit 2 Turn the unit upside down on a work surface Squares stamped into the bottom of the unit show the proper positions for the feet 3 Remove the protective sh...

Страница 23: ...possible connections not all of which are required DSL Ports on page 2 2 GigE Uplink Port 3 on page 2 3 10 100BaseT Uplink Port 2 on page 2 4 Chaining BitStorm 2600s on page 2 5 Management Port on pa...

Страница 24: ...applications in Canada Procedure To cable the DSL Ports 1 Insert a cable tie provided through the top of the anchor mount next to the DSL PORTS 1 24 connector 2 If the connector for your cable has a...

Страница 25: ...g unit in a stack of BitStorm 2600s Procedure To use Port 3 as the uplink 1 Connect the uplink cable to the BitStorm 2600 For a wire connection plug the 8 position modular plug of your uplink cable in...

Страница 26: ...f BitStorm 2600s A straight through cable can be used regardless of the destination interface since the port automatically distinguishes between an MDI and an MDIX Procedure To use Port 2 as the uplin...

Страница 27: ...for the stack That unit is using the fiber interface Copper cables connecting Port 2 to Port 2 must be at least 3 feet 0 9 m long Port 3 to Port 3 must be at least 6 feet 1 8 m long Shorter cables may...

Страница 28: ...cedure To use Port 1 as the out of band management port 1 Connect an 8 position modular cable to Port 1 2 If the BitStorm 2600 is in a rack fasten the cable to a rail with a cable tie 3 Connect the ot...

Страница 29: ...inal emulation program to use the following parameters Maximum speed 9600 bps Data bits 8 Parity None Flow Control None Stop bits 1 2 Determine and procure the proper Data Terminal Equipment DTE cable...

Страница 30: ...B9 plug connector to the CONSOLE port socket 3 If the modem will be permanently connected fasten the connector to the Management Module with its captive screws If the BitStorm 2600 is in a rack dress...

Страница 31: ...nnector in Appendix A Connectors and Pin Assignments for more information CAUTION The ALARM Sense and Sense contacts are intended to be connected to an external alarm relay Do not apply power to these...

Страница 32: ...ipped end of 14 AWG or heavier copper ground wire 2 Remove the screw marked by the ground symbol at the right side of the front panel 3 Fasten the ring terminal to the front panel using the same screw...

Страница 33: ...source 1 Insert the supplied power cord into the power socket on the back of the unit 2 If the BitStorm 2600 is in a rack dress the power cord to the left and fasten it to the rail with a cable tie 3...

Страница 34: ...2 Cabling 2 12 January 2004 2600 A2 GN20 10 All manuals and user guides at all guides com...

Страница 35: ...RT1 10 100BT CONSOLE PORT2 10 100BT PORT3 LINK ACT GigE STATUS ALARM TEST ALARM 1 2 23 1000BT 24 3 4 5 6 7 8 9 10 11 12 13 14 15 16 17 18 19 20 21 22 Link LEDs Activity LEDS DSL Ports LEDs 2600 PORT1...

Страница 36: ...rnet link present Ethernet Link present Ethernet link is present but port is administratively disabled Activity Green Off On No data is being transferred Data is being transferred STATUS Green Off On...

Страница 37: ...anage the BitStorm 2600 Inband Out of band through Port 1 This can be performed using the CLI SNMP or the web interface For more configuration information see the BitStorm 2600 and GranDSLAM 4200 IP D...

Страница 38: ...ion mode copy Copy from one file to another date Set the time zone and date format end If user is in Administrator mode shifts to User mode if user is in User mode positions interface at top of menu t...

Страница 39: ...subnet subnet_mask Specifies the subnet mask to be applied to the IP address The default mask is 255 255 255 0 Example PDYN configure management inband address 137 90 127 3 255 255 255 0 configure man...

Страница 40: ...E port See Console Port in Chapter 2 Cabling 2 At the login prompt type admin and press Enter 3 At the password prompt press Enter The default login password is blank 4 At the PDYN prompt type privile...

Страница 41: ...f band management on the same subnet Startup Procedure for Out of Band Management In out of band management you manage the unit through Port 1 Procedure To start up the BitStorm 2600 using out of band...

Страница 42: ...example 3 A login window appears Enter the default User ID admin and leave Password blank Click on OK The web interface screen appears 4 Click on the menu tab appropriate to what you would like to do...

Страница 43: ...appears 2 In the Configured Users box select admin by clicking in the circle next to it 3 Click on Modify Selected The System Users admin screen appears 4 Type in a new Login Password and a new Privi...

Страница 44: ...addresses can be set using the System Management SNMP screen Procedure To set SNMP parameters 1 Click on the Configuration menu tab then click on SNMP The System Management SNMP screen appears 2 Ente...

Страница 45: ...ge A 3 Port 3 1000BaseT Connector on page A 3 Port 3 GigE SFP Connector on page A 4 Console Port Connector on page A 5 ALARM Connector on page A 6 Figure A 1 BitStorm 2600 IP Front Panel DSL PORTS 1 2...

Страница 46: ...nation for this connector is CA21A The connector is labeled POTS 1 24 Table A 1 lists the pin assignments for each of these interfaces Note that Pins 25 and 50 are not used Table A 1 DSL Connector Pin...

Страница 47: ...3 s 1000BaseT interface is an 8 pin unkeyed modular jack Table A 2 Port 1 and Port 2 Pinouts Signal Pin Transmitted Data 1 Transmitted Data 2 Received Data 3 Unused 4 Unused 5 Received Data 6 Unused...

Страница 48: ...is a standard SFP socket Table A 4 Port 3 GigE Connector Signal Pin VeeT 1 TXFault 2 TXDisable 3 MOD DEF 2 I2C_DATA 4 MOD DEF 1 I2C_CLK 5 MOD DEF 0 SFP_PRESENT_L 6 Rate Select 7 LOS 8 VeeR 9 VeeR 10 V...

Страница 49: ...or that supports an EIA 232 E circuit as shown in Table A 5 Table A 5 Console Port Connector RS 232 Signal Direction Pin Data Carrier Detect Out 1 Receive Data Out 2 Send Data In 3 Data Terminal Ready...

Страница 50: ...operation They open in response to loss of power hardware failure or other alarm conditions The maximum rated load for the alarm relays is 30 VDC 1 0 Amp 60 VDC 0 6 Amp 60 VAC 0 6 Amp Table A 6 ALARM...

Страница 51: ...dware and Installation Guide 2611 A1 430 BitStorm 2600 ReachDSL with 600 Ohm POTS Splitter and UK power cord Includes BitStorm 2600 19 and 23 inch mounting brackets and hardware and Installation Guide...

Страница 52: ...L with 600 Ohm POTS Splitter and India power cord Includes BitStorm 2600 19 and 23 inch mounting brackets and hardware and Installation Guide 2621 A1 436 Mounting Brackets for ETSI 21 inch 535 mm Rack...

Страница 53: ...not rely on vertical air flow DSL Compatibility Model 2611 ReachDSL 2 2 Model 2621 G dmt G 992 1 G lite G 992 2 ANSI T1 413 1998 ADSL2 G 992 3 Electromagnetic Compatibility EMC Meets the following sta...

Страница 54: ...7 mm without mounting brackets Depth 16 0 406 mm with cables Power 90 265 VAC 47 63 Hz Power Consumption Model 2611 45 Watts Maximum Model 2621 43 Watts Maximum Weight 2611 A1 420 15 1 lbs 6 8 kg 2611...

Страница 55: ...grounding screw 2 10 Command Line Interface CLI 4 2 commands 4 2 community strings 4 7 configuration 4 1 CLI commands 4 2 mounting brackets 1 6 configuring inband management 4 5 out of band management...

Страница 56: ...esktop 1 12 screws for wall mount 1 11 self retaining nuts 1 8 unit into rack 1 8 unit on wall 1 10 interfaces C 1 J jack screw 2 2 L LEDs 3 1 Link LEDs 3 2 login 4 4 lug for grounding 2 10 M manageme...

Страница 57: ...e 1 8 related documents iv related specifications iii Return key 4 1 RJ21X connectors A 2 RJ45 pinouts A 3 S screws provided 1 5 SFP socket cabling 2 3 pinouts A 4 shelf installation 1 12 shipping car...

Страница 58: ...Index IN 4 January 2004 2600 A2 GN20 10 All manuals and user guides at all guides com...


Отзывы: