Page: 3 of 20
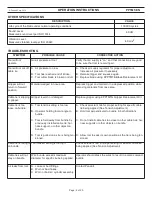
TENSION ADJUSTMENT
There is a tension indicator on the handle of the tool. The tension setting
can be adjusted by turning the selector knob:
1-4 for STD or LH; and 5-8 for HVY.
PPTMT KITS SOLD SEPARATELY • CONTACT PANDUIT FOR MORE INFORMATION
KPPTMTB Blade Replacement Kit - For replacement of a worn blade.
KPPTMTG Gripper Replacement Kit - For replacement of a worn gripper.
TTLK3 Tool Tension Locking Kit - Install to prevent adjustment of the selector knob.
TECHNICAL SPECIFICATIONS -
Air Supply
ITEM
DESCRIPTION
Recommended regulated air pressure to tool (pressures other than
recommended may result in unsatisfactory operation):
Regulator settings: 85 PSIG (5,9 bar) with a max. 10 PSI (0,7 bar)
drop.
DO NOT
EXCEED 90 PSIG (6,2 bar).
Air consumption at 30 cycles per minute:
0.47 cfm @ 85 PSIG (0,222 l/sec @ 5,9 bar)
Line pressure to regulator:
Minimum 80 PSIG (5,5 bar), Maximum 125 PSIG (8,6 bar)
Filter/regulator requirements:
5 micron maximum element rating, 5 PSIG (0,3 bar) maximum
pressure drop @ 80 PSI (5,5 bar) inlet pressure and 12 cfm (5,7
l/sec) flow minimum.
Lubrication for air supply:
Air line lubricators are NOT to be used.
Recommended filter/regulator unit (supplied by user) with 1/8” NPT
ports and 1/4” quick disconnect (industrial interchange) plug:
Recommended source:
Panduit Part Number PL289N1
Recommended main air supply hose (10 ft.) from filter/regulator to
tool (supplied by user); includes a 1/8” NPT male connector (to
regulator) and a 1/8” quick disconnect socket (to tool):
Recommended source:
Panduit Part Number PPH10
© Panduit Corp. 2015
OPERATION INSTRUCTIONS
PPTMT-EN
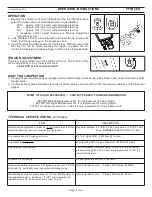
OPERATION
1. Reading the selector knob from the bottom of the tool, flip the knob to
select the cross section of stainless steel ties to be installed:
STD:
Approx. 0.18” (4,6 mm) wide stainless steel ties
LH
Approx. 0.25” (6,4 mm) wide stainless steel ties
HVY:
Approx. 0.31” (7,9 mm) wide stainless steel ties
If necessary, further adjust tension per Tension Adjustment
instructions below.
2. Loop stainless steel tie around bundle and insert the tip through the
head. Pull the tie up snug on the bundle by hand.
3. Insert the tail of the stainless steel tie into the tool. With the nose of the
tool flush to the tie head, squeeze the trigger to tighten the tie.
Continue to depress and release trigger until tool cuts off excess tie tip.
DAILY TOOL INSPECTION
1. Visually inspect movable parts and gripper teeth for metal chips and tie scrap. Keep these areas clear of this and all other
foreign matter.
2. Visually inspect applied stainless steel ties for correct tension and cut-off to verify the working condition of the blade and
gripper.


