© Panduit Corp. 2018
OPERATION INSTRUCTIONS PATMBM4.0
Page: 2 of 4
The following Panduit Automatic Cable Tie Installation Tool Systems: PAT1M4.0, PAT1.5M4.0,
PAT1M4.0-BT or PAT1.5M4.0-BT; shall be referred to as “PAT” Systems.
SHIELD AND CYLINDER INSTALLATION
CAUTION:
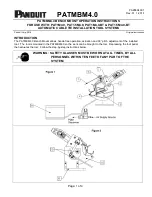
The shield (7) must be in position (as shown in Fig. 01 on
Page 1) to protect the operator’s face from cable ties.
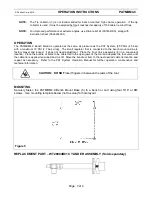
Remove screws from bench mount and attach
shield assembly as shown.
Remove screws from bench mount and attach
cylinder/foot valve assembly as shown.
TOOL HEAD INSTALLATION
Carefully follow the installation procedure for proper operation of the PATMBM4.0 Bench Mount. To adjust the
pitch a 5mm hex wrench is required. There are no tools required for the installation of the tool to the bench
mount.
1. If the PAT System has already been energized for operation, disconnect the female quick disconnect end of
the air hose from the male air inlet on the back of the PDM Dispenser. For PAT System instructions, refer to
Operation Manual (PA27647A01).
2. Loosen the Clamping Plate Knob (2) and lift the Clamping Plate (1) open.
3. Install the PAT tool in the bench mount. Position the tool with the trigger facing (as shown in Fig. 1 on Page
1). Insert the front nose of the tool against the two rubber pads in the Nose Support (4). Push the tool
handle into the clamp until the tool snaps into position. Verify that the Lever (5) is above the tool trigger.
Close the clamping plate and turn clamping plate knob clockwise until tight.
4. Loosen bolts (9) to adjust the angle of the Pitch Plate (10). Rotate Pitch Plate (10) till desired angle for
operation is achieved. Torque bolts (9) to 20 lbf-in, to hold desired tool angle.
5. Connect the female quick disconnect of the mount airline tee to the male air inlet on the back of the PDM
dispenser (refer to Fig. 1 on Page 1). Next, connect the female quick disconnect of the air hose from the air
supply source to the male air inlet of the bench mount airline tee, (refer to
Fig. 1 on Page 1).


