


3
Installation Guide
AT-OMNI-112
HD
MI
PW
R
LINK
TM
O
MNI
S
TREAM
VOLUME
DISPLA
Y
INPUT
ID
1
2
1
2
AT-OMNI-112
ETHERNET
RS-232
DC 48V
RX
TX
1
2
HDMI IN
2
1
2
1
AT-OMNI-112
ETHERNET
RS-232
DC 48V
RX TX
1
2
HDMI IN
2
1
2
1
1
2
1
2
HDMI
PWR
LINK
TM
O
MNI
S
TREAM
VOLUME
DISPLAY
INPUT
ID
1.
Connect an Ethernet cable from the
ETHERNET 1
and
ETHERNET 2
ports on the encoder
to a PoE-capable switch on the Local Area Network (LAN). Note that if a PoE-capable
switch is not available, the 48V DC power supply (sold separately) must be connected to the
encoder.
2.
C
onnect an
HDMI cable from each UHD/HD source to the
HDMI 1
and
HDMI 2
ports on the
encoder.
3.
If using RS-232, connect the included 6-pin Euroblock push-spring connector to the
RS-
232
port on the encoder.
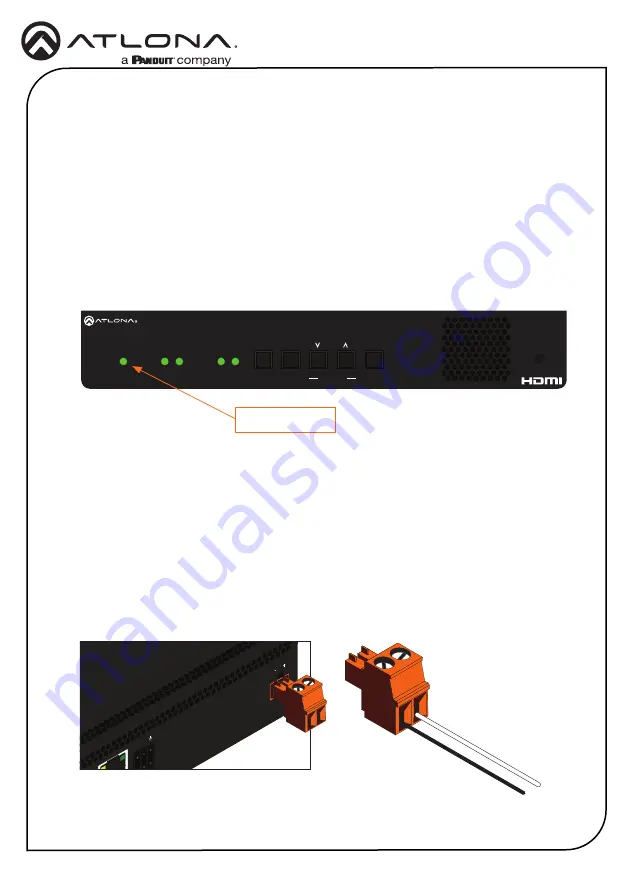
4. The
PWR
indicator, on the front panel, displays the power status of the encoder. When the
encoder is powered, using either PoE or the optional 48V DC power supply (not included),
the LED initially turns red. After a few moments it will turn amber, and finally green.
Installation
The AT-OMNI-112 is powered by PoE (Power over Ethernet), when connected to a PoE-capable
switch. If a PoE-switch is not used, then the optional 48 V power supply (Atlona part no. AT-PS-
48083-C) can be purchased, separately. Insert the positive and negative leads, from the power
supply, into the terminals of the 2-pin captive screw connector block, as shown. The orange
2-pin captive screw connector block is included with the OmniStream power supply package.
Power Supply (optional)
POS
Whit
e
Black
NEG
PWR indicator
Содержание Atlona OmniStream AT-OMNI-112
Страница 7: ...7 Installation Guide AT OMNI 112 Notes...


