


6
Installation Guide
AT-HDR-EX-70-2PS
Updating the Firmware
The follow procedure outlines the firmware update procedure and applies to both the transmitter
and receiver
. Both the AT-HDR-EX-70-2PS firmware and analyzer software will be required for
this process and are available from Atlona.com on the AT-HDR-EX-70-2PS product web page.
1. Download and run the
AT-HDR-EX-2PS Analyzer.exe
file. The software comes with a
ConnectorTool.dll
file. The DLL file must reside in the same folder as the executable, in order
for the software to run.
2. Disconnect power from the unit.
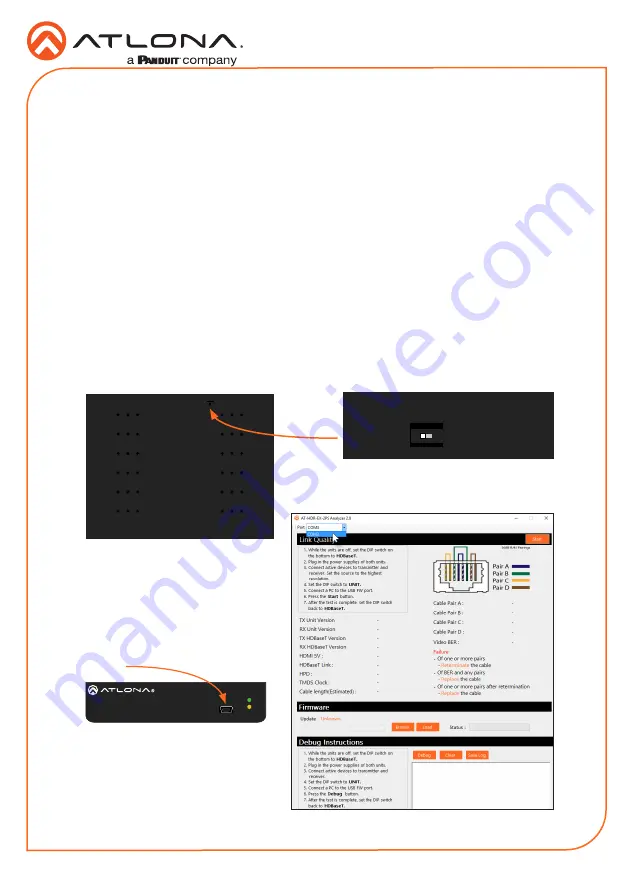
3. Set the DIP switch, on the bottom of the unit, to the
UNIT
position, as shown below.
4. Connect a USB-A to USB mini-B
cable from the computer to the
FW
port on the AT-HDR-EX-70-2PS.
5. Launch the AT-HDR-EX-70-2PS
Analyzer software.
6. Select the proper COM port from
the drop-down list, in the top-left
corner of the software screen.
Requirements
•
AT-HDR-EX-70-2PS-TX / AT-HDR-EX-70-2PS-RX
•
AT-HDR-EX-70-2PS Analyzer software
•
Firmware file
•
Computer running Microsoft Windows®
•
USB-A to mini-B cable
FW
AT-HDR-EX-70-2PS-TX
POWER
LINK
DC 5V
HDBaseT OUT
HDMI IN
ON
1
FW
UNIT
HDBaseT
FW port
FW
AT-HDR-EX-70-2PS-TX
POWER
LINK
DC 5V
HDBaseT OUT
HDMI IN
ON
1
FW
UNIT
HDBaseT
FW
AT-HDR-EX-70-2PS-TX
POWER
LINK
DC 5V
HDBaseT OUT
HDMI IN
ON
1
FW
UNIT
HDBaseT


