Panasonic VL-SWD272 Скачать руководство пользователя страница 10

3.4 Charging the sub monitor

Only connect the charger with the supplied Panasonic
AC adaptor (page 2).

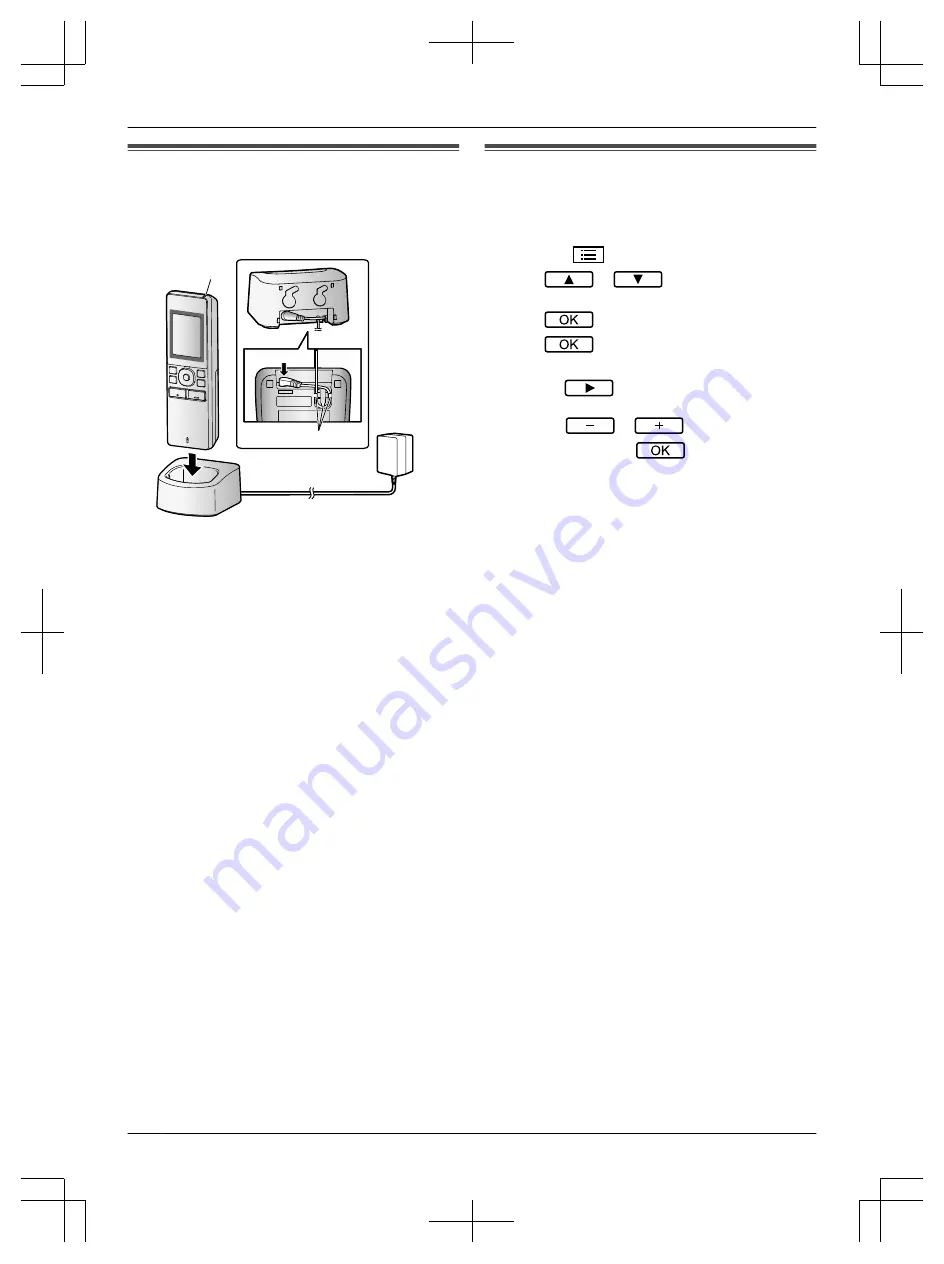
AC adaptor connections


A

*1

B

*1 Press plug firmly.

R

Connect the charger to the power outlet, and then
place the sub monitor in the charger to charge it.
Charging usually takes about 8 hours.

A

 Charge indicator

– when charging: lights
– when charging is completed: off

B

 Hook

Note:

R

The sub monitor does not overcharge even if it is
continuously placed in the charger.

R

When the sub monitor is off the charger or the AC
adaptor is disconnected for 1 week or more, remove
the batteries in order to maintain battery performance
and prevent the batteries from discharging.

3.5 Setting the language, date and
time

R

The play lamp lights if these settings are not
configured.

1

Press the 

M

N

 button to turn on the display.

2

Press 

 or 

 to select the desired

language.

3

Press 

.

4

Press 

 again.

5

Set the date and time.

R

Press 

 to select an item (i.e., year, month,

day, etc.).

R

Press 

 or 

 to change the setting.

6

When finished, press 

.

Note:

R

The date and time settings may be deleted when
there is a power outage. In this case, reconfigure the
settings.

R

The time may become out of sync over time (about
60 seconds per month).

10

3. Preparation

Содержание VL-SWD272

Страница 1: ...d to provide complete protection from property loss Panasonic will not be held responsible in the event that property loss occurs while this system is in operation 1 62 4 chome Minoshima Hakata ku Fuk...

Страница 2: ...sion monitor 2 Product names used in this document Caution R Before attempting to connect or operate this product please read the label on the rear of the main monitor 1 2 Accessory information 1 2 1...

Страница 3: ...urther information about features and operations visit our Web site and find the document http panasonic net pcc support intercom swd272 For Europe Declaration of Conformity R Panasonic System Network...

Страница 4: ...Procedures Usually written in an abbreviated style The verb may be omitted Unless otherwise stated all procedures are for both the main monitor extension monitor and sub monitor Main monitor extensio...

Страница 5: ...he power outlet if the product emits smoke an abnormal smell or makes unusual noise or if the product has been dropped or physically damaged These conditions can cause fire or electric shock Confirm t...

Страница 6: ...gnetic waves Failure to do so may prevent the charger from charging the product Environment main monitor sub monitor R Keep the unit main monitor extension monitor and sub monitor away from electrical...

Страница 7: ...rotect your privacy confidentiality we recommend that you erase the information recorded images from the memory before you dispose of transfer or return the product All the recorded images can be eras...

Страница 8: ...r cannot be correctly operated press the MRESETN button with a pointed object to reset the main monitor Recorded images and configured settings are not affected Soft keys A B A Soft key icons B Soft k...

Страница 9: ...ons sub monitor Battery level Range status The more bars displayed the stronger the signal between sub monitor and main monitor Out of range Indicates the number of the sub monitor being used Indicate...

Страница 10: ...or the AC adaptor is disconnected for 1 week or more remove the batteries in order to maintain battery performance and prevent the batteries from discharging 3 5 Setting the language date and time R T...

Страница 11: ...itor can record doorphone images still images They can save images from up to 50 doorphone calls or monitoring sessions Each time new images are recorded they are saved in an image set of up to 8 imag...

Страница 12: ...e main monitor you can unlock a door or gate using the main monitor R For detailed information about connections see the operating instructions included with the electric lock and the Installation Gui...

Страница 13: ...mpted to register your main monitor select Main monitor 3 Select Extension monitor 4 Select the registration number of the extension monitor to be registered 5 Extension monitor Press M N select Regis...

Страница 14: ...2 Use the keypad to enter the first letter of the resident s name R Press a key repeatedly to scroll through the letters assigned to that key R Note the hints displayed at the bottom of the screen 3 P...

Страница 15: ...ng entrance doors While talking to a visitor or monitoring with a lobby station or camera press 6 3 4 Calling extension telephones 1 Press M N 2 Select the desired extension telephone R Up to 4 extens...

Страница 16: ...m from the camera lens Lighting method LED lights Sub monitor VL WD613 n Main body Power source Rechargeable Ni MH AAA 2 Dimensions mm height width depth Approx 173 52 30 excluding protruding sections...

Отзывы: