background image

English

10

Using the On Screen Displays 

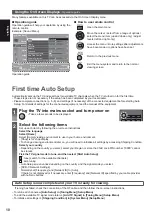
- Operation guide

Many features available on this TV can be accessed via the On Screen Display menu.


Operation guide

Operation guide will help your operation by using the 
remote control.
Example: [Sound Menu]

1/2

0
0

0

11

0

Mode

Standard

Bass
Treble
Equaliser

Headphone Volume

Surround

Auto Gain Control
Volume Correction
Speaker Distance to Wall

Off

Off

Over 30cm

 Main Menu

Picture

Sound

Timer

Setup

Help

Select

Selects your favourite sound 
mode.

Page up

Change

RETURN

Page down

Operation guide

Select

Selects your favourite sound 
mode.

Page up

Change

RETURN

Page down

Balance


How to use remote control

Open the main menu

Move the cursor / select from a range of options / 
select the menu item (up and down only) / adjust 
levels (left and right only)

Access the menu / store settings after adjustments 
have been made or options have been set

Return to the previous menu

Exit the menu system and return to the normal 
viewing screen

First time Auto Setup

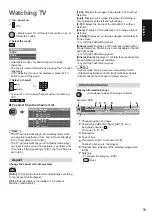
Automatically sets up the TV and searches for available TV channels when the TV is turned on for the first time.

These steps are not necessary if the setup has been completed by your local dealer.

Please complete connections (p. 5 - 8) and settings (if necessary) of the connected equipment before starting Auto 
Setup. For details of settings for the connected equipment, read the manual of the equipment.

1

Plug the TV into mains socket and turn power on

Takes a few seconds to be displayed.

2

Select the following items

Set up each item by following the on-screen instructions.

Select the language
Select [Home]

Select [Home] viewing environment to use in your home environment.

[Shop] is for shop display.

To change viewing environment later on, you will need to initialise all settings by accessing Shipping Condition.

Select your country

Depending on the country you select, select your Region or store the Child Lock-PIN number (“0000” cannot 
be stored).

Tick the TV signal mode to tune, and then select [Start Auto Setup]

:  tune (search for the available channels)
:  skip tuning

Auto Setup screen varies depending on the country and the signal mode you select.

[DVB-C Network Settings]
Normally set [Frequency] and [Network ID] to [Auto].
If [Auto] is not displayed or if necessary, enter [Frequency] and [Network ID] specified by your cable provider 
with numeric buttons.

Auto Setup is now complete and your TV is ready for viewing.

If tuning has failed, check the connection of the RF cable, and then follow the on-screen instructions.

To retune all channels 


[Auto Setup] in [Tuning Menu] (Setup Menu)

To add the available TV signal mode later 


[Add TV Signal] in [Tuning Menu] (Setup Menu)

To initialise all settings 


[Shipping Condition] in [System Menu] (Setup Menu)

Содержание Viera TX-L39EM6Y

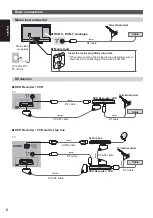
Страница 1: ...ide Accessories 4 Connections 5 Identifying Controls 8 First time Auto Setup 10 Using your VIERA Watching TV 11 Watching External Inputs 12 Using Menu Functions 13 Others Maintenance 13 Specifications 14 For more detailed instructions refer to the Operating Instructions on the CD ROM To view the Operating Instructions on the CD ROM you need a computer equipped with a CD ROM drive and Adobe Reader ...

Страница 2: ...sonic does not guarantee operation and performance of peripheral devices made by other manufacturers and we disclaim any liability or damage arising from operation and or performance from usage of such other maker s peripheral devices ROVI CORPORATION AND OR ITS RELATED AFFILIATES ARE NOT IN ANY WAY LIABLE FOR THE ACCURACY OF THE PROGRAM SCHEDULE INFORMATION PROVIDED BY THE GUIDE PLUS SYSTEM IN NO...

Страница 3: ... tablecloths and curtains Safety Precautions To help avoid risk of electrical shock fire damage or injury please follow the warnings and cautions below Mains plug and lead Warning If you detect anything unusual immediately remove the mains plug This TV is designed to operate on AC 220 240 V 50 60 Hz Insert the mains plug fully into the socket outlet Ensure that the mains plug is easily accessible ...

Страница 4: ...down the volume or temporarily stop using the headphones Battery for the Remote Control Caution Incorrect installation may cause battery leakage corrosion and explosion Replace only with the same or equivalent type Do not mix old and new batteries Do not mix different battery types such as alkaline and manganese batteries Do not use rechargeable batteries Ni Cd etc Do not burn or break up batterie...

Страница 5: ...30 mm Connections External equipment and cables shown are not supplied with this TV Ensure that the unit is disconnected from the mains socket before attaching or disconnecting any leads Check the type of terminals and cable plugs are correct when connecting Always use a fully wired SCART or HDMI cable Keep the TV away from electronic equipment video equipment etc or equipment with an infrared sen...

Страница 6: ...plug firmly into place When disconnecting the mains lead be absolutely sure to disconnect the mains plug at the socket outlet first AV devices DVD Recorder VCR TV DVD Recorder VCR Cable SCART cable RF cable Terrestrial aerial RF cable DVD Recorder VCR and Set top box TV Set top box HDMI cable SCART cable SCART cable DVD Recorder VCR Terrestrial aerial RF cable RF Cable Cable ...

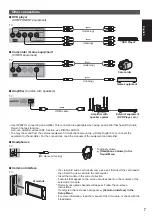
Страница 7: ...nnel sound e g Dolby Digital 5 1ch connect the equipment to the amplifier For the connections read the manuals of the equipment and amplifier Headphones M3 stereo mini plug TV To adjust volume Headphone Volume in the Sound Menu Common Interface TV CI module If a view card and a card reader come as a set first insert the card reader then insert the view card into the card reader Insert the module i...

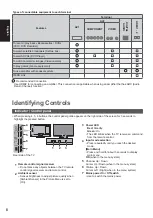
Страница 8: ...nel guide appears on the right side of the screen for 3 seconds to highlight the pressed button 1 Remote control signal receiver Do not place any objects between the TV remote control signal receiver and remote control 2 Ambient sensor Senses brightness to adjust picture quality when Ambient Sensor in the Picture Menu is set to On 3 Power LED Red Standby Green On The LED blinks when the TV receive...

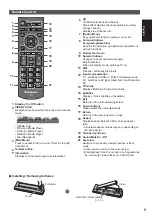
Страница 9: ... Up Down 10 Numeric buttons Changes channel and teletext pages Sets characters When in Standby mode switches TV on 11 Still Freezes unfreezes the picture 12 Input mode selection TV switches to DVB C DVB T Analogue mode AV switches to AV input mode from Input Selection list 13 TV Guide Displays Electronic Programme Guide 14 Subtitles Displays hides subtitles if available 15 Exit Returns to the norm...

Страница 10: ... connected equipment before starting Auto Setup For details of settings for the connected equipment read the manual of the equipment 1 Plug the TV into mains socket and turn power on Takes a few seconds to be displayed 2 Select the following items Set up each item by following the on screen instructions Select the language Select Home Select Home viewing environment to use in your home environment...

Страница 11: ...s the image at the standard 14 9 without distortion Just Displays a 4 3 image full screen Stretching is only noticeable at the left and right edges 4 3 Displays the image at the standard 4 3 without distortion Zoom Displays a 16 9 letterbox or 4 3 image without distortion 4 3 Full Displays a 4 3 image enlarged horizontally to fit the screen For HD High definition signals Sidecut Just Displays a 16...

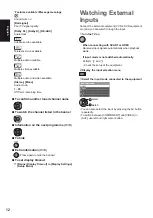
Страница 12: ... input by pressing the AV button repeatedly To switch between COMPONENT and VIDEO in AV2 use left and right cursor button Features available Message meanings Sound mute on Bad signal Poor TV signal quality Dolby D Dolby D HE AAC Audio track Subtitle service available Teletext service available Multiple audio available Multiple video available Multiple audio and video available Stereo Mono Audio mo...

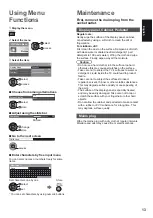
Страница 13: ...ean the dirt or fingerprints For stubborn dirt First clean the dust on the surface Dampen a soft cloth with clean water or diluted neutral detergent 1 part detergent to 100 parts water Wring the cloth and wipe the surface Finally wipe away all the moisture Caution Do not use a hard cloth or rub the surface too hard otherwise this may cause scratches on the surface Take care not to subject the TV s...

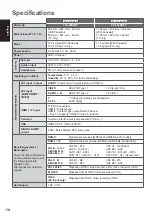
Страница 14: ... PR 0 35 V p p HDMI 1 2 input TYPE A Connectors HDMI1 Content Type HDMI2 Content Type Audio Return Channel This TV supports HDAVI Control 5 function Card slot Common Interface slot complies with CI Plus 1 USB USB2 0 DC 5 V Max 500 mA DIGITAL AUDIO output PCM Dolby Digital DTS Fibre optic Receiving systems Band name Check the latest information on the available services at the following website Eng...

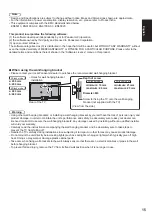
Страница 15: ...stallation a Depth of screw 39 inch model 50 inch model minimum 19 mm minimum 21 mm maximum 20 mm maximum 23 mm Diameter M6 b View from the side Screw for fixing the TV onto the wall hanging bracket not supplied with the TV Warning Using other wall hanging brackets or installing a wall hanging bracket by yourself have the risk of personal injury and product damage In order to maintain the unit s p...

Страница 16: ...ies may be applicable for incorrect disposal of this waste in accordance with national legislation For business users in the European Union If you wish to discard electrical and electronic equipment please contact your dealer or supplier for further information Information on Disposal in other Countries outside the European Union These symbols are only valid in the European Union If you wish to di...

Страница 17: ...algt at købe dette Panasonic produkt Læs denne betjeningsvejledning omhyggeligt inden du begynder at anvende dit apparat og gem den til fremtidig konsultation De i denne betjeningsvejledning viste illustrationer er kun til illustrationsformål Se venligst dit Pan europæiske garantikort hvis du har behov for at kontakte din lokale Panasonic forhandler og få assistance Modelnr TX L39EM6Y TX L50EM6Y D...

Страница 18: ...indhentes fra MPEG LA LLC Se http www mpegla com Panasonic giver ingen garanti for driften og ydeevnen af periferiske enheder der er fremstillet af andre producenter og vi fraskriver os ethvert ansvar eller en enhver beskadigelse opstået i forbindelse med drift og eller ydeevne fra brugen af sådanne periferiske enheder af andre mærker ROVI CORPORATION OG ELLER DETS DATTERSELSKABER ER PÅ INGEN MÅDE...

Страница 19: ...or elektrisk stød brand skade eller kvæstelse bedes du følge advarslerne og sikkerhedsforanstaltningerne beskrevet nedenfor Netstik og ledninger Advarsel Hvis du observerer noget usædvanligt skal du øjeblikkeligt tage stikket ud Dette fjernsyn er beregnet til at fungere ved AC 220 240 V 50 60 Hz Sæt stikket helt ind i stikkontakten Sørg for en nem adgang til stikket Afbryd stikket under rengøring ...

Страница 20: ...ydstyrken eller holde op med at bruge hovedtelefonerne i et stykke tid Batterier til fjernbetjeningen Forsigtig Forkert isættelse af batterier kan resultere i batterilækage ætsning og eksplosion Udskift kun med et af samme slags eller af tilsvarende type Anvend ikke gamle og nye batterier sammen Anvend ikke forskellige typer batterier sammen som for eksempel alkalibatterier og manganbatterier Anve...

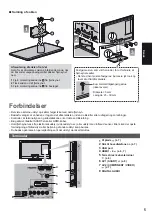
Страница 21: ...ksterne udstyr og kabler følger ikke med dette fjernsyn Bekræft venligst at enheden er taget ud af stikkontakten inden du tilslutter eller udtager nogen ledninger Kontroller at terminaltypen og kabelstikkene er korrekte ved tilslutning Brug altid et tilsluttet SCART stik eller HDMI kabel Hold fjernsynet væk fra elektronisk udstyr videoudstyr osv eller udstyr med infrarød sensor Ellers kan der opst...

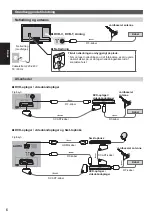
Страница 22: ...ger netledningen ud af forbindelse skal du være absolut sikker på at du tager netledningsstikket ud af kontakten først AV enheder DVD optager videobåndoptager Fjernsyn DVD optager videobåndoptager Kabel SCART kabel RF kabel Jordbaseret antenne RF kabel DVD optager videobåndoptager og Sæt topboks Fjernsyn Sæt topboks HDMI kabel SCART kabel SCART kabel DVD optager videobåndoptager Jordbaseret antenn...

Страница 23: ...d f eks Dolby Digital 5 1ch skal du slutte udstyret til forstærkeren Læs brugsanvisningerne for udstyret og forstærkeren angående tilslutningerne Hovedtelefoner M3 stereo ministik Fjernsyn Regulering af lydstyrken Hovedtlf Styrke i menuen Lyd Almindeligt interface Fjernsyn CI modul Hvis et visningskort og en kortlæser findes som et sæt skal man først sætte visningskortet ind i kortlæseren Sæt modu...

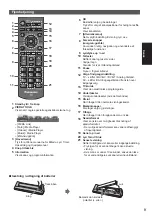
Страница 24: ...en på højre side af skærmen i 3 sekunder og viser den knap der blev trykket på 1 Modtager til fjernbetjeningssignal Placér ikke nogen genstand mellem fjernbetjeningen og signalmodtageren på fjernsynet 2 Rumsensor Registrerer lys for at justere billedkvaliteten når Omgivelsessensor i Billedmenuen er indstillet til Til 3 Strøm LED Rød Standby Grøn Til LED lampen blinker når fjernsynet modtager en ko...

Страница 25: ... tekst tv sider Vælger tegn Tænder for tv et i Standby tilstand 11 Pause Fryser frigiver billedet 12 Valg af indgangsindstilling TV skifter til DVB C DVB T Analog tilstand AV skifter til AV indgangstilstand fra listen over indgangsvalg 13 TV Guide Viser den elektroniske programguide 14 Undertekster Vis skjul undertekster hvis de forefindes 15 Afslut Går tilbage til den normale visningsskærm 16 Mar...

Страница 26: ...det tilsluttede udstyr henvises der til brugsvejledningen for udstyret 1 Slut tv et til stikkontakten i væggen og tænd Det varer et par sekunder inden visningen kommer frem 2 Vælg følgende punkter Opsæt hvert af følgende punkter ved at følge vejledningen på skærmen Vælg sproget Vælg Hjemme Vælg visningsmiljøet Hjemme for at anvende det hjemme hos dig selv Butik er til indkøbsvisning For at skifte ...

Страница 27: ...u 1 BBC ONE Wales 2 BBC THREE 3 BBCi 4 CBBC Channel Alle DVB T kanaler Bemærk Skærmformat Ændr skærmformatforholdet billedstørrelse Automatisk 16 9 14 9 Tilpasset 4 3 Zoom 4 3 Fuld Sidecut Tilpasset Sidecut Zoom Bemærk Informationsbanner Vis informationsbanner 1 ZDF Coronation Street HDTV 20 00 20 55 20 35 45 Alle DVB T kanaler 45 HDTV 2 1 ZDF 1 2 3 6 7 4 5 1 2 3 4 5 6 7 Dansk ...

Страница 28: ...n som er sluttet til udstyret Inputvalg TV Disponible funktioner betydning af meddelelser Svagt signal Dolby D Dolby D HE AAC Stereo Mono 1 90 Bekræftelse af navnet på en ny indstillet kanal Visning af den kanal der står i banneret Information om det næste program Skjule Ekstra information Indstilling af timeout for display Timeout for indikation i Billedindstillinger Opsætningsmenuen Dansk ...

Страница 29: ...ælken 50 Gå til den næste skærm Indtast tegn ved fri indtastningsmenu A B C D E F G H I J K L M N U V W X Y Z Å Æ Ø 0 1 2 3 4 a b c d e f g h i j k l m n u v w x y z å æ ø O P Q R S T 5 6 7 8 9 o p q r s t _ Skriv ind Vedligeholdelse Tag først stikket ud af stikkontakten Displaypanel Kabinet Hylde Almindelig pleje Til genstridigt snavs Forsigtig Netstik Dansk ...

Страница 30: ...PB PR 0 35 V p p HDMI 1 2 indgang TYPE A stik HDMI1 Indholdstype HDMI2 Indholdstype Lydreturkanal Dette fjernsyn understøtter funktionen HDAVI Control 5 Kortsprække Fælles grænseflade stik overholder CI Plus 1 USB USB2 0 DC 5 V Maks 500 mA DIGITAL AUDIO udgang PCM Dolby Digital DTS Fiber optisk Modtagesystemer båndnavn Kontroller den sidste nye information om den tilgængelige service på det følgen...

Страница 31: ...nimum 19 mm minimum 21 mm maksimum 20 mm maksimum 23 mm Diameter M6 b Vist fra siden Skrue til fastgørelse af fjernsynet på vægbeslag leveres ikke med fjernsynet Advarsel Hvis du bruger andre vægophæng eller selv monterer et vægophæng er der risiko for personskade og beskadigelse af apparatet For at opretholde apparatets ydeevne og sikkerhed er det meget vigtigt at man beder forhandleren eller en ...

Страница 32: ...else af elektronikskrot og batterier kan eventuelt udløse bødeforlæg For kommercielle brugere i Den Europæiske Union Når du ønsker at kassere elektriske eller elektroniske apparater bedes du henvende dig til din forhandler eller leverandør for nærmere information Information om bortskaffelse i lande uden for Den Europæiske Union Disse symboler gælder kun inden for Den Europæiske Union Ønsker du at...

Отзывы: