


Advanced
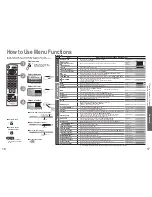
Main menu
Picture menu
Sound menu
Setup menu
Control with HDMI
Setup menu
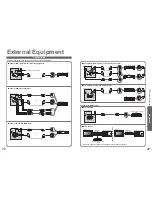
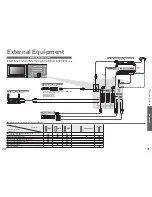
AV2
Q-Link
TOP
On
AV2 out
Monitor
Off
Off
Off
Off timer
Side panel
Power save
System language
Access
DVB Setup Menu
Shipping condition
Teletext
Child Lock
Profile Edit
Tuner Lock
DVB Setup Menu
System Setup
System Update
Access
Access
Teletext
Subtitles
Tuning Menu
Off
ger
ger
Multi Audio
ger
IDTV
EXIT
MENU
OK
MENU
OK
18
19
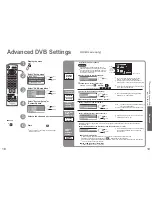
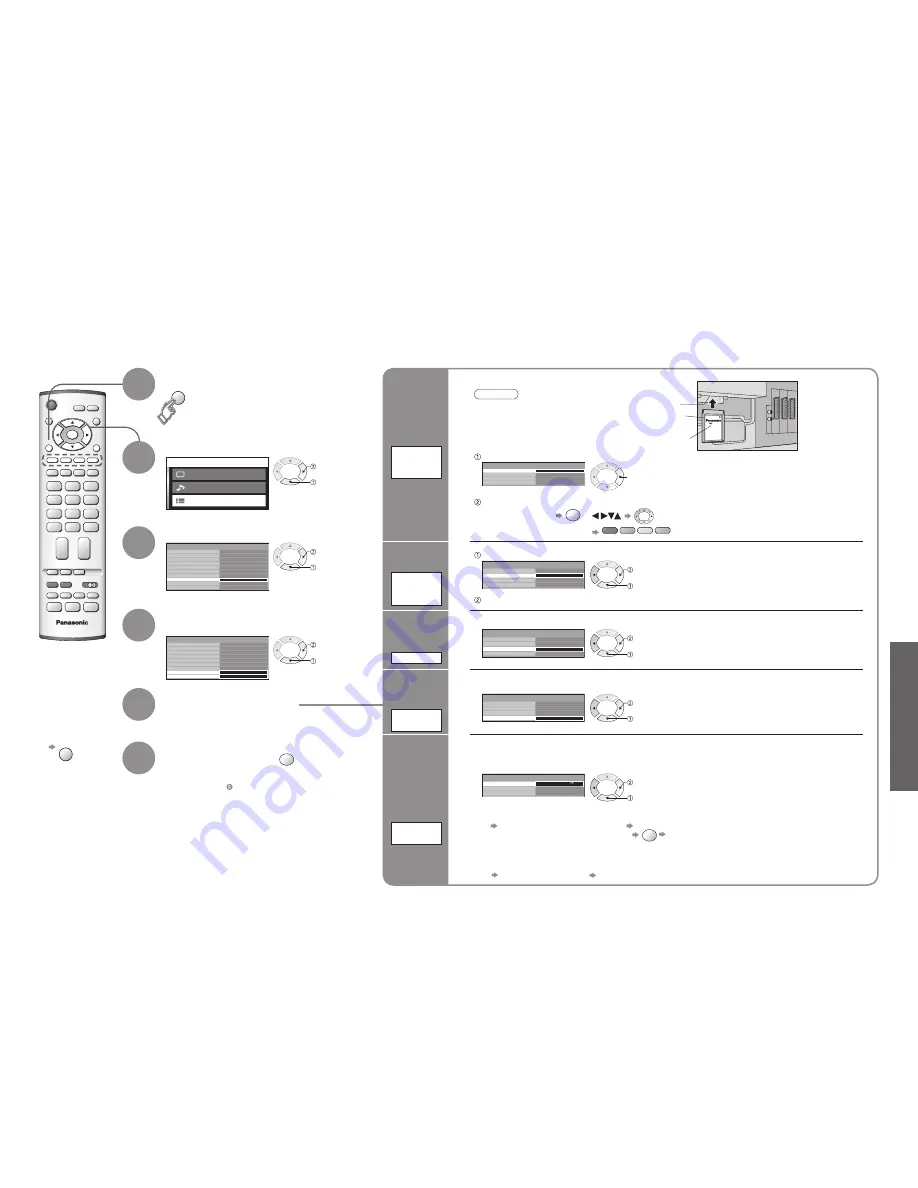
Advanced DVB Settings
3
1
2
4
5
6
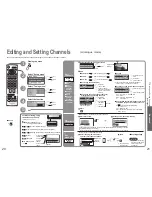
Select "Setup menu"
Select "DVB Setup Menu"
Select "System Setup" or
"System Update"
Display the menu
next
Select a function and set
Store
•
If you exit after , the setting is not stored after
turning off the unit.
■
To exit
EXIT
Pay-TV
Common
Interface
Module
select
next
select
next
select
Information
banner
display time
Display
Timeout
System
Update
Update
unit's
software
system
Language
of subtitles
Preferred
Language
Setting
Adjust the
time data
automatically
Time Zone
(DVB mode only)
Auto
3 seconds
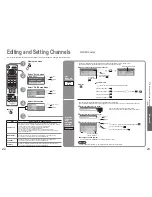
Common Interface Module
Time Zone
DVB System Setup
Access
Display Timeout
Preferred Language Setting
select, go
OK
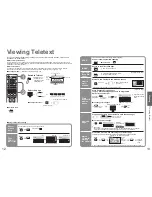
Coloured characters
red
green
yellow
blue
Select "Common Interface Module"
Insert the CI module (optional)
(Rear of the TV)
CI slot
Insert or
remove
squarely
CI module
next
Follow the on-screen instructions
example:
•
For more details, see the manual of the CI
module, or check with the broadcaster.
•
Normally pay-TV services will appear without
following steps 1 and 2 (shown for information only).
•
On-screen operation guide may not correspond
to the remote control buttons.
Caution
•
Turn Off the On / Off switch on the TV unit
whenever inserting or removing the CI module.
•
If a view card and a card reader come as a set,
first insert the card reader, then insert the view
card into the card reader.
•
Advanced DVB Settings (DVB)
(pay-TV
, time, etc.)
Auto
3 seconds
Common Interface Module
Time Zone
DVB System Setup
Display Timeout
Preferred Language Setting
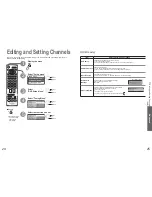
Select "Display Timeout" and set the time
•
0 (No display) to 10 sec. in 1-sec. increments
•
Information banner (p. 10)
set
select
3 seconds
Auto
Common Interface Module
Time Zone
DVB System Setup
Display Timeout
Preferred Language Setting
Select "Time Zone" and set the time
Auto : The time data will be adjusted according to
your area automatically.
Others : The time data will be corrected based on
GMT.
set
select
Auto Update Search in Standby
Software Licence
DVB System Update
On
System Update Search Now
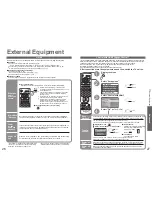
■
To update immediately
Select "System Update Search Now" Searches for an update (for several min.) and
displays a corresponding message if any
OK
Downloads (for about 20 min.)
Select "Auto Update Search in Standby" and then select "On" or "Off"
•
On: Automatically performs a search in standby
at 3:00 AM and 5:00 AM and downloads an
update, if any
Update the software at appropriate intervals to ensure that the unit's performance and functions are updated.
For details (p. 32)
set
select
•
The message might be the notification beforehand. In this case, the schedule information (the date that the
new version can be used) will appear.
■
View software licence information
Select "Software Licence" Display
Access
3 seconds
Auto
Common Interface Module
Time Zone
DVB System Setup
Display Timeout
Preferred Language Setting
Select "Preferred Language Setting"
•
This is the initial language setting for Audio,
Subtitles (p. 11) and Teletext.
next
select
Set the language (Audio, Subtitles, Teletext)


