background image

Others

95

LSQT1157

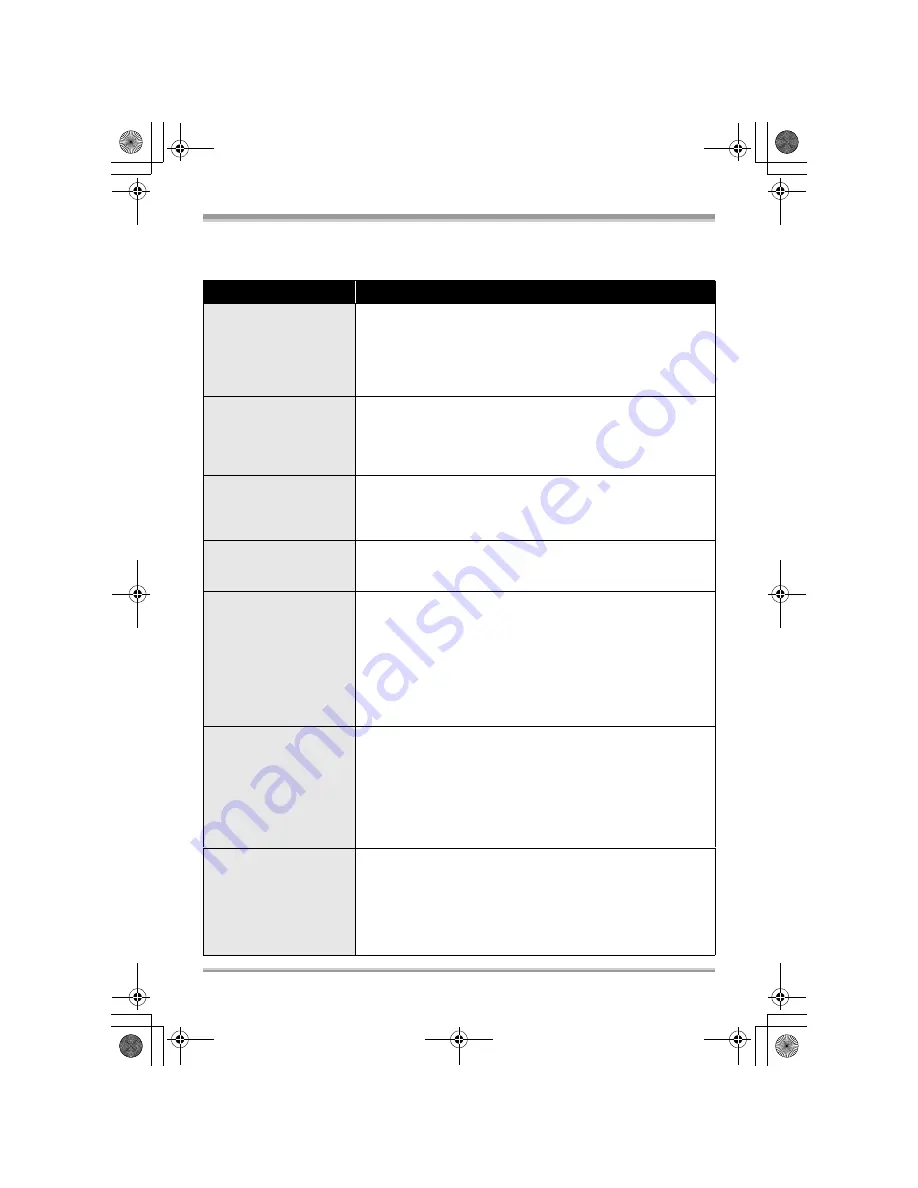
Troubleshooting

Problem

Check points

This unit cannot be 
turned on.

Is the battery fully charged?

#

Charge the battery using the AC adaptor. (

l

24)

The battery protection circuit may have operated. Attach the 
battery to the AC adaptor for 5 to 10 seconds. If the unit still 
cannot be used, the battery is faulty.

Is the LCD monitor opened or the viewfinder extended?

This unit is turned off 
automatically.

If you do not use the unit for approximately 5 minutes, the 
power is automatically turned off to conserve the battery 
charge. To resume recording, turn the power back on.
The power will not turn off automatically when the power save 
function (

l

87) is set to [OFF].

This unit does not stay 
on long enough.

Is the battery low?

#

If the remaining battery power indication is flashing or the 
message “LOW BATTERY.” is displayed, the battery has run 
down. Charge the battery. (

l

24)

A clicking sound is heard 
when the power is turned 
off.

This is the sound of the lens moving and is not a malfunction.

Battery runs down 
quickly.

Is the battery fully charged?

#

Charge it with the AC adaptor. (

l

24)

Are you using the battery in an extremely cold place?

#

The battery is affected by ambient temperature. In cold places, 
the operating time of the battery becomes shorter.

Has the battery worn out?

#

The battery has a limited life. If the operating time is still too short 
even after the battery is fully charged, the battery has worn out 
and can no longer be used. 

This unit cannot be 
operated though it is 
turned on.

This unit does not 
operate normally.

The unit cannot be operated unless you open the LCD monitor 
or extend the viewfinder.

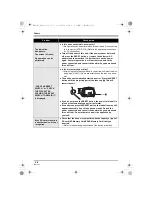
Press the RESET button. (

l

98) If normal conditions are not 

restored yet, remove the battery or AC adaptor, wait about 1 
minute and then reconnect the battery or AC adaptor. Then 
about 1 minute later, turn on the power again. (Conducting the 
above operation when the access lamp is on may destroy the 
data on the disc or card.)

The screen has changed 
suddenly.

Has the demonstration started?

#

If you set [DEMO MODE] to [ON] without inserting a disc or a 
card in video recording mode or picture recording mode, the unit 
is automatically set to the demonstration mode for introducing its 
functions. Normally this should be set to [OFF]. Press the MENU 
button, then select [SETUP] 

#

 [DEMO MODE] 

#

 [OFF] and 

press the joystick.

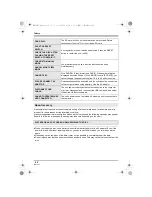
LSQT1157_EB.book  95 ページ  2006年12月11日 月曜日 午後8時46分

Содержание VDR-D310EB

Страница 1: ...Operating Instructions DVD Video Camera Model no VDR D310EB VDR D220EB Before use please read these instructions completely LSQT1157 A LSQT1157_EB book 1 ページ 2006年12月11日 月曜日 午後8時46分 ...

Страница 2: ...The wire which is coloured Brown must be connected to the terminal which is marked with the letter L or coloured Brown or Red WARNING DO NOT CONNECT EITHER WIRE TO THE EARTH TERMINAL WHICH IS MARKED WITH THE LETTER E BY THE EARTH SYMBOL Ó OR COLOURED GREEN OR GREEN YELLOW THIS PLUG IS NOT WATERPROOF KEEP DRY Before use Remove the connector cover How to replace the Fuse The location of the fuse dif...

Страница 3: ...RISK OF ELECTRIC SHOCK OR FIRE HAZARD DUE TO OVERHEATING ENSURE THAT CURTAINS AND ANY OTHER MATERIALS DO NOT OBSTRUCT THE VENTILATION VENTS DO NOT OBSTRUCT THE UNIT S VENTILATION OPENINGS WITH NEWSPAPERS TABLECLOTHS CURTAINS AND SIMILAR ITEMS DO NOT PLACE SOURCES OF NAKED FLAMES SUCH AS LIGHTED CANDLES ON THE UNIT DISPOSE OF BATTERIES IN AN ENVIRONMENTALLY FRIENDLY MANNER The socket outlet shall b...

Страница 4: ...aluable resources and prevent any potential negative effects on human health and the environment which could otherwise arise from inappropriate waste handling Please contact your local authority for further details of your nearest designated collection point Penalties may be applicable for incorrect disposal of this waste in accordance with national legislation For business users in the European U...

Страница 5: ...f the Macrovision Company is required It is prohibited to disassemble or modify the Movie Camera Manufactured under license from Dolby Laboratories Dolby and the double D symbol are trademarks of Dolby Laboratories LEICA is a registered trademark of Leica microsystems IR GmbH and DICOMAR is a registered trademark of Leica Camera AG Other names of systems and products mentioned in these instruction...

Страница 6: ...8 Various recording functions 49 Zoom in out function 49 Recording yourself 50 Backlight compensation function 50 Fade in fade out function 51 Soft skin mode 52 Tele macro function VDR D310 52 Colour night view function 53 Self timer recording 53 Recording guideline function 54 Wide mode 54 Image stabilizer function 54 Wind noise reduction function 55 Manual recording functions 55 Scene mode 55 Ma...

Страница 7: ...ng images onto other video devices 83 With a printer PictBridge 83 Others Menus 86 Menu list 86 Other menus 87 Indications 88 Indications 88 Messages 91 Functions that cannot be used simultaneously 93 Frequently asked questions 94 Troubleshooting 95 Cautions for use 99 Explanation of terms 102 Specifications 104 Number of recordable pictures on an SD card 106 Index 110 LSQT1157_EB book 7 ページ 2006年...

Страница 8: ...iously recorded scene Easy playback l 60 Recorded scenes are displayed as thumbnails You can easily search for the scenes you want to watch Editing scenes l 66 68 You can create an original video playlist by collecting your favourite scenes together and then easily dub this video to a VCR or a DVD recorder hard disk LSQT1157_EB book 8 ページ 2006年12月11日 月曜日 午後8時46分 ...
Страница 9: ...isk Using with a computer VDR D310 Refer to the operating instructions for PC connection You can enjoy editing scenes with the software on the supplied CD ROM and creating original DVD Video discs If you insert a DVD RW or a DVD R disc recorded in this unit that has not been finalized into another device such as DVD recorder computer etc the disc may become unusable Be sure to finalize the disc on...

Страница 10: ...onic UK Ltd It couldn t be simpler Also available through our Internet is direct shopping for a wide range of finished products take a browse on our website for further details Interested in purchasing an extended guarantee Please call 0870 240 6284 or visit our website www panasonic co uk guarantee Accessories Check the accessories before using this unit Battery pack VDR D310 CGA DU12 The supplie...

Страница 11: ...U12 1150 mAh Battery pack lithium CGA DU14 1360 mAh Battery pack lithium CGA DU21 2040 mAh Wide conversion lens VW LW3707M3E VDR D310 Tele conversion lens VW LT3714ME VDR D310 Filter kit VW LF37WE Video DC light VW LDC10E Light bulb for video DC light VZ LL10E Stereo microphone VW VMS2E VDR D310 Tripod VW CT45E 8 cm DVD RAM disc single sided LM AF30E 8 cm DVD RAM disc double sided LM AF60E 8 cm DV...

Страница 12: ... external microphone When the unit is connected with the AC adaptor sometimes noise may be heard depending on the microphone type In this case please switch to the battery for the power supply and the noise will stop 26 Audio video output terminal A V l 80 83 27 Speaker 28 Mode select switch AUTO MANUAL FOCUS l 41 55 56 29 Reset button RESET l 98 30 Card slot cover SD CARD l 31 31 Card access lamp...

Страница 13: ...tor or the ND filter of the Filter Kit VW LF37WE optional is attached use the lens cap included in the Filter Kit 1 Pass the end of the lens cap cord through the belt 2 Pass the lens cap through the loop 3 To attach or remove the lens cap hold both sides of the lens cap with the tips of your finger and thumb During recording The removed lens cap can be attached to the lens cap fixture Using grip b...

Страница 14: ...ting instructions for the tele conversion lens or the wide conversion lens When 2 lens accessories such as the ND filter and tele conversion lens are attached and the W T lever is pressed toward the W side the 4 corners of an image will be darkened Vignetting VDR D220 Rotate the lens hood counter clockwise A to remove it In order to attach it rotate it clockwise B Do not attach the accessories on ...

Страница 15: ...e up to 180o A towards the lens or 90o B towards the viewfinder The brightness and colour level of the LCD monitor can be adjusted from the menu l 39 The unit may be damaged or fail if the LCD monitor is forcibly opened or rotated If the LCD monitor is rotated by 180x towards the lens and the viewfinder is extended when recording yourself the LCD monitor and the viewfinder simultaneously light Pul...

Страница 16: ...l out the battery holder 2 Set the button type battery with its r mark facing upward and then put the battery holder back in place Concerning the button type battery When the button type battery runs down replace it with a new battery part number CR2025 The battery should normally last about 1 year however this depends on how frequently the unit is used Keep the button type battery out of the reac...

Страница 17: ...NENT TYPE NUMBER CR2025 MANUFACTURED BY PANASONIC IT MUST NEVER BE SUBJECTED TO EXCESSIVE HEAT OR DISCHARGE IT MUST THEREFORE ONLY BE FITTED IN EQUIPMENT DESIGNED SPECIFICALLY FOR ITS USE REPLACEMENT BATTERIES MUST BE OF THE SAME TYPE AND MANUFACTURER THEY MUST BE FITTED IN THE SAME MANNER AND LOCATION AS THE ORIGINAL BATTERY WITH THE CORRECT POLARITY CONNECTIONS OBSERVED DO NOT ATTEMPT TO RE CHAR...

Страница 18: ...format DVD Video Recording format VR format DVD Video Recording format VR format DVD Video format Video format Characteristic Rewritable disc Rewritable disc One time recording disc 1 Display on the screen Indication in these instructions RAM RW VR RW V Functions Deleting recorded scenes Editing on this unit Playback on other products 2 3 4 5 Recording after finalizing 6 LSQT1157_EB book 18 ページ 20...

Страница 19: ...roducts 6 Un finalize the disc l 77 Disc type DVD R 8 cm Single sided double sided DVD R DL 8 cm Dual layer on single side DVD R for General Ver 2 0 DVD R for DL Ver 3 0 Recording format DVD Video format Video format DVD Video format Video format Characteristic One time recording disc One time recording disc Display on the screen Indication in these instructions R Functions Deleting recorded scene...

Страница 20: ...able jRecord on a disc with other products after recording on it with this unit jRecord on a disc with this unit after recording on it with other products jInsert an un finalized disc in any other products About format types If a disc is recorded in VR format the data can be exported on a computer About DVD R DL Dual Layer DVD R DL Dual Layer discs have two layers of recording playback surface on ...

Страница 21: ... the screen on the right appears Select YES then press the joystick 2 Select format type then press the joystick 3 When the confirm screen appears select YES then press the joystick To change the format type format the disc again l 77 If the disc is formatted then all the data recorded on the disc will be erased When using brand new DVD RW VIDEO DVD Video format VR DVD Video Recording format LSQT1...

Страница 22: ...use the SD card l 78 We recommend that you use a Panasonic brand SD card When the write protect switch A on SD card is locked no recording deletion or editing will be possible on the card Keep the Memory Card out of reach of children to prevent swallowing A MultiMediaCard cannot be used on this unit Cards that you can use with this unit Card type SD Memory Card SDHC Memory Card Capacity 8 MB 16 MB...

Страница 23: ...e careful about scratches and dirt Do not attach labels or stickers to discs This may cause disc warping and un balanced rotation rendering it unusable Write on the label side of the disc only with a soft oil based felt pen Do not use ballpoint pens or other hard writing implements Do not use record cleaning sprays benzine thinner static electricity prevention liquids or any other solvent Do not u...

Страница 24: ...t the battery holder and slide it until it clicks While sliding the BATTERY lever slide the battery to remove it Hold the battery with your hand so it does not fall Before removing the battery be sure to set the OFF ON switch to OFF and check that the status indicator is off Charging the battery Lights up Charging Goes off Charging completed Flashing The battery is over discharged discharged exces...

Страница 25: ...0 Charging time and recordable time Battery model number Voltage capacity Charging time Supplied battery CGA DU12 optional 7 2 V 1150 mAh 2 h 25 min CGA DU14 optional 7 2 V 1360 mAh 2 h 45 min CGA DU21 optional 7 2 V 2040 mAh 3 h 55 min Battery model number Voltage capacity Charging time Supplied battery CGR DU06 optional 7 2 V 640 mAh 1 h 40 min CGA DU12 optional 7 2 V 1150 mAh 2 h 25 min CGA DU1...

Страница 26: ... 40 min 1 h 30 min 45 min 40 min LP 1 h 45 min 1 h 40 min 45 min 45 min CGA DU14 optional 7 2 V 1360 mAh XP 1 h 45 min 1 h 40 min 45 min 45 min SP 2 h 1 h 50 min 50 min 50 min LP 2 h 5 min 1 h 55 min 55 min 50 min CGA DU21 optional 7 2 V 2040 mAh XP 2 h 50 min 2 h 40 min 1 h 15 min 1 h 10 min SP 3 h 10 min 3 h 1 h 25 min 1 h 20 min LP 3 h 20 min 3 h 5 min 1 h 30 min 1 h 20 min Battery model number...

Страница 27: ...sed This is not a malfunction Be aware that the operating time of the battery will become shorter in low temperatures We recommend charging a spare battery for use when recording CGA DU14 optional 7 2 V 1360 mAh XP 2 h 35 min 2 h 20 min 1 h 5 min 1 h SP 3 h 2 h 40 min 1 h 20 min 1 h 10 min LP 3 h 10 min 2 h 50 min 1 h 25 min 1 h 15 min CGA DU21 optional 7 2 V 2040 mAh XP 3 h 50 min 3 h 30 min 1 h ...

Страница 28: ...y will not charge When recording remove the lens cap before turning the unit on If the unit is turned on with the lens cap attached the automatic white balance adjustment l 102 may not function properly While pressing the button A set the OFF ON switch to ON The status indicator B lights and the power turns on When the unit is turned on for the first time a message asking you to set the date and t...

Страница 29: ...he cover of the disc compartment will not open unless the unit is powered 1 Fit the battery or connect the AC adaptor 2 Slide the DISC EJECT lever once and release it When the power is turned on for the first time after changing the disc or battery the unit carries out a recognition procedure to check that there are no problems with the disc This takes approximately 25 seconds with DVD RAM If you ...

Страница 30: ...spindle grasp the edge of the disc and gently lift it out Take care not to touch the recording playback sides of a disc when inserting or removing it 4 Push the section marked PUSH CLOSE on the cover of the disc compartment to close the cover If you use a new DVD RW it is necessary to format the disc l 21 Identifying recording playback sides of disc Single sided disc The recording playback side is...

Страница 31: ...eattach the battery pack or reconnect the AC adaptor slide the DISC EJECT lever once and then release it A repair disc message may be displayed when the power is turned back on l 92 About recovery Do not insert anything other than the 8 cm DVD RAM DVD RW DVD R or DVD R DL disc into the disc compartment Doing so could cause malfunctions l 20 Examples of discs that cannot be used on this unit Do not...

Страница 32: ...ng the SD card sOperating the OFF ON switch or the mode dial sRemoving the battery or disconnecting the AC adaptor Selecting a mode The mode dial is used to switch between recording and playback modes Rotate the mode dial slowly but surely Rotate the mode dial and set the desired mode pictograph to the position shown in the illustration Do not forcefully rotate the dial How to use the joystick Thi...

Страница 33: ...e the mode dial to select or 1 Move the joystick up down left or right to select the scene to be played back and press the joystick The selected scene is played back on the full screen The operation icon is automatically displayed on the screen 2 Move the joystick up down left or right to operate The operation icon appears or disappears each time the centre of the joystick is pressed 1 Select by m...

Страница 34: ... Tele macro VDR D310 52 In manual mode 3 3 3 White balance 57 2 Iris or gain value 58 1 Shutter speed 58 In manual focus mode 4 4 21 Manual focus adjustment 56 Icon Direction Function Page 1 3 Playback pause 60 4 Stop playback and show thumbnails 60 2 Skip 60 6 Rewind 61 2 Reverse slow frame playback during pause 61 9 1 Skip 60 5 Fast forward 61 1 Forward slow frame playback during pause 61 1 2 1 ...

Страница 35: ...nce 57 2 Iris or gain value 58 1 Shutter speed 58 In manual focus mode 4 4 21 Manual focus adjustment 56 Icon Direction Function Page 1 3 Slide show start pause 64 4 Stop playback and show thumbnails 64 E 2 Playback previous picture during pause 64 D 1 Playback next picture during pause 64 1 2 1 2NEXT NEXT 1 2NEXT 2 2 2 2NEXT NEXT 2 2NEXT 3 3 3 3NEXT NEXT 3 3NEXT 4 4 4 4NEXT NEXT 4 4NEXT LSQT1157_...

Страница 36: ...he help mode is used functions cannot be set When the help mode is used motion pictures and still pictures cannot be recorded Switching the language You can switch the language on the screen display or the menu screen 1 Press the MENU button then select LANGUAGE and press the joystick 2 Select English and press the joystick Using the menu screen Refer to Menu list l 86 for information about the me...

Страница 37: ...em 7 Press the joystick to enter the selection To get back to the previous screen Move the joystick left To exit the menu screen Press the MENU button The menu screen does not appear during recording or playing You cannot start other operations while the menu screen appears The menu screen transition is the same as when the buttons on the main unit are used 1 Press the MENU button 2 Select a menu ...

Страница 38: ... The year will change as follows 2000 2001 2099 2000 The 24 hour system is used to display the time 3 Press the joystick to enter the selection The clock function starts at 00 seconds when the joystick is pressed After pressing the MENU button to finish the setting check the date and time display Changing the date and time display style Press the MENU button then select SETUP DATE TIME desired dis...

Страница 39: ...lect SETUP LCD SET or EVF SET YES and press the joystick 2 Move the joystick up or down to select the item to be adjusted Then move the joystick left or right to make the adjustment The bar display moves LCD SET BRIGHTNESS Brightness of the LCD monitor COLOUR Colour level of the LCD monitor EVF SET BRIGHTNESS Brightness of the viewfinder To adjust the brightness of the viewfinder extend the viewfi...

Страница 40: ...Keep your arms near your body 5 Slightly open your legs When you are outdoors record pictures with the sunlight behind you If the subject is backlit it will become dark in the recording When recording make sure your footing is stable and there is no danger of colliding with another person a ball etc Basic camera positioning 4 5 1 2 3 LSQT1157_EB book 40 ページ 2006年12月11日 月曜日 午後8時46分 ...

Страница 41: ...ents unnecessary recording when you forget to pause recording and walk with the unit tilted upside down while recording continues If the unit continues to be tilted upside down from the normal horizontal position while recording on a disc it is automatically set to recording pause Rotate the mode dial to select Press the MENU button then select SETUP AGS ON and press the joystick The AGS function ...

Страница 42: ...e unit is turned on with the lens cap attached the automatic white balance adjustment may not function properly 1 Turn the unit on 2 Rotate the mode dial to select 3 Open the LCD monitor or extend the viewfinder 4 Press the recording start stop button to start recording To end the recording Press the recording start stop button again to pause recording and are red during recording Do not move this...

Страница 43: ...s While motion picture recording is in progress the recording will not stop even if the LCD monitor is closed and the viewfinder is retracted While WRITING CONTROL DATA TO DISC DO NOT SHAKE THE UNIT is displayed do not disconnect the AC adaptor or remove the battery as doing so may make the disc unusable While motion picture recording is in progress do not disconnect the AC adaptor or remove the b...

Страница 44: ...ced Mosaic pattern noise may appear on a playback image in the following cases jWhen there is a complicated pattern in the background jWhen the unit is moved too much or too fast jWhen a subject with sharp movements has been recorded Particularly if it has been recorded in LP mode Disc type Recording mode XP High quality SP Normal LP Long play DVD RAM Approx 18 min Approx 37 min Approx 75 min DVD ...

Страница 45: ...n with the lens cap attached the automatic white balance adjustment may not function properly 1 Turn the unit on 2 Rotate the mode dial to select 3 Open the LCD monitor or extend the viewfinder VDR D310 4 Press the button halfway in order to adjust focusing For auto focusing only The shutter speed and the iris gain value are fixed and the unit focuses on the subject automatically If O I S l 54 is ...

Страница 46: ...The SD card or the recorded data may be damaged jTurn the unit off jRemove the SD card jOperate the mode dial Other products may degrade or not play back still pictures recorded on this unit To record still pictures clearly When zooming in on the subject with a magnification of 4k or higher it is difficult to reduce the slight shaking from holding this unit by hand We recommend decreasing the zoom...

Страница 47: ...the zoom magnification is high jWhen the unit is shaken jWhen the subject is moving jWhen the subject stands in front of a light source jWhen close subjects and far subjects are included in the same scene jWhen the scene is dark jWhen there is a bright part in the scene jWhen the scene is filled with only horizontal lines jWhen the scene lacks contrast Concerning the focusing area VDR D310 When th...

Страница 48: ... the picture quality Press the MENU button then select BASIC PICT QUALITY desired item and press the joystick Number of pixels and picture quality for still picture recording Icon Aspect Number of pixels 4 3 2048k1512 4 3 1280k960 4 3 640k480 16 9 1920k1080 Icon Aspect Number of pixels 4 3 640k480 16 9 640k360 Still pictures with a high picture quality are recorded Priority is given to the number ...

Страница 49: ...ever during zoom operation the operation sound may be recorded When returning the zoom lever to the original position move it quietly RAM RW VR RW V R If the zoom magnification exceeds 10k VDR D310 32k VDR D220 then the digital zoom function will be activated The maximum magnification provided by the digital zoom can be switched Rotate the mode dial to select Press the MENU button then select ADVA...

Страница 50: ... normal recording Extend the viewfinder to see the picture while recording When the recording aspect is 16 9 the image displayed on the viewfinder screen is squeezed horizontally but this is normal and not a sign of any trouble When the LCD monitor is rotated towards the lens side the icon will not be displayed even if you press the joystick Only some indications will appear on the screen When app...

Страница 51: ...letely disappears recording stops After recording the fade setting is cancelled To cancel fading Select again To select the colour for fade in out The colour which appears in fading pictures can be selected Press the MENU button then select ADVANCED FADE COLOUR WHITE or BLACK and press the joystick If you turn off the power the fade function is cancelled While the fade in fade out function is sele...

Страница 52: ...y focusing only on the subject and blurring the background the image can be impressive The unit can focus on the subject at a distance of approx 50 cm Rotate the mode dial to select or 1 Press the joystick Then move the joystick down to display the icon shown in the illustration 2 Move the joystick right to select If the magnification is 10k or less then it is automatically set to 10k To cancel th...

Страница 53: ...charging time of CCD up to approximately 25k longer than usual so that dark scenes can be recorded brightly For this reason bright dots that are usually invisible may be seen but this is not a malfunction If you turn off the power or operate the mode dial the colour night view function is cancelled If set in a bright place the screen may become whitish for a while SD You can record still pictures ...

Страница 54: ... LINES OFF and press the joystick The guidelines do not appear on the images actually recorded The guidelines are not displayed while rotating the LCD monitor frontward to record yourself RAM RW VR RW V R This allows you to record images compatible with wide screen TVs 16 9 and regular TVs 4 3 Recording images with a 16 9 aspect ratio Rotate the mode dial to select Press the MENU button then selec...

Страница 55: ...D WIND CUT ON and press the joystick To cancel the wind noise reduction function Press the MENU button then select ADVANCED WIND CUT OFF and press the joystick This function s default setting is ON The wind noise reduction depends on the wind strength If this function is activated in strong winds the stereo effect may be reduced When the wind weakens the stereo effect will be restored The wind noi...

Страница 56: ...ording under fluorescent light mercury light or sodium light because the colour and brightness of the playback image may change If you record a subject illuminated with strong light or a highly reflective subject vertical lines of light may appear If the brightness is insufficient the sports mode does not function The 5 display flashes If this mode is used indoors the screen may flicker Portrait m...

Страница 57: ...lect or 1 Set the AUTO MANUAL FOCUS switch to MANUAL The icon shown in the illustration is displayed automatically 2 Move the joystick up to select 3 Move the joystick left or right to select the white balance mode To restore to the automatic adjustment Set the white balance mode to You can also restore the automatic adjustment by setting the AUTO MANUAL FOCUS switch to AUTO White balance This is ...

Страница 58: ...nce adjustment in progress Flashes 2 White balance adjustment in progress Flashes 3 Adjustment completed Lights up When the unit is turned on with the lens cap attached the automatic white balance adjustment may not function properly Please turn the unit on after removing the lens cap When the display flashes the manual white balance previously adjusted is stored Whenever recording conditions chan...

Страница 59: ...uorescent light mercury light or sodium light because the colour and brightness of the playback image may change If you increase the shutter speed manually the gain value will increase automatically depending on how much the sensitivity lowers and the noise on the screen may increase You may see vertical lines of light in the playback image of a brightly shining subject or highly reflective subjec...

Страница 60: ...splayed by moving the joystick If you move and hold the joystick up or down you can advance 8 scenes at a time The screen will not change at this time but the scene numbers and scroll bar display will change so release the joystick when you have arrived at the page with the scene you want to display 3 Press the joystick The selected scene is played back on the full screen The operation icon is aut...

Страница 61: ...d the joystick right during playback until fast forward starts Move and hold the joystick left to rewind Move the joystick again to increase the speed Normal playback is restored when you move the joystick up Operating with the remote control VDR D310 Press the 6 or 5 button 1 Move the joystick up during playback to pause the playback 2 Move and hold the joystick right Slow motion pictures will be...

Страница 62: ... 1 Press the button 2 Press the E or D button Adjust the speaker volume during playback Move the volume lever to change the volume level The further the indicator moves to the right the higher the volume level becomes When the adjustment is completed the volume setting display will disappear Frame by frame playback To adjust the volume Towards r increases the volume Towards s decreases the volume ...

Страница 63: ...scenes exceeds 99 RAM RW VR RW V R jWhen the disc is removed RW V R jWhen the REC ASPECT setting is changed RW V R jWhen the disc is repaired RW V R jWhen the layers switch on a DVD R DL R Press the MENU button then select PLAY SETUP RESUME PLAY ON and press the joystick If playback of a motion picture is stopped R appears on the thumbnail view of the stopped scene If playback is stopped at any po...

Страница 64: ... is automatically displayed on the screen 4 Move the joystick to operate About still picture compatibility This unit is compliant with the unified standard DCF Design rule for Camera File system established by JEITA Japan Electronics and Information Technology Industries Association The file format supported by this unit is JPEG Not all JPEG formatted files will be played back If a non standard fi...

Страница 65: ...k file recorded in a different format or file data is defective an error message may appear The time displayed may be different from the recording time and it may take time to display the thumbnail display when playing back still pictures recorded on another product The power will not turn off when the LCD monitor and the viewfinder are closed and retracted LSQT1157_EB book 65 ページ 2006年12月11日 月曜日 ...

Страница 66: ...ed scene is encircled by a red frame When the joystick is pressed again the selected scene will be cancelled Up to 8 scenes displayed on a page can be set in succession 4 Only when SELECT is selected in step 2 Press the button 5 When the confirmation message appears select YES then press the joystick Only when SELECT is selected in step 2 To continue deleting other scenes Repeat steps 3 5 To compl...

Страница 67: ...cted scene is played back 3 When you reach the area where you want to divide the scene move the joystick down to set the dividing point Using slow motion playback or frame by frame playback makes it easy to search for the point where you want to divide the scene l 61 4 When the confirmation message appears select YES then press the joystick To continue dividing other scenes Repeat steps 2 4 To com...

Страница 68: ... your favourites from the recorded scenes Since the playlist is not created by copying data you will consume little of the disc capacity by making a playlist If you create or delete playlists the original scenes will not be modified Editing scenes on a playlist will not affect the original scenes A Recorded scenes B Playlist The maximum number of items on a disc per side jPlaylists 99 jPlaylist sc...

Страница 69: ...ne to the same playlist Select ADD l 70 To playback a playlist Select the scene to start playback then press the joystick RAM RW VR Rotate the mode dial to select 1 Press the MENU button then select PLAY SETUP PLAYLIST VIEW LIST and press the joystick 2 Select the playlist to be played back then press the joystick Scenes in the selected playlist are displayed as thumbnails 3 Select the scene to st...

Страница 70: ...e will be cancelled Up to 8 scenes displayed on a page can be set in succession 4 Only when SELECT is selected in step 2 Press the button 5 When the confirmation message appears select YES then press the joystick Only when SELECT is selected in step 2 To continue deleting other scenes Repeat steps 3 5 To complete editing Press the MENU button You can also delete scenes by pressing the MENU button ...

Страница 71: ...ere added to is displayed To continue adding scenes to the playlist Repeat steps 1 4 The scenes in a playlist can be moved Select playlist playback mode l 69 steps 1 and 2 1 Press the MENU button then select EDIT MOVE YES and press the joystick 2 Select the scene to be moved then press the joystick The selected scene is encircled by a red frame and the position to insert is shown by a yellow bar 3...

Страница 72: ... joystick To continue dividing other scenes Repeat steps 2 4 To complete editing Press the MENU button Two consecutive scenes can be combined into one Combining scenes on a playlist will not affect the original scenes Select playlist playback mode l 69 steps 1 and 2 1 Press the MENU button then select EDIT COMBINE YES and press the joystick 2 Select the scene to be combined then press the joystick...

Страница 73: ...ress the button 5 When the confirmation message appears select YES then press the joystick Only when SELECT is selected in step 2 To continue deleting other files Repeat steps 3 5 To complete editing Press the MENU button Deleting still picture files recorded on an SD card by other products A still picture file other than JPEG that cannot be played back on this unit may be erased You can also dele...

Страница 74: ... can write the data of the still pictures to be printed and the number of prints DPOF data onto the SD card Rotate the mode dial to select 1 Press the MENU button then select PHOTO SETUP DPOF SET SET and press the joystick 2 Select the file to be set then press the joystick The number of prints set to be in DPOF is displayed 3 Move the joystick up or down to select the number of prints then press ...

Страница 75: ...l Print Order Format This enables picture printing information to be written onto an SD card so that it can be used on a system supporting DPOF The DPOF setting can be established for up to 999 files DPOF setting made on other devices may not be recognized by this unit Please perform the DPOF settings on this unit You cannot add the recording date to pictures to be printed with the DPOF settings L...

Страница 76: ...back the disc on a DVD player Titles are displayed by recording date on the top menu However when PLAY MODE is set to BY DATE to view scenes by recording date some scenes recorded on the same date may be separated l 63 These scenes will be displayed as separate titles on the top menu It may take time to finalize a disc If this unit becomes hot or is shaken strongly or impacted while finalizing the...

Страница 77: ...tate the mode dial to select 1 Press the MENU button then select DISC SETUP DISC PROTECT and press the joystick 2 When the confirmation message appears select YES then press the joystick To release disc protection 1 Press the MENU button then select DISC SETUP DISC PROTECT and press the joystick 2 When the confirmation message appears select YES then press the joystick If the disc has been protect...

Страница 78: ...This unit may not recognize some discs that have been formatted using a computer or a device other than this unit RAM RW VR RW V R Information such as the number of recorded scenes the remaining space and whether or not the disc is finalized or protected is displayed Rotate the mode dial to select or Press the MENU button then select DISC SETUP INFORMATION YES and press the joystick To exit the in...

Страница 79: ... is formatted on other products such as a computer the time spent for recording may become longer and you may not be able to use the SD card Depending on the type of SD card being used it may take time to format During formatting do not turn this unit off When you format the SD card use a battery with sufficient battery power or the AC adaptor Do not remove the SD card while formatting LSQT1157_EB...

Страница 80: ...setting input switch For more information please read the operating instructions for the TV If the images are not displayed correctly on a wide screen TV adjust the aspect setting on the TV Refer to the operating instructions of the TV for details If the pictures are displayed squeezed horizontally on a regular TV 4 3 change the TV ASPECT setting on this unit l below To watch images with a 16 9 as...

Страница 81: ...d cannot be recovered When playing back a disc on a DVD recorder player place the device so that the disc lies flat RAM RW VR 1 Only when playing back a DVD RW VR format Finalize the disc on this unit l 76 2 Insert the disc in the playback device and then play it back Playback is only possible on devices that support 8 cm DVD RAM or DVD RW VR format Refer to the operating instructions of the playb...

Страница 82: ... R Finalize the disc on the unit l 76 2 Insert the disc in the DVD recorder then dub the contents onto the hard disk For details on how to dub the images onto the hard disk refer to the operating instructions of the DVD recorder If your DVD recorder has an SD card slot you can write the still picture files recorded on an SD card with this unit to a disc or the hard disk You cannot record images th...

Страница 83: ...evice and TV The channel set will differ depending on the terminal to which the unit is connected 4 Start playback on this unit Then start recording on the connected device See the operating instructions of the video device for details To stop dubbing Stop recording on the connected device Then stop playback on this unit If the date and time display and function indication are unnecessary cancel t...

Страница 84: ...ting on DATE PRINT If the printer is not capable of date printing this setting is unavailable 7 Select the paper size setting on PAPER SIZE You cannot set paper sizes not supported on the printer 8 Select the layout setting on PAGE LAYOUT You cannot set page layouts not supported on the printer 9 Select PRINT YES and press the joystick The pictures are printed Exit PictBridge by disconnecting the ...

Страница 85: ...ed when VDR D310 VDR D220 is set may be cut at printing Check before printing When using a printer with a trimming or borderless printing function cancel this function before printing Refer to the operating instructions of the printer for details You may not be able to print still pictures recorded with other products When the unit is connected directly to the printer the DPOF settings cannot be u...

Страница 86: ...T l 39 EVF SET l 39 INITIAL SET l 88 DEMO MODE l 88 LANGUAGE l 36 Still picture recording menus BASIC SCENE MODE l 55 GUIDE LINES l 54 PICTURE SIZE l 48 PICT QUALITY l 48 CLOCK SET l 38 ADVANCED O I S l 54 SHTR EFFECT l 47 SETUP DISPLAY l 87 DATE TIME l 38 DATE FORMAT l 38 FORMAT CARD l 78 POWER SAVE l 87 BEEP SOUND l 87 LCD SET l 39 EVF SET l 39 INITIAL SET l 88 DEMO MODE l 88 LANGUAGE l 36 Motio...

Страница 87: ...l 36 DISPLAY The screen indications are selected as shown in the illustration below POWER SAVE OFF The power saving function is not activated 5 MINUTES When about 5 minutes have passed without any operation this unit automatically turns off to prevent the battery from running down When you use this unit turn it on again In the following cases the unit may not turn off even when you set this to 5 M...

Страница 88: ...or introducing its functions If any button is pressed or operated the demonstration mode is cancelled If no operations take place for approx 10 minutes the demonstration mode automatically starts To terminate the demonstration mode insert a disc or an SD card or set this to OFF For normal use set this function to OFF Indications Recording indications YES NO OFF ON Indications Motion picture record...

Страница 89: ...ssing the card Still picture quality R 100 Remaining number of still pictures ZOOM XP SP LP AWB MEGA 3 1M 2 1M 0 3M 0 3M 0 2 Motion picture playback Still picture playback 1 Playback Pause 5 6 Fast forward rewind 7 8 Last first scene paused 9 Skip playback D E Slow motion playback 1 2 Frame by frame playback 0h00m00s Motion picture playback time 01 01 Play mode All scenes on the disc displayed Sce...

Страница 90: ... other products that have different picture sizes from the sizes shown above Time display The built in battery is low l 39 The warning alarm indication appears when LCD monitor is rotated towards the lens side Return the direction of the LCD monitor to normal position and check the warning alarm indication No disc is inserted Unusable disc No SD card is inserted unusable card 3 1M 2 1M 0 3M 0 3M 0...

Страница 91: ...D R has been inserted After finalizing the discs become play only and cannot record If you un finalize a DVD RW Video format it can be used for recording l 77 CANNOT RECORD DISC IS FULL The disc is full or the number of scenes has reached the maximum limit so no further data can be recorded Delete unnecessary scenes l 66 or insert a new disc CANNOT RECORD THE NUMBER OF SCENES HAS EXCEEDED THE MAXI...

Страница 92: ... a new SD card PUSH THE RESET SWITCH An irregularity in the unit has been detected Press the RESET button to restart the unit l 98 CHECK THE DISC AFTER PUSHING THE RESET SWITCH TO REPAIR IT CHANGE TO MANUAL MODE You are attempting to use a function that cannot be used simultaneously CANCEL NIGHT VIEW MODE CANNOT SET With DVD RW Video format and DVD R if the number of dates displayed becomes 99 whe...

Страница 93: ...g mode Backlight compensation When the colour night view function is used When the iris gain is set Soft skin mode Set and cancel While recording to a disc Tele macro Set and cancel Help mode Zoom microphone An external microphone is used Wind noise reduction Scene mode When setting the AUTO MANUAL FOCUS switch to AUTO When the colour night view function is used Change of white balance When digita...

Страница 94: ...ide of the disc to the other The recording time indicated on the disc package is the total time for both sides You will need to eject the disc and turn it over to record on both sides Can DVD R only be recorded to once only Recording can be started and stopped until the disc is full However the data recorded on the DVD R cannot be erased Is playback possible on a DVD player By finalizing a DVD RW ...

Страница 95: ...or l 24 Are you using the battery in an extremely cold place The battery is affected by ambient temperature In cold places the operating time of the battery becomes shorter Has the battery worn out The battery has a limited life If the operating time is still too short even after the battery is fully charged the battery has worn out and can no longer be used This unit cannot be operated though it ...

Страница 96: ...protection on the same device Has the DVD RW Video format or DVD R been finalized After finalizing the discs become play only and cannot record If you un finalize a DVD RW Video format it can be used for recording l 77 Has the SD card s write protect switch been set to LOCK No recording is possible while the write protect switch is set to LOCK l 22 Is the memory of the disc or card full If the dis...

Страница 97: ...tting to match the aspect ratio of the TV Press the MENU button then select SETUP TV ASPECT 16 9 or 4 3 and press the joystick Scenes cannot be deleted or edited Is the DVD RAM or the DVD RW VR format write protected Release the protection l 77 If the disc or the contents on the disc have been protected on another device release the protection on the same device It may not be possible to delete sc...

Страница 98: ...lowing method to restart the unit eject the disc and clean it l 23 If there are scratches on the disc use a new disc The unit has automatically detected an error Press the RESET button with the projecting part of the lens cap A This will restart the unit If you do not press the RESET button the power to this unit is turned off automatically about 1 minute later Even after you press the RESET butto...

Страница 99: ...may be marred and the surface finish may peel off Do not leave rubber or plastic products in contact with the unit for a long time When you use the unit in a sandy or dusty place such as a beach do not let sand or fine dust get into the body and terminals of the unit Also keep the unit away from sea water Sand or dust may damage the unit Care should be taken when inserting and removing a disc or a...

Страница 100: ...apacity Dust and other matter attached to the battery terminals should be removed Prepare spare batteries when going out for recording Prepare batteries appropriate to 3 to 4 times the period during you want to record pictures in In cold places such as a ski resort the period during which you can record pictures is shortened When you travel do not forget to bring an AC adaptor so that you can rech...

Страница 101: ...le is being displayed the access lamp is lit do not remove the SD card operate the mode dial turn off the power or shake or impact the unit About the miniSD Card Be sure to insert miniSD Cards in the dedicated card adaptor before use Inserting a card in this unit without the adaptor may damage the unit or the card Do not insert an empty card adaptor in this unit Do not leave the adaptor in this un...

Страница 102: ...Remove the battery or AC adaptor and leave the unit for about 1 hour When the unit becomes close to the ambient temperature the fog disappears naturally Explanation of terms Automatic white balance White balance adjustment recognizes the colour of light and adjusts so the white colour will become a purer white The unit determines the hue of light that comes through the lens and white balance senso...

Страница 103: ... when close up objects are placed in focus When recording people with distant mountains in the background you cannot focus on both the subject which is close up and the objects which are in the distance Recording a subject behind dirty or dusty window The subject behind the window will not be focused because the focus is on the dirty window Similarly when recording something on the opposite side o...

Страница 104: ...3 4 3 540 Kk3 16 9 VDR D220 1 6z CCD image sensor Total 800 K Effective pixels Moving picture 400 K 4 3 540 K 16 9 Still picture 410 K 4 3 550 K 16 9 Lens VDR D310 Auto Iris F1 8 to F2 8 Focal length 3 0 mm to 30 0 mm Macro Full range AF VDR D220 Auto Iris F1 8 to F3 7 Focal length 2 3 mm to 73 6 mm Macro Full range AF Filter diameter 37 mm Zoom VDR D310 10k optical zoom 25 700k digital zoom VDR D...

Страница 105: ...ithout battery lens cap and a disc Approx 510 g Operating temperature 0 C to 40 C 0 C to 30 C when connected to the computer Operating humidity 10 to 80 Recording media 8 cm DVD RAM Ver 2 1 8 cm DVD RW Ver 1 1 2X SPEED 2X 1X 8 cm DVD R for General Ver 2 0 8 cm DVD R for DL Ver 3 0 Compression MPEG2 Recording mode and transfer rate XP 10 Mbps VBR Approx 18 min recordable time on a single sided DVD ...

Страница 106: ...consumption DC output AC 110 V to 240 V 50 60 Hz 19 W DC 7 9 V 1 4 A Unit operation DC 8 4 V 0 65 A Battery charging Dimensions 61 mm W k 32 mm H k 91 mm D Mass Approx 110 g Number of recordable pictures on an SD card Picture size 2048k1512 1920k1080 Picture quality 8 MB 3 5 4 7 16 MB 8 13 10 17 32 MB 18 29 24 39 64 MB 39 61 51 81 128 MB 75 120 98 155 256 MB 160 250 210 330 512 MB 320 490 410 650 ...

Страница 107: ... 128 MB 185 300 820 1650 256 MB 390 620 1710 3430 512 MB 780 1230 3400 6790 1 GB 1550 2470 6800 13600 2 GB 3160 5030 13830 27660 4 GB 6210 9870 27150 54310 Picture size 640k480 640k360 Picture quality 8 MB 42 86 42 86 16 MB 97 195 97 195 32 MB 210 420 210 420 64 MB 430 870 430 870 128 MB 820 1650 820 1650 256 MB 1710 3430 1710 3430 512 MB 3400 6790 3400 6790 1 GB 6800 13600 6800 13600 2 GB 13830 2...

Страница 108: ...108 LSQT1157 LSQT1157_EB book 108 ページ 2006年12月11日 月曜日 午後8時46分 ...

Страница 109: ...109 LSQT1157 LSQT1157_EB book 109 ページ 2006年12月11日 月曜日 午後8時46分 ...

Страница 110: ...LCD monitor 15 39 101 Locking still pictures 74 M Manual focus 56 Menu 36 Menu list 86 Motion picture playback 60 Motion picture recording 42 N Number of recordable pictures 106 O Operation icons 34 P Pickup lens 30 PictBridge 83 Picture quality 48 Picture size 48 Playing back motion pictures by date 63 Playlist 68 Power save 87 Protect Disc 77 R Recording mode 43 Recording time elapsed 43 Remaini...

Страница 111: ...Video format 20 Viewfinder 15 39 101 Volume adjustment 62 VR format 20 W White balance 57 103 Wide mode 54 Wind noise reduction function 55 Z Zoom 49 Zoom microphone 50 LSQT1157_EB book 111 ページ 2006年12月11日 月曜日 午後8時46分 ...

Страница 112: ...LSQT1157 A F1206Ra0 1000 A B Matsushita Electric Industrial Co Ltd Web site http panasonic net LSQT1157_EB book 112 ページ 2006年12月11日 月曜日 午後8時46分 ...

Отзывы: