background image

Re

cording

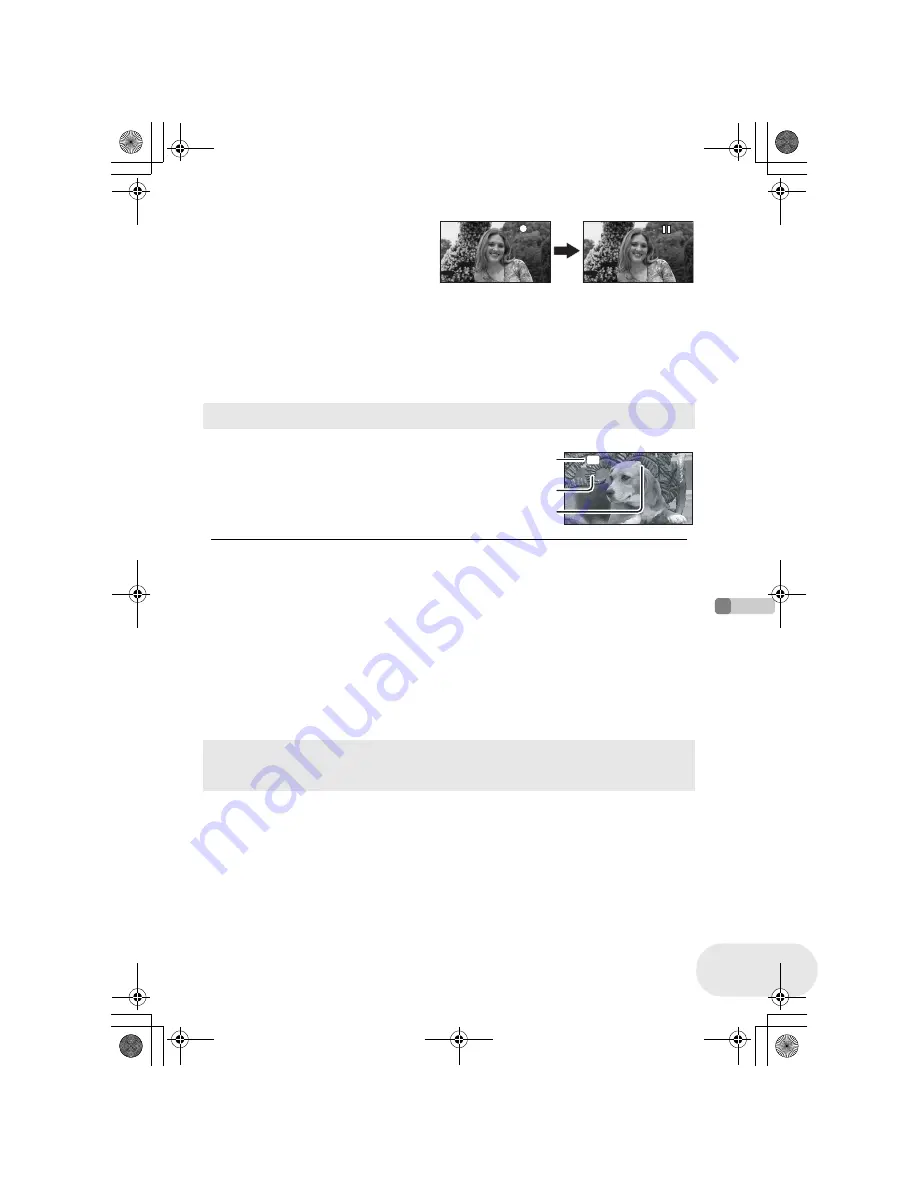
Recording motion pictures

53

LSQT1019

To end the recording

Press the recording start/stop button again to 
pause recording.

[

¥

] and [

;

] are red during recording. Do 

not move this unit until [

;

] is green.

The images recorded between pressing the recording start/stop button to start recording and 
pressing it again to pause recording become one scene.

When about 5 minutes have passed without any operation in recording pause, the unit 
automatically turns off to prevent the battery from running down. When you want to use the unit, 
turn it on again.
This setting can also be set to [OFF]. (

l

139, POWER SAVE)

A

Recording mode

B

Remaining time left for recording

(When the remaining time is less than 1 minute, [R 0h00m] 
flashes red.)

C

Recording time elapsed

Screen indications in the disc recording mode

0h00m10s

0h00m10s

0h00m10s

SP

R   0h30m

R   0h30m

R   0h30m

A

B
C

The maximum number of scenes on a disc 
(per side): 999 (Even if there is remaining capacity 
for recording on a disc, you may not be able to 
record 999 scenes.)

Sound is recorded in Dolby Digital from the internal 
stereo microphone on the front of the unit. Take 
care not to block this microphone.

Each time the unit enters the recording pause 
mode, the counter display will be reset to 
“0h00m00s”.

While motion picture recording is in progress, the 
recording will not stop even if the LCD monitor is 
closed and the viewfinder is retracted.

While “WRITING THE INFORMATION ON THE 
DISC.” is displayed, do not disconnect the AC 
adaptor or remove the battery as doing so may 
make the disc unusable.

While motion picture recording is in progress, do not 
disconnect the AC adaptor or remove the battery. If 
you do, a repair disc message may be displayed 
when the power is turned back on. (

l

146, About 

recovery)

Immediately after recording finishes the ACCESS/PC lamp lights. While it lights, the disc is 
rotating and disc information is being recorded. If you run while holding the unit or swing it, the 
recorded images may be distorted so do not strongly shake or cause impact to it.

LSQT1019(ENG).book  53 ページ  2006年2月3日 金曜日 午後4時37分

Содержание VDR-D250EP

Страница 1: ...300 VDR D250 does not have a built in flash Ilustracja przedstawia model VDR D300 Model VDR D250 nie ma wbudowanego flesza Before use please read these instructions completely Przed pierwszym włączeniem kamery prosimy o dokładne przeczytanie instrukcji obsługi VDR D300 LSQT1019 A LSQT1019 ENG book 1 ページ 2006年2月3日 金曜日 午後4時37分 ...

Страница 2: ... private households This symbol on the products and or accompanying documents means that used electrical and electronic products should not be mixed with general household waste For proper treatment recovery and recycling please take these products to designated collection points where they will be accepted on a free of charge basis Alternatively in some countries you may be able to return your pr...

Страница 3: ...a registered trademark of Leica microsystems IR GmbH and DICOMAR is a registered trademark of Leica Camera AG Microsoft Windows and DirectX are either registered trademarks or trademarks of the Microsoft Corporation in the United States and or other countries IBM and PC AT are registered trademarks of International Business Machines Corporation of the U S Intel Pentium and Celeron are the register...

Страница 4: ... recording 50 Recording motion pictures 52 Changing the recording mode of the motion picture 54 Recording still pictures 55 Number of pixels and picture quality for still picture recording 58 Various recording functions 60 Zoom in out function 60 Recording yourself 62 Backlight compensation function 63 Fade in fade out function 64 Soft skin mode 66 Tele macro function 67 Colour night view function...

Страница 5: ...g with a computer 118 What you can do with a computer 118 Contents on provided CD ROM 119 Operating environment 121 End User License Agreement 124 Installation 125 Installing DVD RAM Driver 125 Installing DVD MovieAlbumSE 127 Installing DVDfunSTUDIO 128 Reading the operating instructions of the software applications 129 Software application uninstallation 129 Connection and recognition 130 Connect...

Страница 6: ... previously recorded scene Easy playback l 81 Recorded scenes are displayed as thumbnails You can easily search for the scenes you want to watch Editing scenes l 87 91 You can create an original video playlist by collecting your favourite scenes together and then easily dub this video to a VCR or a DVD recorder hard disk LSQT1019 ENG book 6 ページ 2006年2月3日 金曜日 午後4時37分 ...

Страница 7: ...to play back the scenes recorded with this unit on it If you have a DVD recorder with hard disk you can dub scenes recorded on a disc with this unit to the hard disk Using with a computer l 118 You can enjoy editing scenes with the software on the supplied CD ROM and creating original DVD Video discs LSQT1019 ENG book 7 ページ 2006年2月3日 金曜日 午後4時37分 ...

Страница 8: ... AC adaptor VSK0651B DE 974GB DC cable K2GJ2DZ00018 AV S cable K2KZ9CB00001 AC cable K2CR2DA00004 Remote control N2QAEC000019 Button type battery CR2025 Lens cap VDR D250 only VYF3031 Shoulder strap VFC3506 1A USB cable K1HA05CD0010 CD ROM Disc cleaning cloth VFC3778 2 LSQT1019 ENG book 8 ページ 2006年2月3日 金曜日 午後4時37分 ...

Страница 9: ...21 2040 mAh Wide conversion lens VW LW3707M3E Tele conversion lens VW LT3714ME Filter kit VW LF37WE Video DC light VW LDC10E Light bulb for video DC light VZ LL10E Stereo microphone VW VMS2E Tripod VW CT45E 8 cm DVD RAM disc single sided LM AF30E 8 cm DVD RAM disc double sided LM AF60E 8 cm DVD RW disc single sided LM RW30E 8 cm DVD RW disc double sided LM RW60E 8 cm DVD R disc single sided LM RF3...

Страница 10: ... be heard depending on microphone type In that case please switch to battery for power supply and noise will stop 11 Viewfinder l 16 12 Delete button l 87 98 100 13 LCD monitor open part OPEN l 16 14 Battery DC cable holder l 26 29 15 Power switch OFF ON l 29 16 Status indicator l 29 17 Mode dial l 35 18 Joystick l 36 Move up down left or right to select items Press the centre to enter the selecti...

Страница 11: ...26 30 Speaker 31 LCD monitor l 16 32 Mode select switch AUTO MANUAL FOCUS l 51 75 33 Power LCD button POWER LCD l 48 34 Reset button RESET l 154 35 Disc eject lever DISC EJECT l 32 36 Disc computer access lamp ACCESS PC l 32 131 37 Disc compartment l 32 38 Grip belt l 12 39 Shoulder strap fixture l 12 Due to limitations in LCD production technology there may be some tiny bright or dark spots on th...

Страница 12: ...ion 1 Flip the belt 2 Adjust the length 3 Fix the belt Put the strap through the fixture 1 and through the stopper 2 so it will not come off Extend part 3 by at least 2 cm Put the opposite end of the strap through A and attach it in the same way Using grip belt 2 1 3 Shoulder strap fixture A 1 2 3 LSQT1019 ENG book 12 ページ 2006年2月3日 金曜日 午後4時37分 ...

Страница 13: ... the other accessories on the hood Except for the lens cap Refer to the operating instructions for the Filter Kit When fitting the tele conversion lens VW LT3714ME optional or the wide conversion lens VW LW3707M3E optional first remove the lens hood Refer to the operating instructions for the tele conversion lens or the wide conversion lens When 2 lens accessories such as the ND filter and tele co...

Страница 14: ...ncluded in the Filter Kit 1 Pass the end of the lens cap cord through the belt 2 Pass the lens cap through the loop made by itself 3 To fit or remove the lens cap hold both sides of the lens cap with the tips of your finger and thumb During recording The lens cap removed can be attached to the lens cap fixture Fitting the lens cap Supplied VDR D250 only Included in the Filter Kit VW LF37WE optiona...

Страница 15: ... the optional tripod Please carefully read the operating instructions for how to attach the tripod to the unit When the tripod is used the card slot cover cannot be opened Insert an SD card before attaching this unit to the tripod l 34 Tripod receptacle LSQT1019 ENG book 15 ページ 2006年2月3日 金曜日 午後4時37分 ...

Страница 16: ...er The viewfinder will be activated If the LCD monitor is opened the viewfinder will be deactivated Using the LCD monitor B A The brightness and colour level of the LCD monitor can be adjusted from the menu l 48 If it is forcibly opened or rotated the unit may be damaged or fail If the LCD monitor is rotated by 180x towards the lens and the viewfinder is extended when recording yourself the LCD mo...

Страница 17: ...4 2 1 l 45 7 Recording start stop buttons START STOP 8 Zoom volume buttons ZOOM VOL 9 Menu button MENU l 45 10 Enter button ENTER l 45 means that these buttons function in the same manner as the corresponding buttons on the unit Using the remote control ZOOM START STOP PHOTO SHOT EXT DISPLAY DATE TIME VOL PLAY STOP SKIP SKIP MENU ENTER PAUSE SEARCH STILL ADV STILL ADV SEARCH 1 2 3 4 6 7 8 9 10 5 L...

Страница 18: ... CR2025 The battery is normally expected to last about 1 year but it depends on operation frequency Keep the button type battery out of the reach of children Caution Danger of explosion if battery is incorrectly replaced Replace only with the same or equivalent type recommended by the equipment manufacturer Discard used batteries according to manufacturer s instructions Warning Risk of fire explos...

Страница 19: ...emote control and the unit s remote control sensor A Within approx 5 m Angle Approx 10o up and 15o down left and right A The remote control is intended for indoor operation Outdoors or under strong light the unit may not operate properly even within the usable ranges LSQT1019 ENG book 19 ページ 2006年2月3日 金曜日 午後4時37分 ...

Страница 20: ...Rewritable disc Rewritable disc One time recording disc 1 1 By formatting the disc it can be used repeatedly l 104 One time recording disc Display on the screen Indication in these instructions RAM RW VR RW V R Functions Deleting recorded scenes Editing on this unit Playback on other products 2 2 DVD players and DVD recorders that support 8 cm discs 3 3 Playback is possible on compatible products ...

Страница 21: ...ecorded on this unit may not be playable on other products Recording on DVD R in DVD Video Recording format is not supported When using DVD RW or DVD R do not perform the following as doing so may make the disc unusable Record on a disc with other products after recording on it with this unit Record on a disc with this unit after recording on it with other products Insert an un finalized disc in a...

Страница 22: ...his unit the screen on the right appears Select YES then press the joystick 2 Select format type then press the joystick 3 When the confirm screen appears select YES then press the joystick When using brand new DVD RW VIDEO DVD Video format VR DVD Video Recording format To change the format type format the disc again l 104 If the disc is formatted then all the data recorded on the disc will be era...

Страница 23: ...d that you use a Panasonic brand SD card When the write protect switch on SD Memory Card is locked no recording deletion or editing will be possible on the card Keep the memory card out of reach of children to prevent swallowing A MultiMediaCard cannot be used on this unit About the miniSD Card Be sure to insert miniSD Cards in the dedicated card adaptor before use Inserting a card in this unit wi...

Страница 24: ...er hard writing implements Do not use record cleaning sprays benzine thinner static electricity prevention liquids or any other solvent Do not use scratch proof protectors or covers Do not expose the terminals of the card to water garbage or dust Do not drop stack or impact discs Do not place objects on them Do not use the following discs Discs with exposed adhesive from removed stickers or labels...

Страница 25: ...ug of the AC cable is not completely connected to the AC adaptor socket As shown in A there is a gap Charging lamp Lights up Charging Goes off Charging completed Flashing The battery is over discharged discharged excessively In a while the lamp will light up and normal charging will start When the battery temperature is excessively high or low the CHARGE lamp flashes and the charging time will be ...

Страница 26: ...ERY RELEASE lever slide the battery to remove it Hold the battery with your hand so it does not fall Fitting the battery Removing the battery Before removing the battery be sure to set the OFF ON switch to OFF and check that the status indicator is off before removing the battery LSQT1019 ENG book 26 ページ 2006年2月3日 金曜日 午後4時37分 ...

Страница 27: ... 1 hour 25 minutes Charging time and recordable time Battery model number Voltage capacity Charging time Supplied battery CGA DU12 optional 7 2 V 1150 mAh 2 h 25 min CGA DU14 optional 7 2 V 1360 mAh 2 h 45 min CGA DU21 optional 7 2 V 2040 mAh 3 h 55 min VDR D300 When using a DVD RAM disc Battery model number Voltage capacity Recording mode Maximum continuously recordable time Intermittent recordab...

Страница 28: ...n 1 h 25 min LP 3 h 15 min 3 h 5 min 1 h 35 min 1 h 30 min Along with the reduction of the battery capacity the display will change If the battery discharges then will flash The recordable time will become shorter in the following cases When you use both the viewfinder and the LCD monitor simultaneously while rotating the LCD monitor frontward to record yourself using the 0 Lux colour night view f...

Страница 29: ... the lens cap fitted the automatic white balance adjustment l 161 may not function properly While pressing the button A set the OFF ON switch to ON The status indicator B lights and the power turns on VDR D300 only In disc recording mode or card recording mode the lens cover opens When the unit is turned on for the first time a message asking you to set the date and time will appear Select YES and...

Страница 30: ... procedure to check that there are no problems with the disc This takes approximately 25 seconds with DVD RAM If you want to start using the unit as soon as you turn on the power do the following 1 Turn on the power 2 After READING DISC disappears from the screen turn off the power You can start recording approximately 8 seconds after you turn on the power again Depending on the condition of the d...

Страница 31: ...rns on To turn off the power Close the LCD monitor and retract the viewfinder The status indicator goes off and the power turns off The power will not turn off unless the LCD monitor is closed and the viewfinder is retracted The power will not turn off while recording on a disc even if the LCD monitor is closed and the viewfinder is retracted How to turn the power on and off with the LCD monitor v...

Страница 32: ...s after the ACCESS PC lamp blinks the cover of the disc compartment will open slightly 2 Open the cover of the disc compartment by hand and insert remove the disc Inserting disc Fit the disc onto the spindle in the centre A Recording playback side B Pickup lens Removing disc While pressing down on the spindle grasp the edge of the disc and gently lift it out 3 Push the section marked PUSH CLOSE on...

Страница 33: ...ide an error message will appear Remove the disc and reinsert it with its recording playback side facing the inside Do not allow the recording playback side to become dirty or scratched Do not remove the battery pack or disconnect the AC adaptor while removing the disc or until power is completely turned off If you do the cover will not open If this happens reattach the battery pack or reconnect t...

Страница 34: ...rning the SD card Electrical noise static electricity or failure of this unit or the SD card may damage or erase the data stored on the SD card We recommend saving important data on a computer Card access lamp When this unit accesses the SD card reading recording playback erasing etc the access lamp lights up If the following operations are performed when the access lamp is lit then the SD card or...

Страница 35: ...aph to the position shown in the illustration Disc recording mode l 52 Use this to record motion pictures on a disc Disc playback mode l 81 Use this to play back motion pictures on a disc Card recording mode l 55 Use this to record still pictures on an SD card Card playback mode l 85 Use this to play back still pictures on an SD card Do not forcefully turn the dial LSQT1019 ENG book 35 ページ 2006年2月...

Страница 36: ... it Menu screen operations l 43 Rotate the mode dial to select or 1 Press the centre of the joystick and icons will be displayed on the screen When the centre of the joystick is pressed again the indication disappears Each time the joystick is moved down the indication changes 2 Move the joystick up left or right to select an item Basic operations 1 Select by moving up 2 Select by moving down 3 Se...

Страница 37: ...ck and press the joystick The selected scene is played back on the full screen The operation icon is automatically displayed on the screen 2 Move the joystick up down left or right to operate Each time the centre of the joystick is pressed the operation icon appears or disappears Operations during playback LSQT1019 ENG book 37 ページ 2006年2月3日 金曜日 午後4時37分 ...

Страница 38: ...de Icon Direction Function Page 1 3 3 Backlight compensation 63 2 Fade 64 1 Help mode 41 2 3 2 Soft skin mode 66 1 Tele macro 67 3 3 3 Colour night view 0 Lux colour night view 68 In manual mode 4 4 3 White balance 78 2 Iris or gain value 80 1 Shutter speed 80 In manual focus mode 5 5 21 Manual focus adjustment 77 1 3 NEXT 2 3 NEXT 3 3 NEXT 4 4 NEXT 5 5 NEXT LSQT1019 ENG book 38 ページ 2006年2月3日 金曜日 ...

Страница 39: ...rd skip during playback 81 1 Forward slow frame playback during pause 82 Card recording mode Icon Direction Function Page 1 2 3 Backlight compensation 63 Ø 2 Self timer 69 1 Help mode 41 2 2 2 Soft skin mode 66 1 Tele macro 67 In manual mode 3 3 3 White balance 78 2 Iris or gain value 80 1 Shutter speed 80 In manual focus mode 4 4 21 Manual focus adjustment 77 1 2 NEXT 2 2 NEXT 3 3 NEXT 4 4 NEXT L...

Страница 40: ...ils 85 E 2 Playback previous picture 85 D 1 Playback next picture 85 Card playback mode When SLIDE SHOW is selected Icon Direction Function Page 1 3 Slide show start pause 85 4 Stop playback and show thumbnails 85 E 2 Playback previous picture during pause 85 D 1 Playback next picture during pause 85 LSQT1019 ENG book 40 ページ 2006年2月3日 金曜日 午後4時37分 ...

Страница 41: ...on during the recording pause 2 Move the joystick right to select 3 Move the joystick up left or right to select the desired icon An explanation of the selected icon is displayed on the screen Each time the joystick is moved down the indication changes To exit the help mode Press the MENU button or select EXIT When the help mode is used functions cannot be set 1 3 NEXT 1 3 NEXT EXIT 1 3 NEXT EXIT ...

Страница 42: ...itching the language You can switch the language on the screen display or the menu screen 1 Press the MENU button then select LANGUAGE and press the joystick 2 Select English and press the joystick LSQT1019 ENG book 42 ページ 2006年2月3日 金曜日 午後4時37分 ...

Страница 43: ...ing on the position of the mode dial Do not switch the mode dial when the menu is displayed 2 Move the joystick up or down in order to select the desired top menu A 3 Move the joystick right or press the joystick The submenu B is displayed 4 Move the joystick up or down in order to select the submenu item C Current settings on menus MENU A B C LSQT1019 ENG book 43 ページ 2006年2月3日 金曜日 午後4時37分 ...

Страница 44: ...the desired item 7 Press the joystick to enter the selection To get back to the previous screen Move the joystick left To exit the menu screen Press the MENU button MENU The menu screen does not appear during recording or playing You cannot start other operations while the menu screen appears LSQT1019 ENG book 44 ページ 2006年2月3日 金曜日 午後4時37分 ...

Страница 45: ...n unit are used 1 Press the MENU button 2 Select a menu item Use the direction buttons 3 4 2 1 and ENTER button in place of the joystick on the main unit 3 Press the MENU button to exit the menu screen Operating with remote control MENU ENTER MENU ENTER MENU ENTER LSQT1019 ENG book 45 ページ 2006年2月3日 金曜日 午後4時37分 ...

Страница 46: ...dial to select or 1 Press the MENU button then select BASIC CLOCK SET YES and press the joystick 2 Move the joystick left or right to select the item to be set Then move the joystick up or down to set the desired value The year will change as follows 2000 2001 2099 2000 The 24 hour system is used to display the time 3 Press the joystick to enter the selection After pressing the MENU button to fini...

Страница 47: ...6 15 30 15 12 2006 15 12 2006 The date and time function are driven by a built in lithium battery Make sure to check the time before recording If the time display becomes the built in lithium battery has run down Use the following steps to charge the battery When turn on the power for the first time after charging a message asking you to set the date and time will appear Select YES and set the dat...

Страница 48: ... on the LCD monitor The entire LCD monitor will become approx twice as bright as the normal Adjusting the brightness and colour level EVF To adjust the brightness of the viewfinder close the LCD monitor and extend the viewfinder to activate it When the LCD monitor is rotated by 180 towards the lens the brightness and colour level of the LCD monitor cannot be adjusted These settings will not affect...

Страница 49: ...witches to the standard picture quality The effect will vary depending on the scene recorded The picture quality on the viewfinder will not be affected This function is automatically set to DYNAMIC when the brightness of the LCD monitor is increased the indication appears on the LCD monitor and cannot be set to NORMAL independently This will not affect the images to be recorded When the LCD monito...

Страница 50: ... belt 3 Do not cover the microphones or sensors with your hands 4 Keep your arms near your body 5 Slightly open your legs When you are outdoors record pictures with the sunlight behind you If the subject is backlit it will become dark in the recording Basic camera positioning 4 5 1 2 3 LSQT1019 ENG book 50 ページ 2006年2月3日 金曜日 午後4時37分 ...

Страница 51: ... prevents unnecessary recording when you forget to pause recording and walk with the unit tilted upside down while recording continues If the unit continues to be tilted upside down from the normal horizontal position while recording on a disc it is automatically put into recording pause Turning the AGS function on off Rotate the mode dial to select Press the MENU button then select SETUP AGS ON o...

Страница 52: ... 71 before recording the images or when watching them on the connected TV l 111 VDR D250 only Remove the lens cap before turning the unit on If the unit is turned on with the lens cap fitted the automatic white balance adjustment may not function properly 1 Turn the unit on 2 Rotate the mode dial to select VDR D300 only The lens cover opens automatically 3 Open the LCD monitor or extend the viewfi...

Страница 53: ...ing capacity for recording on a disc you may not be able to record 999 scenes Sound is recorded in Dolby Digital from the internal stereo microphone on the front of the unit Take care not to block this microphone Each time the unit enters the recording pause mode the counter display will be reset to 0h00m00s While motion picture recording is in progress the recording will not stop even if the LCD ...

Страница 54: ...ing the recording mode of the motion picture Recording modes and recordable time available for the motion picture Recording mode Recordable time on single side XP High quality Approx 18 min SP Normal Approx 37 min LP Long play Approx 75 min Mosaic pattern noise may appear on a playback image in the following cases When there is a complicated pattern in the background When the unit is moved too muc...

Страница 55: ... LCD monitor or extend the viewfinder 4 Press the PHOTO SHOT button halfway in order to adjust focusing For auto focusing only The shutter speed and the iris gain value are fixed and the unit focuses on the subject automatically VDR D300 only If you set O I S to ON then the image stabilizer function will be more effective MEGA optical image stabilizer will be displayed The shutter chance mark is i...

Страница 56: ...ut the number of recordable still pictures on an SD card l 166 When the PICTURE SIZE is set to other than the mega pixel recording mode is set The sound cannot be recorded If the write protection switch on the SD card is set to LOCK it cannot be used for recording The PHOTO SHOT button on the remote control cannot be pressed halfway If set PICT QUALITY to mosaic pattern noise may appear on a playb...

Страница 57: ...nce mark does not appear in manual focus mode When the subject is not easily focused focus on the subject manually You can record still pictures on the card even if the shutter chance mark does not appear but pictures may be recorded without being focused The shutter chance mark does not appear or has difficulty displaying in the following cases When the zoom magnification is high When the unit is...

Страница 58: ...ng VDR D300 Icon Aspect Number of pixels 4 3 2048k1512 4 3 1280k960 4 3 640k480 16 9 1920k1080 VDR D250 Icon Aspect Number of pixels 4 3 1760k1320 4 3 1280k960 4 3 640k480 16 9 1760k992 When this unit is purchased PICTURE SIZE is set to VDR D300 VDR D250 The sides of pictures recorded with a 16 9 aspect ratio may be cut at printing Check before printing 3 1M 1M 0 3M 2 2 3M 1M 0 3M 1 7 2 1 7 LSQT10...

Страница 59: ...picture quality are recorded Priority is given to the number of still pictures recorded Still pictures are recorded in normal picture quality You can add a shutter sound when recording still pictures Press the MENU button then select ADVANCED SHTR EFFECT ON or OFF and press the joystick This function s default setting is ON Switching the shutter effect on off LSQT1019 ENG book 59 ページ 2006年2月3日 金曜日...

Страница 60: ...using the image stabilizer function l 72 When distant subjects are brought closer they are focused at about 1 m VDR D300 1 2 m VDR D250 or more When the zoom magnification is 1k this unit can focus on a subject approx 3 5 cm VDR D300 4 cm VDR D250 away from the lens Macro function The zoom speed varies depending on the range over which the zoom lever is moved The zoom speed does not vary when oper...

Страница 61: ...M RW VR RW V R Interlocked with the zooming operation the microphone will collect sounds clearly far away with the tele shot or those in the vicinity with the wide angle shot Rotate the mode dial to select Press the MENU button then select ADVANCED ZOOM MIC ON and press the joystick Digital zoom function OFF Optical zoom only Up to 10k 25k Up to 25k 700k Up to 700k The larger the digital zoom magn...

Страница 62: ...s a normal recording Extend the viewfinder to see the picture while recording When the recording aspect is 16 9 the image displayed on the viewfinder screen is squeezed horizontally but this is normal and not indicative of any trouble Recording yourself When the LCD monitor is rotated towards the lens side the icon will not be displayed even if you press the joystick Only some indications will app...

Страница 63: ...oystick down to display the icon shown in the illustration 2 Move the joystick up to select ª The image on the screen will become brighter To return to normal recording Select ª again Backlight compensation function This is for protecting a backlit subject from being darkened 1 3 NEXT 1 3 NEXT If you turn off the power or operate the mode dial the backlight compensation function is cancelled LSQT1...

Страница 64: ... Start recording Fade in When you start recording the image audio disappears completely and the image audio gradually appears After recording the fade in part finishes the fade setting is cancelled To fade out 1 During recording press the joystick Then move the joystick down to display the icon shown in the illustration Fade in fade out function Fade in The image and audio gradually appear Fade ou...

Страница 65: ...select the colour for fade in out The colour which appears in fading pictures can be selected Press the MENU button then select ADVANCED FADE COLOUR WHITE or BLACK and press the joystick If you turn off the power the fade function is cancelled While the fade in fade out function is selected it takes several seconds to display the image when you start recording It also takes several seconds to paus...

Страница 66: ...icon shown in the illustration 2 Move the joystick left to select To cancel the soft skin mode Select again Soft skin mode This makes skin colours appear softer for a more attractive appearance 2 3 NEXT 2 3 NEXT If the background or anything else in the scene has colours similar to the skin colour they will also be smoothed If the brightness is insufficient the effect may not be clear LSQT1019 ENG...

Страница 67: ...o 10k To cancel the tele macro function Select again Tele macro function This is for bringing only what you want to record into focus to take close ups VDR D300 The unit can focus on the subject at a distance of approx 50 cm VDR D250 The unit can focus on the subject at a distance of approx 40 cm 2 3 NEXT 2 3 NEXT If a sharper focus cannot be achieved adjust the focus manually l 77 In the followin...

Страница 68: ...unction Move the joystick left or right to bring the subject into focus manually l 77 3 In the case of 0 Lux colour night view function Extend the viewfinder and rotate the LCD monitor towards the lens side When the LCD monitor is reversed the screen is lit in white Extend the viewfinder and view the images while recording The light of the LCD monitor reaches approx 1 2 m or less To cancel the col...

Страница 69: ...he self timer is cancelled If you press the PHOTO SHOT button halfway and then fully the subject is focused when the button is pressed halfway When you press the PHOTO SHOT button fully the subject is focused just before recording To stop the timer midway through Press the MENU button The self timer setting is cancelled Self timer recording This is for recording shots of yourself as well 1 2 NEXT ...

Страница 70: ...CUT OFF and press the joystick Wind noise reduction function This is for reducing the wind noise coming into the microphone when recording This function s default setting is ON Depending on the wind strength the wind noise is reduced If this function is activated in strong winds the stereo effect may be reduced When the wind weakens the stereo effect will be restored This does not work with an ext...

Страница 71: ...mode dial to select Press the MENU button then select BASIC REC ASPECT 16 9 and press the joystick Recording images with a 4 3 aspect ratio Rotate the mode dial to select Press the MENU button then select BASIC REC ASPECT 4 3 and press the joystick Wide mode This is for selecting the screen s aspect ratio when recording motion pictures The default setting is 16 9 LSQT1019 ENG book 71 ページ 2006年2月3日...

Страница 72: ...ess the joystick Image stabilizer function This is for reducing image shakes during recording This function s default setting is ON VDR D300 only In the card recording mode pressing the PHOTO SHOT button halfway increases the effect of the image stabilizer function MEGA optical image stabilizer When a tripod is used we recommend that you turn the image stabilizer off In the following cases the ima...

Страница 73: ...ghtness If it determines that the flash is necessary the indication lights up in yellow When the ß ßi ßj indication or the ßA ßAi ßAj indication is displayed the flash can be lit If the indication is flashing or not displayed the flash cannot be lit The available range of the flash is approx 1 m to 2 5 m in dark places Pictures will appear dark or reddish when they are recorded by using the flash ...

Страница 74: ...L desired item and press the joystick ßj If the brightness is too high ßd0 In normal recording ßi If the brightness is insufficient Red eye reduction function The flash is activated 2 times Do not move until the second flash is finished Use this when you take pictures of people in dark places Red eye phenomenon may appear depending on the recording conditions To adjust the brightness of the flash ...

Страница 75: ...ect BASIC SCENE MODE desired item and press the joystick Scene mode This is for recording in various situations Display Mode Recording conditions 5 Sports To record sports scenes or scenes where there are quick motions Portrait To make people stand out against the background Low light To make the scene brighter in dark conditions Spotlight To make the subject under a spotlight look more attractive...

Страница 76: ...image may change If you record a subject illuminated with strong light or a highly reflective subject vertical lines of light may appear If the brightness is insufficient the sports mode does not function The 5 display flashes If this mode is used indoors the screen may flicker Portrait mode If this mode is used indoors the screen may flicker If so change the scene mode setting to OFF Low light mo...

Страница 77: ...he icon shown in the illustration appear 3 Move the joystick left or right to bring the subject into focus When focused with a wide angle the subject may not be in focus when zoomed in First zoom in on the subject and then focus on it To restore to the automatic adjustment Press the AUTO MANUAL FOCUS switch down again to the FOCUS position You can also restore the auto focusing by setting the AUTO...

Страница 78: ...ode To restore to the automatic adjustment Set the white balance mode to You can also restore the automatic adjustment by setting the AUTO MANUAL FOCUS switch to AUTO White balance This is for recording in natural colours MNL 4 4 NEXT MNL 4 4 NEXT MNL BACK Display Mode Recording conditions Auto white balance adjustment Indoor mode for recording under incandescent lamps Incandescent lights halogen ...

Страница 79: ...k when the white balance is set in the manual adjustment mode When the black balance is adjusted the screen will temporarily be black The black balance cannot be adjusted manually 1 Black balance adjustment in progress Flashes 2 White balance adjustment in progress Flashes 3 Adjustment completed Lights up To set the white balance manually MNL BACK MNL BACK A 1 2 3 When the display flashes white th...

Страница 80: ...00 1 25 to 1 2000 VDR D250 1 25 to 1 500 OPEN OPEN 1 100 100 1 100 OPEN MNL BACK A B When setting both the shutter speed and the iris gain value set the shutter speed and then set the iris gain value Manual shutter speed adjustment Avoid recording under fluorescent light mercury light or sodium light because the colour and brightness of the playback image may change If you increase the shutter spe...

Страница 81: ...ck If you move and hold the joystick up or down you can advance 8 scenes at a time The screen will not change at this time but the scene numbers and scroll bar display will change so release the joystick when you have arrived at the page with the scene you want to display 3 Press the joystick The selected scene is played back on the full screen The operation icon is automatically displayed on the ...

Страница 82: ...be heard except during normal playback If pause play is continued for 5 minutes the screen returns to the thumbnails When the amount of time recorded on the scene is short playback may not be possible The thumbnails of motion pictures that cannot be played back are displayed in shades of blue and white The power will not turn off when the LCD monitor and the viewfinder are closed and retracted Whe...

Страница 83: ...ess the button 2 Press the E or D button Adjust the speaker volume during playback Move the volume lever to change the volume level The further the indicator moves to the right towards the i end the higher the volume level becomes When the adjustment is completed the volume setting display will disappear Frame by frame playback PLAY STOP SKIP SKIP PAUSE SEARCH STILL ADV STILL ADV SEARCH PLAY STOP ...

Страница 84: ...a motion picture is stopped R appears on the thumbnail view of the stopped scene If playback is stopped at any point during a motion picture while RESUME PLAY is set to OFF the next time the motion picture is played back it will be from the beginning Playing back motion pictures by date Even if scenes are recorded on the same day they are grouped separately in the following cases When the number o...

Страница 85: ... and hold the joystick up or down you can advance 8 files at a time The screen will not change at this time but the file numbers and scroll bar display will change so release the joystick when you have arrived at the page with the file you want to display 3 Press the joystick The selected file is played back on the full screen The operation icon is automatically displayed on the screen 4 Move the ...

Страница 86: ...y degrade or not play back data recorded on this unit Playing back still pictures as a slide show Do not operate the mode dial during the slide show While this unit accesses the SD card the access lamp is lit do not remove the SD card It takes time to display the file depending on the number of pixels of the file The thumbnails of still pictures that cannot be played back are displayed in shades o...

Страница 87: ...W Video format and DVD R cannot be deleted Rotate the mode dial to select 1 Press the button during playback 2 When the confirmation message appears select YES then press the joystick Deleting scenes This is for deleting scenes recorded on discs Deleting scenes one at a time LSQT1019 ENG book 87 ページ 2006年2月3日 金曜日 午後4時37分 ...

Страница 88: ...be set in succession 3 Only when SELECT is selected in step 1 Press the button 4 When the confirmation message appears select YES then press the joystick Only when SELECT is selected in step 1 To continue deleting other scenes Repeat steps 2 4 To complete editing Press the MENU button To delete an unwanted part of a scene divide the scene first and then delete the unnecessary part l 89 In case of ...

Страница 89: ...e is played back 3 When you reach the area where you want to divide the scene move the joystick down to set the dividing point Using slow motion playback or frame by frame playback makes it easy to search for the point where you want to divide the scene l 82 83 4 When the confirmation message appears select YES then press the joystick To continue dividing other scenes Repeat steps 2 4 To complete ...

Страница 90: ...wish to combine scenes that are not next to each other or scenes with different recording dates first create a playlist and then combine the scenes on the playlist l 92 97 3 When the confirmation message appears select YES then press the joystick To continue combining other scenes Repeat steps 2 3 To complete editing Press the MENU button Combining scenes This function is only for combining two co...

Страница 91: ...by making a playlist If you create or delete playlists the original scenes will not be modified Editing scenes on a playlist will not affect the original scenes What is a playlist Recorded scenes Playlist The maximum number of items on a disc per side Playlists 99 Playlist scenes 999 If original scenes are deleted the portion of playlists created with these scenes is also deleted LSQT1019 ENG book...

Страница 92: ...ncelled Up to 8 scenes can be set in succession The scenes are registered in the playlist in the order that they were selected After creating a playlist the order of the scenes in it can be changed by MOVE function l 95 4 Press the MENU button 5 When the confirmation message appears select YES then press the joystick The thumbnail view screen of the created playlist is displayed To add another sce...

Страница 93: ... displayed as thumbnails 3 Select the scene to start playback then press the joystick To select a different playlist When the first scene is selected in the playlist thumbnail view screen move the joystick left The screen returns to the PLAYLIST VIEW step 2 To return to showing the original scenes Press the MENU button then select PLAY SETUP PLAY MODE VIEW ALL or BY DATE and press the joystick Pla...

Страница 94: ...y a yellow frame When the joystick is pressed again the selected scene will be cancelled Up to 8 scenes can be set in succession The scenes are added to the playlist in the order that they were selected The order of the scenes in the playlist can be changed by MOVE function l 95 5 Press the MENU button 6 When the confirmation message appears select YES then press the joystick The thumbnail view sc...

Страница 95: ...e joystick 3 Select MOVE then press the joystick 4 Select the scene to be moved then press the joystick The selected scene is encircled by a yellow frame and the position to insert is shown by a red bar 5 Select the position to insert the scene then press the joystick To continue moving other scenes in the playlist Repeat steps 4 5 To complete editing Press the MENU button Moving scenes LSQT1019 E...

Страница 96: ...t the scene to be divided then press the joystick The selected scene is played back 5 When you reach the area where you want to divide the scene move the joystick down to set the dividing point Using slow motion playback or frame by frame playback makes it easy to search for the point where you want to divide the scene l 82 83 6 When the confirmation message appears select YES then press the joyst...

Страница 97: ...he joystick 2 Select the playlist to be edited then press the joystick 3 Select COMBINE then press the joystick 4 Select the scene to be combined then press the joystick The selected scene and the next scene are combined 5 When the confirmation message appears select YES then press the joystick To continue combining other scenes Repeat steps 4 5 To complete editing Press the MENU button Combining ...

Страница 98: ... the button during playback 2 When the confirmation message appears select YES then press the joystick Deleting multiple scenes from the thumbnail display Select playlist playback mode l 93 steps 1 and 2 1 Press the MENU button then select EDIT and press the joystick 2 Select the playlist to be edited then press the joystick Deleting scenes LSQT1019 ENG book 98 ページ 2006年2月3日 金曜日 午後4時37分 ...

Страница 99: ... when SELECT is selected in step 3 Press the button 6 When the confirmation message appears select YES then press the joystick Only when SELECT is selected in step 3 To continue deleting other scenes Repeat steps 4 6 To complete editing Press the MENU button Deleting scenes on a playlist will not increase the remaining capacity for recording The playlist itself is deleted if you delete all the sce...

Страница 100: ...ed Rotate the mode dial to select 1 Press the button during playback 2 When the confirmation message appears select YES then press the joystick Deleting still pictures This is for deleting still picture files recorded on SD cards Deleting files one at a time LSQT1019 ENG book 100 ページ 2006年2月3日 金曜日 午後4時37分 ...

Страница 101: ...confirmation message appears select YES then press the joystick Only when SELECT is selected in step 1 To continue deleting other files Repeat steps 2 4 To complete editing Press the MENU button Deleting still picture files recorded on an SD card by other products A still picture file other than JPEG that cannot be played back on this unit may be erased Deleting multiple files from the thumbnail d...

Страница 102: ... Press the MENU button then select PLAY SETUP LOCK YES and press the joystick 2 Select the file to be protected then press the joystick display appears and the selected file is locked Press the joystick again to release the lock setting You can also select multiple files in succession To complete the settings Press the MENU button Locking still pictures This is for preventing still picture files f...

Страница 103: ... also select multiple files in succession To complete the settings Press the MENU button To cancel all DPOF settings Press the MENU button then select PLAY SETUP DPOF SET CANCEL ALL and press the joystick When the confirmation message appears select YES then press the joystick What is DPOF DPOF stands for Digital Print Order Format This enables picture printing information to be written onto an SD...

Страница 104: ...ge appears select YES then press the joystick When formatting is complete press the MENU button to exit the message screen Formatting discs and cards Formatting discs This is for initializing discs In the case of a double sided disc format each side It may not be possible to format a disc with many scratches or dirt Such discs cannot be used During formatting do not turn this unit off When you for...

Страница 105: ...rmatting is complete press the MENU button to exit the message screen Formatting an SD card This is for initializing cards Use this unit to format SD cards If an SD card is formatted on other products such as a computer the time spent for recording may become longer and you may not be able to use the SD card Depending on the type of SD card being used it may take time to format During formatting d...

Страница 106: ... VR format discs DVD RAM It is not necessary to finalize DVD RAM DVD RW VR format Finalizing a DVD RW VR format increases its compatibility with other products DVD RW VR format after finalization can be recorded and edited in the same way as DVD RW VR format before finalization Do not finalize a disc recorded on this unit using any other device In the case of a double sided disc finalize each side...

Страница 107: ...ess the MENU button to exit the message screen Un finalizing a DVD RW This is for un finalizing a DVD RW Video format so that it can be used for recording DVD RW VR format cannot be un finalized DVD RW VR format after finalization can be recorded and edited in the same way as DVD RW VR format before finalization DVD R cannot be un finalized When you un finalize the disc use a battery with sufficie...

Страница 108: ...ETUP DISC PROTECT and press the joystick 2 When the confirmation message appears select YES then press the joystick To release disc protection 1 Press the MENU button then select SETUP DISC PROTECT and press the joystick 2 When the confirmation message appears select YES then press the joystick If the disc has been protected on another device it may not be possible to release the protection on thi...

Страница 109: ...as the number of recorded scenes the remaining space and whether or not the disc is finalized or protected is displayed Rotate the mode dial to select Press the MENU button then select SETUP INFORMATION YES and press the joystick To exit the information screen Press the MENU button LSQT1019 ENG book 109 ページ 2006年2月3日 金曜日 午後4時37分 ...

Страница 110: ...t is connected 4 Start playback on this unit The image and audio are output on the TV If the image or audio from this unit is not output on the TV Check that the plugs are inserted as far as they go Check the connected terminal Check the TV s input setting input switch For more information please read the operating instructions for the TV Playback on TV A AV S cable supplied Insert the plugs as fa...

Страница 111: ...ay not be displayed correctly For more information please read the operating instructions of your TV Press the MENU button then select SETUP TV ASPECT 4 3 and press the joystick Example of images with a 16 9 aspect ratio on a regular TV 4 3 This function s default setting is 16 9 To display the on screen information on the TV The information displayed on the screen operation icon and time code etc...

Страница 112: ...es that support 8 cm DVD RAM or DVD RW VR format See the operating instructions for DVD recorder player DVD RW VR format may have to be finalized In this case finalize the disc on this unit l 106 You cannot record images that allow One time only recording on a 8 cm disc Playing back a DVD RW Video format or a DVD R Do not insert a disc that has not been finalized into a DVD recorder player the dis...

Страница 113: ...mat may have to be finalized In this case finalize the disc on this unit l 106 Do not insert a DVD RW Video format or DVD R that has not been finalized into a DVD recorder the disc may be unusable Also a message asking you to format the disc may appear on the DVD recorder Do not format the disc If your DVD recorder has an SD card slot you can write the still picture files recorded on an SD card wi...

Страница 114: ...ctures 2 Turn on this unit then rotate the mode dial to select 3 Change the input channel on the video device and TV The channel set will differ depending on the terminal to which the unit is connected 4 Start playback on this unit Then start recording on the connected device See the operating instructions of the video device for details To stop dubbing Stop recording on the connected device Then ...

Страница 115: ...n select SETUP USB FUNCTION PictBridge and press the joystick Press the MENU button to exit the menu screen 2 Connect this unit and a printer The indication appears on this unit s screen If the indication does not appear or continues to flash disconnect and then reconnect the USB cable or check the printer SD card and settings on this unit Do not use any other USB cables except the supplied one Op...

Страница 116: ...et in succession by repeating steps 3 and 4 5 Press the MENU button to display the PictBridge menus 6 Select the date print setting on DATE PRINT If the printer is not capable of date printing this setting is unavailable 7 Select the paper size setting on PAPER SIZE You cannot set paper sizes not supported on the printer STANDARD Size specific to the printer 4t5 INCH L size 5t7 INCH 2L size 4t6 IN...

Страница 117: ...the following operations during printing These operations disable proper printing Disconnecting the USB cable Removing the SD card Switching the mode dial Turning off the power Check the settings for the paper size quality of print etc on the printer The sides of pictures recorded when VDR D300 VDR D250 is set may be cut at printing Check before printing When using the printer with a trimming feat...

Страница 118: ...rantee proper operation of this unit if you use software other than that supplied with this unit What you can do with a computer Can do Software used Playing back on a computer DVD MovieAlbumSE supplied Copying a disc DVD MovieAlbum CopyTool supplied Creating a DVD Video disc DVD MovieAlbumSE supplied and DVDfunSTUDIO supplied Can do Software used Playing back on a computer Commercially available ...

Страница 119: ...r DVD RW VR format It is also possible to transfer exported data to DVDfunSTUDIO It is possible to edit the motion pictures on a DVD RAM if you have a separate DVD RAM drive Playing back DVD RAM and DVD RW VR format A Playback area B Thumbnails Disc contents are shown DVD MovieAlbum CopyTool This is used when creating a copy of a VR format disc Copy the data to the hard disk of the computer and th...

Страница 120: ... write the data to a new disc B DVD menus created Arrange the motion pictures exported from DVD MovieAlbumSE in the DVD menu and edit the menu design C Burning button The contents start being written to disc 3 A DVD Video disc is created Playback is possible on a DVD player Acrobat Reader To view the installed operating instructions Adobe Acrobat Reader 5 0 or later is required If the Adobe Acroba...

Страница 121: ...ome Edition Microsoft Windows XP Professional Personal computer IBM PC AT compatible personal computer OS Microsoft Windows 2000 Professional Microsoft Windows XP Home Edition Microsoft Windows XP Professional CPU Intel Pentium III 450 MHz or higher 1 GHz or higher recommended or Intel Celeron 633 MHz or higher including compatible CPU Intel Pentium III 1 GHz or higher recommended for Windows XP R...

Страница 122: ...ternal DVD RAM DVD RW VR format compatible drive DVDfunSTUDIO 2 4 Personal computer IBM PC AT compatible personal computer OS Microsoft Windows 2000 Professional Service Pack 4 Microsoft Windows XP Home Edition Service Pack 2 Microsoft Windows XP Professional Service Pack 2 CPU Intel Pentium III 800 MHz or higher RAM 256 MB or more 512 MB or more recommended Display High Colour 16 bit or more Desk...

Страница 123: ...Tablet PC Edition is not guaranteed This software is not compatible with Microsoft Windows 3 1 Windows 95 Windows 98 Windows ME Windows NT and 64 bit operating system This software is not compatible with a multi CPU environment This software is not compatible with a multi boot environment If your computer does not satisfy the above system requirements an error may occur when writing data to disc S...

Страница 124: ...ng or Disassembly Licensee may not reverse engineer decompile or disassemble the Software except to the extent either of them is permitted under law or regulation of the country where Licensee resides Matsushita or its distributors or dealers will not be responsible for any defects in the Software or damage to Licensee caused by Licensee s reverse engineering decompiling or disassembly of the Soft...

Страница 125: ...Menu screen will appear If the Setup Menu screen does not appear double click the CD ROM drive icon in My Computer 2 Click DVD RAM Driver The software application may not run properly if you cancel the installation at any point e g by pressing Cancel 3 Click Driver and Formatter Setup If an Information or Question message appears continue to follow the on screen messages to install it 4 Click Next...

Страница 126: ... to reboot will appear Click Yes If any trouble has occurred while installing DVD RAM Driver When the Block is selected in the Driver Signing Options in the System Properties the installation procedure will not complete Select Warn and try again To check and change the setting select start Settings Control Panel Performance and Maintenance System and select Driver Signing of the Hardware tab About...

Страница 127: ...ironment you may be required to install DirectX 9 0b If so click Yes and install it If you install the software in a computer that is not compatible with DirectX 9 0b or 9 0c the computer may not work properly If you are unsure whether or not your computer is compatible contact the maker of your computer 3 Click Next 4 Select PAL for the TV system click Next 5 Click Next Continue to follow the on ...

Страница 128: ...nment you may be required to install DirectX 9 0b If so click Yes and install it If you install the software in a computer that is not compatible with DirectX 9 0b or 9 0c the computer may not work properly If you are unsure whether or not your computer is compatible contact the maker of your computer 3 Click Next 4 Select PAL Europe for the TV system click Next 5 Click Next Continue to follow the...

Страница 129: ...start All Programs Programs Panasonic DVDfunSTUDIO Operating instructions Follow the steps below to uninstall any software applications that you no longer require 1 Select start Settings Control Panel Add or Remove Programs Applications 2 Select the software application to be deleted then click Change Remove Change or Remove or Add Remove Proceed with the uninstallation by following the on screen ...

Страница 130: ... RW Video format and DVD R on this unit before using them on the computer Un finalized discs will not be recognized by the computer Connect this unit to the AC adaptor 1 Insert a disc or card with recorded images in the unit turn on the unit and then select the unit s operation mode When using a disc Select When using a card Select 2 Only in card playback mode Press the MENU button then select SET...

Страница 131: ...ed to a computer it is recognized as an external drive Depending on the operating environment of the computer the shape of the drive icon and the drive name Example E will differ In disc playback mode When accessing the disc Windows XP Optical disc drive is displayed in My Computer Windows 2000 Removable Disk and optical disc drive are displayed in My Computer When a DVD RAM or DVD RW VR format is...

Страница 132: ... this unit to read the SD card Always use this unit to format SD cards When data not supported by this unit has been recorded on a computer it will not be recognized by this unit 1 Double click the icon in task tray Hardware disconnect dialogue appears Depending on your computer s settings this icon may not be displayed 2 Select USB Mass Storage Device and click Stop 3 Verify MATSHITA DVD RAM LMXK...

Страница 133: ...31 USB Device is displayed at DVD CD ROM drives USB Mass Storage Device is displayed at Universal Serial Bus controllers Windows 2000 Professional MATSHITA DVD RAM LMXK1931 USB Device is displayed at DVD CD ROM drives MATSHITA DVD RAM LMXK1931 USB Device is displayed at Disc drives USB Mass Storage Device is displayed at Universal Serial Bus controllers When using a card USB Mass Storage Device is...

Страница 134: ...ent is displayed when the software is first started so read carefully through its terms and conditions then click I agree Connect this unit to the AC adaptor 1 Insert a DVD RAM or DVD RW VR format with recorded images in the unit turn on the unit and then rotate the mode dial to select 2 Connect this unit and a computer Do not use any other USB cables except the supplied one Operation is not guara...

Страница 135: ...export is complete a message will appear Check the small box for Eject the disc being used and then click Yes DVD MovieAlbumSE automatically closes and DVDfunSTUDIO automatically starts When starting DVD MovieAlbumSE the Mount Information dialogue box may appear or the recorded images may not be shown If this occurs try the following procedure If there are multiple drives a drive other than this u...

Страница 136: ...ing the software use Windows Explorer to right click the drive icon for this unit and select Eject The names of playlists created on this unit cannot be displayed on DVD MovieAlbumSE If you export an image recorded in 16 9 aspect ratio with DVD MovieAlbumSE it is saved as a 4 3 aspect image that has been squeezed horizontally If you then use the exported image with DVDfunSTUDIO it is displayed as ...

Страница 137: ... l 48 EVF SET l 48 INITIAL SET l 139 JOYSTICK LED l 140 DEMO MODE l 140 LANGUAGE l 42 Still picture recording menus BASIC SCENE MODE l 75 PICTURE SIZE l 58 PICT QUALITY l 59 CLOCK SET l 46 ADVANCED ß FLASH l 73 RED EYE l 74 ßw FLASH LEVEL l 74 O I S l 72 REC LAMP l 139 SHTR EFFECT l 59 SETUP DISPLAY l 139 DATE TIME l 47 DATE FORMAT l 47 POWER SAVE l 139 BEEP SOUND l 139 LCD AI l 49 LCD SET l 48 EV...

Страница 138: ...l 106 UN FINALIZE l 107 DISC PROTECT l 108 INFORMATION l 109 DISPLAY l 139 DATE l 82 DATE FORMAT l 47 POWER SAVE l 139 BEEP SOUND l 139 LCD AI l 49 LCD SET l 48 EVF SET l 48 TV ASPECT l 111 JOYSTICK LED l 140 LANGUAGE l 42 Still picture playback menus DELETE SELECT l 101 ALL l 101 PLAY SETUP PLAY MODE l 86 LOCK l 102 DPOF SET l 103 SETUP DISPLAY l 139 DATE TIME l 47 DATE FORMAT l 47 FORMAT CARD l ...

Страница 139: ...nit to a computer or printer via the USB cable BEEP SOUND OFF ON This allows operations such as starting and ending recording to be signaled by a beep When OFF is set no beep is heard when an operation such as recording is started or ended 1 Beep When you start recording When you turn on the power When this unit is recognized by the computer or the printer etc 2 Beeps When you pause recording When...

Страница 140: ...this to ON without inserting a disc or an SD card this unit is automatically set to the demonstration mode for introducing its functions If any button is pressed or operated the demonstration mode is cancelled If no operations take place for approx 10 minutes the demonstration mode automatically starts To terminate the demonstration mode insert a disc or an SD card or set this to OFF For normal us...

Страница 141: ...ing time 15 30 15 12 2006 Date time indication Red Recording writing to a disc Green Recording pause Wide mode Auto mode Manual mode MF Manual focus 2t Zoom magnification indication ª Back light mode Image stabilizer Power LCD 16 9 AUTO MNL 1 100 Shutter speed OPEN F2 0 F number 0dB Gain value Soft skin mode Tele macro Fade White Fade Black Colour night view function 0 Lux colour night view functi...

Страница 142: ...Aj Flash VDR D300 only Red eye reduction VDR D300 only White Green Shutter chance mark Ø Self Timer recording MEGA OIS VDR D300 only AWB MEGA Number of recording pixels for still pictures VDR D300 2048k1512 1920k1080 VDR D250 1760k1320 1760k992 VDR D300 VDR D250 1280k960 640k480 White Green Red Card can be recorded to Recognizing the card Recording accessing the card Still picture quality R 100 Re...

Страница 143: ...hen a printer compatible with PictBridge is connected Accessing the card When connected to a computer 1 DPOF already set to more than 1 Locked still pictures Number of recording pixels for still pictures VDR D300 2048k1512 1920k1080 VDR D250 1760k1320 1760k992 VDR D300 VDR D250 1280k960 640k480 The picture size is not displayed for still pictures recorded with other products that have different pi...

Страница 144: ...co jp pavc global cs e_cam This website is in English only CANNOT RECORD IN AGS MODE The AGS function is activated l 51 CANNOT RECORD THIS DISC IS FINALIZED A finalized DVD RW Video format or DVD R has been inserted After finalizing the discs become play only and cannot record If you un finalize a DVD RW Video format it can be used for recording l 107 CANNOT RECORD DISC IS FULL The disc is full or...

Страница 145: ...tart the unit l 154 CHANGE TO MANUAL MODE You are attempting to use a function that cannot be used simultaneously CANCEL NIGHT VIEW MODE TURN OFF POWER LCD CANNOT SET With DVD RW Video format and DVD R if the number of dates displayed becomes 99 when PLAY MODE is set to BY DATE you cannot switch the wide setting CHANGE MODE TO USE USB The USB cable is connected in the recording mode DISCONNECT USB...

Страница 146: ...epending on the error About recovery DISC ERROR HAS OCCURRED REPAIR DISC NOW When you repair the disc use a battery with sufficient battery power or the AC adaptor Depending on the condition of the data it may not be possible to completely repair the data If the disc is removed without it being repaired you will no longer be able to playback the scenes recorded before the power went off Do not rep...

Страница 147: ...the iris gain is set Soft skin mode Set and cancel While recording to a disc Tele macro Set and cancel Help mode Image stabilizer When the colour night view function is used VDR D250 only In card recording mode VDR D250 only Functions Conditions which disable the functions Flash VDR D300 only In disc recording mode Zoom microphone An external microphone is used Wind noise reduction Scene mode When...

Страница 148: ...to the other The recording time indicated on the disc package is the total time for both sides You will need to eject the disc and turn it over to record on both sides Can DVD R only be recorded to once only Recording can be started and stopped until the disc is full However the data recorded on the DVD R cannot be erased Is playback possible on a DVD player By finalizing a DVD RW Video format or ...

Страница 149: ...D MovieAlbumSE if you have a separate DVD RAM drive DVD RW VR format DVD RW Video format DVD R Editing is not possible on a computer Is it possible to copy data to a computer DVD RAM DVD RW VR format Use DVD MovieAlbum CopyTool or the File Export function in DVD MovieAlbumSE Before using DVD RW VR format on a computer be sure to finalize it on this unit DVD RW Video format DVD R Copying data to a ...

Страница 150: ...RY is displayed the battery has run down Charge the battery l 25 Battery runs down quickly Is the battery fully charged Charge it with the AC adaptor l 25 Are you using the battery in an extremely cold place The battery is affected by ambient temperature In cold places the operating time of the battery becomes shorter Has the battery worn out The battery has a limited life If the operating time is...

Страница 151: ...apsed time indication is not shown If you set SETUP DISPLAY OFF indications other than warnings and date indications disappear Recording does not start although power is supplied to this unit and the disc or card is correctly inserted Is the DVD RAM or the DVD RW VR format write protected Release the protection l 108 If the DVD RAM or DVD RW VR format was protected on another device release the pr...

Страница 152: ...re you trying to record a scene which is hard to bring into focus in auto focus mode There are some recording subjects and surroundings for which the auto focus does not operate correctly l 162 If so use the manual focus mode to adjust the focus l 77 Is the night view function set When the night view function is working focusing shifts into the manual mode Sound is not played back from the built i...

Страница 153: ...d s write protect switch is set to LOCK then deletion is disabled l 23 The images on the SD card do not look normal The data may be destroyed It may have been destroyed by static or electromagnetic waves Store important data on a computer or other products as well Even if a disc or a card is formatted it cannot be used Either this unit or the disc or card may be damaged Please consult a dealer Use...

Страница 154: ...rding mode Set it to a playback mode If it is set to card playback mode disconnect the USB cable set USB FUNCTION to PC CONNECT and then reconnect the USB cable Select another USB terminal on the computer Check the operating environment l 121 Turn on the power to this unit When DVD MovieAlbumSE is started the Mount Information dialogue box appears You inserted an incompatible disc A disc other tha...

Страница 155: ...the computer The DISC EJECT lever does not work when the unit is connected to the computer The DISC EJECT lever does not work after the unit is connected to the computer Use Windows Explorer to right click the drive icon and execute Eject Or use the software s eject button to eject the disc After files are exported from DVD MovieAlbumSE a confirmation message is displayed about ejecting the disc S...

Страница 156: ... with them Do not extend the cords and the cables Do not spray insecticides or volatile chemicals onto the unit If the unit is sprayed with such chemicals its body may be marred and the surface finish may peel off Do not leave rubber or plastic products in contact with the unit for a long time When you use the unit in a sandy or dusty place such as a beach do not let sand or fine dust get into the...

Страница 157: ... is charged The battery should be stored in the vinyl bag so metal does not come into contact with the terminals The battery should be stored in a cool place free from humidity with as constant temperature as possible Recommended temperature 15 C to 25 C Recommended humidity 40 to 60 Extremely high temperatures or low temperatures will shorten the life of the battery If the battery is kept in high...

Страница 158: ...llowing phenomena may occur Block noise in playback image Momentary stop of playback image Sound interrupted during playback or abnormal sound Thumbnail display with shades of blue and white Disc cannot correctly be recognized Delay between video and audio When recording images this unit may avoid the portions of disc where recording is not possible due to dust scratches etc It will pause at such ...

Страница 159: ...When the unit has become very cold for example due to storage in a cold area its LCD monitor will be slightly darker than usual immediately after the power is turned on The normal brightness will be restored when the unit s internal temperature rises About the SD card LCD monitor viewfinder Extremely high precision technology is employed to produce the LCD Monitor screen featuring a total of appro...

Страница 160: ...of rain When this unit is in a very humid place where the air is thick with steam e g a heated swimming pool When this unit is taken to a location with a significant temperature difference such as from a cold place to a hot place If for example you have used this unit for recording on a ski slope and are taking it into a heated room place the unit inside a plastic bag remove as much of the air fro...

Страница 161: ... of the effective range of automatic white balance adjustment the image will become reddish or bluish Even within the effective range of automatic white balance adjustment the automatic white balance adjustment may not function properly if there is more than one light source For light outside the functional automatic white balance adjustment range use the manual white balance adjustment mode White...

Страница 162: ...arly when recording something on the opposite side of a road with heavy traffic a vehicle that happens to pass by may be brought into focus Recording a subject that is surrounded by objects with glossy surfaces or by highly reflective objects Since whatever is shiny or glistens is brought into focus it is hard to focus on the subject to be recorded The focus may become blurry when recording subjec...

Страница 163: ...RW DVD Video format DVD RW DVD R Image sensor 1 6z 3CCD image sensor Total 800 Kk3 Effective pixels VDR D300 Moving picture 630 Kk3 4 3 540 Kk3 16 9 Still picture 710 Kk3 4 3 540 Kk3 16 9 VDR D250 Moving picture 400 Kk3 4 3 380 Kk3 16 9 Still picture 530 Kk3 4 3 400 Kk3 16 9 Lens Auto Iris F1 8 to F2 8 Focal length VDR D300 3 0 mm to 30 0 mm VDR D250 2 45 mm to 24 5 mm Macro Full range AF Filter d...

Страница 164: ...ard reader writer function No copyright protection support USB 2 0 compliant Hi Speed PictBridge compliant Motion picture transfer Flash VDR D300 only GN 4 8 Dimensions excluding projecting parts VDR D300 Approx 63 mm W k 87 mm H k 138 mm D VDR D250 Approx 63 mm W k 87 mm H k 136 mm D Mass without supplied battery lens cap and a disc VDR D300 Approx 585 g VDR D250 Approx 555 g Operating temperatur...

Страница 165: ...AM LP 2 5 Mbps VBR Approx 75 min recordable time on a single sided DVD RAM Audio compression Dolby Digital Dolby AC3 16 bit 48 kHz 2 ch Recording media SD Memory Card 8 MB 16 MB 32 MB 64 MB 128 MB 256 MB 512 MB 1 GB 2 GB Maximum Compression JPEG Design rule for Camera File system based on Exif 2 2 standard DPOF corresponding Picture size VDR D300 2048k1512 1920k1080 16 9 1280k960 640k480 VDR D250 ...

Страница 166: ...5 120 98 155 256 MB 160 250 210 330 512 MB 320 490 410 650 1 GB 630 990 820 1290 2 GB 1290 2010 1680 2630 VDR D250 Picture size 1760k1320 1760k992 Picture quality 8 MB 4 7 7 11 16 MB 10 18 18 28 32 MB 24 40 40 61 64 MB 51 83 83 125 128 MB 99 160 160 240 256 MB 210 330 330 510 512 MB 410 660 660 1010 1 GB 820 1330 1330 2010 2 GB 1680 2700 2700 4100 3 1M 2 2 3M 1 7 LSQT1019 ENG book 166 ページ 2006年2月3...

Страница 167: ...n in the table are approximations VDR D300 and VDR D250 Picture size 1280k960 640k480 Picture quality 8 MB 8 14 45 95 16 MB 21 34 100 200 32 MB 47 75 220 440 64 MB 97 155 440 880 128 MB 185 300 880 1760 256 MB 390 620 1760 3520 512 MB 780 1230 3520 7040 1 GB 1550 2470 7040 14080 2 GB 3160 5030 14080 28160 1M 0 3M LSQT1019 ENG book 167 ページ 2006年2月3日 金曜日 午後4時37分 ...

Страница 168: ...zeń elektrycznych i elektronicznych dotyczy gospodarstw domowych Przedstawiony symbol umieszczony na produktach lub dołączonej do nich dokumentacji informuje że niesprawnych urządzeń elektrycznych lub elektronicznych nie można wyrzucać razem z odpadami gospodarczymi Prawidłowe postępowanie w razie konieczności pozbycia się urządzeń elektrycznych lub elektronicznych utylizacji powtórnego użycia lub...

Страница 169: ...kiem handlowym firmy Leica microsystems IR GmbH a DICOMAR jest zarejestrowanym znakiem handlowym firmy Leica Camera AG Microsoft Windows oraz DirectX są znakami handlowymi lub zarejestrowanymi znakami handlowymi firmy Microsoft Corporation w Stanach Zjednoczonych i lub innych krajach IBM i PC AT są zarejestrowanymi znakami handlowymi firmy International Business Machines Corporation w USA Intel Pe...

Страница 170: ...zęciem nagrywania 216 Nagrywanie filmów 218 Zmiana trybu nagrywania filmu 220 Robienie zdjęć 221 Ilość pikseli i jakość obrazu podczas fotografowania 224 Różne funkcje nagrywania 226 Funkcja przybliżania i oddalania zoom 226 Nagrywanie samego siebie 228 Funkcja kompensacji oświetlenia tła 229 Funkcja stopniowego pojawiania się zanikania 230 Tryb wygładzania skóry 232 Funkcja tele makro 233 Funkcje...

Страница 171: ...czniesz używać kamery razem z komputerem 284 Opis funkcji kamery po połączeniu z komputerem 284 Zawartość załączonej płyty CD ROM 285 Wymagania systemowe 287 Umowa licencyjna użytkownika oprogramowania 290 Instalacja 291 Instalacja DVD RAM Driver 291 Instalacja DVD MovieAlbumSE 293 Instalacja DVDfunSTUDIO 294 Czytanie instrukcji obsługi programów 295 Odinstalowanie oprogramowania 295 Połączenie i ...

Страница 172: ...tąpi żadnej z poprzednio nagranych scen Łatwe odtwarzanie l 247 Nagrane sceny są wyświetlane w formie miniatur Można łatwo szukać scen które chce się obejrzeć Edytowanie scen l 253 257 Można utworzyć oryginalne nagranie wideo listę odtwarzania zbierając ulubione sceny razem i potem łatwo przegrać nagranie na magnetowid lub dysk twardy nagrywarki DVD LSQT1019 POL book 172 ページ 2006年2月14日 火曜日 午後2時38分...

Страница 173: ...aby móc odtwarzać sceny nagrane na niej w kamerze Jeśli macie Państwo nagrywarkę DVD z dyskiem twardym można przegrać sceny nagrane na płycie w kamerze na dysk twardy Używanie razem z komputerem l 284 Możesz edytować sceny używając programów znajdujących się na płycie CD ROM będącej częścią zestawu i tworzyć oryginalne płyty DVD Video LSQT1019 POL book 173 ページ 2006年2月14日 火曜日 午後2時38分 ...

Страница 174: ...VSK0651B DE 974GB Kabel zasilania prądem stałym K2GJ2DZ00018 Kabel audio wideo K2KZ9CB00001 Kabel zasilania prądem zmiennym K2CR2DA00004 Pilot N2QAEC000019 Bateria guzikowa CR2025 Pokrywa obiektywu tylko model VDR D250 VYF3031 Pasek na ramię VFC3506 1A Kabel USB K1HA05CD0010 CD ROM Szmatka do czyszczenia płyt VFC3778 2 LSQT1019 POL book 174 ページ 2006年2月14日 火曜日 午後2時38分 ...

Страница 175: ... mAh Konwerter szerokokątny VW LW3707M3E Telekonwerter VW LT3714ME Zestaw filtrów VW LF37WE Lampa VW LDC10E Żarówka do lampy VZ LL10E Mikrofon stereo VW VMS2E Statyw VW CT45E Płyta DVD RAM o średnicy 8 cm jednostronna LM AF30E Płyta DVD RAM o średnicy 8 cm dwustronna LM AF60E Płyta DVD RW o średnicy 8 cm jednostronna LM RW30E Płyta DVD RW o średnicy 8 cm dwustronna LM RW60E Płyta DVD R o średnicy ...

Страница 176: ...słyszalny szum W tym przypadku należy zasilać kamerę akumulatorem który zlikwiduje szum 11 Wizjer l 182 12 Przycisk usuwania l 253 264 266 13 Przycisk otwierania ekranu LCD OPEN l 182 14 Akumulator komora na kabel zasilacza l 192 195 15 Przełącznik zasilania OFF ON l 195 16 Wskaźnik stanu l 195 17 Pokrętło wyboru trybu l 201 18 Joystick l 202 Poruszaj w górę dół lewo i prawo aby wybierać elementy ...

Страница 177: ... BATTERY RELEASE l 192 30 Głośnik 31 Ekran LCD l 182 32 Przełącznik wyboru trybu AUTO MANUAL FOCUS l 217 241 33 Przycisk podświetlenia LCD POWER LCD l 214 34 Przycisk reset RESET l 320 35 Suwak wysuwania płyty DISC EJECT l 198 36 Kontrolka odczytu lub zapisu płyty dostępu do komputera ACCESS PC l 198 297 37 Komora płyty l 198 38 Pasek na rękę l 178 39 Zaczep na pasek na ramię l 178 Z uwagi na ogra...

Страница 178: ...nie poduszki 1 Odwróć pasek 2 Wyreguluj długość 3 Zamocuj pasek Przełóż pasek przez zaczep 1 oraz przez ogranicznik 2 aby się nie odwiązał Wyciągnij część 3 na przynajmniej 2 cm Przełóż drugi koniec paska poprzez A i przywiąż go w ten sam sposób Korzystanie z paska na rękę 2 1 3 Zaczep na pasek na ramię A 1 2 3 LSQT1019 POL book 178 ページ 2006年2月14日 火曜日 午後2時38分 ...

Страница 179: ...ęść opcjonalna z przodu osłony przeciwsłonecznej obiektywu Nie zakładaj innych akcesoriów na osłonie przeciwsłonecznej Za wyjątkiem pokrywy obiektywu Przeczytaj instrukcję obsługi dotyczącą zestawu filtrów Gdy zakładasz telekonwerter VW LT3714ME opcjonalny lub konwerter szerokokątny VW LW3707M3E opcjonalny najpierw zdejmij osłonę przeciwsłoneczną Przeczytaj instrukcję obsługi dotyczącą telekonwert...

Страница 180: ...u zawartą w zestawie filtrów 1 Przełóż koniec sznurka pokrywy obiektywu przez pasek 2 Przełóż pokrywę obiektywu przez pętlę 3 Aby założyć lub zdjąć pokrywę obiektywu przytrzymaj obie strony pokrywy używając palców i kciuka Podczas nagrywania Zdjęta pokrywa obiektywu może być przyczepiona do uchwytu pokrywy obiektywu Zakładanie pokrywy obiektywu W zestawie tylko dla VDR D250 Zawarty w zestawie filt...

Страница 181: ...pcjonalnego statywu Proszę uważnie przeczytać instrukcję obsługi aby dowiedzieć się jak dołączyć statyw do kamery Podczas korzystania ze statywu nie można otworzyć pokrywy gniazda karty pamięci Kartę SD należy włożyć do kamery przed podłączeniem do niej statywu l 200 Gniazdo statywu LSQT1019 POL book 181 ページ 2006年2月14日 火曜日 午後2時38分 ...

Страница 182: ... kierunku wizjera Wysuń wizjer Wizjer zostanie włączony Jeśli ekran LCD jest otwarty wizjer będzie wyłączony Korzystanie z ekranu LCD B A Jasność i poziom kolorów ekranu LCD można regulować z menu l 214 W przypadku otwarcia lub obracania ekranu na siłę urządzenie może ulec uszkodzeniu i przestać działać poprawnie Jeśli ekran LCD jest obrócony o 180x w stosunku do obiektywu a wizjer jest wysunięty ...

Страница 183: ...6 Przyciski strzałek 3 4 2 1 l 211 7 Przyciski rozpoczęcia zatrzymania nagrywania START STOP 8 Przycisk powiększenia głośności ZOOM VOL 9 Przycisk menu MENU l 211 10 Przycisk akceptacji ENTER l 211 Oznacza że te przyciski będą działać tak samo jak odpowiadające im przyciski na kamerze Używanie pilota ZOOM START STOP PHOTO SHOT EXT DISPLAY DATE TIME VOL PLAY STOP SKIP SKIP MENU ENTER PAUSE SEARCH S...

Страница 184: ...ałać około 1 roku ale zależy to od sposobu użytkowania Bateria guzikowa powinna być przechowywana w miejscu niedostępnym dla dzieci Uwaga Niebezpieczeństwo wybuchu gdy bateria zostanie nieprawidłowo wymieniona Użyj ten sam typ baterii lub równowartościowej baterii zalecanej przez producenta Likwiduj baterie zgodnie z instrukcjami producenta Ostrzeżenie Ryzyko pożaru wybuchu i poparzeń Baterii nie ...

Страница 185: ...kiem pilota w kamerze A Maksimum ok 5 m Kąt Około 10o z góry i 15o z dołu z lewej i z prawej strony A Pilot jest przeznaczony do pracy wewnątrz pomieszczeń Gdy pilot będzie używany na zewnątrz budynku lub w ostrym świetle może nie działać prawidłowo nawet znajdując się w użytecznym zasięgu LSQT1019 POL book 185 ページ 2006年2月14日 火曜日 午後2時38分 ...

Страница 186: ...go zapisu Płyta wielokrotne go zapisu Płyta jednorazowego zapisu 1 1 Po sformatowaniu płyty można z niej korzystać wielokrotnie l 270 Płyta jednorazowego zapisu Symbol na ekranie Oznaczenie w tej instrukcji RAM RW VR RW V R Funkcje Usuwanie nagranych scen Edycja w kamerze Odtwarzanie na innych produktach 2 2 Odtwarzacze i nagrywarki DVD obsługujące płyty 8 cm 3 3 Odtwarzanie możliwe na kompatybiln...

Страница 187: ...rządzeniach może być niemożliwe Kamera nie pozwala na nagrywanie na płytach DVD R w formacie DVD Video Recording Podczas używania płyt DVD RW lub DVD R nie wolno przeprowadzać poniższych działań ponieważ może to uniemożliwić korzystanie z płyt Nagrywać na płycie w innych urządzeniach po nagraniu płyty w tej kamerze Nagrywać na płycie w tej kamerze po nagraniu płyty w innych urządzeniach Wkładać ni...

Страница 188: ...kamery pojawi się ekran widoczny po prawej stronie Wybierz TAK i naciśnij środek joysticka 2 Wybierz format i naciśnij środek joysticka 3 Kiedy pojawi się ekran zatwierdzenia wybierz TAK i naciśnij środek joysticka W przypadku korzystania z nowej płyty DVD RW WIDEO Format DVD Video VR Format DVD Video Recording Aby zmienić format ponownie sformatuj płytę l 270 Formatowanie płyty powoduje usunięcie...

Страница 189: ...anasonic Po zablokowaniu blokady zapisu w karcie SD na karcie nie będzie można nagrywać usuwać z niej nagrań ani ich edytować Kartę pamięci należy przechowywać w miejscu niedostępnym dla dzieci aby zapobiec jej połknięciu Kart typu MultiMediaCard nie można stosować w tej kamerze Informacje dotyczące karty miniSD Karty miniSD przed użyciem należy włożyć do specjalnej przejściówki Włożenie karty do ...

Страница 190: ...aj długopisów ani innych podobnych przyborów do pisania Nie stosuj sprayów do czyszczenia płyty benzyny rozcieńczalnika płynów antystatycznych lub jakichkolwiek innych rozpuszczalników Nie stosuj elementów chroniących przed zadrapaniem Nie wystawiaj końcówek karty na działanie wody brudu lub kurzu Nie upuszczaj płyt nie ustawiaj ich w stos ani nimi nie rzucaj Nie kładź ani nie stawiaj niczego na p...

Страница 191: ...miejscu Wtyczka kabla zasilania nie jest w pełni podłączona do gniazda zasilacza sieciowego Jak widać na rysunku A istnieje odstęp Kontrolka ładowania Kontrolka zapalona Trwa ładowanie Kontrolka zgaszona Ładowanie zakończone Kontrolka miga Akumulator jest skrajnie zbyt mocno rozładowany Po chwili kontrolka zapali się i rozpocznie się normalne ładowanie Kiedy temperatura akumulatora jest zbyt wysok...

Страница 192: ...ię on na miejscu Przytrzymując suwak BATTERY RELEASE wysuń akumulator aby go wyjąć Przytrzymaj akumulator ręką aby nie spadł Wkładanie akumulatora Wyjmowanie akumulatora Zanim wyjmiesz baterię ustaw przełącznik OFF ON na pozycję OFF i sprawdź czy wskaźnik stanu wyłączył się LSQT1019 POL book 192 ページ 2006年2月14日 火曜日 午後2時38分 ...

Страница 193: ... i czas nagrywania Numer modelu akumulatora Napięcie pojemność Czas ładowania Dołączony akumulator CGA DU12 opcja 7 2 V 1150 mAh 2 h 25 min CGA DU14 opcja 7 2 V 1360 mAh 2 h 45 min CGA DU21 opcja 7 2 V 2040 mAh 3 h 55 min VDR D300 Podczas używania płyty DVD RAM Numer modelu akumulatora Napięcie pojemność Tryb nagrywania Maksymalny czas ciągłego nagrywania Czas przerywanego nagrywania Dołączony aku...

Страница 194: ...h 35 min 1 h 25 min LP 3 h 15 min 3 h 5 min 1 h 35 min 1 h 30 min Wraz ze zmniejszaniem się poziomu naładowania akumulatora wyświetlany symbol będzie się zmieniał Po rozładowaniu akumulatora miga Czas nagrywania będzie krótszy w następujących przypadkach Gdy używasz jednocześnie wizjera oraz ekran LCD gdy ekran LCD jest obrócony w twoją stronę gdy używasz trybu nagrywania kolorów w całkowitej ciem...

Страница 195: ...era zostanie włączona z założoną pokrywą obiektywu automatyczna regulacja balansu bieli l 327 może nie działać poprawnie Naciskając przycisk A ustaw przełącznik OFF ON na ON Wskaźnik stanu B zapala się i włącza się zasilanie Tylko model VDR D300 Pokrywa obiektywu otwiera się w trybie nagrywania na płytę lub na kartę Gdy kamera jest włączana po raz pierwszy pojawi się komunikat o potrzebie wpisania...

Страница 196: ... procedurę rozpoznawania aby sprawdzić czy płyta jest w dobrym stanie W przypadku DVD RAM trwa to około 25 sekund Jeśli chcesz rozpocząć nagrywanie od razu po włączeniu zasilania zrób co następuje 1 Włącz kamerę 2 Po tym jak komunikat ODCZYT PŁYTY zniknie z ekranu wyłącz kamerę Nagrywanie można rozpocząć około 8 sekund po ponownym włączeniu kamery W zależności od stanu płyty może to trwać dłużej J...

Страница 197: ...a zasilanie włączy się Wyłączanie zasilania Zamknij ekran LCD lub wsuń wizjer Wskaźnik stanu zgaśnie a zasilanie wyłączy się Zasilanie nie wyłączy się dopóki ekran LCD nie zostanie zamknięty a wizjer wsunięty Zasilanie nie wyłączy się dopóki kamera nagrywa na płycie pomimo że ekran LCD będzie zamknięty a wizjer wsunięty Jak włączać i wyłączać zasilanie używając ekranu LCD wizjera Ustaw przełącznik...

Страница 198: ... po mignięciu kontrolki ACCESS PC pokrywa komory płyty nieznacznie się otworzy 2 Otwórz pokrywę komory płyty ręką i włóż lub wyjmij płytę Wkładanie płyty Włóż płytę na występ w środku komory A Strona nagrywania odtwarzania B Soczewka odczytu zapisu Wyjmowanie płyty Wciskając występ na środku komory płyty chwyć krawędź płyty i delikatnie ją wyjmij 3 Naciśnij fragment pokrywy komory płyty oznaczony ...

Страница 199: ...roną do środka kamery pojawi się komunikat o błędzie Wyjmij płytę i włóż ją ponownie ze stroną nagry wania odczytu skierowaną do środka kamery Nie pozwól aby strona nagrywania odczytu uległa zadrapaniu lub zabrudzeniu Nie wyjmuj akumulatora ani nie odłączaj zasilacza podczas wyjmowania płyty przed całkowitym wyłączeniem kamery Jeśli tak zrobisz pokrywa się nie otworzy W takim przypadku ponownie po...

Страница 200: ...lektryczne elektryczność statyczna lub usterka kamery lub karty SD może uszkodzić lub usunąć dane zapisane na karcie SD Zalecamy zapis ważnych danych na komputerze Kontrolka dostępu do karty Kiedy kamera uzyskuje dostęp do karty SD odczyt nagrywanie odtwarzanie kasowanie itp zapala się kontrolka dostępu do karty Jeśli poniższe działania zostaną przeprowadzone kiedy kontrolka się pali karta SD lub ...

Страница 201: ... i ustaw żądany piktogram trybu w miejscu pokazanym na ilustracji Tryb nagrywania płyt l 218 Służy do nagrywania filmów na płycie Tryb odtwarzania płyt l 247 Służy do odtwarzania filmów z płyty Tryb nagrywania na karcie l 221 Służy do nagrywania zdjęć na karcie SD Tryb odtwarzania z karty l 251 Służy do przeglądania zdjęć z karty SD Nie obracaj pokrętłem na siłę LSQT1019 POL book 201 ページ 2006年2月14...

Страница 202: ...cka aby wybrać Obsługa ekranu menu l 209 Obróć pokrętło wyboru trybu na lub 1 Naciśnij środek joysticka aby na ekranie pojawiły się ikony Gdy naciśniesz ponownie środek joysticka ikony znikną Poruszenie joysticka w dół zmienia ikonę 2 Przesuń joystick w górę w lewo lub w prawo aby wybrać element Podstawowe działania 1 Wybierz naciskając w górę 2 Wybierz naciskając w dół 3 Wybierz naciskając w lewo...

Страница 203: ... naciśnij środek joysticka Wybrana scena zostanie odtworzona na całym ekranie Na ekranie automatycznie pojawi się ikona obsługi 2 Przesuń joystick w górę w dół w lewo lub w prawo aby nawigować Każde naciśnięcie środka joysticka powoduje wyświetlenie lub ukrycie ikony obsługi Czynności wykonywane podczas odtwarzania LSQT1019 POL book 203 ページ 2006年2月14日 火曜日 午後2時38分 ...

Страница 204: ... tła 229 2 Pojawianie się zanikanie 230 1 Tryb pomocy 207 2 3 2 Tryb wygładzania skóry 232 1 Tele makro 233 3 3 3 Kolorowe nagrywanie w ciemności Kolorowe nagrywanie w całkowitej ciemności 0 luksów 234 W trybie ręcznym 4 4 3 Balans bieli 244 2 Przysłona lub wartość wzmocnienia 246 1 Czas naświetlania 246 W trybie ręcznego ustawiania ostrości 5 5 21 Ręczna regulacja ostrości 243 1 3 NEXT 2 3 NEXT 3...

Страница 205: ...czas odtwarzania 247 1 Wolne przewijanie do przodu odtwarzanie poklatkowe podczas pauzy 248 Tryb nagrywania na karcie Ikona Kierunek Funkcja Strona 1 2 3 Kompensacja oświetlenia tła 229 Ø 2 Samowyzwalacz 235 1 Tryb pomocy 207 2 2 2 Tryb wygładzania skóry 232 1 Tele makro 233 W trybie ręcznym 3 3 3 Balans bieli 244 2 Przysłona lub wartość wzmocnienia 246 1 Czas naświetlania 246 W trybie ręcznego us...

Страница 206: ...wietl poprzednie zdjęcie 251 D 1 Wyświetl następne zdjęcie 251 Tryb odtwarzania z karty Kiedy wybrano POK SLAJ Ikona Kierunek Funkcja Strona 1 3 Rozpoczęcie zatrzymanie pokazu slajdów 251 4 Zatrzymaj odtwarzanie i pokaż miniatury 251 E 2 Pokaż poprzednie zdjęcie podczas pauzy 251 D 1 Pokaż następne zdjęcie podczas pauzy 251 LSQT1019 POL book 206 ページ 2006年2月14日 火曜日 午後2時38分 ...

Страница 207: ...icka aby wyświetlić ikonę podczas pauzy nagrywania 2 Przesuń joystick w prawo aby wybrać 3 Przesuń joystick w górę w lewo lub w prawo aby wybrać żądaną ikonę Na ekranie pojawi się opis wybranej ikony Poruszenie joysticka w dół zmienia ikonę Wyjście z ekranu pomocy Naciśnij przycisk MENU lub wybierz EXIT Gdy włączony jest tryb pomocy nie można włączać funkcji 1 3 NEXT 1 3 NEXT EXIT 1 3 NEXT EXIT 1 ...

Страница 208: ...T1019 Przełączanie języka Można wybrać język komunikatów na ekranie i w menu 1 Naciśnij przycisk MENU wybierz LANGUAGE i naciśnij środek joysticka 2 Wybierz Polski i naciśnij środek joysticka LSQT1019 POL book 208 ページ 2006年2月14日 火曜日 午後2時38分 ...

Страница 209: ...i od położenia pokrętła wyboru trybu W czasie wyświetlania menu nie obracaj pokrętłem 2 Przesuń joystick w górę lub w dół aby wybrać żądane menu główne A 3 Przesuń joystick w prawo lub naciśnij środek joysticka Pojawi się menu niższego poziomu B 4 Przesuń joystick w górę lub w dół aby wybrać element menu niższego poziomu C Aktualne ustawienia menu MENU A B C LSQT1019 POL book 209 ページ 2006年2月14日 火曜...

Страница 210: ...any element 7 Naciśnij środek joysticka aby wejść do wybranego elementu Aby cofnąć się do poprzedniego ekranu Przesuń joystick w lewo Aby wyjść z ekranu menu Naciśnij przycisk MENU MENU Ekran menu nie pojawia się podczas nagrywania lub odtwarzania Po wyświetleniu ekranu menu nie można uruchomić innych funkcji LSQT1019 POL book 210 ページ 2006年2月14日 火曜日 午後2時38分 ...

Страница 211: ...wania przycisków na kamerze 1 Naciśnij przycisk MENU 2 Wybierz element menu Użyj przycisków strzałek 3 4 2 1 i przycisku ENTER zamiast joysticka na kamerze 3 Naciśnij przycisk MENU aby wyjść z ekranu menu Używanie pilota MENU ENTER MENU ENTER MENU ENTER LSQT1019 POL book 211 ページ 2006年2月14日 火曜日 午後2時38分 ...

Страница 212: ...oru trybu na lub 1 Naciśnij przycisk MENU wybierz PODSTAWOWE UST ZEG TAK i naciśnij środek joysticka 2 Przesuń joystick w lewo lub prawo aby wybrać element do ustawienia Następnie przesuń joystick w górę lub w dół aby ustawić żądaną wartość Lata przełączają się następująco 2000 2001 2099 2000 Czas jest wyświetlany w systemie 24 godzinnym 3 Naciśnij środek joysticka aby wejść do wybranego elementu ...

Страница 213: ... 15 12 2006 15 30 15 12 2006 15 12 2006 Funkcja daty i czasu jest zasilana z wbudowanej baterii litowej Przed rozpoczęciem nagrywania pamiętaj o sprawdzeniu wyświetlanego czasu Jeśli wyświetlacz czasu pokazuje oznacza to że wbudowana bateria litowa jest rozładowana Użyj następującego sposobu aby ją naładować Po włączeniu zasilania po raz pierwszy po łado waniu pojawi się komunikat o potrzebie usta...

Страница 214: ...nij przycisk POWER LCD Na ekranie LCD pojawi się ikona Cały ekran LCD stanie się około 2 razy jaśniejszy niż zwykle Regulacja jasności i nasycenia kolorów EVF Aby ustawić jasność wizjera zamknij ekran LCD i wysuń wizjer aby go włączyć Kiedy ekran LCD jest obrócony o 180 w kierunku obiektywu nie można regulować jasności i poziomu kolorów ekranu LCD Te ustawienia nie mają wpływu na nagrywane obrazy ...

Страница 215: ... obrazy NORMALNY Przełącza na standardową jakość obrazu Efekt zależy od nagrywanej sceny Nie będzie to miało wpływu na jakość obrazu w wizjerze Funkcja ta jest automatycznie ustawiana na wartość DYNAMICZ gdy zwiększy się jasność ekranu na ekranie LCD pojawi się ikona i nie można jej niezależnie ustawić na wartość NORMALNY Nie będzie to miało wpływu na nagrywane obrazy Gdy ekran LCD jest obrócony o...

Страница 216: ...pod paskiem na rękę 3 Nie przykrywaj mikrofonów ani czujników rękami 4 Trzymaj ręce blisko ciała 5 Stań w lekkim rozkroku Kiedy jesteś na dworze nagrywaj ze słońcem za plecami Jeśli nagrywany obiekt jest oświetlony od tyłu na nagraniu będzie on zbyt ciemny Podstawowe ułożenie kamery 4 5 1 2 3 LSQT1019 POL book 216 ページ 2006年2月14日 火曜日 午後2時38分 ...

Страница 217: ...246 Ustawienie ostrości l 243 Zabezpieczenie przed filmowaniem ziemi AGS tylko model VDR D300 Funkcja ta zapobiega przypadkowemu nagrywaniu gdy użytkownik nie włączy pauzy nagrywania i będzie niósł kamerę odwróconą do góry nogami Jeśli kamera będzie odwrócona do góry nogami podczas nagrywania na płycie automatycznie włączy się pauza nagrywania Włączanie i wyłączanie funkcji AGS Obróć pokrętło wybo...

Страница 218: ...ądaniem ich na podłączonym telewizorze l 277 Tylko model VDR D250 Zdejmij pokrywę obiektywu przed włączeniem kamery Jeśli kamera zostanie włączona z założoną pokrywą obiektywu automatyczna regulacja balansu bieli może nie działać poprawnie 1 Włącz kamerę 2 Obróć pokrętło wyboru trybu na Tylko model VDR D300 Pokrywa obiektywu otwiera się automatycznie 3 Otwórz ekran LCD lub wyciągnij wizjer 4 Aby r...

Страница 219: ...cen na płytę na stronę to 999 Nie można nagrać na płycie więcej niż 999 scen nawet jeśli na płycie jest jeszcze wolne miejsce Dźwięk jest nagrywany w formacie Dolby Digital poprzez wbudowany mikrofon stereo umieszczony z przodu kamery Uważaj by nie blokować mikrofonu Po każdym przełączeniu kamery w tryb zatrzymania nagrywania licznik zostanie wyzerowany i będzie wyświetlać 0h00m00s Gdy kamera nagr...

Страница 220: ... nagrywania ulega skróceniu Zmiana trybu nagrywania filmu Dostępne tryby nagrywania i czas nagrywania filmów Tryb nagrywania Czas nagrywania na jednej stronie XP Wysoka jakość Około 18 min SP Normalna jakość Około 37 min LP Long play długie nagranie Około 75 min Zakłócenia w kształcie mozaiki mogą pojawić się na odtwarzanym nagraniu w następujących wypadkach Kiedy w tle jest złożony wzór Kiedy kam...

Страница 221: ...sk PHOTO SHOT aby wyregulować ustawianie ostrości W przypadku automatycznego ustawiania ostrości Czas naświetlania i wartość wzmocnienia przysłony są stałe i kamera automatycznie ustawi ostrość na obiekcie Tylko model VDR D300 Jeśli ustawisz STAB DRGAŃ na ZAŁĄCZ wtedy stabilizator obrazu będzie bardziej wydajny Pojawi się komunikat Optyczny stabilizator obrazu MEGA Znak dobrego zaostrzenia jest pr...

Страница 222: ...OZM OBR jest ustawiony na inną wartość niż włączany jest megapikselowy tryb nagrywania Nie można nagrywać dźwięku Jeśli blokada zapisu na karcie SD jest ustawiona na LOCK na karcie nie można nic nagrać Przycisk PHOTO SHOT na pilocie nie może być naciśnięty do połowy Jeśli element JAKOŚĆ OBR jest ustawiony na mogą pojawić się mozaikowe zakłócenia na odtwarzanym obrazie w zależności od zawartości ob...

Страница 223: ...a karty R 100 R 100 R 100 A B C Znak dobrego zaostrzenia nie pojawia się w ręcznym ustawianiu ostrości Gdy trudno jest automatycznie ustawić ostrość na obiekcie ustaw ją ręcznie Możesz zapisać zdjęcia na karcie nawet jeśli nie pojawi się znak dobrego zaostrzenia ponieważ zdjęcia mogą być zapisane bez zaostrzenia Znak dobrego zaostrzenia nie pojawia się lub miga w następujących przypadkach Gdy zast...

Страница 224: ...Ikona Format Ilość pikseli 4 3 2048k1512 4 3 1280k960 4 3 640k480 16 9 1920k1080 VDR D250 Ikona Format Ilość pikseli 4 3 1760k1320 4 3 1280k960 4 3 640k480 16 9 1760k992 Fabrycznie element ROZM OBR jest ustawiony na wartość VDR D300 VDR D250 Podczas druku boki zdjęć wykonanych w formacie 16 9 mogą zostać ucięte Sprawdź to przed drukowaniem 3 1M 1M 0 3M 2 2 3M 1M 0 3M 1 7 2 1 7 LSQT1019 POL book 22...

Страница 225: ...wysokiej jakości Ważniejsza będzie ilość możliwych do zapisania zdjęć Zdjęcia będą zapisywane w normalnej jakości Możesz dodać dźwięk migawki podczas fotografowania Naciśnij przycisk MENU wybierz ZAAWANSOW EF SKRÓTU ZAŁĄCZ lub WYŁĄCZ i naciśnij środek joysticka Domyślnie ta funkcja jest ustawiona na ZAŁĄCZ Włączanie i wyłączanie dźwięku migawki LSQT1019 POL book 225 ページ 2006年2月14日 火曜日 午後2時38分 ...

Страница 226: ...amy stosowanie funkcji stabilizacji obrazu l 238 Gdy dalekie obiekty są przybliżone ostrość ustawiona jest na około 1 m VDR D300 1 2 m VDR D250 lub więcej Gdy powiększenie wynosi 1k kamera może nastawić ostrość na obiekt oddalony o ok 3 5 cm VDR D300 4 cm VDR D250 od obiektywu Funkcja makro Szybkość zoomu różni się w zależności od stopnia odchylenia dźwigni zoom Szybkość powiększania jest stała gd...

Страница 227: ...zania RAM RW VR RW V R W połączeniu z funkcją zoomu kamery mikrofon będzie wyraźnie nagrywał dźwięki z oddali w funkcji mikrofonu kierunkowego lub z najbliższego otoczenia kamery jeśli będziemy nagrywać bez zbliżenia Obróć pokrętło wyboru trybu na Naciśnij przycisk MENU wybierz ZAAWANSOW ZOOM MIKR ZAŁĄCZ i naciśnij środek joysticka Funkcja zoomu cyfrowego WYŁĄCZ Tylko zoom optyczny do 10k 25k Do 2...

Страница 228: ...ny jest normalnie a nie odwrócony Wysuń wizjer aby widzieć obraz podczas nagrywania Gdy format obrazu podczas nagrywania wynosi 16 9 obraz widziany na ekranie wizjer jest rozciągnięty w poziomie ale jest to normalne zachowanie i nie oznacza usterki Nagrywanie samego siebie Kiedy ekran LCD jest obrócony w kierunku obiektywu ikony nie będą wyświetlane nawet po naciśnięciu joysticka Na ekranie będą p...

Страница 229: ...y wyświetlić ikonę pokazaną na ilustracji 2 Przesuń joystick w górę aby wybrać ª Obraz na ekranie rozjaśni się Aby powrócić do normalnego nagrywania Wybierz ª ponownie Funkcja kompensacji oświetlenia tła Ta funkcja służy zapobieganiu ściemnienia nagrywanego obiektu oświetlonego od tyłu 1 3 NEXT 1 3 NEXT Jeśli wyłączysz zasilanie lub obrócisz pokrętłem zmiany trybu funkcja kompensacji oświetlenia t...

Страница 230: ...ię stopniowo Po rozpoczęciu nagrywania najpierw obraz dźwięk znika całkowicie a potem obraz dźwięk pojawia się stopniowo Po ukończeniu nagrywania funkcja stopnio wego pojawiania się zanikania zakończy się a ustawienie zostanie anulowane Aby włączyć zanikanie 1 Podczas nagrywania naciśnij środek joysticka Następnie przesuń joystick w dół aby wyświetlić ikonę pokazaną na ilustracji Funkcja stopniowe...

Страница 231: ...anie Wybierz ponownie Aby wybrać kolor dla pojawiania się zanikania Można wybrać kolor zanikających i pojawiających się obrazów Naciśnij przycisk MENU wybierz ZAAWANSOW WYGAŚ KOL BIAŁY lub CZARNY i naciśnij środek joysticka Jeśli wyłączysz zasilanie funkcja stopniowego pojawiania się zostanie anulowana Jeśli wybrano funkcję pojawiania się zanikania po rozpoczęciu nagrywania obraz pojawi się po kil...

Страница 232: ...zaną na ilustracji 2 Przesuń joystick w lewo aby wybrać Aby wyłączyć tryb wygładzania skóry Wybierz ponownie Tryb wygładzania skóry W tym trybie kolor skóry jest mniej intensywny co poprawia wygląd nagrywanych osób 2 3 NEXT 2 3 NEXT Jeśli tło lub coś innego w scenie ma kolor zbliżony do koloru skóry ich obraz również zostanie wygładzony Jeśli jasność jest zbyt niska efekt może nie być wyraźnie wid...

Страница 233: ...nie na 10k Wyłączanie funkcji tele makro Wybierz ponownie Funkcja tele makro Służy do skoncentrowania ujęcia na obiekcie w przybliżeniu VDR D300 Kamera może ustawić ostrość na obiekcie odległym o ok 50 cm VDR D250 Kamera może ustawić ostrość na obiekcie odległym o ok 40 cm 2 3 NEXT 2 3 NEXT Jeśli nie można ustawić bardziej ostrego obrazu automatycznie ustaw go ręcznie l 243 W następujących przypad...

Страница 234: ...st funkcja nagrywania w ciemności Przesuń joystick w lewo lub w prawo aby ręcznie ustawić ostrość na nagrywanym obiekcie l 243 3 W przypadku funkcji nagrywania kolorów w całkowitej ciemności 0 luksów Wyciągnij wizjer i obróć ekran LCD w stronę obiektywu Gdy ekran LCD jest odwrócony ekran jest podświetlony na biało Wysuń wizjer i patrz się na obraz podczas nagrywania Światło z ekranu LCD sięga na m...

Страница 235: ...Jeśli naciśniesz do połowy przycisk PHOTO SHOT a następnie całkowicie kamera ustawi ostrość obiektu gdy przycisk jest naciśnięty do połowy Gdy naciśniesz całkowicie przycisk PHOTO SHOT kamera ustawi ostrość na obiekcie tuż przed nagrywaniem Aby wyłączyć samowyzwalacz podczas odliczania Naciśnij przycisk MENU Samowyzwalacz zostanie wyłączony Nagrywanie z samowyzwalaczem Ta funkcja służy do robienia...

Страница 236: ...TYWIATR WYŁĄCZ i naciśnij środek joysticka Funkcja redukcji szumu wiatru Ta funkcja służy do ograniczania szumu wiatru nagrywanego przez mikrofon Domyślnie ta funkcja jest ustawiona na ZAŁĄCZ Szum wiatru jest zmniejszany w zależności od siły wiatru Jeśli funkcja zostanie włączona przy silnym wietrze może to zmniejszyć efekt stereo Kiedy wiatr osłabnie efekt stereo zostanie przywrócony Nie działa z...

Страница 237: ...rętło wyboru trybu na Naciśnij przycisk MENU wybierz PODSTAWOWE FORMAT 16 9 i naciśnij środek joysticka Zapisywanie obrazów w formacie 4 3 Obróć pokrętło wyboru trybu na Naciśnij przycisk MENU wybierz PODSTAWOWE FORMAT 4 3 i naciśnij środek joysticka Tryb panoramiczny Służy do wyboru formatu obrazu podczas nagrywania filmów Domyślne ustawienie to 16 9 LSQT1019 POL book 237 ページ 2006年2月14日 火曜日 午後2時3...

Страница 238: ...ciśnij środek joysticka Funkcja stabilizacji obrazu Ta funkcja służy do zmniejszania drgań podczas nagrywania Domyślnie ta funkcja jest ustawiona na ZAŁĄCZ Tylko model VDR D300 W trybie nagrywania na kartę naciśnięcie do połowy przycisku PHOTO SHOT zwiększa działanie funkcji stabilizacji obrazu optyczny stabilizator obrazu MEGA W przypadku korzystania ze statywu zalecamy wyłączenie tej funkcji W p...

Страница 239: ...yłączony Jeśli flesz powinien zostać użyty ikona zapali się na żółto Gdy wyświetlana jest ikona ß ßi ßj lub ßA ßAi ßAj flesz może być użyty Jeśli ikona miga lub nie jest widoczna flesz nie może być użyty Zasięg flesza wynosi od ok 1 m do 2 5 m w ciemnych miejscach Zdjęcia będą ciemne lub zaczerwienione gdy zostały zrobione przy użyciu flesza a obiekt znajdował się dalej niż 2 5 m od obiektywu Gdy ...

Страница 240: ...lement i naciśnij środek joysticka ßj Jeśli flesz jest zbyt jasny ßd0 Do zwykłego fotografowania ßi Jeśli jasność flesza jest niewystarczająca Funkcja redukcji efektu czerwonych oczu Flesz błyśnie dwa razy Nie poruszaj się dopóki nie zabłyśnie po raz drugi Użyj tej funkcji gdy robisz zdjęcia ludziom w ciemnych miejscach Efekt czerwonych oczu zależy od warunków otoczenia Ustawianie jasności flesza ...

Страница 241: ... naciśnij środek joysticka Tryb sceny Ta funkcja służy do nagrywania w różnych sytuacjach Symbol Tryb Okoliczności nagrywania 5 Sport Do nagrywania scen sportowych lub scen z szybko poruszającymi się obiektami Portret Aby wyraźnie oddzielić nagrywane osoby od tła Słabe oświetlenie Aby rozjaśnić scenę nagrywaną przy słabym oświetleniu Oświetlenie punktowe Aby nagrywany obiekt oświetlony punktowo wy...

Страница 242: ... oświetlonego obiektu lub obiektu silnie odbijającego światło na nagraniu mogą pojawić się poziome linie światła Jeśli jasność jest niewystarczająca tryb sportowy nie działa Symbol 5 będzie migać Jeśli ten tryb jest używany do nagrywania wewnątrz pomieszczeń ekran może migotać Portret Jeśli ten tryb jest używany do nagrywania wewnątrz pomieszczeń ekran może migotać Jeśli tak jest ustawienie trybu ...

Страница 243: ...F oraz kona przedstawiona na ilustracji 3 Przesuń joystick w lewo lub w prawo aby ręcznie ustawić ostrość na nagrywanym obiekcie Kiedy ustawiono ostrość w oddaleniu po zbliżeniu obiekt może być nieostry Najpierw należy zbliżyć obiekt korzystając z funkcji zoom a potem ustawić ostrość Aby przywrócić automatyczną regulację Ustaw przełącznik AUTO MANUAL FOCUS w położenie FOCUS Można również przywróci...

Страница 244: ...ę Ustaw tryb balansu bieli na Można również przywrócić automatyczną regulację ustawiając przełącznik AUTO MANUAL FOCUS w położenie AUTO Balans bieli Ta funkcja służy do nagrywania w naturalnych kolorach MNL 4 4 NEXT MNL 4 4 NEXT MNL BACK Symbol Tryb Okoliczności nagrywania Automatyczna regulacja balansu bieli Tryb do nagrywania wewnątrz pomieszczeń przy oświetleniu żarówkami Światło żarówek światł...

Страница 245: ...tomatycznie reguluje czerń gdy balans bieli jest ustawiany ręcznie Po ustawieniu balansu bieli ekran przez pewien czas będzie czarny Balans czerni nie może być ustawiony ręcznie 1 Przebiega regulacja balansu czerni Miga 2 Przebiega regulacja balansu bieli Miga 3 Regulacja zakończona Zapala się Aby ręcznie ustawić balans bieli MNL BACK MNL BACK A 1 2 3 Kiedy symbol miga na biało wcześniej ustawiony...

Страница 246: ...0 do 1 8000 VDR D300 1 25 do 1 2000 VDR D250 1 25 do 1 500 OPEN OPEN 1 100 100 1 100 OPEN MNL BACK A B W przypadku ustawiania czasu naświetlanie i wartości wzmocnienia przysłony najpierw ustaw czas naświetlania Ręczna regulacja czasu naświetlania Unikaj nagrywania w świetle świetlówek lamp rtęciowych lub sodowych ponieważ może to zmienić kolory i jasność nagrywanego obrazu Jeśli ręcznie zwiększysz...

Страница 247: ...ysticka w górę lub w dół można przełączać się co 8 scen Ekran w tym momencie nie będzie się przełączał ale zmieniać będą się numery scen i pasek przewijania dlatego po dojściu do strony ze sceną jaką chce się wyświetlić należy puścić joystick 3 Naciśnij środek joysticka Wybrana scena zostanie odtworzona na całym ekranie Na ekranie automatycznie pojawi się ikona obsługi 4 Przesuń joystick aby kontr...

Страница 248: ...ciśnij przycisk E lub D Za wyjątkiem normalnego odtwarzania dźwięk nie jest odtwarzany Jeśli pauza jest włączona przez 5 minut ekran przełączy się do miniatur Jeśli nagrana scena jest bardzo krótka odtwarzanie może być niemożliwe Miniatury filmów których nie można odtworzyć są wyświetlone na biało niebiesko Zasilanie nie wyłączy się gdy ekran LCD zostanie zamknięty i gdy wizjer zostanie wsunięty G...

Страница 249: ... 2 Naciśnij przycisk E lub D Regulacja głośności podczas odtwarzania Aby zmienić poziom głośności przesuń suwak głośności Im dalej wskaźnik zostanie przesunięty w prawo w kierunku i tym wyższy będzie poziom głośności Po zakończeniu regulacji symbol regulacji głośności zniknie Odtwarzanie klatka po klatce PLAY STOP SKIP SKIP PAUSE SEARCH STILL ADV STILL ADV SEARCH PLAY STOP SKIP SKIP PAUSE SEARCH S...

Страница 250: ...ticka Po zatrzymaniu odtwarzania filmu na symbolu miniatury zatrzymanej sceny pojawia się symbol R Jeśli w dowolnym momencie zatrzyma się odtwarzanie filmu kiedy WZNÓW ODT jest ustawione na WYŁĄCZ podczas następnego odtwarzania filmu będzie on odtworzony od początku Odtwarzanie filmów zgodnie z datą nagrania Nawet jeśli sceny zostały nagrane tego samego dnia są one zgrupowane osobno w poniższych p...

Страница 251: ...ięciu i przytrzymaniu joysticka w górę lub w dół można przełączać się co 8 plików Ekran w tym momencie nie będzie się przełączał ale zmieniać będą się numery plików i pasek przewijania dlatego po dojściu do strony z plikiem jaki chce się wyświetlić należy puścić joystick 3 Naciśnij środek joysticka Wybrany plik zostanie wyświetlony na całym ekranie Na ekranie automatycznie pojawi się ikona obsługi...

Страница 252: ...rządzeniu a inne urządzenia mogą obniżyć jakość lub nie odtworzyć danych nagranych na tej kamerze Wyświetlanie zdjęć w formie pokazu slajdów Podczas pokazu slajdów nie zmieniaj położenia pokrętła wyboru trybu Kiedy kamera uzyskuje dostęp do karty SD kontrolka dostępu do karty świeci nie wyjmuj karty SD Czas potrzebny na wyświetlenie pliku zależy od ilości pikseli w pliku Miniatury zdjęć których ni...

Страница 253: ...VD RW format Video i DVD R nie można usunąć Obróć pokrętło wyboru trybu na 1 Podczas odtwarzania naciśnij przycisk 2 Kiedy pojawi się ekran zatwierdzenia wybierz TAK i naciśnij środek joysticka Usuwanie scen Ta funkcja służy do usuwania scen nagranych na płytę Usuwanie scen pojedynczo LSQT1019 POL book 253 ページ 2006年2月14日 火曜日 午後2時38分 ...

Страница 254: ... Ustawić można po kolei do 8 scen wyświetlanych na stronie 3 Tylko jeśli w pierwszym kroku wybrano WYBIERZ Naciśnij przycisk 4 Kiedy pojawi się ekran zatwierdzenia wybierz TAK i naciśnij środek joysticka Tylko jeśli w pierwszym kroku wybrano WYBIERZ Aby dalej usuwać sceny Powtórz kroki 2 4 Aby zakończyć edycję Naciśnij przycisk MENU Aby usunąć tylko część sceny najpierw podziel scenę a następnie u...

Страница 255: ... 3 Po dojściu do miejsca w którym chce się podzielić scenę należy przesunąć joystick w dół aby wyznaczyć punkt podziału Używając odtwarzania w zwolnionym tempie lub odtwarzania klatka po klatce możesz łatwo znaleźć miejsce w którym chcesz podzielić scenę l 248 249 4 Kiedy pojawi się ekran zatwierdzenia wybierz TAK i naciśnij środek joysticka Aby dalej dzielić sceny Powtórz kroki 2 4 Aby zakończyć ...

Страница 256: ...i chce się połączyć sceny które po sobie nie następują lub mają różne daty nagrania najpierw należy utworzyć listę odtwarzania a potem połączyć sceny na liście l 258 263 3 Kiedy pojawi się ekran zatwierdzenia wybierz TAK i naciśnij środek joysticka Aby dalej łączyć sceny Powtórz kroki 2 3 Aby zakończyć edycję Naciśnij przycisk MENU Łączenie scen Ta funkcja służy do łączenia dwóch następujących po ...

Страница 257: ...orzy się lub usuwa listę odtwarzania oryginalne sceny będące jej częścią nie są modyfikowane Edytowanie scen na liście odtwarzania nie wpływa na oryginalne sceny Czym jest lista odtwarzania Nagrane sceny Lista odtwarzania Maksymalna liczba elementów na płytę na stronę to Listy odtwarzania 99 Sceny na listach odtwarzania 999 Po usunięciu oryginalnych scen fragmenty listy odtwarzania utworzone przy ...

Страница 258: ...a ustawić 8 scen po kolei Sceny są rejestrowane na liście odtwarzania w kolejności ich wybierania Po utworzeniu listy odtwarzania kolejność scen na liście można zmieniać korzystając z funkcji PRZENIEŚ l 261 4 Naciśnij przycisk MENU 5 Kiedy pojawi się ekran zatwierdzenia wybierz TAK i naciśnij środek joysticka Wyświetlony zostanie ekran z miniaturami utworzonych list odtwarzania Aby dodać kolejną s...

Страница 259: ...ietlone w formie miniatur 3 Wybierz scenę od której chcesz rozpocząć odtwarzanie i naciśnij środek joysticka Aby wybrać inną listę odtwarzania Po wyborze pierwszej sceny na ekranie miniatur przesuń joystick w lewo Na ekranie ponownie wyświetli się WIDOK LIST krok 2 Aby powrócić do widoku oryginalnych scen Naciśnij przycisk MENU wybierz UST ODTWA TRYB ODTW WSZYSTKO lub PO DACIE i naciśnij środek jo...

Страница 260: ...jest otoczona żółtą ramką Po ponownym naciśnięciu joysticka wybrana scena zostanie usunięta Można ustawić 8 scen po kolei Sceny są dodawane do listy odtwarzania w kolejności ich wybierania Kolejność scen na liście odtwarzania można zmieniać poprzez funkcję PRZENIEŚ l 261 5 Naciśnij przycisk MENU 6 Kiedy pojawi się ekran zatwierdzenia wybierz TAK i naciśnij środek joysticka Wyświetlony zostanie ekr...

Страница 261: ...oysticka 3 Wybierz PRZENIEŚ i naciśnij środek joysticka 4 Wybierz scenę do przeniesienia i naciśnij środek joysticka Wybrana scena jest otoczona żółtą ramką a miejsce w które ma być przeniesiona oznaczone jest czerwonym paskiem 5 Wybierz miejsce do wstawienia sceny i naciśnij środek joysticka Aby przenosić kolejne sceny do listy odtwarzania Powtórz kroki 4 5 Aby zakończyć edycję Naciśnij przycisk ...

Страница 262: ...ybierz scenę do podzielenia i naciśnij środek joysticka Rozpocznie się odtwarzanie wybranej sceny 5 Po dojściu do miejsca w którym chce się podzielić scenę należy przesunąć joystick w dół aby wyznaczyć punkt podziału Używając odtwarzania w zwolnionym tempie lub odtwarzania klatka po klatce możesz łatwo znaleźć miejsce w którym chcesz podzielić scenę l 248 249 6 Kiedy pojawi się ekran zatwierdzenia...

Страница 263: ...ISTY i naciśnij środek joysticka 2 Wybierz listę do edycji i naciśnij środek joysticka 3 Wybierz POŁĄCZ i naciśnij środek joysticka 4 Wybierz scenę do połączenia i naciśnij środek joysticka Wybrana scena zostanie połączona z następną sceną 5 Kiedy pojawi się ekran zatwierdzenia wybierz TAK i naciśnij środek joysticka Aby dalej łączyć sceny Powtórz kroki 4 5 Aby zakończyć edycję Naciśnij przycisk M...

Страница 264: ... 1 Podczas odtwarzania naciśnij przycisk 2 Kiedy pojawi się ekran zatwierdzenia wybierz TAK i naciśnij środek joysticka Usuwanie wielu scen z ekranu miniatur Wybierz tryb odtwarzania listy odtwarzania l 259 kroki 1 i 2 1 Naciśnij przycisk MENU wybierz ED LISTY i naciśnij środek joysticka 2 Wybierz listę do edycji i naciśnij środek joysticka Usuwanie scen LSQT1019 POL book 264 ページ 2006年2月14日 火曜日 午後...

Страница 265: ...lanych na stronie 5 Tylko jeśli w trzecim kroku wybrano WYBIERZ Naciśnij przycisk 6 Kiedy pojawi się ekran zatwierdzenia wybierz TAK i naciśnij środek joysticka Tylko jeśli w trzecim kroku wybrano WYBIERZ Aby dalej usuwać sceny Powtórz kroki 4 6 Aby zakończyć edycję Naciśnij przycisk MENU Usuwanie scen na liście odtwarzania nie zwiększa dostępnego miejsca do nagrywania Sama lista odtwarzania jest ...

Страница 266: ...ć pokrętło wyboru trybu na 1 Podczas odtwarzania naciśnij przycisk 2 Kiedy pojawi się ekran zatwierdzenia wybierz TAK i naciśnij środek joysticka Usuwanie zdjęć Ta funkcja służy do usuwania plików zdjęć nagranych na karcie SD Usuwanie plików pojedynczo LSQT1019 POL book 266 ページ 2006年2月14日 火曜日 午後2時38分 ...

Страница 267: ...cisk 4 Kiedy pojawi się ekran zatwierdzenia wybierz TAK i naciśnij środek joysticka Tylko jeśli w pierwszym kroku wybrano WYBIERZ Aby dalej usuwać pliki Powtórz kroki 2 4 Aby zakończyć edycję Naciśnij przycisk MENU Usuwanie plików nagranych na karcie SD w innych urządzeniach Plik zdjęcia inny niż JPEG którego nie można wyświetlić w kamerze można usunąć Usuwanie wielu plików z ekranu miniatur W prz...

Страница 268: ... MENU wybierz UST ODTWA BLOKADA TAK i naciśnij środek joysticka 2 Wybierz plik do zablokowania i naciśnij środek joysticka Pojawi się symbol a wybrany plik zostanie zablokowany Naciśnij środek joysticka ponownie aby wyłączyć blokadę Możesz również wybrać kilka plików występujących kolejno Aby zakończyć ustawienia Naciśnij przycisk MENU Blokowanie zdjęć Ta funkcja służy do zabezpieczania plików zdj...

Страница 269: ... zakończyć ustawienia Naciśnij przycisk MENU Aby anulować wszystkie ustawienia DPOF Naciśnij przycisk MENU wybierz UST ODTWA UST DPOF ANUL WSZ i naciśnij środek joysticka Kiedy pojawi się komunikat zatwierdzenia wybierz TAK i naciśnij środek joysticka Czym jest DPOF DPOF oznacza Digital Print Order Format cyfrowy format zamówienia wydruku Pozwala on na zapisanie informacji o druku zdjęcia na karci...

Страница 270: ...rz TAK i naciśnij środek joysticka Po zakończeniu formatowania naciśnij przycisk MENU aby wyjść z ekranu komunikatu Formatowanie płyt i kart Formatowanie płyt Ta funkcja służy do rozpoczęcia korzystania z płyt W przypadku płyt dwustronnych należy sformatować obie strony Formatowanie płyty może być niemożliwe jeśli płyta jest mocno zarysowana lub zabrudzona Takich płyt nie można używać Podczas form...

Страница 271: ...owania naciśnij przycisk MENU aby wyjść z ekranu komunikatu Formatowanie karty SD Ta funkcja służy do rozpoczęcia korzystania z kart Do formatowania kart SD należy używać tej kamery Jeśli karta SD została sformatowana w innych urządzeniach takich jak komputer czas nagrywania może być dłuższy i możliwe że z karty SD nie będzie można korzystać Czas formatowania karty SD zależy od jej rodzaju Podczas...

Страница 272: ... l 250 Sceny te będą wyświetlone w formie oddzielnych nazw w menu głównym W zależności od stanu płyty czas potrzebny do jej zamknięcia może się różnić Zamykanie może trwać nawet do 15 minut Jeśli podczas zamykania kamera się nagrzeje zostanie potrząśnięta lub uderzona zamykanie nie powiedzie się i możliwe że płyty nie będzie można odtworzyć na innych urządzeniach Jeśli podczas zamykania zasilanie ...

Страница 273: ...anu komunikatu Cofanie zamknięcia płyty DVD RW Ta funkcja służy do cofania zamknięcia płyty DVD RW format Video aby można było na niej ponownie nagrywać Płyt DVD RW format VR nie można otworzyć po zamknięciu Płyta DVD RW format VR po jej zamknięciu może być nagrywana i edytowana tak jak płyta DVD RW format VR przed zamknięciem Płyty DVD R nie można otworzyć po zamknięciu Podczas cofania zamykania ...

Страница 274: ...ZAB PŁYTY i naciśnij środek joysticka 2 Kiedy pojawi się ekran zatwierdzenia wybierz TAK i naciśnij środek joysticka Aby zwolnić zabezpieczenie płyty 1 Naciśnij przycisk MENU wybierz USTAWIENIA ZAB PŁYTY i naciśnij środek joysticka 2 Kiedy pojawi się komunikat zatwierdzenia wybierz TAK i naciśnij środek joysticka Jeśli dysk został zabezpieczony w innym urządzeniu możliwe że w tej kamerze nie będzi...

Страница 275: ...ane są informacje takie jak liczba nagranych scen pozostałe miejsce to czy dysk jest zamknięty i zabezpieczony czy nie Obróć pokrętło wyboru trybu na Naciśnij przycisk MENU wybierz USTAWIENIA INFORMACJE TAK i naciśnij środek joysticka Aby wyjść z ekranu informacji Naciśnij przycisk MENU LSQT1019 POL book 275 ページ 2006年2月14日 火曜日 午後2時38分 ...

Страница 276: ...twarzanie na kamerze Obraz i dźwięk będą odtwarzane na telewizorze Jeśli obraz lub dźwięk z kamery nie jest przesyłany do telewizora Sprawdź czy wtyczki zostały włożone do oporu Sprawdź podłączone końcówki Sprawdź ustawienia wejścia telewizora przełącznik źródła Aby uzyskać więcej informacji przeczytaj instrukcję obsługi telewizora Odtwarzanie na telewizorze A Kabel audio wideo w zestawie Wkładaj ...

Страница 277: ...gą być wyświetlane nieprawidłowo Aby uzyskać więcej informacji przeczytaj instrukcję obsługi telewizora Naciśnij przycisk MENU wybierz USTAWIENIA FORMAT TV 4 3 i naciśnij środek joysticka Przykład wyświetlania obrazów w formacie 16 9 na zwykłym telewizorze TV 4 3 Domyślnie ta funkcja jest ustawiona na 16 9 Wyświetlanie informacji na telewizorze Informacje wyświetlane na ekranie ikona funkcji i cza...

Страница 278: ...VD RAM lub DVD RW o średnicy 8 cm format VR Przeczytaj instrukcję obsługi odtwarzacza nagrywarki DVD Możliwe że płyty DVD RW format VR trzeba będzie zamknąć przed odtworzeniem W tym wypadku zamknij płytę w kamerze l 272 Na płycie 8 cm nie można nagrywać obrazów pozwalających na Jednorazowe nagrywanie Odtwarzanie płyty DVD RW format Video lub płyty DVD R Nie wkładaj nie zamkniętej płyty do odtwarza...

Страница 279: ...R trzeba będzie zamknąć przed odtworzeniem W tym wypadku zamknij płytę w kamerze l 272 Nie wkładaj do nagrywarki płyty DVD RW format Video lub DVD R która nie była zamknięta możliwe że płyty nie będzie można odczytać Na nagrywarce DVD może pojawić się komunikat aby sformatować płytę Nie formatuj płyty Jeśli nagrywarka DVD jest wyposażona w czytnik kart SD można zapisać pliki zdjęć nagrane na karci...

Страница 280: ...kamerę i obróć pokrętło wyboru trybu na 3 Zmień kanał wejścia źródło na magnetowidzie i telewizorze Ustawiony kanał zależy od gniazda do którego można podłączyć kamerę 4 Rozpocznij odtwarzanie na kamerze Następnie włącz nagrywanie na podłączonym urządzeniu wideo Aby uzyskać szczegółowe informacje przeczytaj instrukcję obsługi magnetowidu lub innego urządzenia wideo Aby przerwać kopiowanie Zatrzyma...

Страница 281: ...STAWIENIA F CJA USB PictBridge i naciśnij środek joysticka Naciśnij przycisk MENU aby wyjść z ekranu menu 2 Podłącz kamerę do drukarki Na ekranie kamery pojawi się Jeśli symbol nie pojawia się lub nie przestaje migać odłącz kabel USB i podłącz go ponownie lub sprawdź drukarkę kartę SD i ustawienia w kamerze Użyj tylko kabla USB który jest dołączony do kamery Nie gwarantujemy prawidłowego działania...

Страница 282: ...ąc kroki 3 i 4 5 Naciśnij przycisk MENU aby wyświetlić menu PictBridge 6 Wybierz ustawienie druku daty w DRUKUJ DATĘ Jeśli drukarka nie może drukować daty na zdjęciach ustawienie będzie niedostępne 7 Wybierz ustawienie rozmiaru papieru w ROZM PAPIERU Nie można ustawić rozmiarów papieru nie obsługiwanych przez drukarkę STANDARD Rozmiar zależny od drukarki 4t5 CALI Rozmiar L 5t7 CALI Rozmiar 2L 4t6 ...

Страница 283: ...ką Podczas drukowania unikaj poniższych działań Te działania uniemożliwiają poprawny wydruk Odłączanie kabla USB Wyjmowanie karty SD Obracanie pokrętła wyboru Wyłączanie zasilania Sprawdź ustawienia dotyczące rozmiaru papieru jakości druku itp na drukarce Boki nagranych zdjęć mogą być ucięte podczas druku gdy ustawiona jest wartość VDR D300 VDR D250 Sprawdź to przed drukowaniem Gdy używasz drukark...

Страница 284: ...ne do kamery Opis funkcji kamery po połączeniu z komputerem Dostępne funkcje Użyte oprogramowanie Odtwarzanie na komputerze DVD MovieAlbumSE oprogramowanie dołączone do produktu Kopiowanie płyty DVD MovieAlbum CopyTool oprogramowanie dołączone do produktu Tworzenie płyty DVD Video DVD MovieAlbumSE oprogramowanie dołączone do produktu i DVDfunSTUDIO oprogramowanie dołączone do produktu Dostępne fun...

Страница 285: ...żesz również przenieść wyeksportowane dane do DVDfunSTUDIO Jest też możliwa edycja filmów na płytach DVD RAM jeżeli masz dodatkowy napęd DVD RAM Odtwarzanie płyt DVD RAM i DVD RW format VR A Obszar odtwarzania B Miniatury Wyświetlana jest zawartość płyty DVD MovieAlbum CopyTool Program ten jest używany do kopiowania płyt w formacie VR Skopiuj dane na twardy dysk komputera a następnie skopiuj je na...

Страница 286: ...IO a następnie zapisz dane na nową płytę B Utworzone menu DVD Ułóż filmy wyeksportowane z programu DVD MovieAlbumSE w menu DVD i zmień wygląd menu C Przycisk nagrywania na płytę Zawartość będzie nagrana na płytę 3 Utworzona jest płyta DVD Video Można ją odtworzyć na odtwarzaczu DVD Acrobat Reader Aby przeczytać zainstalowaną instrukcję obsługi na komputerze musi być zainstalowany program Adobe Acr...

Страница 287: ... Windows XP Home Edition Microsoft Windows XP Professional Komputer Komputer zgodny z IBM PC AT System operacyjny Microsoft Windows 2000 Professional Microsoft Windows XP Home Edition Microsoft Windows XP Professional Procesor Intel Pentium III 450 MHz lub szybszy zalecany 1 GHz lub szybszy lub Intel Celeron 633 MHz lub szybszy a także kompatybilne procesory dla Windows XP zalecany Intel Pentium I...

Страница 288: ...rznego napędu komputera zgodnego z formatem DVD RAM DVD RW format VR DVDfunSTUDIO 2 4 Komputer Komputer zgodny z IBM PC AT System operacyjny Microsoft Windows 2000 Professional Service Pack 4 Microsoft Windows XP Home Edition Service Pack 2 Microsoft Windows XP Professional Service Pack 2 Procesor Intel Pentium III 800 MHz lub szybszy Pamięć RAM 256 MB lub więcej zalecane 512 MB lub więcej Monitor...

Страница 289: ... na systemach Microsoft Windows XP Media Center Edition i Tablet PC Edition Oprogramowanie to nie jest kompatybilne z Microsoft Windows 3 1 Windows 95 Windows 98 Windows ME Windows NT i 64 bitowymi systemami operacyjnymi Programy te nie są kompatybilne z komputerami wieloprocesorowymi Programy te nie są kompatybilne z komputerami posiadającymi wiele systemów operacyjnych Jeśli twój komputer nie sp...

Страница 290: ... jednym miejscu Artykuł 5 Łamanie kodu dekompilacja i dezasemblacja Licencjobiorca nie może łamać kodu dekompilować lub dezasemblować Oprogramowania za wyjątkiem zakresu tych czynności na które pozwala prawo w kraju zamieszkania licencjobiorcy Firma Matsushita jej dystrybutorzy lub sprzedawcy nie są odpowiedzialni za jakiekolwiek wady Oprogramowania oraz za szkody Licencjobiorcy spowodowane przez ...

Страница 291: ...ekran Setup Menu Jeśli ekran Setup Menu nie pojawi się kliknij dwa razy na ikonę napędu w My Computer 2 Kliknij na DVD RAM Driver Oprogramowanie może nie działać prawidłowo jeśli przerwiesz instalację np naciskając Cancel 3 Kliknij na Driver and Formatter Setup Jeśli pojawi się komunikat Information lub Question wykonuj instrukcje pojawiające się na ekranie 4 Kliknij na Next Nie podłączaj kabla US...

Страница 292: ... Yes Ewentualne problemy podczas instalacji DVD RAM Driver Gdy wybrano Block w Driver Signing Options w System Properties instalacja nie zostanie zakończona Wybierz Warn i spróbuj ponownie Aby sprawdzić i zmienić ustawienie wybierz start Settings Control Panel Performance and Maintenance System i Driver Signing na karcie Hardware Informacje dotyczące narzędzia wspomagającego RAMASST RAMASST jest n...

Страница 293: ...otrzebie instalacji DirectX 9 0b W takim przypadku naciśnij Yes aby go zainstalować Komputer może nie działać prawidłowo gdy zainstalujesz oprogramowanie a komputer nie jest kompatybilny z DirectX 9 0b lub 9 0c Jeśli nie wiesz czy twój komputer jest zgodny skontaktuj się z producentem 3 Kliknij na Next 4 Wybierz PAL jako system obrazu i kliknij na Next 5 Kliknij na Next Wykonuj instrukcje wyświetl...

Страница 294: ...zebie instalacji DirectX 9 0b W takim przypadku naciśnij Yes aby go zainstalować Komputer może nie działać prawidłowo gdy zainstalujesz oprogramowanie a komputer nie jest kompatybilny z DirectX 9 0b lub 9 0c Jeśli nie wiesz czy twój komputer jest zgodny skontaktuj się z producentem 3 Kliknij na Next 4 Wybierz PAL Europe jako system obrazu i kliknij na Next 5 Kliknij na Next Wykonuj instrukcje wyśw...

Страница 295: ...ovieAlbumSE Operation Manual DVDfunSTUDIO Wybierz start All Programs Programs Panasonic DVDfunSTUDIO Operating instructions Wykonaj poniższe instrukcje aby odinstalować oprogramowanie którego już nie potrzebujesz 1 Wybierz start Settings Control Panel Add or Remove Programs Applications 2 Wybierz program do odinstalowania i kliknij na Change Remove Change or Remove lub Add Remove Wykonuj polecenia...

Страница 296: ...DVD R w kamerze przed używaniem jej w komputerze Płyty które nie były zamknięte nie będą rozpoznane przez komputer Podłącz kamerę do zasilacza sieciowego 1 Włóż płytę lub kartę z nagranymi obrazami do kamery włącz kamerę i wybierz tryb pracy Gdy używasz płyty Wybierz Gdy używasz karty Wybierz 2 Tylko w trybie odtwarzania Naciśnij przycisk MENU wybierz USTAWIENIA F CJA USB POŁ PC i naciśnij środek ...

Страница 297: ...a do komputera komputer rozpoznaje ją jako zewnętrzny napęd W zależności od używanego systemu kształt ikony napędu i nazwa napędu mogą się różnić na przykład E W trybie odczytywania płyt Podczas pracy z płytą Windows XP W My Computer widoczny jest optyczny napęd Windows 2000 Removable Disk i optyczny napęd są wyświetlane w My Computer Gdy do kamery jest włożona płyta DVD RAM lub DVD RW format VR m...

Страница 298: ... tej karty SD Do formatowania kart SD należy zawsze używać tej kamery Gdy dane nie obsługiwane przez kamerę zostały zapisane na komputerze nie będą one rozpoznane przez kamerę 1 Kliknij dwa razy na ikonę w pasku zadań Pojawi się okno dialogowe odłączania sprzętu Ikona ta może nie być widoczna w zależności od ustawień komputera 2 Wybierz USB Mass Storage Device i kliknij na Stop 3 Sprawdź czy wybra...

Страница 299: ...drives Wyświetlany jest element USB Mass Storage Device w Universal Serial Bus controllers Windows 2000 Professional Wyświetlany jest element MATSHITA DVD RAM LMXK1931 USB Device w DVD CD ROM drives Wyświetlany jest element MATSHITA DVD RAM LMXK1931 USB Device w Disc drives Wyświetlany jest element USB Mass Storage Device w Universal Serial Bus controllers Gdy używasz karty Wyświetlany jest elemen...

Страница 300: ...rwszy wyświetlona jest Umowa licencyjna użytkownika oprogramowania którą należy dokładnie przeczytać a następnie kliknąć na I agree Podłącz kamerę do zasilacza sieciowego 1 Włóż płytę DVD RAM lub DVD RW format VR z zapisanymi zdjęciami do kamery włącz kamerę i obróć pokrętłem trybu aby wybrać 2 Podłącz kamerę do komputera Użyj tylko kabla USB który jest dołączony do kamery Nie gwarantujemy prawidł...

Страница 301: ...zył się pojawi się komunikat Zaznacz małe pole Eject the disc being used i naciśnij Yes DVD MovieAlbumSE zamknie się automatycznie i uruchomi się program DVDfunSTUDIO Podczas uruchamiania DVD MovieAlbumSE może pojawić się komunikat Mount Information lub nagrane obrazy mogą nie być wyświetlone W tym wypadku można wypróbować poniższą procedurę Jeśli w komputerze jest kilka napędów można wybrać inny ...

Страница 302: ...lorer aby kliknąć prawym przyciskiem na ikonę napędu kamery i wybrać Eject Nazwy list odtwarzania utworzone w kamerze nie mogą być wyświetlane w DVD MovieAlbumSE Jeśli wyeksportujesz obraz zapisany w formacie 16 9 używając DVD MovieAlbumSE zostanie on zapisany w formacie 4 3 i będzie ściśnięty w poziomie Gdy używasz obrazu wyeksportowanego za pomocą DVDfunSTUDIO jest wyświetlany w formacie 16 9 Me...

Страница 303: ...l 214 USTAW EVF l 214 UST WST l 305 LED JOY STICK l 306 F CJA DEMO l 306 LANGUAGE l 208 Menu robienia zdjęć PODSTAWOWE F CJA SCENY l 241 ROZM OBR l 224 JAKOŚĆ OBR l 225 UST ZEG l 212 ZAAWANSOW ß FLASH l 239 CZERW OKO l 240 ßw POZIOM FL l 240 STAB DRGAŃ l 238 L NAGR l 305 EF SKRÓTU l 225 USTAWIENIA WYŚWIETL l 305 DATA CZAS l 213 FORM DATY l 213 OSZCZ EN l 305 DŹW BIP l 305 AI LCD l 215 USTAW LCD l ...

Страница 304: ...YTY l 270 ZAMKNIJ l 272 NIE ZAM l 273 ZAB PŁYTY l 274 INFORMACJE l 275 WYŚWIETL l 305 DATA l 248 FORM DATY l 213 OSZCZ EN l 305 DŹW BIP l 305 AI LCD l 215 USTAW LCD l 214 USTAW EVF l 214 FORMAT TV l 277 LED JOY STICK l 306 LANGUAGE l 208 Menu przeglądania zdjęć USUŃ WYBIERZ l 267 WSZYSTKO l 267 UST ODTWA TRYB ODTW l 252 BLOKADA l 268 UST DPOF l 269 USTAWIENIA WYŚWIETL l 305 DATA CZAS l 213 FORM DA...

Страница 305: ...Gdy kamera jest podłączona do komputera lub drukarki kablem USB DŹW BIP WYŁĄCZ ZAŁĄCZ Ta funkcja pozwala na włączenie lub wyłączenie sygnalizowania początku i końca nagrywania sygnałem dźwiękowym Jeśli ustawiono WYŁĄCZ po zakończeniu lub rozpoczęciu nagrywania nie włączy się sygnał dźwiękowy 1 sygnał dźwiękowy Przy rozpoczęciu nagrywania Przy włączeniu kamery Po wykryciu kamery przez komputer druk...

Страница 306: ... opcję ustawi się na ZAŁĄCZ bez wkładania płyty lub karty SD kamera automatycznie przełączy się na tryb demonstracji prezentujący jej funkcje Po naciśnięciu dowolnego przycisku tryb demonstracyjny zostaje wyłączony Jeśli przez około 10 minut nie przeprowadzi się żadnego działania kamerą tryb demonstracji rozpocznie się automatycznie Aby wyłączyć tryb demonstracyjny włóż płytę lub kartę SD lub usta...

Страница 307: ...ne Nagrywanie zapisywanie na płytę zielony Zatrzymanie nagrywania Tryb panoramiczny Tryb automatyczny Tryb ręczny MF Ręczna ostrość 2t Wskaźnik poziomu zoomu ª Tryb oświetlenia tła Stabilizacja obrazu Podświetlenie LCD 16 9 AUTO MNL 1 100 Czas naświetlania OPEN F2 0 Numer F 0dB Wartość wzmocnienia Tryb wygładzania skóry Tele makro Rozjaśnianie biały Ściemnianie czarny Funkcja nagrywania kolorów w ...

Страница 308: ... R ß ßi ßj ßA ßAi ßAj Flesz Tylko model VDR D300 Redukcja efektu czerwonych oczu Tylko model VDR D300 biały zielony Znak dobrego zaostrzenia Ø Nagrywanie z samowyzwalaczem MEGA OIS Tylko model VDR D300 AWB MEGA Liczba pikseli rozdzielczość zdjęć VDR D300 2048k1512 1920k1080 VDR D250 1760k1320 1760k992 VDR D300 VDR D250 1280k960 640k480 biały zielony czerwony Na karcie można nagrywać Trwa rozpoznaw...

Страница 309: ...er folderu zdjęć pliku Gdy podłączona jest drukarka zgodna z PictBridge Operacje na karcie Gdy jest podłączona do komputera 1 DPOF już ustawione na więcej niż 1 Zablokowane zdjęcia Liczba pikseli rozdzielczość zdjęć VDR D300 2048k1512 1920k1080 VDR D250 1760k1320 1760k992 VDR D300 VDR D250 1280k960 640k480 Rozmiar zdjęcia nie jest wyświetlany w przypadku zdjęć nagranych przy użyciu innych produktó...

Страница 310: ... jp pavc global cs e_cam Strona jest dostępna jedynie w języku angielskim NIE MOŻE NAGR W TR AGS Funkcja AGS jest włączona l 217 NIE MOŻNA ZAPISAĆ PŁYTA SFINALIZOWANA Włożono zamkniętą płytę DVD RW format Video lub DVD R Po zamknięciu płyty mają status tylko do odczytu i nie można na nich nagrywać Po cofnięciu zamknięcia płyty DVD RW format Video można na niej nagrywać l 273 NIE MOŻNA ZAPISAĆ BRAK...

Страница 311: ...erę l 320 ZMIENIĆ NA F CJĘ MANUALNĄ Próbujesz włączyć funkcję której nie można używać jednocześnie z innymi aktualnie ustawionymi funkcjami ANULUJ F CJĘ WIDOKU NOCĄ ANULUJ F CJĘ ZASIL LCD NIE MOŻNA USTAWIĆ W przypadku płyt DVD RW format Video i DVD R jeśli liczba wyświetlanych danych wynosi 99 gdy element TRYB ODTW jest ustawiony na PO DACIE nie możesz zmienić ustawienia panoramicznego NIE MOŻNA U...

Страница 312: ...cjami w komunikacie Czas trwania naprawy zależy od rodzaju błędu O odzyskiwaniu WYSTĄPIŁ BŁĄD PŁYTY NAPRAWIAĆ Podczas naprawiania płyt korzystaj z wystarczająco naładowanego akumulatora lub z zasilacza sieciowego W zależności od stanu danych ich całkowita naprawa może być niemożliwa Jeśli płyta zostanie wyjęta bez przeprowadzenia naprawy odtwarzanie scen nagranych przed przerwą w zasilaniu nie będ...

Страница 313: ...enia Tryb wygładzania skóry Włączanie i wyłączanie Podczas nagrywania na płytę Tele makro Włączanie i wyłączanie Tryb pomocy Stabilizacja obrazu Gdy włączona jest funkcja nagrywania kolorów w ciemności tylko model VDR D250 W trybie nagrywania na karcie tylko model VDR D250 Funkcje Warunki uniemożliwiające działanie funkcji Flesz tylko model VDR D300 W trybie zapisywania na płytę Zoom mikrofonu Gdy...

Страница 314: ...rywania podany na opakowaniu płyty oznacza całkowity czas dla obu stron Aby nagrywać na obu stronach należy wyjąć płytę i zmienić stronę Czy na płytę DVD R można nagrywać tylko raz Nagrywanie można zatrzymywać i wznawiać aż do zapełnienia płyty Jednakże danych raz nagranych na płytę DVD R nie można usunąć Czy można odtwarzać płyty nagrane w kamerze na odtwarzaczu DVD Po zamknięciu płyty DVD RW for...

Страница 315: ... MovieAlbumSE jeżeli posiadasz dodatkowy napęd DVD RAM DVD RW format VR DVD RW format Video DVD R Edytowanie nie jest możliwe na komputerze Czy można skopiować dane do komputera DVD RAM DVD RW format VR Użyj DVD MovieAlbum CopyTool lub użyj funkcji Eksportu pliku w programie DVD MovieAlbumSE Zanim użyjesz płyty DVD RW format VR na komputerze musisz ją najpierw zamknąć DVD RW format Video DVD R Kop...

Страница 316: ...CZERPANA BATERIA akumulator jest rozładowany Naładuj akumulator l 191 Akumulator szybko się wyładowuje Czy akumulator jest w pełni naładowany Naładuj akumulator korzystając z zasilacza sieciowego l 191 Czy korzystasz z akumulatora w skrajnie niskiej temperaturze Na akumulator ma wpływ temperatura otoczenia W zimnych miejscach czas działania akumulatora ulega skróceniu Czy akumulator jest zużyty Ak...

Страница 317: ...ilocie wyczerpała się Wymień ją na nową baterię guzikową l 184 Suwak DISC EJECT nie działa Pokrywa płyty nie otworzy się jeśli kamera nie jest zasilana Podłącz naładowany akumulator lub zasilacz sieciowy Suwak DISC EJECT nie działa gdy kamera jest podłączona do komputera l 321 Płyta nie może być odczytana Czy powierzchnia płyty nie jest pokryta odciskami palców lub nie jest zabrudzona Jeżeli na pł...

Страница 318: ...e nie działać normalnie Zamknij pokrywę komory płyty Nagrywanie rozpoczyna się ale od razu się zatrzymuje Odtwarzane nagranie przerywa Czy płyta jest zarysowana lub brudna Oczyść płytę l 190 Kamera jest nadmiernie rozgrzana Postępuj zgodnie z treścią komunikatów na ekranie Aby ponownie skorzystać z kamery wyłącz ją i odczekaj chwilę Kamera sama przestaje nagrywać Czy włączona jest funkcja AGS Nagr...

Страница 319: ... biesko nie można usunąć Jeśli sceny są niepotrzebne sformatuj płytę lub kartę aby usunąć dane l 270 271 Należy pamiętać że sformatowanie płyty lub karty usuwa wszystkie dane nagrane na płycie lub karcie Czy plik na karcie SD jest zablokowany Zablokowanych plików nie można usunąć Zdejmij blokadę l 268 Jeśli blokada karty SD przed zapisem jest ustawiona na LOCK usuwanie jest niemożliwe l 189 Zdjęci...

Страница 320: ...grywania Ustaw ją na tryb odtwarzania Jeśli kamera jest ustawiona na tryb odtwarzania odłącz kabel USB ustaw F CJA USB na POŁ PC i podłącz kabel USB Wybierz inne złącze USB w komputerze Sprawdź wymagania systemowe l 287 Włącz zasilanie kamery Po włączeniu DVD MovieAlbumSE pojawia się okno Mount Information Włożono niekompatybilną płytę Do napędu włożoną inną płytę niż DVD RAM lub DVD RW format VR ...

Страница 321: ...ze Suwak DISC EJECT nie działa gdy kamera jest podłączona do kom putera Suwak DISC EJECT nie działa gdy kamera jest podłączona do komputera Użyj Windows Explorer aby kliknąć prawym przyciskiem na ikonę napędu i wykonać polecenie Eject Możesz również użyć przycisku wysunięcia w programie aby wysunąć płytę Gdy wszystkie pliki są eksportowane z DVD MovieAlbumSE pojawi się komunikat z pytaniem o potwi...

Страница 322: ...ko dołączonych do nich przewodów i kabli Nie przedłużaj kabli ani przewodów Nie spryskuj kamery środkami owadobójczymi ani innymi lotnymi substancjami chemicznymi Po spryskaniu kamery takimi substancjami chemicznymi jej obudowa może zostać uszkodzona a wykończenie powierzchni kamery może zacząć odchodzić Nie pozwól by przedmioty z tworzyw sztucznych lub gumy długo stykały się z kamerą Podczas używ...

Страница 323: ...mulatora nawet po jego naładowaniu Akumulator powinien być przechowywany w torebce winylowej tak aby końcówki akumulatora nie stykały się z metalowymi przedmiotami Akumulator należy przechowywać w chłodnym i suchym miejscu z możliwie stałą temperaturą Zalecana temperatura 15 C do 25 C Zalecana wilgotność 40 do 60 Skrajnie wysoka lub niska temperatura skraca okres użytkowania akumulatora W przypadk...

Страница 324: ...ia we fragmentach odtwarzanych nagrań Chwilowe zatrzymywanie się odtwarzanego nagrania Przerywanie dźwięku podczas odtwarzania lub dźwięk zniekształcony Ekran miniatur z miniaturami na jasnoniebiesko Kamera nie może rozpoznać płyty Opóźnienie pomiędzy dźwiękiem a obrazem Podczas nagrywania obrazów kamera może pomijać fragmenty płyty na których nagrywanie jest niemożliwe z powodu kurzu pyłów zadrap...

Страница 325: ...ury na ekranie LCD może skraplać się para Zetrzyj ją suchą i miękką szmatką Kiedy kamera jest bardzo zimna np z powodu jej przechowywania w niskiej temperaturze ekran LCD będzie ciemniejszy niż zwykle zaraz po włączeniu kamery Kiedy wzrośnie temperatura wewnątrz kamery ekran LCD uzyska normalną jasność Informacje dotyczące karty SD Ekran LCD wizjer Podczas produkcji ekranu LCD posia dającego razem...

Страница 326: ...a kamerę Po letniej ulewie Po umieszczeniu kamery w zaparowanym miejscu o dużej wilgotności np przy ogrzewanym basenie Po przeniesieniu kamery pomiędzy miejscami o dużej różnicy temperatur np z miejsca zimnego do gorącego Jeśli np kamera była używana do nagrywania na stoku narciarskim i jest przenoszona do ogrzewanego pomieszczenia należy ją umieścić w torbie z tworzywa sztucznego usunąć z torby j...

Страница 327: ...cznym zakresem automatycznej regulacji balansu bieli ekran może stać się czerwonawy lub niebieskawy Nawet w zakresie skutecznej automatycznej regulacji balansu bieli automatyczna regulacja balansu bieli może nie działać poprawnie jeśli jest więcej niż jedno źródło światła W przypadku oświetlenia poza zakresem automatycznej regulacji balansu bieli należy stosować tryb ręcznej regulacji balansu biel...

Страница 328: ... ze znacznym natężeniem ruchu samochodowego ostrość może zostać ustawiona na przejeżdżającym pojeździe Nagrywanie obiektów otoczonych błyszczącymi obiektami lub obiektami silnie odbijającymi światło Ponieważ ostrość ustawia się na wszystkim co błyszczy lub migocze trudno ustawić ostrość na obiekcie który chcemy nagrać Obraz może być nieostry podczas nagrywania obiektów przy brzegu morza w trybie n...

Страница 329: ... Video DVD RW DVD R Przetwornik obrazu 1 6z przetwornik obrazu 3CCD Suma 800 Kk3 Efektywne piksele VDR D300 Ruchomy obraz 630 Kk3 4 3 540 Kk3 16 9 Nieruchomy obraz 710 Kk3 4 3 540 Kk3 16 9 VDR D250 Ruchomy obraz 400 Kk3 4 3 380 Kk3 16 9 Nieruchomy obraz 530 Kk3 4 3 400 Kk3 16 9 Obiektyw Automatyczna przesłona F1 8 do F2 8 Długość ogniskowej VDR D300 3 0 mm do 30 0 mm VDR D250 2 45 mm do 24 5 mm Ma...

Страница 330: ...do stereo mini jack USB Funkcja czytania zapisu kart bez obsługi ochrony praw autorskich Zgodne z USB 2 0 Hi Speed Zgodne z PictBridge Przesyłanie filmów Flesz tylko model VDR D300 GN 4 8 Wymiary bez wystających części VDR D300 Około 63 mm SZ k 87 mm W k 138 mm G VDR D250 Około 63 mm SZ k 87 mm W k 136 mm G Ciężar bez dołączonego akumulatora pokrywy obiektywu i płyty VDR D300 Około 585 g VDR D250 ...

Страница 331: ...5 Mbps VBR Około 75 min na jednostronnej płycie DVD RAM Metoda kompresji dźwięku Dolby Digital Dolby AC3 16 bit 48 kHz 2 kanały Nośniki danych Karta pamięci SD 8 MB 16 MB 32 MB 64 MB 128 MB 256 MB 512 MB 1 GB 2 GB maksimum Metoda kompresji JPEG Design rule for Camera File system w oparciu o standard Exif 2 2 odpowiedni DPOF Rozmiar obrazu VDR D300 2048k1512 1920k1080 16 9 1280k960 640k480 VDR D250...

Страница 332: ...5 120 98 155 256 MB 160 250 210 330 512 MB 320 490 410 650 1 GB 630 990 820 1290 2 GB 1290 2010 1680 2630 VDR D250 Rozdzielczość zdjęć 1760k1320 1760k992 Jakość zdjęć 8 MB 4 7 7 11 16 MB 10 18 18 28 32 MB 24 40 40 61 64 MB 51 83 83 125 128 MB 99 160 160 240 256 MB 210 330 330 510 512 MB 410 660 660 1010 1 GB 820 1330 1330 2010 2 GB 1680 2700 2700 4100 3 1M 2 2 3M 1 7 LSQT1019 POL book 332 ページ 2006...

Страница 333: ...li podano przybliżone dane VDR D300 i VDR D250 Rozdzielczość zdjęć 1280k960 640k480 Jakość zdjęć 8 MB 8 14 45 95 16 MB 21 34 100 200 32 MB 47 75 220 440 64 MB 97 155 440 880 128 MB 185 300 880 1760 256 MB 390 620 1760 3520 512 MB 780 1230 3520 7040 1 GB 1550 2470 7040 14080 2 GB 3160 5030 14080 28160 1M 0 3M LSQT1019 POL book 333 ページ 2006年2月14日 火曜日 午後2時38分 ...

Страница 334: ...Inne 334 LSQT1019 Inne LSQT1019 POL book 334 ページ 2006年2月14日 火曜日 午後2時38分 ...

Страница 335: ...Inne 335 LSQT1019 LSQT1019 POL book 335 ページ 2006年2月14日 火曜日 午後2時38分 ...

Страница 336: ...Backcover LSQT1019 A F0206Nt0 1000 A L Matsushita Electric Industrial Co Ltd Web site http www panasonic co jp global LSQT1019 POL book 336 ページ 2006年2月14日 火曜日 午後2時38分 ...

Отзывы: