background image

5

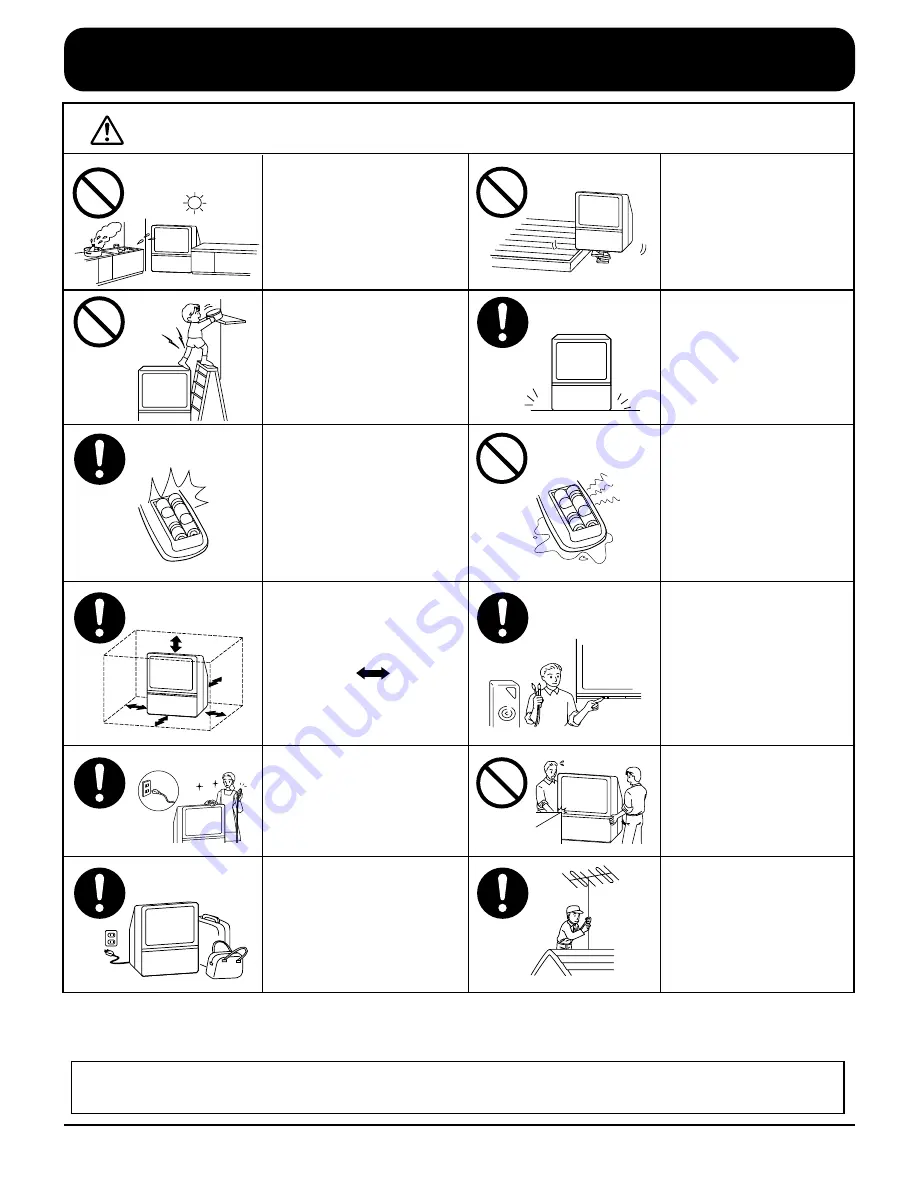
A d e q u a t e   v e n t i l a t i o n   i s
essential to prevent failure of
electrical components, we
recommend that a gap of at
least 10cm (       ) is left all
around this unit even when it
is placed inside a cabinet or
between shelves.

Cautions

DO NOT place in humid or
dusty location, or areas
exposed to smoke or steam.
DO NOT place in direct
sunlight and other sources
of direct heat.

Warnings and Cautions

Turn the power “Off ” before
connecting other electrical
equipment.

Before cleaning, unplug the
power plug from the socket.

DO NOT joint the unit.

Unplug the power plug from the
socket if you are not going to
use the unit for an extended
period.

Ask your sales outlet to install
the aerial.

To ensure continued excellent performance by this product, periodic cleaning is recommended. See page 57 for more

information.

To protect the TV’s components, it has been equipped with a fan that begins to operate when the surrounding

atmosphere reaches a specified temperature. The operation of this fan is not a malfunction.

DO NOT place in an unstable
location

DO NOT stand, or place heavy
objects on the unit.
Particular care should be taken
by families with small children.

Place in a safe location.

When inserting batteries,
ensure that the polarities
(positive and negative) are
correctly aligned. Insert as
shown on remote control. If
inserted incorrectly, battery
fluid may leak, and fire, injury,
or damage to surrounding
components may result.

Do not mix new and old
b a t t e r i e s .   U s e   o n l y   t h e
specified batteries. Failure to
follow this precaution may
result in leakage  of battery
fluid. Fire, injury, or damage
to surrounding components
may also result.

Содержание TX-51P100 series

Страница 1: ...evision TX 51P100 Series TC 51P100 Series Model No TQBC0185 2 This is a combined Operating Instruction manual for all the above series of models Please read these instructions before operating your set and retain them for future reference ...

Страница 2: ...1 ...

Страница 3: ...hase receipt also and note down the Model Number and Serial Number of your set in the space provided on the rear cover of these Instructions Important Information 1 The long time max 2 hours use of TV game on the set is not recommended since the signal from TV game may be the cause of damage on picture projection tubes on the set 2 Do not allow a still picture to be displayed for an extended perio...

Страница 4: ...l the Skip Function 31 General Operation 32 35 How to switch the power ON or OFF STANDBY mode 32 Programme Number Selection 32 Direct Programme Number Selection 32 Volume adjustment 32 TV AV mode Selection Display button Game button Sound Mute button Recall button Off Timer button 33 Sound System Selection 34 Colour System Selection 35 Advanced Remote Control Operation 36 41 PICTURE IN PICTURE Ope...

Страница 5: ... unit near water Near a bath tub etc Warnings and Cautions Warnings DO NOT insert foreign objects metal or easily flammable objects TAKE CARE NOT to damage the power cord DO NOT use at a voltage other than indicated DO NOT remove the rear cover as live parts and High Voltage components are accessible when the rear cover is removed DO NOT touch the aerial cable and this unit when there is lightning...

Страница 6: ...ance by this product periodic cleaning is recommended See page 57 for more information To protect the TV s components it has been equipped with a fan that begins to operate when the surrounding atmosphere reaches a specified temperature The operation of this fan is not a malfunction DO NOT place in an unstable location DO NOT stand or place heavy objects on the unit Particular care should be taken...

Страница 7: ...piece and note the functions available as shown below TC 51P100G TC 51P100H REVEAL TV AV 2 1 3 5 4 6 8 0 7 9 TV TEXT INDEX HOLD MAIN MENU VCR VCR LD DVD N SURROUND LD DVD SKIP SKIP F P TIME TEXT F T B D PNR P AI STROBE CHANGE PIP ACTION CH SEARCH STILL PIP RGB DISC SIDE A B R G Y B Stereo Bilingual Selection button REVEAL TV AV 2 1 3 5 4 6 8 0 7 9 TV TEXT INDEX HOLD MAIN MENU VCR VCR LD DVD N SURR...

Страница 8: ...not apply to your TV Model Number T C 5 1 P 1 0 0 G T X 5 1 P 1 0 0 H Function available T C 5 1 P 1 0 0 H T X 5 1 P 1 0 0 X Destination Multi Language English Middle East NZ Australia Southeast Asia Hong Kong China Chinese Arabic Power Source AC 110 240V 50 60Hz AC 220 240V 50 60Hz To ensure safety secure the casters in place using the supplied stoppers This set is equipped with casters to enable...

Страница 9: ...ing Aerial installation upgrading of existing systems or accessories required and the costs incurred are the responsibility of you the Customer Before Operating This Set Connecting the Aerial Cable to the RF In Terminal UHF Aerial RF In Terminal VHF Aerial Mixer 75 Ohm Coaxial Cable Coaxial Aerial Plug RF In Terminal Coaxial aerial plug 75 Ohm Coaxial Cable Please take safety precautions to preven...

Страница 10: ... Use two R6 AA size batteries Insert the batteries ensuring correct polarity This is identifiable by the and symbols on both the batteries and inside the battery compartment 1 Open the cover Apply slight downward pressure while pulling towards the bottom 3 Replace the cover Do not use rechargeable Ni Cd batteries They are different in shape and performance and may fail to ensure correct operation ...

Страница 11: ...ollowing procedures once with PAL signal and again with the NTSC signal 1 Push the Main Menu button Select the FEATURES menu by using the Position Up or Down button Push the Position Left or Right button to enter FEATURES function Select the CONVERGENCE menu by using the Position Up or Down button 3 2 MAIN MENU N N N Push the Position Left or Right button to enter CONVERGENCE ADJUSTMENT mode Verti...

Страница 12: ...n the red line with the green line Becomes a yellow line Use the Position Up or Down Left or Right buttons to align the blue line with the yellow line Becomes a white line Push the N button to return to the normal viewing Stores blue If you wish to view a video with a different colour system PAL SECAM NTSC repeat the steps above while displaying a picture Convergence Adjustment for GREEN RED and B...

Страница 13: ...age 38 P AI page 39 VCR LD DVD Play page 55 VCR LD DVD Rewind Review page 55 VCR LD DVD Power page 55 LD DVD button page 54 VCR button page 54 Main Menu page 18 Normalisation page 42 43 Position button Off Timer button page 33 Stereo Bilingual Sound Selection page 41 TV TEXT Selection page 51 TEXT Favourite Page Selection page 51 Time TEXT page 52 TC 51P100 Series are not equipped ...

Страница 14: ... Digit Programme Number Selection page 32 Picture in Picture Selection page 36 Still page 38 PIP Action page 36 Main Sub Picture Change page 37 VCR LD DVD Fast Forward Cue page 55 VCR LD DVD Stop page 55 VCR Still Advance VCR page 55 VCR Record VCR page 55 VCR LD DVD Pause Still page 55 Programme Number Up and Down VCR page 55 TEXT Hold page 51 TEXT Index page 51 TEXT Full Top Bottom Selection pag...

Страница 15: ...ume Up Down button See page 32 AV4 Input Terminals See page 16 AV3 Input terminals See page 15 AV1 Input terminals See page 15 Monitor Output Terminals See page 16 Programme Number button See page 32 Game button See page 33 AV2 Input Terminals Main headphone Jack See page 17 Sub headphone Jack See page 17 Display button See page 33 S VIDEO VIDEO AUDIO LEFT RIGHT MONO MONO MONO AV4 IN AV3 IN DVD Y ...

Страница 16: ... no input picture signal the Background Colour of the TV screen will change This only occurs if the Blue Back function is set to the ON condition refer to page 45 for details 2 When an S Video cable is connected to the S Video terminal the Video input will be automatically switched off for that AV mode 3 When a Monaural VCR is used connect the Monaural Audio cable to the Audio L Left terminal 4 Si...

Страница 17: ... 2 The monitor output emits the main picture normal video and audio signals 3 Teletext display on screen will not be output at the MONITOR OUT terminals 4 Even if the television is in picture in picture condition MONITOR OUT terminals output the same signals as main picture on the screen and sound from speakers Sub picture including strobe still channel search etc will not be output at the MONITOR...

Страница 18: ... Picture CHANGE B A A B A Speaker Sound A Stereo A Stereo A Stereo A Stereo B Stereo B Stereo B Mono A Mono A Mono A Stereo A Stereo B Stereo Main Headphones Sub Headphones Monitor Output Main Headphones plug When a Main Headphones plug is inserted into the Headphones socket all speakers will be automatically disconnected only the Main Headphones will function Use Volume Up or Down button to contr...

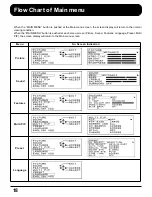
Страница 19: ...screen display will return to the normal viewing condition When the MAIN MENU button is pushed at each menu screen Picture Sound Features Language Preset Multi PIP the screen display will return to the Main menu screen Menu On Screen Indication Picture Sound Features Preset Multi PIP Language ...

Страница 20: ... Chart of Main menu TELETEXT mode Menu On Screen Indication FEATURES Text Text Press TV TEXT button at the channel receiving Text Signal to set Text menu ON TEXT mode is accessed upon pressing MAIN MENU button ...

Страница 21: ...d the unit memories the channels tuned in order from programme No 1 Push the button 1 to view channel 2 Push the button 2 to view channel 4 Push the button 3 to view channel 6 During position mode various reception channels can be viewed DIRECT SELECT When the Channel Selection is on DIRECT and Auto Tune is performed the unit memories the programme number which is the same as the channel tuned Thi...

Страница 22: ...H SELECT Select the CH SELECT Channel Select Mode by pushing the Volume Up or Down button Push the PRE PRESET button 8 times CH SELECT Condition Setting range when the POSITION has been selected Position 0 99 Setting range when the DIRECT has been selected Channel 1 125 The channel select indicator will change as follows DIRECT POSITION This returns the set to the normal viewing condition 1 2 3 1 ...

Страница 23: ...ndition The system select indicator will change as follows This returns the set to the normal viewing condition SYSTEM SELECT Region CHINA HK UK ASIA M EAST NZ INDONES AUSTRALIA E EUROPE SPECL VER AMERICA CATV JAPAN China Hong Kong United Kingdom Malaysia Singapore Thailand Asia countries Kuwait Saudi Arabia United Arab Emirates Middle East countries etc New Zealand Indonesia etc Australia CIS Pol...

Страница 24: ...2 1 2 12 13 21 28 57 58 62 63 69 57 21 62 63 69 21 62 63 69 21 62 63 69 21 62 63 69 21 62 63 69 62 63 69 62 63 62 C13 90 91 92 93 94 95 96 97 98 99 70 73 74 75 76 77 78 79 S 1 S 2 S 3 S 1 S 2 S 3 S 1 S 2 S 3 E65 E69 S01 S02 S03 S 1 S 1 S 2 S 3 80 81 89 Z1 Z9 S1 S2 S10 S1 S2 S10 S1 S2 S10 S1 S2 S10 S1 S2 S10 100 117 120 125 Z20 Z37 S21 S41 S21 S41 S21 S41 S21 S41 S21 S41 100 125 Z10 Z11 Z12 Z13 Z14...

Страница 25: ...ons are tuned the on screen display will automatically change from AUTO TUNE to SOUND SYS Position Confirm the sound condition of each Programme Number by using the Programme Number Up button If necessary push the Volume Up or Down button to improve the Sound quality Automatic Search AUTO TUNE Condition Search Start The best tuning position is automatically memorized If the Sound is not clear or n...

Страница 26: ...ontrol 2 If a clear picture with correct colours cannot be obtained when a Broadcast or AV signal is received refer to the Colour System Selection operation on page 35 3 After the Automatic tune is finished push the Programme Number button to confirm the tuning condition for each Programme Number If some Programme Numbers are unused it is possible to skip such Programme Numbers Please refer to the...

Страница 27: ...e Number Up or Down button Push the Volume Up or Down button Volume Next higher Channel Volume Next lower Channel Push the PRE PRESET button 2 3 4 Manual Search MANUAL TUNE Condition Select the desired Programme Number Search Start The best tuning position is automatically memorized SOUND SYS Condition 1 CH1 2 CH2 2 CH4 2 CH4 TV set TV AV PRE DISPLAY GAME 1 4 6 3 5 2 ...

Страница 28: ...lease refer to the Programme Number skip operation on page 30 3 When using a VCR without video and audio input output terminals it is convenient to connect the aerial cable as indicated in the instruction manual of VCR and to set the designated channel to programme No 0 In that case perform manual tune after setting the colour system and sound system in advance Further in multi system VCR it is mo...

Страница 29: ... the channel which you want to improve using the Programme Number Up or Down button Push the PRE PRESET button 7 times setting the Preset menu to FINE TUNE Push and hold the Volume Up or Down button until the clear picture is received Push the PRE PRESET button twice S e l e c t t h e d e s i r e d Programme Number Fine Tune Condition Fine Tune Start The AFC function is deactivated The symbol appe...

Страница 30: ...O F F Programme Number which you want to return to Automatic Frequency Control cancel the manual fine tuning Push the PRE PRESET button 4 times setting the Preset menu to MANUAL TUNE Push the Volume Up or Down button briefly Push the PRE PRESET button 5 times 1 2 3 4 AFC OFF Programme Numbers are indicated to you by the symbol to the left of the Programme Numbers in the On Screen Display Manual Se...

Страница 31: ...ip Programme Number on which no TV stations are tuned appearing on the screen The function is only effective when selecting Programme Numbers by pushing the Programme Number up or Down button either on the TV set or the remote control 1 CH1 2 CH2 2 CH2 Select a Programme Number you want to skip by pushing the Programme Number up or down button Repeat Steps 2 and 3 for the r e m a i n i n g P r o g...

Страница 32: ...gramme Number by pushing the Programme Number Up or Down button Push the Volume Up or Down button Repeat Steps 2 and 3 if you wish to cancel the skip function on any other Programme Number After the Skip Cancel Operation is completed push the PRE PRESET button once Channel Skip Condition The displayed ON condition changes to OFF This returns the set to the normal viewing condition 1 CH1 2 CH2 2 CH...

Страница 33: ...her on the set or on the Remote Control Programme Number Selection Push the Programme Number Up or Down button to select the next higher or lower Programme number Direct Programme Number Selection CH SELECT POS You can select the numbers directly by pushing Number 0 9 button and the two digit Numbers by pushing Two Digit and Programme Number buttons Programme Number 8 8 Programme Number 12 1 2 Dir...

Страница 34: ... cancel Programme Number Refer to page 20 Audio Mode Refer to page 41 Sound Menu Refer to page 43 Picture Menu Refer to page 42 Off Timer Refer to page 33 Off Timer button The TV set may be preset to switch to stand by after a fixed period By pushing Off Timer button you can select the preset time either 30 60 90 minutes or AUTO mode Setting Off Timer to AUTO mode If the set is not switched off wh...

Страница 35: ... 1 Push the PRE PRESET button 5 times Push the Volume Up or Down button repeatedly until the optimum sound is obtained Push the PRE PRESET button 4 times 3 2 PRE PRE Sound System Condition Note These are different sound broadcast transmission systems applicable to differing countries The sound system will change as shown This returns the set to the normal viewing condition The selected Sound Syste...

Страница 36: ... until the optimum image is produced Push the PRE PRESET button 3 times In the AV mode push the PRE PRESET button once Colour System Condition The colour system will change as shown Note PAL SECAM and NTSC 3 58 are different colour signal broadcast transmission systems applicable to differing countries NTSC 4 43 is a trick playback mode used in special VCR s to playback NTSC recorded video tapes t...

Страница 37: ...2 When the set is in PIP mode the left and right picture are processed by two different circuits Therefore there may be a minor difference in clarity between the Pictures Main Picture input mode Main Picture Sub Picture Sub Picture input mode AV1 7 PIP Normal mode Picture in Picture mode TV AV 2 1 3 5 4 6 8 0 7 9 D PNR TV TEXT INDEX HOLD MAIN MENU STROBE VCR DISC SIDE VCR LD DVD N CHANGE PIP ACTIO...

Страница 38: ...gnal mode seguentially S u b H e a d p h o n e s Vo l u m e adjustment Push the PIP ACTION button and volume Up or Down button to increase or decrease the sub Headphones volume level Note The volume for the main picture on sub picture can be adjusted separately CHANGE Push the CHANGE button to swap from Main picture to sub picture and vice versa Position buttons Only for PIP mode By pushing each P...

Страница 39: ...he strobe effect When the Screen Use mode is ALL When the Screen Use mode is PART STROBE CH Channel SEARCH By pushing this button it is possible to search through all tuned programme numbers Push the desired programme number STILL PICTURE STILL PICTURE 1 2 3 4 5 6 7 8 9 10 11 12 13 14 15 16 2 3 STILL mode Normal Viewing Condition Push the Still button and the Main picture as a still frame PIP mode...

Страница 40: ...GE PIP ACTION CH SEARCH SURROUND STILL PIP 2 1 P AI 2 P AI D PNR P AI Picture Artificial Intelligence The P AI continuously detects fine difference in the picture signal with great precision and including the picture brightness black level and contrast This function automatically adjusts the picture to the best quality for the scene and reproduces images that provide a sense of depth OFF STRONG AU...

Страница 41: ...STEREO MONO automatic switching occurs it is recommended that STEREO switch to MONO Refer to page 41 be used If problems or unusual sudden effects are encountered in any of the surround modes it is recommended that SURROUND OFF be selected TV AV 2 1 3 5 4 6 8 0 7 9 D PNR STROBE VCR LD DVD CHANGE PIP ACTION CH SEARCH SURROUND STILL PIP 1 P AI Type of broadcast TV mode AV mode On screen display SURR...

Страница 42: ...ystem is used in the following countries New Zealand Singapore Hong Kong and China 2 If the stereo signal is poor or the receiving conditions are not optimum of if STEREO MONO automatic switching occurs it is recommended you switch from STEREO to MONO When the broadcasting mode changes to STEREO or MONO after you have selected MONO mode change over to S T E R E O m o d e w i l l b e m a d e automa...

Страница 43: ...elected Menu will be changed to the Normal mode Normalisation will not occur if the Menu is not displayed when the N button is pushed The Normal mode is the factory preset condition Returning to this original condition is called Normalisation Helpful Hint Normalisation MAIN MENU Picture Menu Operation Picture Menu Function DYNAMIC STANDARD SOFT For viewing in brighter environments This menu select...

Страница 44: ... Operation BASS and TREBLE can not be adjusted By pushing the Normal N button on the Remote Control while the Sound Menu is displayed the selected Menu will be changed to the Normal mode Normalisation will not occur if the Menu is not displayed when the N button is pushed The Normal mode is the factory preset condition Returning to this original condition is called Normalisation MAIN MENU Sound Me...

Страница 45: ...d to reduce picture noise during poor quality reception conditions P AI mode The P AI continuously detects fine differences in the picture signal with great precision and including the picture brightness black level and contrast This function Automatically adjusts the picture to the best quality for the scene and reproduces images that provide a sense of depth C TEMP Colour Temperature mode The C ...

Страница 46: ...Disable this Feature to view correctly Blue if no input picture signal or input signal is weak VCR GAME mode Reproduction of irregular signals such as certain TV games and rental video tapes may be improved TEXT Select mode No indication for TC 51P100G TC 51P100H The viewer can select from the following three text languages Please select the option matching the text signal being received Display L...

Страница 47: ...the Child Lock function is set ON picture and sound of the TV AV mode being viewed will disappear PICTURE SHIFT For use as a screen saver the following displays change position shift every 20 minutes by several millimetres Standard on screen status indicators all current system settings can be displayed using the Recall button Input screen in game mode CONVERGENCE ADJUSTMENT See page 10 ...

Страница 48: ...tion Language Menu Operation 1 Push the Main Menu button 2 Select the Language menu by pushing the Position Up or Down button 3 Push the Position Left or Right button The on screen language display will change MAIN MENU ...

Страница 49: ... PIP mode SCREEN USE mode When using the strobe or channel search functions select whether these features are to apply to the full screen or to the sub screen PART Sub screen strobe channel search ALL Main screen strobe channel search PIP SIZE mode This feature allows the user to change the sub picture size in PIP mode SMALL 1 16 size of the main picture LARGE 1 9 size of the main picture When the...

Страница 50: ...t STILL mode Normal Viewing Condition STILL mode on and the Main picture as a still frame PIP mode is ON STILL mode on to display the sub picture as a still frame CHANGE mode When the CHANGE mode is ON to Swap from Main picture to sub picture and vice versa When the Screen Use mode is ALL When the Screen Use mode is PART When the Screen Use mode is ALL When the Screen Use mode is PART STILL PICTUR...

Страница 51: ... about one of these subjects push the appropriately coloured button This facility enables fast access to information of the subjects shown What are the advantages Page selection at the touch of a Colour coded button Easy to use step by step selection of the topics subject Reduction of waiting time Page status line at bottom of screen so you always know which button will take you to the desired inf...

Страница 52: ... hold the current page Push again to cancel the hold Reveal Push to reveal hidden words e g quiz page answers Push again to hide Colour Coded buttons In FASTEXT mode these correspond to the differently coloured subjects In LIST mode they correspond to the differently coloured page numbers Favourite Page F P Stores a favourite page in memory for instant recall To store such a page the TV must be in...

Страница 53: ...age and continue watching the normal programme until the correct sub page is found Select the required page number 22 using buttons 0 9 1 Push the TIME TEXT button Enter desired sub page number To select page 6 enter 0 0 0 and 6 2 1 3 P AI TV AV 2 1 3 5 4 6 8 0 7 9 D PNR TV TEXT INDEX HOLD MAIN MENU STROBE VCR DISC SIDE VCR LD DVD N CHANGE PIP ACTION CH SEARCH SURROUND STILL PIP LD DVD SKIP SKIP A...

Страница 54: ...e numbers can be altered for channel position To do this push one of the colour coded buttons and enter the new page number Push and hold List store the page number will change colour TEXT MODE Push to change from FASTEXT mode to LIST mode and vice versa In FASTEXT mode four differently coloured subjects are displayed at the bottom of the page Push the appropriate coloured button to access more in...

Страница 55: ...ain 2 Depending on the model operation of VCR s LD s or DVD s of the manufacturers listed above may not be possible 3 In some cases new products may not be operative 4 It will not operate with other than the above manufactures TV AV 2 1 3 5 4 6 8 0 7 9 D PNR TV TEXT INDEX HOLD MAIN MENU STROBE VCR DISC SIDE VCR LD DVD N CHANGE PIP ACTION CH SEARCH SURROUND STILL PIP LD DVD SKIP SKIP A B REVEAL F P...

Страница 56: ...tton Programme Number Up and Down Button Rew Rewind Review Button LD DVD Power Button Stop Button DISC SIDE A Selection Button Play Button FF Fast Forward Cue Button DISC SIDE B Selection Button Pause Still Button Programme Skip Button 2 3 4 5 6 7 8 9 A B SKIP SKIP 1 9 7 4 2 5 3 6 8 P AI TV AV 2 1 3 5 4 6 8 0 7 9 D PNR TV TEXT INDEX HOLD MAIN MENU STROBE VCR DISC SIDE VCR LD DVD N CHANGE PIP ACTIO...

Страница 57: ...ed into AC outlet Not switched on Contrast and Brightness Volume setting Check by pushing the Power Switch or Stand by button on the Remote Control Colour Control Retune Channels Convergence Adjustment Refer to page 10 Sound System Refer to page 34 Colour System Refer to page 35 Symptoms Snowy Picture Multiple Image Interference Normal Picture No Picture No Colour Scrambled Multiple Image Colour N...

Страница 58: ...cloth from time to time If you use a chemically treated cloth please be careful to follow the instructions that come with the cloth Remove dirt and soiling by wiping with a light cloth Even if the unit is heavily soiled do not apply cleaner directly to the unit Soak a cloth in a solution of neutral cleanser thinned with water Then wring out the cloth wipe the unit clean and finish by wiping with a...

Страница 59: ...69 PAL B AUST 13 57 PAL D K 13 62 NTSC M Japan 14 69 NTSC M U S A 21 Systems Function 1 2 3 4 5 6 7 8 9 10 11 12 13 14 15 16 17 18 19 20 21 PAL B G H PAL I PAL D K SECAM B G SECAM D K SECAM K1 NTSC M NTSC 3 58 4 5 MHz Reception of broadcast transmis sions and Playback from Video Cassette Tape Recorders Playback from Special VCR s Playback from Special Disc Players and Special VCR s NTSC 4 43 5 5 M...

Страница 60: ... 1 Vp p 75 Ω Audio Out Approx 0 5 V 1 KΩ AV1 IN Rear S Video Video Audio L R terminals AV2 IN Front S Video Video Audio L R terminals AV3 IN Rear Video Audio L R terminals AV4 IN Rear Video or Y PB PR Audio L R terminals Accessories Supplied Remote control Transmitter TNQE194 TX 51P100H TX 51P100X TNQE196 TC 51P100H TC 51P100G R6 AA Battery 2 75 Ω coaxial aerial plug Dimensions W D H 1095 mm 500 m...

Страница 61: ...el number and serial number of this product can be found on its cabinet You should note this serial number in the space provided below and retain this book plus your purchase receipt as a permanent record of your purchase to aid in identification in the event of theft or loss and for Warranty Service purposes Model Number Serial Number ...

Отзывы: