84
English
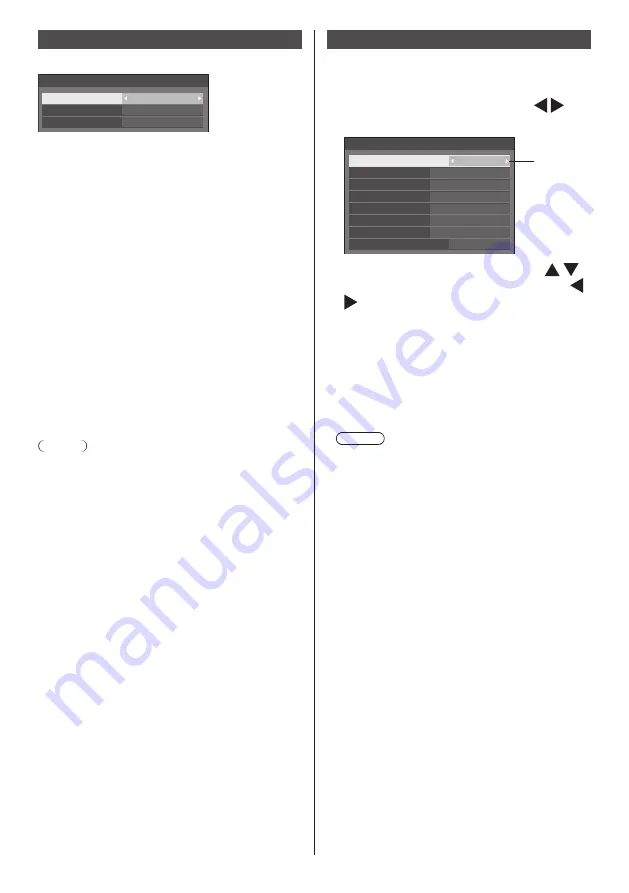
Screen Transfer settings
[Screen Transfer settings] - submenu screen
Screen Transfer settings
Cut in
On
Off
PIN code
Screen Transfer function
Enable
■
[Screen Transfer function]
Set the function to display images using Panasonic’s
dedicated application “Screen Transfer” to enable or
disable.
■
[Cut in]
Sets whether to allow video interruption by another user
while displaying a video using “Screen Transfer”.
[Off]:
Disables video interruption.
[On]:
Enables video interruption.
■
[PIN code]
Sets whether to require the input of PIN code when
connecting to this unit using “Screen Transfer”.
[Off]:
Does not require the input of PIN code.
[On]:
Requires the input of PIN code.
Note
●
For 98 and 86 inch models, [Screen Transfer settings]
is displayed only when the main software version is
4.0000 or later.
Function button settings
Assigns specific functions to the numeric buttons (<1>
to <6>). The buttons can be used as shortcut keys by
assigning frequently used operations.
1
Switch [Function group] with .
[Function button settings] - submenu screen
Function button settings
Function group
Function button 1
Function button 2
Function button 3
Function button 4
Function button 5
Function button 6
MEMORY VIEWER
Function button guide
Input
On
Input
↓
Memory load
↓
Shortcut
DisplayPort
HDMI1
DIGITAL LINK
DVI-D
USB
2
Select the numeric button with
and set the function to assign with
.
Functions assignable to the numeric
buttons
[Input] (Direct input select)
Input can be selected with single-touch operation.
[HDMI1] / [HDMI2] / [DisplayPort] / [DIGITAL
LINK] / [
DVI-D
] / [SLOT] / [PC] / [Screen
Transfer] / [USB] / [
MEMORY VIEWER
]
Note
●
For 98 and 86 inch models, [Screen Transfer] is
displayed only when the main software version is
4.0000 or later.
[Memory load]
Memory can be loaded with single-touch operation.
Refer to “Memory load”. (see page 53)
[MEMORY1] to [MEMORY6]
●
[MEMORY1] to [MEMORY6] load functions are
already assigned to <1> to <6> respectively.
These settings cannot be changed.
[Shortcut]
[Signal], [Screensaver], [Set up timer], [Power
management settings], [Network settings],
[Multi display settings], [Portrait settings]
●
Pressing the numeric button displays the menu
screen. Pressing the button again exits the
menu screen.
[
AV mute
]
●
Pressing the numeric button mutes the audio
and pictures.
To cancel, press any button on the remote
control except the <Standby (ON/OFF) button>.
[Digital zoom]
●
Switches to [Digital zoom] mode by pressing
numeric buttons. (see page 42)


