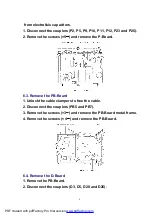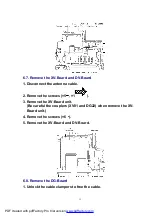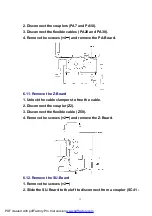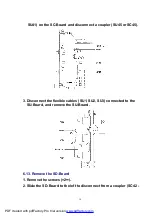
3. Disconnect the flexible cables (D33 and D34).
4. Remove the screws (×4 ) and remove the D-Board.
6.5. Remove the rear terminal cover
1. Remove the screws (×4 , ×7 , ×2
).
2. Remove the rear terminal cover.
6.6. Remove the metal frame
1. Unlock the cable clampers to free the cable.
2. Disconnect the couplers (D3, D5, H7, P10 and PB7) and relay
connector (SP-R, SP-L).
3. Remove the screws (×5 ) remove the metal frame.
10
PDF created with pdfFactory Pro trial version
Содержание TH-42PE55E
Страница 21: ...7 1 Lead of Wiring 1 37 inch 21 PDF created with pdfFactory Pro trial version www pdffactory com ...
Страница 22: ...22 PDF created with pdfFactory Pro trial version www pdffactory com ...
Страница 29: ...9 3 Option Description 29 PDF created with pdfFactory Pro trial version www pdffactory com ...
Страница 30: ...30 PDF created with pdfFactory Pro trial version www pdffactory com ...
Страница 48: ...15 2 Packing Exploded Views 1 48 PDF created with pdfFactory Pro trial version www pdffactory com ...
Страница 49: ...49 PDF created with pdfFactory Pro trial version www pdffactory com ...
Страница 50: ...15 3 Packing Exploded Views 2 50 PDF created with pdfFactory Pro trial version www pdffactory com ...
Страница 51: ...51 PDF created with pdfFactory Pro trial version www pdffactory com ...
Страница 52: ...15 4 Packing Exploded Views 3 52 PDF created with pdfFactory Pro trial version www pdffactory com ...
Страница 58: ...C1171 EEEHB1C470P C 47PF J 16V 1 58 PDF created with pdfFactory Pro trial version www pdffactory com ...
Страница 104: ...C426 ECJ2XC1H471J C 470PF J 50V 1 104 PDF created with pdfFactory Pro trial version www pdffactory com ...
Страница 129: ...14 Block and Schematic Diagram 14 1 Schematic Diagram Notes 67 ...
Страница 130: ...14 Block and Schematic Diagram 14 1 Schematic Diagram Notes 67 ...


