background image

12

13

Quick Start 

Guide

 First 

T

ime 

Setup

 Identifying 

Controls

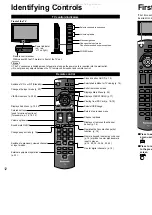
Identifying Controls

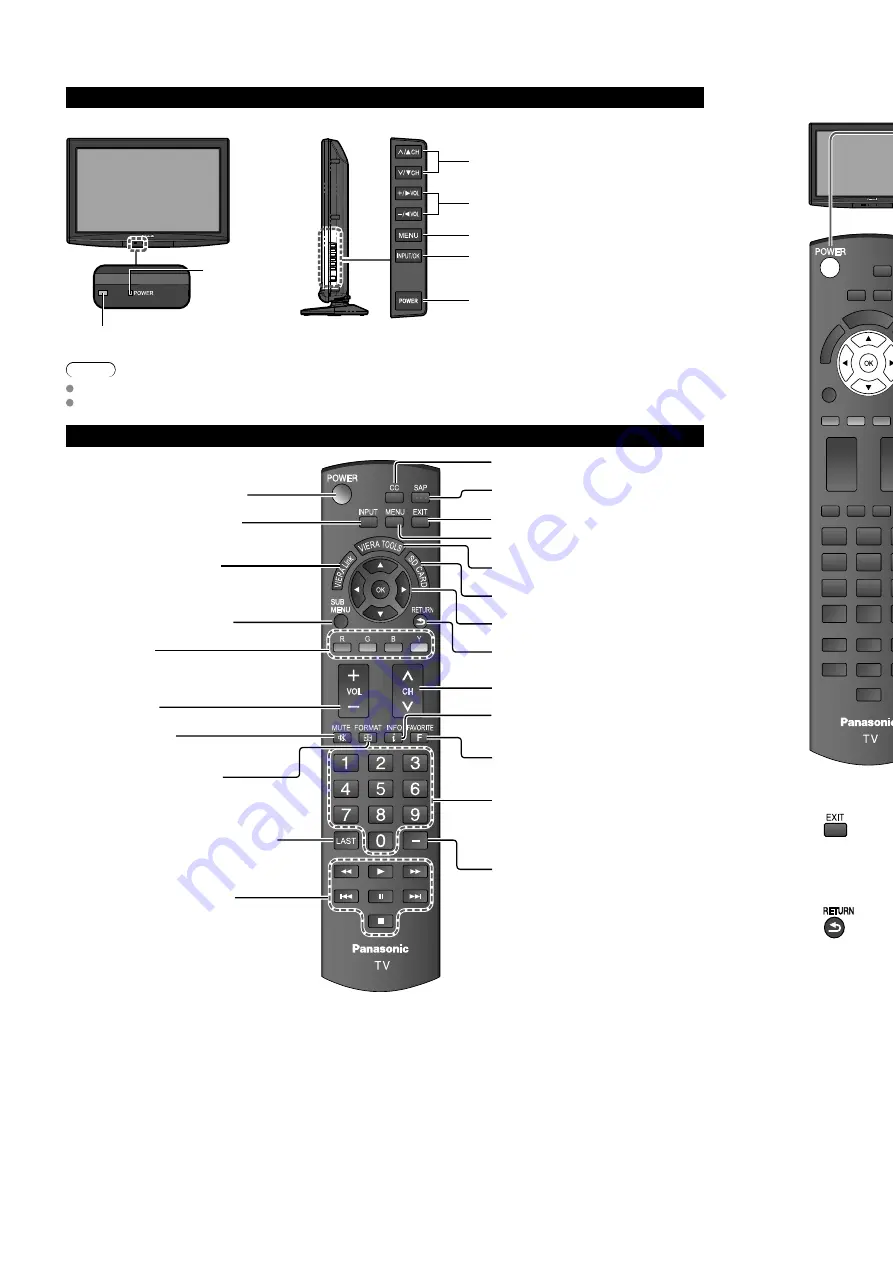
Remote control sensor

Within about 23 feet (7 meters) in front of the TV set.

Power indicator 

( on:  red, 

off:  no light)

Note

 The TV consumes a limited amount of power as long as the power cord is inserted into the wall outlet.

 Do not place any objects between the TV remote control sensor and remote control.

TV controls/indicators

Changes the input mode

Chooses menu and submenu entries.

Volume up/down

Selects channels in sequence

Front of the TV

POWER button

Menu navigations

Remote control

Switches TV On or Off (Standby)

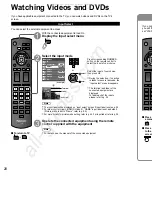
Changes the input mode (p. 20)

VIERA Link menu (p. 32-33)

Displays Sub Menu (p. 15, 26)

Colored buttons 

(used for various functions)

(for example, p. 14, 18, 32)

Volume up/down

Sound mute On/Off

Changes aspect ratio (p. 16)

Switches to previously viewed channel 

or input modes.

External equipment operations

(p. 33)

Closed caption On/Off (p. 15)

Selects Audio Mode for TV viewing (p. 15)

Exits from menu screen
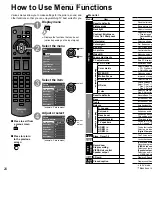
Displays Main Menu (p. 24)

Displays VIERA TOOLS (p. 17)

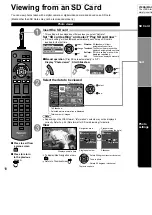
Viewing from SD Card (p. 18-19)

Selects/OK/Change

Returns to previous menu

Channel up/down

Displays or removes the channel 

banner (p. 16)

Operates the Favorite channel list 

function. (p. 16)

Numeric keypad to select any channel 

(p. 15) or press to enter alphanumeric 

input in menus. 

(p. 14, 20, 32, 34, 36, 39, 40)

Use for digital channels. (p. 15)

First Time Setup

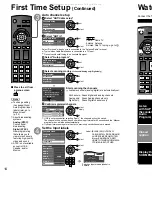
“First time setup” is displayed only when the TV is turned on for the first time after the power cord is 
inserted into a wall outlet and when “Auto power on” (p. 26-27) is set to “No”.

or


Press to exit from 
a menu screen


Press to return 
to the previous 
screen 

Turn the TV On with the POWER button

or

(Remote)

(TV)

 *  This setting will be skipped next time if you select “Home”.

 Select your language

Language

English

Français

Español

 select

 ok

 Be sure to select “Home”

Please select your viewing environment.

Home

Store

 select

 ok

 Please confirm your selection (Home) before pressing OK button.


If you select “Store” by mistake in  , confirmation screen will be 
displayed.

You are selecting the mode for store demonstration

Yes

No

 select

 ok

 Select “No” and return to previous screen  .

 If you select “Yes”, Screen enters store demonstration mode. 

To display the “Please select your viewing environment” screen again as shown 

above and select “Home”, do one of the following:

• Press and hold down the side POWER button.

• Unplug the TV and plug it again.

Adjust the clock

First time setup

Language

Clock

ANT/Cable setup
Input labels

 next

 select

2009

1
7

10 AM

10

Clock

Year

Month
Day
Hour
Minute

 set

 select item

Year: Select 

the 

year

Month: Select the month 

Day: Select 

the 

day

Hour: Adjust 

the 

hour 

Minute:  Adjust the minute

All manuals and user guides at all-guides.com

Содержание TC-L32S1L

Страница 1: ...for Warranty Service purposes Model Number Serial Number Web Site http panasonic net Panasonic Corporation 2009 Printed in U S A This product has a fluorescent lamp that contains mercury Disposal may...

Страница 2: ...DHC Logo is a trademark HDAVI Control is a trademark of Panasonic Corporation Manufactured under license from Dolby Laboratories DOLBY and the double D symbol are trademarks of Dolby Laboratories Turn...

Страница 3: ...tripod bracket or table specified by the manufacturer or sold with the apparatus When a cart is used use caution when moving the cart apparatus combination to avoid injury from tip over 13 Unplug thi...

Страница 4: ...ter Firmly tight Reference Accessories Remote Control Transmitter N2QAYB000321 Batteries for the Remote Control Transmitter 2 AA Battery Operating Instructions Quick setup guide For viewing programmin...

Страница 5: ...dards include digital high definition television HDTV standard definition television SDTV data broadcasting multi channel surround sound audio and interactive television If no Cable Box Cable Box Cabl...

Страница 6: ...er DVD Recorder or VCR Satellite Receiver TV VHF UHF Antenna You can enjoy high definition programming by subscribing to high definition satellite service Connection can be done with the use of HDMI o...

Страница 7: ...Colored buttons used for various functions for example p 14 18 32 Volume up down Sound mute On Off Changes aspect ratio p 16 Switches to previously viewed channel or input modes External equipment ope...

Страница 8: ...Progress Number of analog channels Number of digital channels 8 10 0 Press RETURN to quit RETURN Start scanning the channels Available channels analog digital are automatically set All channels Scans...

Страница 9: ...Favorite Feature 1Display the SUB MENU SUB MENU 2Select Set favorite All Setup SUB MENU Edit CH caption Signal meter Set favorite Channel surf mode select ok 3Set the displayed channel Set favorite 1...

Страница 10: ...lly is Off Display Photo viewer Start Slideshow select next Slideshow Select the data to be viewed Slideshow Folders R Y Sort by month G Sort by date B OK Select RETURN Name Pana0001 Date 03 04 2009 S...

Страница 11: ...n is taken for several seconds the Input select menu disappears HDMI 1 GAME Terminal example Label The terminal and label of the connected equipment are displayed To label each of the inputs please re...

Страница 12: ...able connected To connect PC p 41 PC menu se Making settings Menu Picture PC adjustm Audio menu Display the Input select menu Input select TV 1 2 3 4 5 6 7 8 Component HDMI 2 HDMI 3 Video 1 PC Video 2...

Страница 13: ...tch to Off wh A I sound S HDMI 1 in HDMI 2 in HDMI 3 in The default settin Select audio inpu Digital Compon Timer Sleep Timer 1 5 The TV can autom Lock Locks the channe VIERA Link Record now Stop reco...

Страница 14: ...conserve ener continues for mor Note Not in use whe No activity for for the first time The on screen d Advanced setup Auto power on Turns TV On auto TV AC cord must The Sleep tim Play SD card automati...

Страница 15: ...tion Version Operations HDAVI Control or later Automatic Input Switching p 31 Power on link p 31 Power off link p 31 Default speakers p 31 One touch theater playback p 31 Speaker control p 33 HDAVI Co...

Страница 16: ...Input signal C Note There is a pos function conn of equipment For more deta For Recorder You cannot op When you turn Automatic lip sync function for HDAVI Control 3 or later Minimizes lip sy Amplifie...

Страница 17: ...ange Set Speaker control You can select H Control theater s This function is a Player theater is Select Sp Select Ho Recorder TV Record now Stop recording VIERA Link control Speaker output VIERA Link...

Страница 18: ...w a blocked program or change rating settings RETURN Password Enter password If it is your first time entering the password enter the password twice in order to register it Select the Lock mode Off Of...

Страница 19: ...ANT Cable setup ANT in Auto program Manual program Signal meter next select Set Auto program Set automatically Automatically se Select AN Select Ca Or select Select Au C ANT Cable setup ANT in Auto p...

Страница 20: ...5 Service 6 The settings in Analog or Digital depend on the broadcaster To make more in depth display settings in digital programs Select Digital setting and press OK Select the item and set Automatic...

Страница 21: ...Link Picture Audio Timer Lock SD card Closed caption next select Select the timer to set Timer Sleep Timer 1 Timer 2 Timer 3 Timer 4 Timer 5 select next Turns Off automatically Sleep Turns On Off auto...

Страница 22: ...under age 8 No offensive language nudity or sexual content C8 Programming generally considered acceptable for children 8 years and over No profanity nudity or sexual content G General programming suit...

Страница 23: ...e latest information on the following website http panasonic jp support global cs This site is in English only SD Card warning messages Do not remove the card while the unit is accessing data this can...

Страница 24: ...kHz and vertical scanning frequency of 48 to 120 Hz However the image will not be displayed properly if the signals exceed 1 200 lines Some PC models cannot be connected to the set There is no need t...

Страница 25: ...e looseness around the panel to prevent the damage to the panel The remote control does not work Are the batteries installed correctly p 6 Are the batteries new If there is a prob suggested chec numbe...

Страница 26: ...VHF UHF 2 69 CATV 1 135 Operating Conditions Temperature 32 F 95 F 0 C 35 C Humidity 20 80 RH non condensing Connection Terminals VIDEO IN 1 VIDEO RCA PIN Type 1 1 0 V p p 75 AUDIO L R RCA PIN Type 2...

Отзывы: