background image

57

Before Requesting 

Service

Power
1:

The SD Multi AV Device power 
cannot be turned on.

1-1: Is the power source connected 

correctly?

1-2: Is the Battery fully charged? Charge it 

with the AC Adaptor. 

2:

The SD Multi AV Device power shuts 
off automatically.

2:

If you do not use the SD Multi AV 
Device for more than 10 minutes, the 
power shuts off automatically to save 
the Battery power. 

3:

The SD Multi AV Device power does 
not stay on long enough.

3:

Is the Battery low? Charge the Battery 
or attach a fully charged Battery.


Battery
1:

Battery runs down quickly.

1-1: Is the Battery fully charged? Charge it 

with the AC Adaptor. 

1-2: Are you using the Battery in an 

extremely cold place? In cold places, 
the operating time of the Battery 
becomes shorter. 

1-3: Has the Battery worn out? If the 

operating time is still short even after 
the Battery is fully charged, the Battery 
has worn out.

Recording
1:

Recording does not start although 
power is supplied to the SD Multi AV 
Device and the Memory Card is 
correctly inserted.

1-1: Is the SD Multi AV Device turned on?
1-2: Is the write-protect switch set to 

[LOCK]? Being set to [LOCK], the 
Memory Card cannot be recorded.

1-3: Does the Memory Card have enough 

free space? Delete useless data in the 
Memory Card.

Playback
1:

Recorded images are not clear.

1:

Is [MPEG4 MODE] on the menu set to 
[NORMAL] or [ECONOMY]? If 
recording is done with it set to 
[NORMAL] or [ECONOMY], images 
with fine details may include a mosaic-
like pattern. Set [MPEG4 MODE] to 
[SUPER FINE] or [FINE]. 

2:

Playback images do not look 
normal.

2:

The picture may be damaged. In order 
to prevent the loss of image data, 
backing up on a personal computer is 
recommended.

3:

Actual recording time/still image 
storage capacity in the Memory 
Card is different from those 
described in these Operating 
Instructions drastically.

3-1: Actual recording time/still image 

storage capacity depends on the kind 
of the image.

3-2: When MPEG4 moving picture data, still 

picture data, sound data, and audio 
data are recorded in the Memory Card, 
less capacity in the Memory Card can 
be used.

4:

While playing back a Voice file or a 
Music file, the LCD Monitor is 
suddenly turned off.

4-1: The LCD Monitor is automatically 

turned off approx. 5 seconds after 
starting playing back or recording a 
Voice file. Pressing the [

1

SET] button 

turns on the LCD Monitor. However, in 
the case of not conducting any 
operation for approx. 5 seconds, the 
LCD Monitor is turned off again. (The 
LCD Monitor is on while stopping 
playback (or pausing ).)

4-2: When the [POWER SAVE] mode is set 

to [ON], the LCD Monitor is turned off 5 
seconds after starting playback of a 
Music file.

AV20U.book  57 ページ  2003年4月2日 水曜日 午後9時9分

Содержание SV-AV20A

Страница 1: ...lease read these instructions completely For USA assistance please call 1 800 211 PANA 7262 or send e mail to consumerproducts panasonic com For Canadian assistance please call 1 800 561 5505 or visit us at www panasonic ca R VQT0C32 1 AV20U book 1 ページ 2003年4月2日 水曜日 午後9時9分 ...

Страница 2: ... Reverse Engineering Decompiling or Disassembly Licensee may not reverse engineer decompile or disassemble the Software except to the extent either of them is permitted under law or regulation of the country where Licensee resides Matsushita or its distributors will not be responsible for any defects in the Software or damage to Licensee caused by Licensee s reverse engineering decompiling or disa...

Страница 3: ...e Recorded Voice Playback 25 Listening to Music Music Playback 26 Adjusting the Volume 27 Advanced Functions Backlight Compensation Function 28 Adjusting White Balance 28 Erasing the Files Recorded on a Memory Card 29 Protecting files File Protection 30 Writing Printing Data on a Memory Card DPOF Setting 31 Playing back still pictures one by one P Slide Show 32 Formatting the Memory Card 33 On a P...

Страница 4: ...ur Safety IMPORTANT Please respect all copyrights Whatever you have recorded and created can be used for your personal entertainment only Under copyright laws other materials cannot be used without obtaining permission from the holders of the copyrights WARNING TO REDUCE THE RISK OF FIRE OR SHOCK HAZARD AND ANNOYING INTERFERENCE USE ONLY THE RECOMMENDED ACCESSORIES AND DO NOT EXPOSE THIS EQUIPMENT...

Страница 5: ...s and is protected by the patented technologies and intellectual properties of Japan and the U S To use these copyright protected technologies authorization of the Macrovision Company is required It is prohibited to disassemble or modify the SD Multi AV Device l 00 indicates the page to be referred to Note that the SD Multi AV Device may not play back the data recorded or created on another produc...

Страница 6: ...nnect the equipment into an outlet on a circuit different from that to which the receiver is connected Consult the dealer or an experienced radio TV technician for help FCC Caution To assure continued compliance follow the attached installation instructions and use only shielded interface cables with ferrite core when connecting to computer or peripheral devices Any changes or modifications not ex...

Страница 7: ...he MPEG4 moving picture data can be edited on the personal computer ªClock setting When you purchase the SD Multi AV Device the clock setting has not been performed To start please set the year month date and time l 17 ªPower supply frequency Under fluorescent lighting horizontal stripes consisting of light and dark patterns may appear on the screen as illustrated below To reduce the effect of the...

Страница 8: ... Ver 3 0 refer to the PDF manual This manual describes installation only 8 Carrying Case RFC0069 H Put the SD Multi AV Device in the Carrying Case supplied after use or when carrying it Optional Accessory 1 Battery Pack CGA S301 l 10 Supplies power to the SD Multi AV Device CAUTION This unit will operate on 110 120 220 240 V AC An AC plug adaptor may be required for voltages other than 120 V AC Pl...

Страница 9: ...Lamp l 49 7 Memory Card Slot l 11 8 DC Input Socket DC IN 4 8V l 10 9 Card Eject Lever CARD EJECT 1 l 11 10 Earphone Terminal l 12 11 Volume Adjustment Button sVOLr l 27 12 Speaker 13 Power Lamp l 10 14 USB Terminal l 40 15 USB Terminal Cover l 40 16 Power Mode Switch OFF PLAY REC l 13 17 Recording Start Stop Button l 20 22 24 51 18 Microphone built in monaural l 24 19 Flash l 20 20 Lens l 47 21 B...

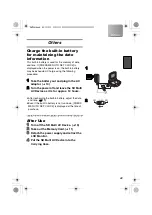
Страница 10: ...d After the battery is set close the cover 3 Connect the AC Adaptor to AC Main socket 4 Connect the DC Input Lead to the DC IN 4 8V socket on the SD Multi AV Device Power Lamp flashes and Charging starts When recharging turn the power of the SD Multi AV Device off 5 Wait until Power Lamp 1 goes off When recharging is completed Power Lamp goes off If the Power Lamp flashes quickly or slowly when re...

Страница 11: ...ng the Memory Card Slide the Card Eject Lever 3 to remove the Memory Card and pull it out Attaching the Hand Strap 1 Pass the shorter loop of the Hand Strap through the Strap Holder 2 Pass the big loop of the Strap through the small loop CAUTION Danger of explosion if battery is incorrectly replaced Replace only with the same or equivalent type recommended by the manufacturer Dispose of used batte...

Страница 12: ...en the LCD Monitor 2 Adjust the LCD Monitor angle according to the desired recording playing angle The LCD Monitor can rotate up to the angles illustrated 1 Up to 120 maximum 2 Up to 180 maximum 3 Up to 90 maximum Using the Earphones 1 Plug the Earphone Terminal into the terminal 1 2 1 1 AV20U book 12 ページ 2003年4月2日 水曜日 午後9時9分 ...

Страница 13: ...econds only icons are displayed 1 ªAbout the Operation Modes Seven operation modes are provided as follows Still picture JPEG format still picture record mode l 20 Still picture JPEG format still picture play mode l 21 Moving picture MPEG4 format record mode l 22 Moving picture MPEG4 format play mode l 23 Sound VOICE format record mode l 24 Sound VOICE format play mode l 25 Music MPEG2 AAC MP3 for...

Страница 14: ... 5 For selecting an item press the UP DOWN side of the Multi function Button to select a desired item and then press the LEFT RIGHT side to set the item 1 For conducting an item press the UP DOWN side of the Multi function Button to select a desired item and then press the 1 SET Button 2 6 Press the MENU Button Menu screen disappears and the selected item is now being set Press the MENU Button whe...

Страница 15: ... status and picture quality will be displayed Return to the previous screen RETURN Sub Menu for REC Mode 1 Initial setup INITIAL SETUP AC mains AC MAINS l 18 Clock setting CLOCK SET l 17 Card format CARD FORMAT l 33 Return to the previous screen RETURN 2 Display setup DISPLAY SETUP Display DISPLAY When it is set to ON superimposed indications such as playback status and picture quality will be dis...

Страница 16: ...ard editing CARD EDITING Display setup DISPLAY SETUP l 15 Return to the previous screen RETURN 3 Voice Playback Menu Beep sound BEEP SOUND l 15 Erase all files ERASE ALL FILES l 29 File protection FILE PROTECTION l 30 Display DISPLAY When it is set to ON superimposed indications such as playback status and picture quality will be displayed Return to the previous screen RETURN 4 Music Playback Menu...

Страница 17: ... SETUP and press the 1 SET Button 4 Select CLOCK SET and press the 1 SET Button 5 Select YEAR and press the LEFT RIGHT side of the Multi function Button to set a desired value and select MONTH 6 In the same way set MONTH DAY HOUR MINUTE to a desired value 7 Press the MENU Button When the built in battery has been exhausted set the date and time after the battery has charged l 43 1 2 3 4 RETURN INI...

Страница 18: ... the Appearance of Horizontal Stripes Consisting of Light and Dark Patterns If adjustment of the frequency does not have much effect on reducing horizontal stripes operate the SD Multi AV Device as follows for MPEG4 mode and PICTURE mode 1 Set the Power Mode Switch to REC l 13 2 Press for approx 1 second The Indication appears when the horizontal stripes reduction function is activated To Release ...

Страница 19: ...ulti function Button for adjustment If BRIGHTNESS is selected the brightness can be increased by moving the 3 to the right If COLOR is selected the color can become darker by moving the 3 to the right 6 Press the MENU Button The MENU screen disappears If left unused for approx 5 seconds the display will automatically revert to the DISPLAY SETUP screen These adjustments do not affect the recorded i...

Страница 20: ...ng Start Stop Button The still image is recorded on the Memory Card ªTo Double the Image Size Press 2k for approx 1 second 1 Press 2k again to turn back to the normal size ªTo Check the Recorded Image immediately Press the 1 SET Button 2 The recorded image displays for 5 seconds The REVIEW Indication is displayed Press the MENU Button when the checking display appears to show ERASE CARD FILE displ...

Страница 21: ...t a desired file 3 Press the 1 SET Button A still picture file is played back ªOperation during Playback Stop Reverts to the index picture screen 9 Displays the previous next screen 1 SET Slide show ªTo Play Back All of the Still Pictures One by One While playing back press the 1 SET Button 1 The image is played back for 5 seconds Press to stop Press to pause Only JPEG formatted files are able to ...

Страница 22: ...NOMY Press the MENU Button after completing the setting 4 Press the Recording Start Stop Button Recording starts While recording the moving picture press the Recording Start Stop Button to stop recording ªTo Double the Image Size Press 2k for approx 1 second 1 Press 2k again to turn back to the normal size 1 REC OFF PLAY MODE 2 3 MENU INITIAL SETUP DISPLAY SETUP RETURN SETUP MENU MPEG4 MODE SUPER ...

Страница 23: ... file is played back After playing back continuously from the selected file to the last file the display reverts to the index picture screen ªOperation during Playback Stop Reverts to the index picture screen Pause Press during playing 9 Finding the beginning of a file Tap this button 9 Fast forwarding rewinding Press and hold this button for approx 1 second ªFor Repeat Playback Press the MENU But...

Страница 24: ...p recording The LCD Monitor will shut off approx 5 seconds after starting to record This is not a malfunction but a normal sequence in recording When voice recording stops the LCD Monitor turns on again The recorded file is automatically locked to prevent accidental erasure If the 1 SET Button is pressed while recording the LCD Monitor turns on and will turn off again in approx 5 seconds If the so...

Страница 25: ...nitor will turn off When stopping playback the file list reverts and the LCD Monitor turns on again ªOperation during Playback Stop Reverts to the form of a list Pause Press during playback 9 Finding the beginning of a file Tap this button 9 Fast forward fast backward Press and hold If the 1 SET Button is pressed while playing the LCD Monitor turns on and will turn off again in approx 5 seconds Ho...

Страница 26: ...lti function Button to select a desired file Music files not having a still picture associated are displayed as shown 1 3 Press the 1 SET Button A music file is played back ªOperation during playing Stop Reverts to the index picture screen Pause Press during playback 9 Finding the beginning of a file Tap this button 9 Fast forward fast backward Press and hold No audio is output during fast forward...

Страница 27: ...ts the playback audio level for moving picture files music files and voice files 1 Press s or r of the VOL Button The VOLUME indication appears 2 If the volume buttons are left unoperated for 2 seconds the VOLUME indication will automatically disappear DEFAULT PLAYLIST PLAYLIST 1 PLAYLIST 2 PLAYLIST 3 SELECT PLAYLIST VOL 1 VOLUME 2 1 AV20U book 27 ページ 2003年4月2日 水曜日 午後9時9分 ...

Страница 28: ... Balance The SD Multi AV Device adjusts White Balance automatically However depending on the scene or light condition the Automatic White Balance may not be able to bring out natural colors In such cases the white balance can be adjusted manually 1 Set the Power Mode Switch to REC and set the operation mode to PICTURE or MPEG4 2 Point the SD Multi AV Device at a full screen white subject e g white...

Страница 29: ...ess the LEFT RIGHT side of the Multi function Button to select YES 5 Press the 1 SET Button The selected file is erased from the Memory Card If NO is selected the file selection is cancelled After erasing the file the display reverts to the index picture screen ªTo Erase All Files 1 Set the Power Mode Switch to PLAY and set to the desired operation mode 2 Press the MENU Button 3 Select CARD EDITIN...

Страница 30: ... to select LOCK 5 Press the 1 SET Button The selected file is locked and the Indication is attached to the selected files ªTo Release the File Protection Select UNLOCK in Step 4 above The Indication disappears ªTo Lock All Files 1 Set the Power Mode Switch to PLAY and set to the desired operation mode 2 Press the MENU Button 3 Select CARD EDITING and press the 1 SET Button 4 Select FILE PROTECTION...

Страница 31: ...RIGHT side of the Multi function Button to set the number to be printed and press the 1 SET Button When DPOF setting is set to 1 or more the indication appears ªTo Release All the DPOF Settings 1 Set the Power Mode Switch to PLAY and set the operation mode to PICTURE 2 Press the MENU Button 3 Select CARD EDITING and and press the 1 SET Button 4 Select DPOF RESETTING and press the 1 SET Button 1 A ...

Страница 32: ...D MovieStage Ver 2 0 1 Install the SD MovieStage Ver 2 0 on your personal computer l 38 2 Insert the Memory Card into the SD Multi AV Device and connect to the personal computer 3 Start the SD MovieStage Ver 2 0 4 Drag and drop thumbnails in the content field to the rehearsal field in your favorite order 5 Click the Windup button in the reherasal field 6 Drag and drop the Windup icon onto SD Memor...

Страница 33: ...U Button 3 Select INITIAL SETUP and press the 1 SET Button 4 Select CARD FORMAT and press the 1 SET Button A verification message appears 5 Select YES to be formatted Formatting is carried out If NO is selected the Memory Card format is cancelled INITIAL SETUP DISPLAY SETUP RETURN SETUP MENU QUALITY FINE BEEP SOUND OFF FLASH OFF EXIT MENU AC MAINS RETURN INITIAL SETUP CARD FORMAT 50Hz CLOCK SET EX...

Страница 34: ...other than the one pre installed is not guaranteed Dual CPUs or Multi boot environments are not supported Only users having system administrator Administrator authority can use these software applications Click the desired language in Read before you install on the startup screen before installation and read the Readme file The software is available in English Even if you operate a personal comput...

Страница 35: ...nc dba Gracenote Other names of systems and products mentioned in these Operating Instructions are usually the registered trademarks or trademarks of the manufacturers who developed the systems or products concerned The contents or complete reproduction or copy of these Operating Instructions could be changed without notice When installing or using this software specify the user name to Administra...

Страница 36: ... 2000 Professional Windows XP Home Edition Professional CPU Intel Celeron 366 MHz or higher HDD 350 MB or more When acquiring DV moving images 240 MB min RAM 128 MB or more Windows 98SE Me 256 MB or more Windows 2000 XP Display High Color 16 bit or more with a resolution of 800 k 600 pixels or more Drive CD ROM Drive I F USB terminal Others Pointing device such as a mouse or equivalent to mouse Th...

Страница 37: ...s 2000 XP Display High Color 16 bit or more with a resolution of 800 k 600 pixels or more Sound Compatible with the Creative Sound Blaster 16 and speakers Drive CD ROM Drive Must support digital recording CD ROM drive connected through IEEE 1394 or USB may not allow accurate recording I F USB terminal Others Pointing device such as a mouse or equivalent to mouse The following software except for t...

Страница 38: ...is activated Installing SD MovieStage Ver 2 0 1 Insert the supplied CD ROM into the personal computer s CD ROM drive The launcher for the installation is activated automatically 2 Click SD MovieStage Ver 2 0 When SD MovieStage Ver 2 0 screen appears click Next 3 Read License Agreement carefully and click Yes if you accept the terms of the agreement 4 Complete the installation according to the mess...

Страница 39: ... Read License Agreement carefully and click Yes if you accept the terms of the agreement 4 Enter your name and the serial No described on the CD ROM casing and click Next 5 Complete the installation according to the message When the setup screen for the Media Format 7 1 is displayed install the Media Format 7 1 according to the message When the DirectX 8 1 setup screen appears install it Failure t...

Страница 40: ...i AV Device is disabled The Removable disk icon appears in My Computer Starting the Software ªStarting the SD MovieStage Ver 2 0 1 Start All programs programs Panasonic SD MovieStage SD MovieStage ªStarting the SD Jukebox Ver 3 0 1 Start All programs program Panasonic SD JukeboxV3 SD JukeboxV3 Connect the USB cable after the USB driver is installed Use both the AC adaptor and the battery Either on...

Страница 41: ...n task tray Hardware disconnect dialog box appears 2 Select USB Mass Storage Device and click Stop 3 Click OK Click OK and you can safely disconnect the cable If you no longer need software Uninstall 1 Select Start Settings Control Panel 2 Double click Add Remove Programs 3 Select the software to be uninstalled and click Change Remove Uninstalling steps may vary depending on the OS Please refer to...

Страница 42: ...e MISC Files in which DPOF Data has been set to the image are in this folder Slide show data created by SD MovieStage Ver 2 0 are in this folder AUTPLAY0 MRK etc SD_VIDEO MPEG4 moving picture is recorded in ASF format MOL001 ASF etc It can be played back with Windows Media Player 6 4 or later Because of small size this File is well suited for transmitting data through a telephone line etc SD_VOICE...

Страница 43: ...in the AC adaptor l 10 2 Turn the power off and leave the SD Multi AV Device as it is for approx 12 hours After recharging the built in battery adjust the date and time l 17 Even if the built in battery is not run down PRESS MENU TO SET CLOCK is displayed at the time of purchase After Use 1 Turn off the SD Multi AV Device l 13 2 Take out the Memory Card l 11 3 Detach the power supply and retract t...

Страница 44: ...mage Quality PICTURE mode Fine Normal Economy MPEG4 mode Super fine Fine Normal Economy 5 Double zoom display Double zoom l 20 22 6 Camera Functions Horizontal Stripes Reduction Mode l 18 ª Backlight Compensation Mode l 28 1 White Balance setting l 28 7 Remaining Battery Power When the battery power becomes low the indication changes When the battery level indicator indicates the battery will run ...

Страница 45: ...ext LOW BATTERY The battery may be exhausted Replace it with a fully charged battery or recharge the supplied battery NO CARD The Memory Card is not inserted or the Memory Card may not be inserted correctly CARD FULL The memory capacity is fully utilized Erase any unnecessary files or replace it with a new Memory Card CARD LOCKED The write protect switch of the SD Memory Card is set to LOCK see pa...

Страница 46: ...V Device near radio transmitters or high voltage lines If you record pictures near radio transmitters or high voltage lines recorded images or sounds may be adversely affected Do not use the SD Multi AV Device for surveillance purposes or other business use If you use the SD Multi AV Device for a long period of time the internal temperature increases and consequently this may cause malfunction The...

Страница 47: ...he LCD Monitor Wipe it with a soft dry cloth If your SD Multi AV Device is extremely cold when you turn its power on the image on the LCD Monitor will be slightly darker than usual at first However as the internal temperature increases it goes back to the normal brightness ªOptimal Use of the Battery Battery Characteristics This Battery is a rechargeable lithium ion battery Its ability to generate...

Страница 48: ... may rust and cause malfunctions Do not allow the Battery terminals to come in contact with metal objects such as necklaces hairpins etc This can result in a short circuit or heat generation and if you touch the Battery in this condition you may be badly burned Store the Battery in a completely discharged state To store the Battery for a long period of time we recommend you charge it once every ye...

Страница 49: ...harged battery are as follows 68 F 20 C 60 The times number of images listed in the above table are approximate If you disconnect the DC Input Lead or the AC Main Lead while charging the Battery Power Lamp flashes several times and goes off For continuing Battery charge wait for approx 1 minute and then connect the AC Main Lead and the DC Input Lead It is recommended to set the battery even when u...

Страница 50: ...off Set the Power Mode Switch to OFF and turn it back on ª Using the Menu Screen l 14 To abort the setting press the MENU Button While a Menu is displayed you cannot record or play back The menu screen does not appear during recording ª Setting Date and Time l 17 The built in battery sustains the operation of the clock The clock might cause a deviation from the correct date and or time so be sure ...

Страница 51: ...ble shows still image storage capacity for each image quality settings The numbers shown in the above table are approximate and may vary depending on picture content ª Playing back Still Pictures l 21 The image data files recorded on the Memory Card with the SD Multi AV Device conform to the DCF Design rules for Camera Files system universal standard stipulated by JEITA Japan Electronics and Infor...

Страница 52: ...layback on the next file In the index picture screen the first frame for the pictures is displayed For example if the first frame is painted in black as a whole a black screen will be displayed MPEG4 files recorded by another device or another application may not be played back Files recorded on the SD Multi AV Device may not be played back on another movie camera or the file size may not be displ...

Страница 53: ...e MP3 or MPEG2 AAC files which were written with SD Jukebox Ver 3 0 may not be played back The bit rates recommended supported are 64 kbps 96 kpbs or 128 kbps for both the MPEG2 AAC and MP3 files WMA data cannot be played back ª Adjusting the Volume l 27 The L R indication on the earphones represents Left Right When checking the sound which is being recorded volume adjustment is not available ª Ba...

Страница 54: ...ion l 30 Even if files are locked the files will be deleted when the Memory Card is formatted Any music files MPEG2 AAC and MP3 cannot be locked or unlocked Files recorded by Voice Recording Functions are automatically locked to prevent accidental erasure The File Protection carried out by this SD Multi AV Device is only effective for this SD Multi AV Device The SD Memory Card has a write protecti...

Страница 55: ...ing with the PC l 40 To erase pictures that you recorded on the Memory Card by using the SD Multi AV Device be sure to erase them on the SD Multi AV Device or SD MovieStage Ver 2 0 not on a personal computer the explorer etc You may not be able to properly play back on the SD Multi AV Device after editing the recorded data or changing the image data on a personal computer Moving Picture format MPE...

Страница 56: ...ty indicated on the SD Memory Card label corresponds to the total amount of the capacity to protect and manage the copyright and of the capacity available as a conventional memory for a SD Multi AV Device Personal Computer or others The SD_VOICE folder the voice files contained in it and SD_AUDIO folder are specified to the hidden files Those folders and files may not be displayed on the Explorer ...

Страница 57: ...in the Memory Card Playback 1 Recorded images are not clear 1 Is MPEG4 MODE on the menu set to NORMAL or ECONOMY If recording is done with it set to NORMAL or ECONOMY images with fine details may include a mosaic like pattern Set MPEG4 MODE to SUPER FINE or FINE 2 Playback images do not look normal 2 The picture may be damaged In order to prevent the loss of image data backing up on a personal com...

Страница 58: ...intosh Mac OS 8 0 or later The Windows Media Player for Macintosh can be downloaded from Microsoft s Web site 2 Red blue green or white dots appear on the screen 2 1 0 01 or less of the pixels of some LCD Monitors may remain turned on or off 2 2 If the SD Multi AV Device is used continuously for a long time or used at a high ambient temperature red blue green or white dots may appear on the screen...

Страница 59: ...Weight Approx 3 25 oz 92 g without Battery and Memory Card Approx 4 2 oz 119 g with Battery and SD Memory Card Operating Temperature 32oFj104oF 0 oCj40 oC Operating Humidity 10 j80 AC Adaptor Panasonic VSK0626 Information for your safety Dimensions Approx 2 k 1 1 16 k 2 13 16 50 W k 26 H k 70 D mm Weight Approx 2 12 oz 60 g Battery Pack Panasonic CGA S301A1 Information for your safety Dimensions A...

Страница 60: ...o products purchased and serviced in the United States or Puerto Rico This warranty is extended only to the original purchaser of a new product which was not sold as is A purchase receipt or other proof of the original purchase date is required for warranty service Carry In or Mail In Service For Carry In or Mail In Service in the United States call 1 800 211 PANA 1 800 211 7262 For assistance in ...

Страница 61: ...UENTIAL DAMAGES RESULTING FROM THE USE OF THIS PRODUCT OR ARISING OUT OF ANY BREACH OF THIS WARRANTY As examples this excludes damages for lost time travel to and from the servicer loss of media or images data or other memory content The items listed are not exclusive but are for illustration only ALL EXPRESS AND IMPLIED WARRANTIES INCLUDING THE WARRANTY OF MERCHANTABILITY ARE LIMITED TO THE PERIO...

Страница 62: ... Centralized Factory Servicenter Panasonic Services Company 1705 N Randall Road Elgin IL 60123 7847 Attention SD Products Repair Please carefully pack and ship prepaid and insured to the Elgin Centralized Factory Servicenter Customer s in Puerto Rico please ship or carry in to location below Service in Puerto Rico Product Repairs MAIL TO Web Site http www panasonic com You can purchase parts acces...

Страница 63: ...imento de la misma y colocar la batería Acoplar la batería con la etiqueta mirando hacia arriba Después de haber colocado la batería cerrar la tapa 3 Conectar el cable principal CAs al adaptador CA y a la toma de corriente principal CA 4 Conectar el cable de entrada del DC DC IN 4 8V a la toma de corriente del dispositivo AV Múltiple SD La luz indicadora de encendido parpadea y empieza a cargar Du...

Страница 64: ...botón de encendido selector modo en PLAY o REC El dispositivo AV Múltiple SD está encendido 2 Poner en REC para seleccionar el modo de grabación Poner en PLAY para seleccionar el modo de reproducción 3 Pulsar el botón MODE para seleccionar un modo de funcionamiento Cada vez que se pulsa el botón MODE el modo de funcionamiento cambia como sigue En varios segundos se visualizarán solo iconos ªInform...

Страница 65: ...o de funcionamiento 3 Pulsar el botón de grabación Start Stop Durante la grabación de la imagen dinámica o la voz pulsar el botón de grabación Start Stop para detener la grabación Reproducción de imágenes estáticas imágenes dinámicas la voz grabada la música 1 Poner el botón de encendido selector modo en PLAY 2 Pulsar el botón MODE para seleccionar un modo de funcionamiento 3 Pulsar hacia ARRIBA A...

Страница 66: ...ecaucus NJ 07094 Panasonic Sales Company PSC Division of Matsushita Electric of Puerto Rico Inc Ave 65 de Infantería Km 9 5 San Gabriel Industrial Park Carolina Puerto Rico 00985 Panasonic Canada Inc 5770 Ambler Drive Mississauga Ontario L4W 2T3 P VQT0C32 1 F0103Mk1023 8000 B AV20U book 66 ページ 2003年4月2日 水曜日 午後9時9分 ...

Отзывы: