28
8.3.2.
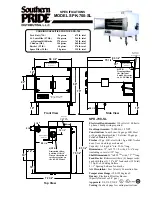
Doctor Mode Table 2
FL Display Test
Tact SW
Inspection
Volume Setting
To check the FL segments
display (All segments will light
up).
To conduct the acceptance of
all keys on the main set.
Item
FL display
Key operation
Front Key
Mode name
Description
To check for preset volume
setting.
Note : In tuner mode this
function is not possible.
In Doctor mode:
Press [1] button on the remote
control of HC55.
To cancel, press [0] button on
remote control. It returns Doctor
Mode.
To exit Doctor Mode, press [ ]
button on main unit or on the
remote control of HC55.
In Doctor mode:
In Bluetooth selector, press [2]
button on the remote control of
HC55.
To cancel, press [0] button on
remote control. It returns Doctor
Mode.
To exit Doctor Mode, press [ ]
button on main unit or on the
remote control of HC55.
In Doctor mode:
Press [7] button on the remote
control of HC55.
To cancel, press [0] button on
remote control. It returns Doctor
Mode.
To exit Doctor Mode, press [ ]
button on main unit or on the
remote control of HC55.
In Doctor mode:
Press [8] button on the remote
control of HC55.
To cancel, press [0] button on
remote control. It returns Doctor
Mode.
To exit Doctor Mode, press [ ]
button on main unit or on the
remote control of HC55.
In Doctor mode:
Press [9] button on the remote
control of HC55.
To cancel, press [0] button on
remote control. It returns Doctor
Mode.
To exit Doctor Mode, press [ ]
button on main unit or on the
remote control of HC55.
NE3/5
(SP unit)
NE1
1 POWER POWER
1 digit
of FL
st
2 digit
of FL
nd
3 digit
of FL
rd
4 digit
of FL
th
5 digit
of FL
th
2
SELEC-
TOR
SELEC-
TOR
3
WPS
D.BASS
4
VOL-
VOL-
5
VOL+
VOL+
Remarks
No
FL
Display
Содержание SL-NE5EF
Страница 11: ...11 3 2 Troubleshooting Guide ...
Страница 13: ...13 4 1 License ...
Страница 14: ...14 5 General Introduction 5 1 Using AirPlay with this system s speakers ...
Страница 15: ...15 5 2 Playing back music files on the DLNA server ...
Страница 16: ...16 5 3 Bluetooth Operations ...
Страница 17: ...17 5 4 Playable media ...
Страница 18: ...18 6 Location of Controls and Components 6 1 Main Unit Key Button Operations ...
Страница 19: ...19 6 2 Remote Control Key Button Operations ...
Страница 20: ...20 7 Installation Instructions 7 1 Connections ...
Страница 21: ...21 7 2 Inserting media ...
Страница 22: ...22 7 3 Network settings ...
Страница 23: ...23 ...
Страница 24: ...24 ...
Страница 38: ...38 10 3 Main Parts Location Diagram ...
Страница 61: ...61 Caution A click sound could be heard when the iPod Top is fully catched Step 12 Fix 1 screw ...
Страница 68: ...68 13 3 Main Parts Location Diagram ...
Страница 88: ...88 ...
Страница 100: ...100 ...
Страница 102: ...102 ...
Страница 140: ...140 ...
Страница 144: ...144 ...