background image

104

VQT2N91

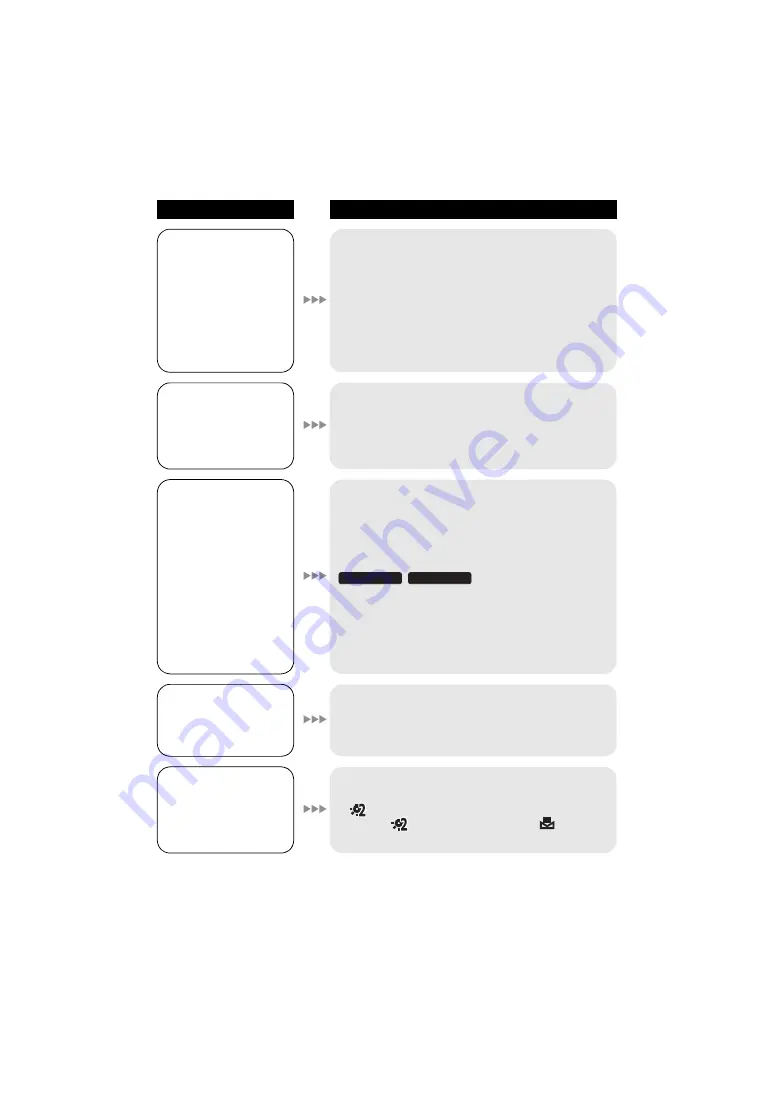
Problem

Check points

This unit cannot be 
operated though it is 
turned on.

This unit does not 
operate normally.

Remove the battery or AC adaptor, wait about 
1 minute and then reconnect the battery or AC 
adaptor. Then about 1 minute later, turn on the 
power again. (Conducting the above operation while 
the media is being accessed may damage the data 
on the media.)

If normal operation is still not restored, detach the 
power connected, and consult the dealer who you 
purchased this unit from.

The remaining time 
indication or the 
elapsed time 
indication is not 
shown.

If you set [SETUP] 

>

 [DISPLAY] 

>

 [OFF], 

indications other than warnings and date etc. are not 
displayed. (

l

25)

The unit arbitrarily 
stops recording.

Use an SD card that can be used for motion picture 
recording. (

l

18)

The recordable time may have shortened due to the 
deterioration of the data writing speed or repeated 
recording and deletion. Using the unit, format the SD 
card, built-in memory or HDD (

l

74)

/

If the unit is exposed to strong vibrations or shocks 
while recording on HDD, recording may stop to 
protect the HDD. If the unit is used in a place with 
loud sounds, the recording may stop due to sound 
vibrations. Recording data on an SD card is 
recommended in these places.

Auto focus function 
does not work.

Set to Intelligent auto mode to on.

If you are trying to record a scene which is hard to 
bring into focus in auto focus mode, use the manual 
focus mode to adjust the focus. (

l

33, 58)

Colour balance of 
images is strange 
when recording in a 
place such as a 
gymnasium.

In a place with multiple light sources, such as a 
gymnasium or a hall, set the white balance setting to 

 (Indoor mode2). If you cannot record clearly 

with the 

 (Indoor mode2), set it to 

 (Manual 

adjustment mode). (

l

56)

SDR-H95

SDR-H85

Содержание SDRT55K

Страница 1: ...til 2010 1 25 Operating Instructions Before use please read these instructions completely VQT2N91 1 SD Video Camera Model No SDR S50 SDR S45 SDR T55 SDR T50 SD HDD Video Camera Model No SDR H95 SDR H8...

Страница 2: ...CE THIS UNIT IN A BOOKCASE BUILT IN CABINET OR IN ANOTHER CONFINED SPACE ENSURE THE UNIT IS WELL VENTILATED TO PREVENT RISK OF ELECTRIC SHOCK OR FIRE HAZARD DUE TO OVERHEATING ENSURE THAT CURTAINS AND...

Страница 3: ...cture playback are indicated by in these operating instructions Functions that can be used for still picture recording still picture playback are indicated by in these operating instructions Pages for...

Страница 4: ...to sound vibrations Recording data on an SD card is recommended in these places Back up data periodically The HDD is temporary storage In order to avoid erasing data due to static electricity electrom...

Страница 5: ...ed trademarks or trademarks of the Microsoft Corporation in the United States and or other countries Microsoft product screen shot s reprinted with permission from Microsoft Corporation IBM and PC AT...

Страница 6: ...ecording Recording Basic 1 Before recording 32 Intelligent auto mode 33 Quick start 35 Quick power on 35 2 Recording motion pictures 36 Selecting a media to record SDR T55 SDR T50 SDR H95 SDR H85 37 R...

Страница 7: ...rmatting 74 With a TV 1 Watching Video Pictures on your TV 75 Backup With other products 1 Connecting a DVD burner to copy to play back a disc 77 Preparing for copying playing back 77 Copying to discs...

Страница 8: ...gion of China and Saudi Arabia AV cable K2KYYYY00054 USB cable Type A mini B cable K1HY04YY0032 not supplied for SDR S45 CD ROM Software CD ROM Operating Instructions VFF0570 Optional accessories Batt...

Страница 9: ...al image stabilizer button O I S SDR S50 SDR T55 SDR T50 SDR H95 SDR H85 l 45 4 Power button l 21 5 Delete button l 68 6 Long recording button LONG REC l 38 7 Audio video output terminal A V l 75 83 U...

Страница 10: ...g functions and playback operations and to operate the menu screen Move the joystick up down left or right to select a setting or scene and then press the joystick to set it 1 Select by moving up down...

Страница 11: ...Status indicator l 21 26 HDD access lamp ACCESS HDD SDR H95 SDR H85 l 4 27 DC input terminal DC IN l 14 Do not use any other AC adaptors except the supplied one 28 Grip belt Adjust the belt length an...

Страница 12: ...can only guarantee the quality performance or safety of genuine Panasonic batteries and not those made by other companies It has been found that counterfeit battery packs which look very similar to t...

Страница 13: ...e battery Removing the battery Be sure to hold down the power button until the status indicator goes off Then remove the battery while supporting the unit to prevent it from dropping Move the battery...

Страница 14: ...arged if the power is turned on 1 Connect the AC adaptor to this unit s DC input terminal 2 Connect the AC cable to the AC adaptor then the AC outlet For the AC cable plug in 2 and then 3 The status i...

Страница 15: ...sing Panasonic batteries l 8 16 If you use other batteries we cannot guarantee the quality of this product Do not heat or expose to flame Do not leave the battery ies in an automobile exposed to direc...

Страница 16: ...mAh 4 h 50 min 6 h 3 h 10 min SDR H95 SDR H85 Battery model number Voltage Capacity minimum Charging time Recording destination Recording mode Maximum continuously recordable time Actual recordable t...

Страница 17: ...indication The display changes as the battery capacity reduces If there is less than 3 minutes remaining then will become red If the battery discharges then will flash The remaining battery capacity i...

Страница 18: ...Memory Cards SDHC Memory Cards and SDXC Memory Cards When using an SDHC memory card SDXC memory card with other equipment check the equipment is compatible with these memory cards Cards that you can u...

Страница 19: ...rt global cs e_cam This website is in English only 4 GB or more Memory Cards that do not have the SDHC logo or 48 GB or more Memory Cards that do not have the SDXC logo are not based on SD Memory Card...

Страница 20: ...out 3 Securely close the SD card cover Do not touch the terminals on the back of the SD card See page 110 for details on handling the SD card Inserting removing an SD card When using an SD card not fr...

Страница 21: ...n the power on off To turn on the power A The status indicator lights To turn off the power B The status indicator goes off In the following cases opening the LCD monitor does not turn on the power Pr...

Страница 22: ...22 VQT2N91 Preparation Setup 4 Selecting a mode Change the mode to recording or playback Operate the mode switch to change the mode to or Recording mode l 36 42 Playback mode l 59 65...

Страница 23: ...then move the joystick right or press the joystick Descriptions of submenus and current settings on menus are displayed scrolling at the bottom of the screen 4 Select the desired setting then press th...

Страница 24: ...only for 6 It will be displayed only when the MEDIA SELECT is set to Built inMemory 7 For users who have this menu is not displayed Language selection Menu list SDR T55 SDR T50 SDR H95 SDR H85 SDR S5...

Страница 25: ...T50 SDR H95 SDR H85 SETUP DISPLAY The screen indications are selected as shown in the illustration below OFF ON EXT DISPLAY l 76 CLOCK SET l 28 SET WORLD TIME l 29 DATE TIME l 28 DATE FORMAT l 28 ECON...

Страница 26: ...the unit demonstration Only when the mode is at the position If DEMO MODE is switched ON when there is no SD card inserted the demonstration automatically starts If DEMO MODE is switched ON when there...

Страница 27: ...ry is selected 8 This appears only when the VIDEO HDD is selected For any other menus that are not described above refer to menus with the same names for the recording mode and motion picture playback...

Страница 28: ...nds A message may be displayed prompting you to set the world time l 29 Press the MENU button to complete the setting Changing the date and time display mode Select the menu l 23 SETUP DATE TIME OFF D...

Страница 29: ...he screen for selecting home travel destination appears after setting the home region successively If the home region has already been set once execute the menu operation for Step 1 5 Only when settin...

Страница 30: ...ystick to return to the previous screen 2 Make adjustments Close the setting by pressing the MENU button POWER LCD This makes it easier to view the LCD monitor in bright places including outdoors Sele...

Страница 31: ...image recorded is the same as a normal recording When the LCD monitor is rotated towards the lens side the icon will not be displayed even if you press the joystick Only some indications will appear...

Страница 32: ...ind you If the subject is backlit it will become dark in the recording Keep your arms near your body and separate your legs for better balance Do not cover the microphones with your hand Basic motion...

Страница 33: ...sed Intelligent auto mode MANUAL Intelligent auto Manual button iA MANUAL Press this button to change the mode to Intelligent auto mode or manual mode Please refer to page 55 about manual mode Mode Sc...

Страница 34: ...this unit 2 Blue sky 3 Cloudy sky rain 4 TV screen 5 Sunlight 6 White fluorescent lamp 7 Halogen light bulb 8 Incandescent light bulb 9 Sunrise or sunset 10 Candlelight If the automatic white balance...

Страница 35: ...to recording pause When in quick start standby mode about 70 of the power used in recording pause mode is being consumed so the recording time will be reduced Quick start standby mode is cancelled if...

Страница 36: ...an be recorded while recording the motion picture l 43 The images recorded between pressing the recording start stop button to start recording and pressing it again to pause recording become one scene...

Страница 37: ...tures then press the centre of the joystick Media set for still pictures and motion pictures will be outlined in a yellow frame Press the MENU button to end Selecting a media to record SDR T55 SDR T50...

Страница 38: ...Recording will take place in a mode suitable for playback in devices conforming to the SD Video standard Long recording mode Allows for recording at the same image quality as normal recording mode for...

Страница 39: ...g mode Recording mode XP SP LP SD card 4 GB 50 min 1 h 40 min 3 h 20 min 8 GB 1 h 45 min 3 h 30 min 7 h 16 GB 3 h 30 min 7 h 14 h 32 GB 7 h 30 min 15 h 30 h 64 GB 15 h 30 h 60 h 30 min Built in memory...

Страница 40: ...attery l 16 When the unit is moved a lot or moved quickly or when a fast moving subject is recorded particularly when recording in LP LLP mode mosaic type noise may appear at playback Long recording m...

Страница 41: ...appears move the unit slowly while recording Message will not appear while pausing the recording Message will appear even if it is pausing the recording if DEMO MODE is set to ON In some recording con...

Страница 42: ...ictures Refer to page 37 for methods for selecting recording media 1 Change the mode to and open the LCD monitor 2 Press the button Because of slower shutter speeds it is recommended that you use a tr...

Страница 43: ...dication does not appear For vivid still pictures we recommend pausing motion picture recording and taking still pictures after releasing the PRE REC mode SD cards are only mentioned with their main m...

Страница 44: ...0k If 70k or 2000k is selected the digital zoom range is displayed in blue while zooming The larger the digital zoom magnification the more the image quality is degraded If you take your finger off th...

Страница 45: ...tion is high jLocation is extremely dark jWhen you record a moving subject while tracking it Stabilization may not be possible under strong shaking When a tripod is used we recommend that you turn the...

Страница 46: ...ith the new subject and press the AF AE button once again 3 Start recording Pressing and holding the AF AE button releases the AF AE tracking About target frame In the event of failure to achieve targ...

Страница 47: ...g Backlight compensation Select an icon with the joystick To release reselect the operation icon Not displayed when the Intelligent Auto Mode is on The shaded operation icons are not displayed while...

Страница 48: ...e menu l 23 RECORD SETUP FADE COLOUR WHITE or BLACK Help mode Select the desired icon with the joystick to display an explanation on the screen To exit the help mode Press the MENU button Web mode You...

Страница 49: ...roximately 3 seconds before the recording start stop button is pressed appears on the screen Aim this unit at the subject and position it securely Press the recording start stop button to start record...

Страница 50: ...e recording start stop button was pressed The date indication for scenes recorded using the PRE REC function will be the date when the start stop button is pressed Therefore the date indication when d...

Страница 51: ...To make fast moving scenes less shaky with slow playback and pause of playback Portrait To make people stand out against the background Low light For dark scenes such as at dusk Spotlight Improved qu...

Страница 52: ...he intelligent auto mode detected faces appear with frames Change the mode to Select the menu l 23 RECORD SETUP FACE FRAMING desired setting Up to 5 frames are indicated Larger faces and faces nearer...

Страница 53: ...e by setting the white balance Change the mode to Select the manual mode l 55 Select the menu l 23 RECORD SETUP WB ADJUST The currently set white balance icon will be displayed l 56 Adjust by moving t...

Страница 54: ...ed becomes 1 25 the screen may be seen as if frames are missed and afterimages may appear If the scene is low in brightness or contrast the subject may not be focused on WIND NOISE CANCELLER When the...

Страница 55: ...hile in the screen above Press the joystick forward This will allow you to switch between manual mode and manual focus mode To release the manual mode Press the iA MANUAL button again MNL MANUAL 4 5 4...

Страница 56: ...balance modes When the unit is turned on with the lens cover closed the automatic white balance adjustment may not function properly Please turn the unit on after opening the lens cover When the displ...

Страница 57: ...ter speed and the iris gain value set the shutter speed and then set the iris gain value Manual shutter speed adjustment You may see a band of light around the object that is shining very bright or ha...

Страница 58: ...th the joystick The area in focus will be displayed in blue Display will return to normal approximately 2 seconds after the completion of the focus adjustment operation When MF ASSIST is set to OFF th...

Страница 59: ...to play back the SD card Select VIDEO Built inMemory to play back the built in memory Select VIDEO SD CARD to play back the SD card Select VIDEO HDD to play back the HDD Select VIDEO SD CARD to play...

Страница 60: ...elow 20 scenes 9 scenes 1 scene Time frame index l 62 9 scenes display returns if the power is turned off or the mode is changed To play back scenes recorded in long recording mode l 38 1 Select CHANG...

Страница 61: ...ll be shown continuously at approximately 2 3rd the speed of normal playback intervals of 0 5 seconds Slow playback of the motion picture recorded in long recording mode will be carried out at 0 5 sec...

Страница 62: ...aspect ratio of the motion picture l 52 Quality will be different from the normal still picture One scene images will be displayed as thumbnails under the set search conditions It is possible to play...

Страница 63: ...the date select icon and press the joystick A Date select icon 2 Select the playback date then press the joystick The scenes recorded on the date selected are displayed as thumbnails 3 Select the scen...

Страница 64: ...ate are played back repeatedly If playback of a scene was stopped halfway the playback can be resumed from where it was stopped Select the menu l 23 If playback of a motion picture is stopped appears...

Страница 65: ...y back the SD card Select PICTURE Built inMemory to play back the built in memory Select PICTURE SD CARD to play back the SD card Select PICTURE HDD to play back the HDD Select PICTURE SD CARD to play...

Страница 66: ...layed as thumbnails 3 Select the still picture to be played back and press the joystick Playing back of all the still pictures returns if the power is turned off or the mode is changed Even if still p...

Страница 67: ...When DATE SETUP has been selected Select the desired playback date then press the centre of the joystick When SLIDES INTERVAL has been selected Select the playback interval then press the centre of th...

Страница 68: ...cannot be deleted 3 Only when SELECT is selected in step 2 Select the scene still picture to be deleted then press the joystick A scene or still picture will be selected and will be displayed Press t...

Страница 69: ...till pictures conforming to DCF standard with this unit all the data related to the scenes still pictures may be deleted When still pictures recorded on an SD card by other products are deleted a stil...

Страница 70: ...hen press the joystick to play back the part to be deleted When you stop the playback the confirmation message appears When NO is selected the confirmation message appears Proceed to step 6 6 Select Y...

Страница 71: ...ill pictures repeat steps 2 3 Press the MENU button to complete the settings To cancel all DPOF settings What is DPOF DPOF Digital Print Order Format is a format which allows the user of a digital cam...

Страница 72: ...rrent media information will be displayed Press the centre of the joystick to switch display between SD card and built in memory Press the centre of the joystick to switch display between SD card and...

Страница 73: ...pictures or 99 dates can be set in succession If 2 or more SD cards are necessary to copy change the card following the instructions on the screen 4 Press the MENU button after the copying complete me...

Страница 74: ...press the joystick After formatting is complete press the MENU button to close the message screen Perform a physical formatting of the built in memory HDD when this unit is to be disposed transferred...

Страница 75: ...of the TV for details about TV compatibility 1 Connect this unit and a TV 2 Turn on this unit and change the mode to 3 Start playback on this unit If the image or audio from this unit does not appear...

Страница 76: ...etails To display the on screen information on the TV The information displayed on the screen operation icon and time code etc can be displayed on the TV Select the menu l 23 Select OFF to erase the i...

Страница 77: ...ow playback on other devices and additional copying will not be possible 2 Only DVD RAM copied with the DVD burner or VideoCam Suite 3 0 can additionally copy 3 Connect this unit and a DVD burner befo...

Страница 78: ...Connection Cable supplied with DVD burner B DVD burner optional Insert the plugs as far as they will go 4 Insert the disc in the DVD burner Insert the DVD disc with the recording label side up when u...

Страница 79: ...tlined in red Press the centre of the joystick again to deselect Up to 99 scenes 99 dates can be selected in succession 3 Select START then press the centre of the joystick When 2 or more discs are ne...

Страница 80: ...pting you to format the disc may be displayed Do not format the disc since deleted data cannot be restored later Approximate time for copying to a disc To copy motion pictures to the full capacity of...

Страница 81: ...TV l 75 2 Use the joystick to select a scene or a still picture then press the centre of the joystick for playback The playback operation is performed the same as when playing back motion pictures or...

Страница 82: ...hen copying still pictures 1 Select the menu l 23 If a disc that you copied to is inserted in another device without protecting it a message may be displayed prompting you to format the disc We recomm...

Страница 83: ...s unit can be copied dubbed onto the hard disk or a DVD disc Refer to the operating instructions of your DVD recorder for information about whether or not it supports copying dubbing from an SD card o...

Страница 84: ...92 Copy to PC You can copy motion still picture data to the HDD of PCs Copy to disc You can copy to disc in conventional standard picture quality MPEG2 format Upload to YouTube You can easily upload...

Страница 85: ...anasonic net avc sdcard information SDXC html VideoCam Suite 3 0 can handle images recorded with this unit or by using VideoCam Suite 3 0 Images created with other video cameras DVD recorders software...

Страница 86: ...e Engineering Decompiling or Disassembly Licensee may not reverse engineer decompile or disassemble the Software except to the extent either of them is permitted under law or regulation of the country...

Страница 87: ...Windows XP Home Edition Service Pack 2 Service Pack 3 Microsoft Windows XP Professional Service Pack 2 Service Pack 3 Microsoft Windows Vista Home Basic Service Pack 1 Service Pack 2 Microsoft Window...

Страница 88: ...t users only can use this software An administrative account user should install and uninstall this software DVD discs authored with this software are not guaranteed to play in all DVD players Dependi...

Страница 89: ...ft Windows Vista Business Service Pack 1 Service Pack 2 Microsoft Windows Vista Enterprise Service Pack 1 Service Pack 2 Microsoft Windows 7 Starter Microsoft Windows 7 Home Basic Microsoft Windows 7...

Страница 90: ...he installation screen does not appear automatically double click the CD ROM drive icon in Computer 2 Click Next 3 Select I accept the terms of the license agreement then click Next 4 Select the count...

Страница 91: ...ideoCam Suite 3 0 Follow the steps below to uninstall any software applications that you no longer require 1 Select start Control Panel Uninstall a program 2 Select VideoCam Suite 3 0 then click Unins...

Страница 92: ...been installed Use the joystick to select PC then press the centre of the joystick When you select an option other than PC reconnect the USB cable When Windows is used as the PC operating system a me...

Страница 93: ...u ray disc recorder or Panasonic DVD recorder the battery will charge When connecting this unit to a PC for the first time make sure to connect this unit to the PC with the power of this unit turned o...

Страница 94: ...er that contains the still pictures DCIM 100CDPFQ etc 2 Drag and drop the still pictures onto the destination folder on the PC s HDD Do not delete the SD card s folders Doing so may make the SD card u...

Страница 95: ...y authorized or with the user name for a standard user account If you log on with a user name for a guest user account the software cannot be used On the PC Select start All Programs Programs Panasoni...

Страница 96: ...etails on how to use it In order to upload motion pictures to YouTube a user account must first be obtained via the YouTube site After uploading is complete a message appears If OK is clicked the USB...

Страница 97: ...Use the joystick to select PC then press the centre of the joystick 3 Double click CAM_SD displayed on the desktop CAM_SD and CAM_MEM are displayed on the desktop CAM_SD and CAM_HDD are displayed on t...

Страница 98: ...d Recording SDR T55 SDR T50 SDR H95 SDR H85 SDR S45 R 1h20m 0h00m00s A 1 100 OPEN 0dB MF 15 11 2010 12 34 PRE REC LONG REC AWB LSP XP SP LP LXP LSP LLP LONG REC Green Recording pause PRE REC l 49 Manu...

Страница 99: ...folder file name 100 0001 Still picture folder file name 1 DPOF already set to more than 1 l 71 Resume playback l 64 Protected motion pictures still pictures l 69 Scenes recorded in the web mode l 48...

Страница 100: ...ars after this message wait a while without turning the unit off It may take time until the unit can be used CHECK CARD This card is not compatible or it cannot be recognised by the unit If this messa...

Страница 101: ...of the data it may not be possible to completely repair the data If recovery fails recorded scene playback will be impossible before power is turned OFF When data recorded on another device is recove...

Страница 102: ...nction is used When the iris gain is set Colour night view When the AF AE tracking is used MF assist function When digital zoom 78k SDR S45 40k or higher is used Shutter sound While recording motion p...

Страница 103: ...function l 25 is set to OFF When this unit is connected to a DVD burner to copy or play back images a disc is being accessed the power turns off automatically if the Mini AB USB Connection Cable is r...

Страница 104: ...e recordable time may have shortened due to the deterioration of the data writing speed or repeated recording and deletion Using the unit format the SD card built in memory or HDD l 74 If the unit is...

Страница 105: ...nnot be recovered Back up important data on a PC disc etc If the SD card is inserted in this unit it is not recognised If the SD card is formatted on a PC it may not be recognised by this unit Use thi...

Страница 106: ...ray and follow the instructions on the screen The power of the DVD burner cannot be turned on When the unit is connected to the DVD burner use the respective AC adaptors for both this unit and the DVD...

Страница 107: ...Camera SD HDD Video Camera off and remove the battery or disconnect AC adaptor Then reinsert the battery or reconnect AC adaptor and turn the SD Video Camera SD HDD Video Camera on Do not use the SD...

Страница 108: ...net it is recommended that you place a desiccant silica gel in with it When disposing of or giving away this unit note that Formatting and deletion simply change the file management information and ca...

Страница 109: ...malfunctions To store the battery for a long period of time we recommend you charge it once every year and store it again after you have completely used up the charged capacity Dust and other matter...

Страница 110: ...acity indicated on the label of an SD card is the total of the capacity for copyright protection and management and the capacity which can be used on the unit a PC etc Do not apply strong shocks bend...

Страница 111: ...not work properly Make every effort to ensure that condensation does not form If it does form take the actions described below Causes of condensation Condensation takes place when the ambient tempera...

Страница 112: ...tive pixels 520 K 4 3 470 K 16 9 SDR S45 only Effective pixels 380 K 4 3 350 K 16 9 Lens Auto Iris F1 9 to F5 7 Focal length 1 48 mm to 104 mm Macro Wide range AF 35 mm equivalent Optical zoom 37 4 mm...

Страница 113: ...vel 1 0 Vp p 75 h PAL system AV terminal audio output level Line 316 mV 600 h USB SD card Read Write No copyright protection support Built in memory Read only HDD Read only Hi Speed USB USB 2 0 USB te...

Страница 114: ...GB 12 GB 16 GB 24 GB 32 GB FAT32 system compliant SDXC Memory Card 48 GB 64 GB exFAT system compliant Built in memory 8 GB 4 GB HDD 120 GB 80 GB Compression Normal recording mode MPEG 2 Long recordin...

Страница 115: ...32 system compliant SDXC Memory Card 48 GB 64 GB exFAT system compliant Built in memory 8 GB 4 GB HDD 120 GB 80 GB Compression JPEG Design rule for Camera File system based on Exif 2 2 standard DPOF c...

Страница 116: ...Panasonic Corporation Web site http panasonic net Panasonic Corporation 2009...

Отзывы: