background image

Recording

42

LSQT1211

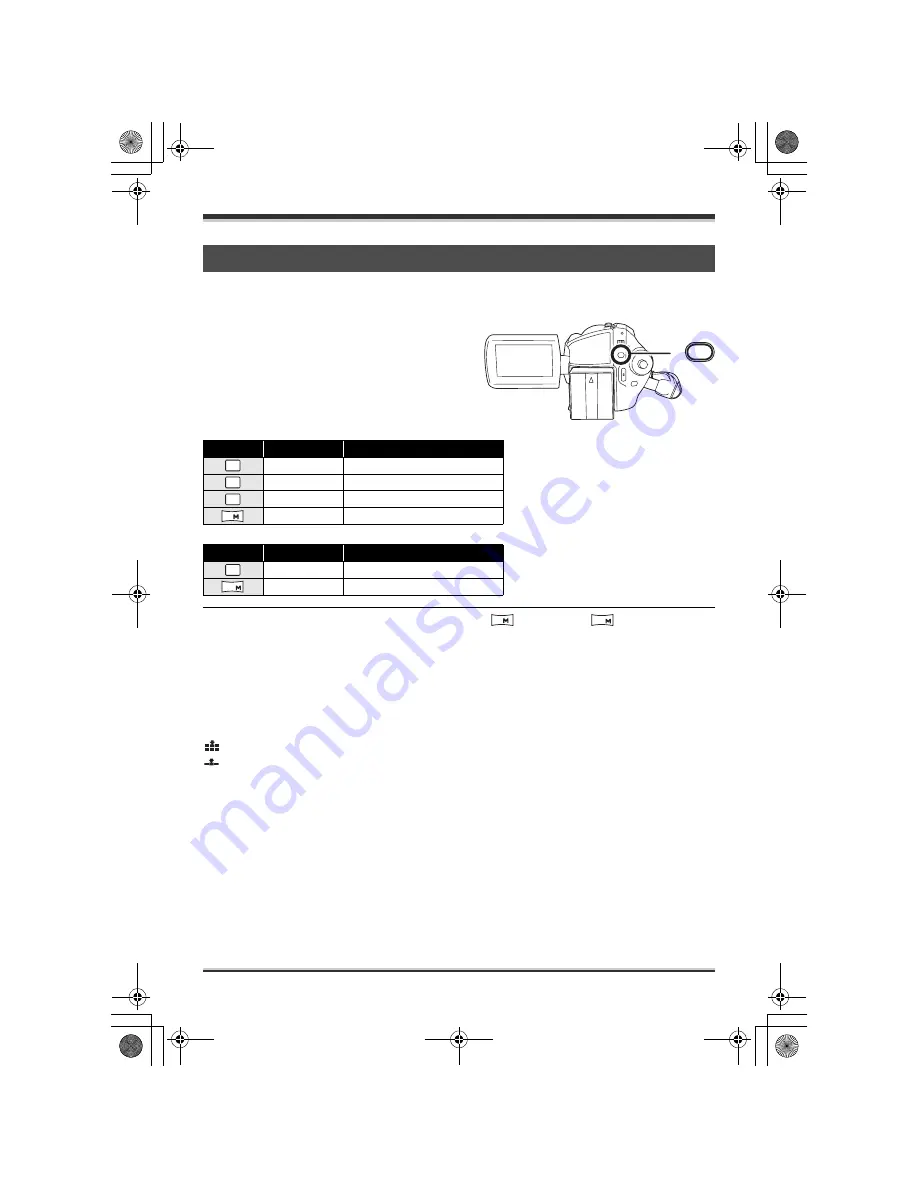
[PICTURE SIZE]

Changing the recording size.

Press the MENU button, then select 
[BASIC] 

#

 [PICTURE SIZE] 

#

 desired 

item and press the joystick.

SDR-H250:

SDR-H20:

When this unit is purchased, [PICTURE SIZE] is set to [

] (SDR-H250)/[

] (SDR-H20). The 

sides of pictures recorded with a 16:9 aspect ratio may be cut at printing. Check before printing.

[PICT. QUALITY]

Selecting the picture quality.

Press the MENU button, then select [BASIC] 

#

 [PICT. QUALITY] 

#

 desired 

item and press the joystick.

Number of pixels and picture quality for still picture recording

Icon

Aspect

Number of pixels

4:3

2048

k

1512

4:3

1280

k

960

4:3

640

k

480

16:9

1920

k

1080

Icon

Aspect

Number of pixels

4:3

640

k

480

16:9

640

k

360

:Still pictures with a high picture quality are recorded.

: Priority is given to the number of still pictures recorded. Still pictures are recorded in normal picture 

quality.

MENU

3.1

M

1

M

0.3

M

2

0.3

M

0.2

2

0.2

LSQT1211(PAL_ENG).book  42 ページ  2007年2月13日 火曜日 午後1時14分

Содержание SDR-H250EB

Страница 1: ...ns SD Card Hard Disk Video Camera Model No SDR H250EB SDR H20EB The illustration shows SDR H250 SDR H20 does not have a video light Before use please read these instructions completely LSQT1211 A LSQT...

Страница 2: ...or Blue The wire which is coloured Brown must be connected to the terminal which is marked with the letter L or coloured Brown or Red WARNING DO NOT CONNECT EITHER WIRE TO THE EARTH TERMINAL WHICH IS...

Страница 3: ...INSTALL OR PLACE THIS UNIT IN A BOOKCASE BUILT IN CABINET OR IN ANOTHER CONFINED SPACE ENSURE THE UNIT IS WELL VENTILATED TO PREVENT RISK OF ELECTRIC SHOCK OR FIRE HAZARD DUE TO OVERHEATING ENSURE TH...

Страница 4: ...p to save valuable resources and prevent any potential negative effects on human health and the environment which could otherwise arise from inappropriate waste handling Please contact your local auth...

Страница 5: ...R is a registered trademark of Leica Camera AG Microsoft Windows and DirectX are either registered trademarks or trademarks of the Microsoft Corporation in the United States and or other countries IBM...

Страница 6: ...t function 43 Recording yourself 44 Recording with the video light SDR H250 44 Backlight compensation function 45 Fade in fade out function 45 Soft skin mode 46 Tele macro function SDR H250 47 Colour...

Страница 7: ...ction and recognition procedures 82 About the computer display 83 To disconnect USB cable safely 84 Using the recorded images on a computer 84 DVD COPY function 84 Playing back and importing images 85...

Страница 8: ...D You can also record motion pictures and still pictures on an SD card Easy recording l 36 No need to search for the recording start position The new recording will not overwrite any previously record...

Страница 9: ...your favourite scenes recorded on the HDD Using with a computer l 77 If you use the supplied software you can create a backup DVD of the scenes recorded on this unit with just one button You can also...

Страница 10: ...Ltd It couldn t be simpler Also available through our Internet is direct shopping for a wide range of finished products take a browse on our website for further details Interested in purchasing an ext...

Страница 11: ...l 72 73 12 Status indicator l 23 13 Power switch OFF ON l 23 14 HDD computer access lamp ACCESS PC l 18 83 15 Mode dial l 25 16 Joystick l 25 17 Delete button l 61 65 66 18 USB terminal l 74 82 19 Re...

Страница 12: ...cess lamp ACCESS l 19 83 37 Grip belt l 12 Adjust the belt length so it fits your hand Adjust the belt length and the pad position 1 Flip the belt 2 Adjust the length 3 Replace the belt For the lens p...

Страница 13: ...f your finger and thumb During recording The removed lens cap can be attached to the lens cap fixture This is a hole for attaching the unit to the optional tripod Please carefully read the operating i...

Страница 14: ...ton PHOTO SHOT 2 On screen display button EXT DISPLAY l 73 3 Date time button DATE TIME l 31 4 Playback operation buttons l 56 5 Delete button 6 Direction buttons 3 4 2 1 l 30 7 Recording start stop b...

Страница 15: ...ed for indoor operation Outdoors or under strong light the unit may not operate properly even within the usable ranges Warning Keep the Button Type battery out of the reach of children Never put Butto...

Страница 16: ...Cards formatted in FAT32 system Concerning the internal HDD and cards that can be used on this unit Internal HDD Hard Disk Drive SD Memory Card SDHC Memory Card Display on the screen Indication in the...

Страница 17: ...32 MB to 128 MB jSD cards from 256 MB to 4 GB other than the ones mentioned above Please confirm the latest information on the following website This website is in English only http panasonic jp supp...

Страница 18: ...detected l 94 Do not use the unit in a low pressure area The HDD may be damaged if you use this unit where the altitude is more than 3000 m Back up important recorded data to protect it Save recorded...

Страница 19: ...ghts up If the following operations are performed when the access lamp is lit then the SD card or the recorded data may be damaged or this unit may malfunction sOpening the card slot cover sRemoving t...

Страница 20: ...ttery against the battery holder and slide it until it clicks While sliding the BATTERY lever slide the battery to remove it Hold the battery with your hand so it does not fall Before removing the bat...

Страница 21: ...lied battery CGA DU12 optional 7 2 V 1150 mAh 2 h 25 min CGA DU14 optional 7 2 V 1360 mAh 2 h 45 min CGA DU21 optional 7 2 V 2040 mAh 3 h 55 min Battery model number Voltage capacity Charging time Sup...

Страница 22: ...time of the battery will become shorter in low temperatures We recommend charging a spare battery for use when recording Battery model number Voltage capacity Recording destination Maximum continuousl...

Страница 23: ...it on If the unit is turned on with the lens cap attached the automatic white balance adjustment l 106 may not function properly Set the OFF ON switch to ON The status indicator A lights and the power...

Страница 24: ...n off the power Check that the status indicator has gone off 2 Open the LCD monitor and then slide the card slot open lever A to open the card slot cover 3 Insert remove the SD card into from the card...

Страница 25: ...scene and then press the joystick to set it Menu screen operations l 29 Rotate the mode dial to select or 1 Press the centre of the joystick and icons will be displayed on the screen The indication di...

Страница 26: ...the scene to be played back and press the joystick The selected scene is played back on the full screen The operation icon is automatically displayed on the screen 2 Move the joystick up down left or...

Страница 27: ...n mode 46 1 Tele macro SDR H250 47 In manual mode 3 3 3 White balance 51 2 Iris or gain value 53 1 Shutter speed 53 In manual focus mode 4 4 21 Manual focus adjustment 51 Icon Direction Function Page...

Страница 28: ...White balance 51 2 Iris or gain value 53 1 Shutter speed 53 In manual focus mode 4 4 21 Manual focus adjustment 51 Icon Direction Function Page 1 3 Slide show start pause 59 4 Stop playback and show t...

Страница 29: ...tton or select EXIT When the help mode is used functions cannot be set When the help mode is used motion pictures and still pictures cannot be recorded Switching the language You can switch the langua...

Страница 30: ...joystick up or down in order to select the desired item 7 Press the joystick to enter the selection To get back to the previous screen Move the joystick left To exit the menu screen Press the MENU bu...

Страница 31: ...n move the joystick up or down to set the desired value The year will change as follows 2000 2001 2099 2000 The 24 hour system is used to display the time 3 Press the joystick to enter the selection T...

Страница 32: ...F ON switch is set to OFF the battery is still being recharged Adjusting the LCD monitor 1 Press the MENU button then select SETUP LCD SET YES and press the joystick 2 Move the joystick up or down to...

Страница 33: ...will not affect the images to be recorded If you turn on the unit when the AC adaptor is used this function will automatically be Bright SDR H250 The LCD monitor will become a little darker when the...

Страница 34: ...hands 4 Keep your arms near your body 5 Slightly open your legs When you are outdoors record pictures with the sunlight behind you If the subject is backlit it will become dark in the recording When...

Страница 35: ...n prevents unnecessary recording when you forget to pause recording and walk with the unit tilted upside down while recording continues If the unit continues to be tilted upside down from the normal h...

Страница 36: ...the aspect ratio setting l 49 before recording the images or when watching them on the connected TV l 72 SDR H250 Open the lens cover before turning the unit on If the unit is turned on with the lens...

Страница 37: ...g mode B Selected recording destination C Remaining time left for recording When the remaining time is less than 1 minute R 0h00m flashes red D Recording time elapsed Sound is recorded from the intern...

Страница 38: ...ttern in the background jWhen the unit is moved too much or too fast jWhen a subject with sharp movements has been recorded Particularly if it has been recorded in LP mode If you record still pictures...

Страница 39: ...on with the lens cover closed the automatic white balance adjustment may not function properly SDR H20 Remove the lens cap before turning the unit on If the unit is turned on with the lens cap attach...

Страница 40: ...l pictures clearly When zooming in on the subject with a magnification of 4k or higher it is difficult to reduce the slight shaking from holding this unit by hand We recommend decreasing the zoom magn...

Страница 41: ...stands in front of a light source jWhen close subjects and far subjects are included in the same scene jWhen the scene is dark jWhen there is a bright part in the scene jWhen the scene is filled with...

Страница 42: ...Selecting the picture quality Press the MENU button then select BASIC PICT QUALITY desired item and press the joystick Number of pixels and picture quality for still picture recording Icon Aspect Num...

Страница 43: ...igh the subject may not be focused easily If you take your finger off the zoom lever during zoom operation the operation sound may be recorded When returning the zoom lever to the original position mo...

Страница 44: ...t be displayed even if you press the joystick Only some indications will appear on the screen When appears return the direction of the LCD monitor to normal position and check the warning alarm indica...

Страница 45: ...nd the subject appears dark Rotate the mode dial to select or 1 Press the joystick Then move the joystick down to display the icon shown in the illustration 2 Move the joystick up to select The image...

Страница 46: ...If you turn off the power the fade function is cancelled While the fade in fade out function is selected it takes several seconds to display the image when you start recording It also takes several s...

Страница 47: ...djust the focus manually l 51 In the following cases the tele macro function is cancelled jThe zoom magnification becomes lower than 10k jThe power is turned off or the mode dial is operated HDD SD Th...

Страница 48: ...ed when the button is pressed halfway SDR H250 When you press the Photoshot button fully in auto focus mode the subject is focused just before recording SDR H250 To stop the timer midway through Press...

Страница 49: ...image stabilizer function Press the MENU button then select ADVANCED O I S OFF and press the joystick This function s default setting is ON In the picture recording mode pressing the Photoshot button...

Страница 50: ...L FOCUS switch to MANUAL 2 Press the MENU button then select BASIC SCENE MODE desired item and press the joystick 5 Sports To record sports scenes or scenes where there are quick motions Portrait To m...

Страница 51: ...image may become whitish HDD SD If auto focusing is difficult due to the conditions then manual focusing is available Rotate the mode dial to select or 1 Set the AUTO MANUAL FOCUS switch to MANUAL 2...

Страница 52: ...or A The white balance sensor detects the type of light source during recording Do not cover the white balance sensor during recording or it may not function properly About the black balance adjustmen...

Страница 53: ...ite balance first HDD SD Shutter Speed Adjust it when recording fast moving subjects Aperture Adjust it when the screen is too bright or too dark Rotate the mode dial to select or 1 Set the AUTO MANUA...

Страница 54: ...ch the sensitivity lowers and the noise on the screen may increase You may see vertical lines of light in the playback image of a brightly shining subject or highly reflective subject but this is not...

Страница 55: ...e been recorded the next or previous page is displayed by moving the joystick If you move and hold the joystick up or down you can fast forward or fast rewind the pages The screen will not change at t...

Страница 56: ...rts Move and hold the joystick left to rewind Move the joystick again to increase the speed Normal playback is restored when you move the joystick up Operating with the remote control SDR H250 Press t...

Страница 57: ...or D button Adjust the speaker volume during playback Move the volume lever to change the volume level The further the indicator moves to the right the higher the volume level becomes When the adjust...

Страница 58: ...s thumbnails 4 Select the scene to be played back Even if scenes are recorded on the same day they are grouped separately when the number of scenes exceeds 99 Press the MENU button then select PLAY SE...

Страница 59: ...move and hold the joystick up or down you can fast forward or fast rewind the pages The screen will not change at this time but the file numbers and scroll bar display will change Release the joystic...

Страница 60: ...t accesses the SD card the access lamp is lit do not remove the SD card It takes time to display the file depending on the number of pixels of the file When a file is displayed as on the thumbnail dis...

Страница 61: ...medium except the locked scenes jWhen PLAY MODE is set to BY DATE All the scenes selected by date except the locked scenes 3 Only when SELECT is selected in step 2 Select the scene to be deleted then...

Страница 62: ...nes can be locked so that they are not deleted by mistake However please be aware that if a medium is formatted then all the data on the medium will be erased Rotate the mode dial to select Select HDD...

Страница 63: ...e joystick 2 Select the scene to be added to the playlist then press the joystick The selected scene is encircled by a red frame When the joystick is pressed again the selected scene will be cancelled...

Страница 64: ...scenes on a playlist will not affect the original scenes Select playlist playback mode l 64 Playing back a playlist steps 1 and 2 1 Press the MENU button then select EDIT ADD YES and press the joysti...

Страница 65: ...llow bar 3 Select the position to insert the scene then press the joystick To continue moving other scenes in the playlist Repeat steps 2 3 To complete editing Press the MENU button Deleting scenes on...

Страница 66: ...ave already been deleted when the deletion is cancelled cannot be restored To complete editing Press the MENU button You can also delete scenes by pressing the MENU button selecting EDIT DELETE and th...

Страница 67: ...tored To complete editing Press the MENU button Deleting still picture files recorded on an SD card by other products A still picture file other than JPEG that cannot be played back on this unit may b...

Страница 68: ...ick The number of prints set to be in DPOF is displayed 3 Move the joystick up or down to select the number of prints then press the joystick You can select from 0 to 999 The selected number of pictur...

Страница 69: ...at they were selected 4 Only when SELECT is selected in step 2 Press the MENU button 5 When the confirmation message appears select YES then press the joystick Copying of the file starts Only when SEL...

Страница 70: ...ts to this unit HDD Information concerning the space used and remaining on the HDD is displayed Rotate the mode dial to select Select HDD in MEDIA SELECT Press the MENU button then select SETUP HDD ST...

Страница 71: ...ormatted on other products such as a computer the time spent for recording may become longer and you may not be able to use the SD card Depending on the type of SD card being used it may take time to...

Страница 72: ...ut setting input switch For more information please read the operating instructions for the TV If you have a TV with an SD card slot the motion pictures and still pictures recorded on an SD card may b...

Страница 73: ...e AV S cable supplied and then dub l below Insert the SD card into the SD card slot on the DVD recorder then dub the contents onto the hard disk or a disc For details on how to dub the images refer to...

Страница 74: ...ding on the connected device See the operating instructions of the video device for details To stop dubbing Stop recording on the connected device Then stop playback on this unit If the date and time...

Страница 75: ...g the USB cable after the pictures have been printed When you want to stop printing halfway Move the joystick down A confirmation message appears If YES is selected the number of prints set is cancell...

Страница 76: ...y not be able to print still pictures recorded with other products When the unit is connected directly to the printer the DPOF settings cannot be used Connect the printer directly to this unit Do not...

Страница 77: ...hen create original DVD Video discs l 87 You can also write data in the DVD VR DVD Video Recording format on DVD RAM or DVD RW discs D You can automatically write the images recorded on this unit s HD...

Страница 78: ...it operating system is not guaranteed Operating environment Hardware IBM PC AT compatible personal computer OS Microsoft Windows 2000 Professional Service Pack 3 or Service Pack 4 Microsoft Windows XP...

Страница 79: ...ble to use DVD RAM discs Depending on your computer it may not be possible to use some of the DVD discs listed in the table above Refer to the operating instructions of your computer for details about...

Страница 80: ...A Customer Support Center in your region UK Germany France and Spain Toll Free 800 1532 4865 Other Countries 44 1489 564 764 Languages supported English German French Spanish Website http www pixela c...

Страница 81: ...ge selection screen does not appear double click the CD ROM drive icon in My Computer 2 Select the language for the installation and click Next 3 Click Next The software may not run properly if you ca...

Страница 82: ...the operating environment the name of the buttons may differ Example Change Remove Proceed with the uninstallation by following the on screen instructions After uninstalling the software be sure to re...

Страница 83: ...rd access lamp lights or appears on the LCD monitor Do not disconnect the USB cable or AC adaptor while the HDD or card is being accessed as it may damage the data The HDD and card cannot be accessed...

Страница 84: ...his icon may not be displayed 2 Select USB Mass Storage Device and click Stop 3 Verify MATSHITA HDD Cam HDD USB Device or MATSHITA HDD Cam USB Device is selected and click OK Click Close and you can s...

Страница 85: ...are converted to motion pictures and written onto the DVD disc Check on the DVD player or other player device whether the DVD Video disc you have created can be played properly If the disc cannot be p...

Страница 86: ...ps to start it Select start All Programs Programs PIXELA ImageMixer3 for Panasonic ImageMixer3 for Panasonic 3 Click Playback Import Video The browser screen is displayed 4 Select SDR H250 SDR H20 HDD...

Страница 87: ...e Operation is not guaranteed with any other USB cables The USB function selection screen will appear 2 Select PC CONNECT HDD or SD CARD and press the joystick This unit will be automatically recognis...

Страница 88: ...scene to the menu screen by drag and drop You cannot add a still picture to the menu if it is not a file folder For details refer to software help l 82 11 Insert a DVD disc into the DVD drive and cli...

Страница 89: ...l 91 LCD SET l 32 INITIAL SET l 91 ILLUMINATION l 91 DEMO MODE l 91 LANGUAGE l 29 Still picture recording menus BASIC SCENE MODE l 50 GUIDE LINES l 48 PICTURE SIZE l 42 PICT QUALITY l 42 CLOCK SET l...

Страница 90: ...l 68 COPY l 69 MEDIA SELECT HDD l 59 SD CARD l 59 SETUP DISPLAY l 90 DATE TIME l 31 DATE FORMAT l 31 FORMAT CARD 2 l 70 POWER SAVE l 90 BEEP SOUND l 91 LCD SET l 32 TV ASPECT l 72 ILLUMINATION l 91 L...

Страница 91: ...condition ILLUMINATION This allows operations to be signaled by the lighting of the illumination LED on the top of the unit 1 Flash When you turn on the power When in a recording mode in orange When...

Страница 92: ...2 2007 15 30 R 10000 1 16 9 AUTO MNL Soft skin mode Tele macro SDR H250 Fade White Fade Black Colour night view function Video light SDR H250 Zoom microphone Wind noise reduction Power LCD plus functi...

Страница 93: ...uter 1 DPOF already set to more than 1 Locked motion pictures and still pictures SDR H250 SDR H20 Number of recording pixels for still pictures 2048k1512 1920k1080 1280k960 640k480 640k480 640k360 The...

Страница 94: ...ODE An 8 MB or 16 MB SD card has been inserted in video recording mode CHECK CARD This card is not compatible or it cannot be recognised by the unit CARD LOCKED The write protection switch on the SD c...

Страница 95: ...DETECTED PLEASE TRY AGAIN AFTER A WHILE The unit has detected that it is being dropped so the operation has stopped INTERNAL TEMPERATURE TOO HIGH PLEASE TURN UNIT OFF AND WAIT A WHILE The internal te...

Страница 96: ...view function is used When the video light is on gain up mode When the iris gain is set Soft skin mode Set and cancel While recording Tele macro Set and cancel Help mode Video light on gain up mode I...

Страница 97: ...ng motion pictures is not possible Is it possible to play back an SD card recorded with this unit on other products Motion pictures These can be played back on any device which supports motion picture...

Страница 98: ...ion pictures Original still picture files JPEG files are also recorded onto the DVD disc Can I use the DVD COPY function to copy motion pictures recorded on SD cards onto DVD discs as well No you cann...

Страница 99: ...aptor l 20 Are you using the battery in an extremely cold place The battery is affected by ambient temperature In cold places the operating time of the battery becomes shorter Has the battery worn out...

Страница 100: ...e normally Close the card slot cover Recording starts but stops immediately The playback picture breaks up for a moment The unit is hot Follow the messages on the display To use the unit again turn th...

Страница 101: ...read the operating instructions of your TV and select the channel that matches the input used for the connection Is the TV ASPECT setting correct Change the setting to match the aspect ratio of the T...

Страница 102: ...0 Press the RESET button with the projecting part of the lens cap B If you do not press the RESET button the power to this unit is turned off automatically about 1 minute later Even after you press th...

Страница 103: ...puter l 81 The DVD COPY function cannot be used in the video recording mode or picture recording mode Rotate the mode dial to select or then press the DVD COPY button I cannot copy images using the DV...

Страница 104: ...cables supplied with them Do not extend the cords and the cables Do not spray insecticides or volatile chemicals onto the unit If the unit is sprayed with such chemicals its body may be marred and th...

Страница 105: ...atteries enough to last for 3 to 4 times the period during you want to record pictures in In cold places such as a ski resort the period during which you can record pictures is shortened When you trav...

Страница 106: ...t inside from the cold e g a ski slope to a warm room When this unit is moved from an air conditioned car to outside When a cold room has been warmed up quickly When cool wind from an air conditioner...

Страница 107: ...ce the white colour is the reference for all the colours that make up light the unit can record pictures in a natural hue if it can recognise the reference colour white Auto focus The lens is moved fo...

Страница 108: ...its sharpness Recording a subject with little contrast It is easy to bring subjects with a sharp contrast or vertical lines or stripes into focus This means that a subject with little contrast such a...

Страница 109: ...mage sensor Total 800 K Effective pixels Moving picture 400 K 4 3 540 K 16 9 Still picture 410 K 4 3 550 K 16 9 Lens SDR H250 Auto Iris F1 8 to F2 8 Focal length 3 0 mm to 30 0 mm Macro Full range AF...

Страница 110: ...ature 0 C to 40 C Operating humidity 10 to 80 Operating altitude Less than 3000 m above sea level Recording media SD Memory Card 32 MB 1 64 MB 1 128 MB 1 256 MB 512 MB 1 GB 2 GB removable type FAT12 a...

Страница 111: ...type FAT12 and FAT16 format corresponding SDHC Memory Card 4 GB removable type FAT32 format corresponding HDD 30 GB fixed type Compression JPEG Design rule for Camera File system based on Exif 2 2 st...

Страница 112: ...55 250 210 320 512 MB 310 490 410 640 1 GB 630 990 820 1290 2 GB 1280 2010 1670 2630 4 GB 2520 3950 3290 5170 Picture size 1280k960 640k480 Picture quality HDD 30 GB 47070 74890 99999 99999 SD 8 MB 7...

Страница 113: ...n SD card the number of recordable still pictures will become smaller Picture size 640k480 640k360 Picture quality HDD 30 GB 99999 99999 99999 99999 SD 8 MB 37 75 37 75 16 MB 92 185 92 185 32 MB 200 4...

Страница 114: ...2 106 Locking motion picture scenes 62 Locking still picture files 67 M Manual focus 51 Menu 29 Menu list 89 Motion picture playback 55 Motion picture recording 36 N Number of recordable pictures 112...

Страница 115: ...115 LSQT1211 Others V Video light 44 Volume adjustment 57 W White balance 51 107 Wide mode 49 Wind noise reduction function 49 Z Zoom 43 Zoom microphone 44 LSQT1211 PAL_ENG book 115...

Страница 116: ...LSQT1211 A F0207Td0 3000 A B Matsushita Electric Industrial Co Ltd Web site http panasonic net LSQT1211 PAL_ENG book 116...

Отзывы: