background image

Getting started

RQT6191

10

POWER

VOLUME

DISC

1

2

3

4

5


/ I

OPEN /CLOSE

TUNING

DISC SKIP

MEMORY

TUNE MODE FM MODE

SFC

SUBWOOFER LEVEL

DOWN

UP

SELECTOR

PHONES

V

K

Y

Z

[

\

U

^

`

_

a b

X

8

7

WAKE

W

]

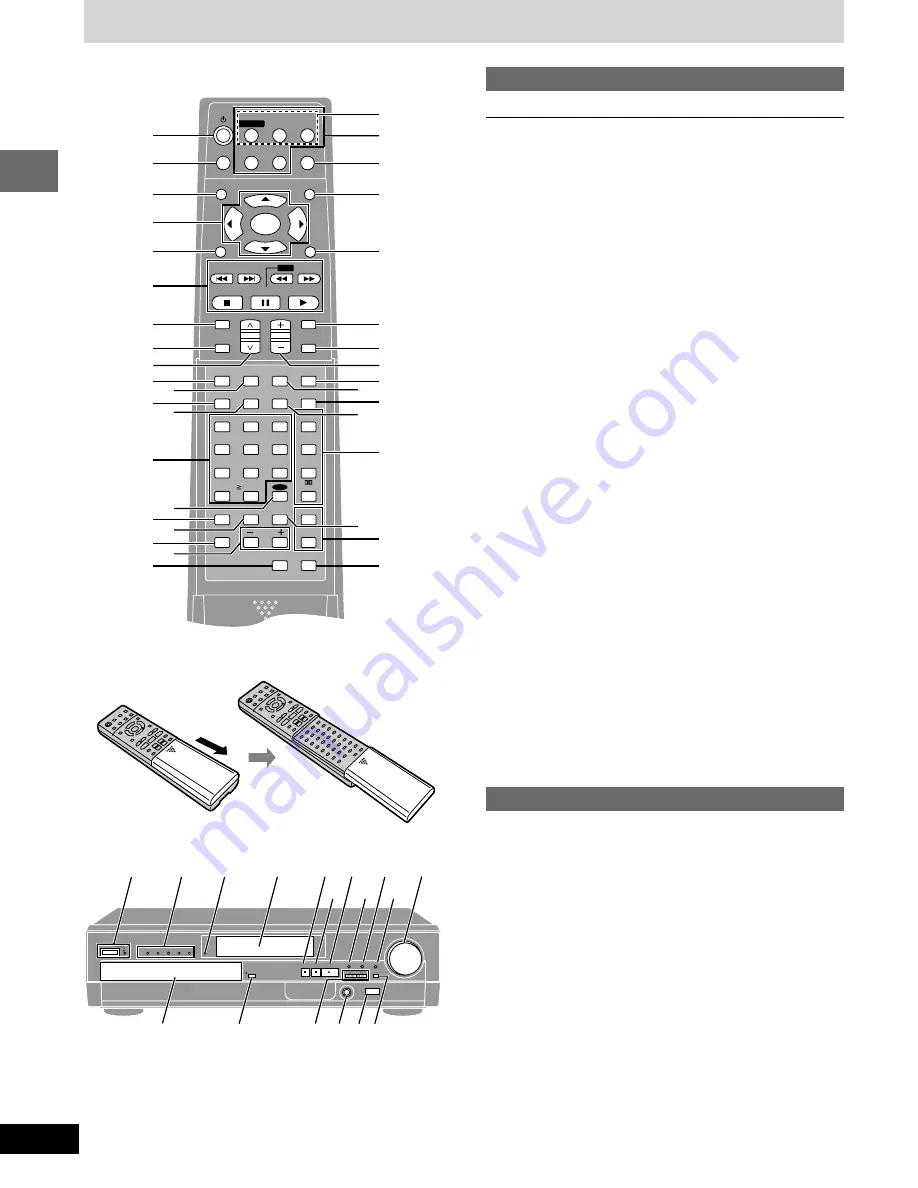
Control reference guide

Remote control

Page

1

Power button [

Í

]  . . . . . . . . . . . . . . . . . . . . . . . . . . . . . . . . . 11

2

FL display button [FL DISPLAY]  . . . . . . . . . . . . . . . . . . . . 23

3

Top menu button [TOP MENU]  . . . . . . . . . . . . . . . . . . . 11, 12

4

Cursor buttons [

3

4

2

1

]/Enter button [ENTER]  . . . . . 9

5

Display button [DISPLAY]  . . . . . . . . . . . . . . . . . . . . . . . . . . 16

6

Basic operation buttons

7

Disc skip button [DISC SKIP]  . . . . . . . . . . . . . . . . . . . . . . . 11

8

Sound field control button [SFC]  . . . . . . . . . . . . . . . . . . . . 21

9

Channel select buttons [

W

W

W

W

W

X

X

X

X

X

, CHANNEL]  . . . . . . . . . 19, 26

:

Initial settings button [SETUP]  . . . . . . . . . . . . . . . . . . . . 9, 25

;

Subtitle button [SUB TITLE]  . . . . . . . . . . . . . . . . . . . . . . . . 14

<

Speaker channel select button [CH SELECT]  . . . . . . . . . . 21

=

Test button [TEST]  . . . . . . . . . . . . . . . . . . . . . . . . . . . . . . . 21

>

Numbered buttons (1–9, 0, 

S

10/ENTER)  . . . . . . . . . . . . . . 11

?

Disc button [DISC]  . . . . . . . . . . . . . . . . . . . . . . . . . . . . . . . . 11

@

Disc manager button [DISC MANAGER]  . . . . . . . . . . . . . . 15

A

Play mode button [PLAY MODE]  . . . . . . . . . . . . . . . . . . . . 15

B

Cinema button [CINEMA]  . . . . . . . . . . . . . . . . . . . . . . . . . . 13

C

TV volume buttons [

s

s

s

s

s

 TV VOL 

r

r

r

r

r

]  . . . . . . . . . . . . . . . . . . . 26

D

Position memory button [P.MEMORY]  . . . . . . . . . . . . . . . 12

E

Equipment buttons and indicators

Select the equipment you want to operate.

Press [DVD/CD] to operate this unit.

Press [VCR] to operate a video cassette recorder.

Press [TV] to operate a television.

These buttons light for a few seconds to indicate the remote
control mode.

F

Input select buttons
[DVD/CD, MAIN UNIT, VCR, TV, TUNER/BAND, AUX]

Pressing [DVD/CD] or [TUNER/BAND] also turns the unit on.
[TUNER/BAND] also switches radio bands.

G

TV/Video button [TV/VIDEO]  . . . . . . . . . . . . . . . . . . . . . . . . . 26

H

Menu button [MENU]  . . . . . . . . . . . . . . . . . . . . . . . . . . . . 11, 12

I

Return button [RETURN]  . . . . . . . . . . . . . . . . . . . . . . . . 9, 25

J

Muting button [MUTING]  . . . . . . . . . . . . . . . . . . . . . . . . . . . 23

K

Subwoofer level button [SUBWOOFER LEVEL]  . . . . . . . . 22

L

Volume buttons [

r

r

r

r

r

s

s

s

s

s

, VOLUME]  . . . . . . . . . . . . . . . . . 11, 18

M

Angle button [ANGLE]  . . . . . . . . . . . . . . . . . . . . . . . . . . . . 15

N

Audio button [AUDIO]  . . . . . . . . . . . . . . . . . . . . . . . . . . . . . 15

O

Marker button [MARKER]  . . . . . . . . . . . . . . . . . . . . . . . . . . 13

P

Mix 2ch button [MIX 2ch]  . . . . . . . . . . . . . . . . . . . . . . . . . . 21

Q

Sound field and effect buttons  . . . . . . . . . . . . . . . . . . . 21, 22

R

Cancel button [CANCEL]  . . . . . . . . . . . . . . . . . . . . . . . . . . 13

S

Repeat buttons [REPEAT, A-B REPEAT]  . . . . . . . . . . . . . 14

T

Timer button [TIMER]  . . . . . . . . . . . . . . . . . . . . . . . . . . . . . 23

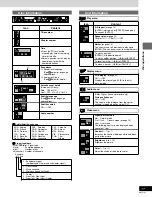
Main unit

U

Standby/on switch [POWER]  . . . . . . . . . . . . . . . . . . . . . . . 11

Press to switch the unit from on to standby mode or vice versa.
In standby mode, the unit is still consuming a small amount of power.

Standby/on indicator [

Í

/I]

When the unit is connected to the AC mains supply, this indicator
lights red in standby mode and lights green when the unit is turned on.

V

Disc indicators [DISC 1–5]  . . . . . . . . . . . . . . . . . . . . . . . . . 11

W

Wake timer indicator [WAKE]  . . . . . . . . . . . . . . . . . . . . . . . 23

X

Display

Y

Stop, tune mode button [

, TUNE MODE]  . . . . . . . . . 11, 18

Z

Pause, FM mode button [

;

, FM MODE]  . . . . . . . . . . . 11, 18

[

Play, memory button [

1

, MEMORY]  . . . . . . . . . . . . . . 11, 19

\

Volume control [VOLUME, DOWN, UP]  . . . . . . . . . . . . 11, 18

]

Disc tray  . . . . . . . . . . . . . . . . . . . . . . . . . . . . . . . . . . . . . . . . 11

^

Open/close button [

<

 OPEN/CLOSE]  . . . . . . . . . . . . . . . . 11

_

Skip/search, tuning buttons
[

:

/

6

5

/

9

X

X

X

X

X

 TUNING 

W

W

W

W

W

]  . . . . . . . . . . . . . . . 13, 18

`

Headphone jack [PHONES]  . . . . . . . . . . . . . . . . . . . . . . . . 23

a

Remote control signal sensor

b

Input select button [SELECTOR]  . . . . . . . . . . . . . . . . . . . . 11

ENTER

VCR

TV

TUNER/BAND

AUX

TV/VIDEO

FL DISPLAY

TOP MENU

MENU

SKIP

PLAY

PAUSE

DISC SKIP CHANNEL

VOLUME

SFC

MUTING

SUBWOOFER

LEVEL

STOP

RETURN

DISPLAY

SLOW


/SEARCH

DVD/CD

MAIN UNIT

DISC

MANAGER

ANGLE

AUDIO

SUB TITLE

SETUP

TV VOL

1

2

3

4

5

6

7

8

9

0

PLAY MODE

CH SELECT

TEST

MIX 2ch

DISC1

DISC2

DISC4

DISC5

DISC3

CANCEL

CINEMA

P.MEMORY

TIMER

DISC

1

2

F

3

H

G

4

5

6

<

7

:

9

@

B
D

A

?

;
=

I

J

8

K

>

L

C

E

A-B

REPEAT

SUPER

SURROUND

MARKER

REPEAT

SEAT

POSITION

CENTER

FOCUS

PRO LOGIC

M
O

N

Q

R

T

S

P

    10/ENTER

Buttons 

7

8

, and 

K

 function the same as the controls on the re-

mote control.

How to open the remote control

Содержание SC-HT67

Страница 1: ...ase keep this manual for future reference As an ENERGY STAR Partner Panasonic has determined that this product meets the ENERGY STAR guidelines for energy efficiency The servicenter list and warranty can be found on pages 34 and 35 The region number of this unit is 1 You can play DVD Video marked 1 ALL or with a re gion number including 1 Example See page 5 for details 1 ALL 2 4 1 ...

Страница 2: ...harmful interference and 2 this device must accept any interference received including interference that may cause undesired operation The lightning flash with arrowhead symbol within an equilateral triangle is intended to alert the user to the presence of uninsulated dangerous voltage within the product s enclosure that may be of suffi cient magnitude to constitute a risk of electric shock to per...

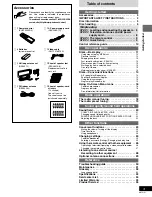
Страница 3: ...me Turning off the display 23 Timer functions 23 Using headphones 23 Changing settings 24 Common procedures 25 Entering a password Ratings Changing the delay time 25 Using the remote control with other equipment 26 Operating a television Operating a video cassette recorder 26 Changing the remote control code 27 Listening to an external source Recording to other equipment 28 Optional antenna connec...

Страница 4: ...utions listed below Keep these operating instructions handy for future reference Safety 1 Power source Connect the unit to a power source of the type described in these instructions or as marked on the unit 2 Polarization The unit is equipped with a polarized power plug where one blade is wider than the other This safety feature en sures that the plug fits into your household AC outlet only one wa...

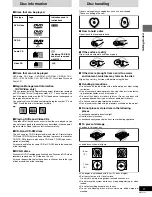
Страница 5: ...not put anything except discs in trays Do not use cleaning discs or discs which are badly warped or cracked Discs that cannot be played DVD Audio PAL discs DVD ROM DVD RAM CD ROM CDV CD G iRW DVD RW CVD SVCD SACD Divx Video Discs and Photo CD Region Management Information DVD Video only This unit responds to the Region Management Information recorded on DVD Video This unit s region number is 1 You...

Страница 6: ...om falling if you cannot set them up on an even surface Front speakers 1 Left 2 Right SB AFC95 The left and right speakers are the same Surround speakers 3 Left 4 Right SB AFC95 Place either side of listening position or slightly to the rear about 1 meter 3 feet higher than ear level The left and right speakers are the same Center speaker 5 SB PC89 You can also put this speaker directly under the ...

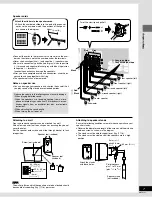
Страница 7: ...ers under the terminals Never short circuit positive i and negative j speaker wires Be sure to connect only positive red or gray wires to positive i terminals and negative black or gray with blue stripe wires to negative j terminals Incorrect connection can damage the speakers After you have completed setup and connection wind the ex cess cord and keep together with string The speaker nets cannot ...

Страница 8: ...ther surface Screw included Note The included AC power supply cord is for use with this unit only Do not use it with other equipment Conserving power The unit consumes power approx 0 25 W even when it is turned off with Í To save power when the unit is not to be used for a long time unplug it from the household AC outlet Remember to reset the radio stations and any other memory items before using ...

Страница 9: ...video is auto matically selected if recorded on the disc 4 3 Letterbox The letterbox the original widescreen im ages appear with black bands above and below version of the video is automatically selected if recorded on the disc Batteries Insert so the poles i and j match those in the remote control Do not use rechargeable type batteries Do not mix old and new batteries use different types at the s...
Страница 10: ...button SUBWOOFER LEVEL 22 L Volume buttons r r r r r s s s s s VOLUME 11 18 M Angle button ANGLE 15 N Audio button AUDIO 15 O Marker button MARKER 13 P Mix 2ch button MIX 2ch 21 Q Sound field and effect buttons 21 22 R Cancel button CANCEL 13 S Repeat buttons REPEAT A B REPEAT 14 T Timer button TIMER 23 Main unit U Standby on switch POWER 11 Press to switch the unit from on to standby mode or vice...

Страница 11: ...ay be lower when playing DVDs than when playing other discs or during television broadcasts If you turn the volume up be sure to reduce the volume again be fore playing other sources so that a sudden increase in output does not occur When a menu appears on the television DVD V VCD Remote control only Press the numbered buttons to select an item To select a 2 digit number Example To select item 23 ...

Страница 12: ...r turn the unit on RESUME lights on the display Press 1 PLAY to start play from the memorized position The position is cleared When playing DVD Chapter Preview below To clear the position before play Press You can memorize positions on up to five different discs at a time When you memorize another position the earliest position is replaced Chapter Preview DVD V The message Press PLAY to Preview Ch...

Страница 13: ...than DVD CD is selected Cin 1 Skipping chapters or tracks DVD V CD VCD Press or 9 Each press increases the number of skips Press 6 5 9 on the main unit Fast forward and rewind SEARCH DVD V CD VCD During play Press 6 or 5 Press and hold 6 5 9 on the main unit Audio will be heard during search You can turn this audio off if you want to page 24 Audio Audio during Search Slow motion play DVD V VCD Whi...

Страница 14: ...ss 1 3 Press 3 4 to select OFF or ON Remote control only A B repeat play Repeat play DVD V When the elapsed play time is displayed CD VCD A B repeat play You can repeat a section between points A and B within a title or track 1 During play Press A B REPEAT at the starting point A 2 Press A B REPEAT at the finishing point B A B repeat starts To cancel Press A B REPEAT until is displayed Note Some s...

Страница 15: ...Î 1 English Program play Random play CD VCD While stopped Press PLAY MODE to select the play mode The mode changes as follows each time you press the button Program play Random play Normal play All disc random play After selecting the mode follow the steps for the mode Program play To play a maximum of 24 tracks in a programmed order Select tracks from any disc 1 Press DISC and 1 5 to select the d...

Страница 16: ...m a Current position b Title number c Chapter number d Condition play pause or slow search e Time When the elapsed play time is displayed Press 3 4 to show the elapsed play time or remaining time for the title Select a position to start play by specifying a time with the num bered buttons DVD V Remote control only On Screen Menu Icons are menus that contain information about the disc or unit These...

Страница 17: ...details Karaoke vocal on off Karaoke DVD only Solo OFF or ON Duet OFF V1iV2 V1 or V2 Subtitle language See A below for language abbreviations Subtitles on off ON OFF Angle number T 2 C 2 1 46 50 1 Vocal OFF ENG ON 1 ENG 1 ON 1 1 ENG 3 2 1 ch Digital Î b a Video menu Digital picture mode Nor Normal mode Cin 1 Cin 2 Cinema mode page 13 User User mode The following items are also displayed when you s...

Страница 18: ...ode improves sound quality if reception is weak but broad casts are heard in monaural Press FM MODE again to cancel the mode The mode is also canceled when you changed the frequency Turn MONO off for normal listening Stereo and monaural broadcasts are automatically played as they are received FM frequency step The step is factory set to 0 2 MHz but you can change it to receive broadcasts allocated...

Страница 19: ...annel is erased if another station is preset in that channel Selecting channels 1 Press TUNER BAND to select FM or AM Main unit Press SELECTOR Each time you press the button DVD CD FM AM TV VCR AUX 2 Press the numbered buttons or CHANNEL W W W W W or X X X X X to select the channel To select a 2 digit number Example To select channel 12 press S10 ENTER 1 2 Main unit Press TUNING XorW while PRESET ...

Страница 20: ...rate center speaker channel Software encoded with Dolby Surround can be identified with this mark DVD CD Video CD Laser Disc Video tape Radio This mode adds surround effects to stereo sources You can adjust the volume of the surround speakers to get the best surround effect This mode adds surround effects to movie software that hasn t been recorded with the above systems You can adjust the volume ...

Страница 21: ...cator appears as Sch instead SWch does not appear 2 Press 3 to increase or 4 to decrease Changing sound field and quality Press SFC to select a setting Each time you press the button HEAVY Adds punch to rock factory preset CLEAR Clarifies higher sounds SOFT For background music DISCO Reverberates sound to make you feel like you were in a disco LIVE Makes vocals more alive HALL Expands sound to mak...

Страница 22: ...ass while you are using headphones ERROR appears on the display Remote control only SUPER SURROUND Press SUPER SURROUND to select MUSIC or MOVIE Each time you press the button MUSIC l l l l l l l MOVIE l l l l l l STEREO SOUND off To cancel Press SUPER SURROUND to select STEREO SOUND Note Turn super surround off when playing a DVD recorded with Dolby Digital The surround effects will not be reprod...

Страница 23: ...nge the setting Repeat the procedure from the beginning Using headphones 1 Reduce the volume and connect the headphones not included Headphone plug type 6 3 mm 1 4q stereo 2 Adjust headphone volume with VOLUME Audio is automatically switched to stereo 2 channel If sound is dis torted turn on dynamic range compression page 24 Audio D Range Compression Note Avoid listening for prolonged periods of t...

Страница 24: ...c range compression on in the following cases For clear dialogue when listening at low volume When sound is distorted while playing multi channel DVD through two channels when headphones are connected or when using the MIX 2ch mode On Off English Français Español On Off Yes No Items Audio Choose the preferred audio language Subtitle Choose the preferred subtitle language Menus Choose the preferred...

Страница 25: ...structions Setting 1 3 ms 2 6 ms 3 9 ms 5 3 ms Difference Approx 50 cm 11 2 feet Approx 100 cm 3 feet Approx 150 cm 5 feet Approx 200 cm 6 feet Setting 5 3 ms 10 6 ms 15 9 ms Difference Approx 200 cm 6 feet Approx 400 cm 12 feet Approx 600 cm 18 feet Numbered buttons Entering a password Ratings DVD V The password screen is shown when you select levels 0 to 7 1 Input a 4 digit password with the num...

Страница 26: ...annels Press CHANNEL W W W W WorX X X X X Channels 1 to 10 can also be selected with the numbered buttons 0 selects channel 10 Starting play Press 1 PLAY Fast forwarding and rewinding Press 6 or 5 To stop play Press Using the remote control with other equipment ENTER VCR TV TUNER BAND AUX TV VIDEO FL DISPLAY TOP MENU MENU SKIP PLAY PAUSE DISC SKIP CHANNEL VOLUME SFC MUTING SUBWOOFER LEVEL STOP RET...

Страница 27: ...SFC MUTING SUBWOOFER LEVEL STOP RETURN DISPLAY SLOW SEARCH DVD CD MAIN UNIT DISC MANAGER A B REPEAT ANGLE AUDIO SUBTITLE SETUP TV VOL 1 2 3 4 5 6 7 8 9 0 PLAY MODE CH SELECT TEST MIX 2ch DISC1 DISC2 DISC4 DISC5 DISC3 CANCEL REPEAT CINEMA P MEMORY TIMER DISC TV VCR SUPER SURROUND MARKER SEAT POSITION CENTER FOCUS PRO LOGIC 10 ENTER Numbered buttons Panasonic 01 02 26 Sony 04 Fisher 14 G E 02 03 07 ...

Страница 28: ...LUME SFC MUTING SUBWOOFER LEVEL STOP RETURN DISPLAY SLOW SEARCH DVD CD MAIN UNIT VCR DVD CD AUX TUNER BAND R L VCR AUDIO IN AUX LINE OUT AUDIO OUT PLAY OUT REC IN A B L R You can playback the sound from a video cassette recorder through this unit s speaker 1 Press VCR Main unit Press SELECTOR Each time you press the button DVD CD FM AM TV VCR AUX 2 Start play A A A A A You can playback the sound f...

Страница 29: ... or other convenient location Leave the loop antenna connected Note Disconnect the outdoor antenna when the unit is not in use Do not use the outdoor antenna during an electrical storm B AM ANT FM ANT 75h GND LOOP EXT AM ANT FM ANT 75h GND LOOP EXT 5 12m 1 2 2 1 A 1 Remove a piece of the outer insulator 2 Twist the shield braid 3 Expose the core wire AM outdoor antenna AM loop antenna FM outdoor a...

Страница 30: ... the television or video cassette recorder try changing the code This remote control cannot operate some televisions or video cassette recorders J K Condensation has formed Wait 1 to 2 hours for it to evaporate This unit cannot play discs other than DVD Video CD and Video CD 5 This unit cannot play DVD Video with a region number other than 1 ALL or multiple region numbers including 1 5 The disc ma...
Страница 31: ... operation performed Read the instructions and try again Trouble is likely to have occurred The number following H depends on the status of the unit Reset procedure Press Í to switch the unit to the standby mode and then back to ON Alternatively press Í to switch the unit to the standby mode disconnect the AC power supply cord and then reconnect it If the service numbers fail to clear note the ser...

Страница 32: ...level of sound that can be heard above the noise of the equipment and the highest level of sound before distortion occurs Frame still and field still Frames are the still pictures that go together to make a moving pic ture There are about 30 frames shown each second One frame is made up of two fields A regular television shows these fields one after the other to create frames A still is shown when...

Страница 33: ...dio Sampling frequency CD 44 1 kHz DVD 48 kHz 96 kHz Decoding 16 20 24 bit linear Wow and flutter Below measurable limit D A converter Delta sigma DAC Pick up Beam Source Semiconductor Laser Wavelength CD VCD 790 nm DVD 658 nm SPEAKER SECTION Front and surround speakers SB AFC95 Type 1 way 1 speaker system Bass ref Full range 8 cm 31 8z cone type Impedance 6 Input power MUSIC 60 W Output sound pre...

Страница 34: ... Km 9 5 San Gabriel Industrial Park Carolina Puerto Rico 00985 Phone 787 750 4300 Fax 787 768 2910 Servicenter List F08130 As of AUG 01 Factory Servicenters Locations CALIFORNIA 6550 Katella Avenue Cypress CA 90630 800 Dubuque Avenue S San Francisco CA 94080 3878 Ruffin Road Suite A San Diego CA 92123 FLORIDA 3700 North 29th Avenue Suite 102 Hollywood FL 33020 GEORGIA 8655 Roswell Road Suite 100 A...

Страница 35: ...RE LIMITED TO THE AP PLICABLE WARRANTY PERIOD SET FORTH ABOVE Some states do not allow the exclusion or limitation of incidental or consequential damages or limitations on how long an implied warranty lasts so the above exclusions or limitations may not apply to you This warranty gives you specific legal rights and you may also have other rights which vary from state to state If a problem with thi...

Страница 36: ...our musical enjoyment Now it s time to consider how you can maximize the fun and excitement your equipment offers This manufacturer and the Electronic Industries Association s Con sumer Electronics Group want you to get the most out of your equipment by playing it at a safe level One that lets the sound come through loud and clear without annoying blaring or distortion and most importantly without...

Отзывы: