background image

48

VQT3M06

Reference

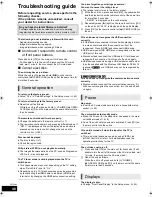
Troubleshooting guide

Before requesting service, please perform the 

following checks.

If the problem remains unresolved, consult 

your dealer for instructions.

The following do not indicate a problem with this unit:

j

Regular disc rotating sounds.

j

Image disturbance during search.

– Image disturbance when replacing 3D discs.

Unit doesn’t respond to remote control 
or front panel buttons.

Press and hold [

Í

/I] on the main unit for 5 seconds.

j

If still unable to turn the unit off, disconnect the AC mains 

lead, wait 1 minute, then reconnect the AC mains lead.

Cannot eject disc.

The unit may have a problem.

While the unit is off, press and hold [

9

] on the remote 

control and [

<

OPEN/CLOSE] on the unit at the same time for 

more than 5 seconds.

To return to the factory preset.

Select “Yes” in “Default Settings” in the Setup menu. (

>

45)

To return all settings to the factory preset.

Reset the unit as follows:
While the unit is off, press and hold [+ VOLUME], [

<

OPEN/

CLOSE] and [

Í

/I] on the main unit at the same time for more 

than 5 seconds.

The remote control doesn’t work properly.

Change the batteries in the remote control. (

>

7)

The remote control and main unit are using different codes. If 
“SET 

” is displayed on the unit’s display when a button is 

pressed on the remote control, change the code on the 
remote control. (

>

45)

Disc cannot be played.

The disc is dirty. (

>

7)

Check the region code.

Still pictures (JPEG) do not playback normally.

The images that were edited on the PC, such as Progressive 
JPEG, etc., may not playback.

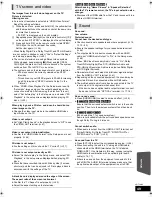
The TV tuner mode is not displayed when the TV is 
switched on.

This phenomenon may occur, depending on the TV setting, 
when “Quick Start” is set to “On”.

Depending on the TV, this phenomenon may be prevented 
by reconnecting the HDMI cable to a different HDMI input 
terminal or by changing the HDMI auto connection setting.

You have forgotten your ratings password.
You want to cancel the ratings level.

The ratings level returns to the factory preset.

1

While the unit is on, press and hold [OK], the yellow button 
and the blue button on the remote control at the same time 
for more than 5 seconds.
– “00 RET” is displayed on the unit’s display.

2

Repeatedly press [

1

] (right) on the remote control or [

Í

/I] 

on the unit until “03 VL” is displayed on the unit’s display.

3

Press [OK] on the remote control or [

<

OPEN/CLOSE] on 

the unit.

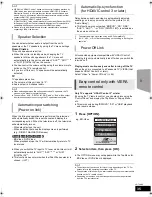
This unit does not recognize the USB connection 
correctly.

If USB device is connected to this unit while playing a disc or 
in a video communication the connection will not be 
recognized. Press [HOME] and reconnect USB device.

USB memory and USB HDD are not


recognized via the rear 

USB port of this unit.

Disconnect and reconnect the USB cable. If it still does not 
recognize the connection, turn this unit off and on again.

USB devices connected using a USB extension cable other 
than the supplied with the Wireless LAN Adaptor DY-WL10 
(optional) 

[BTT270]

 or a USB hub may not be recognized by 

this unit.

[BTT775]


[BTT770]


[BTT370]

This unit does not recognize the communication camera 
correctly.

Disconnect and reconnect the communication camera. If it 
still does not recognize the connection, turn the unit off and 
on again.

No power.

Insert the AC mains lead securely into a household mains 
socket. (

>

20)

The unit switches to standby mode.

When the time set for the sleep timer has passed, the main 
unit will be turned off. (

>

8)

One of the unit’s safety devices is activated. Press [

Í

/I] on 

the main unit to turn the unit on.

This unit is turned off when the input for the TV is 
switched.

This is a normal phenomenon when using VIERA Link 
(HDAVI Control 4 or later). For details please read the 
operating instructions for the TV.

The unit does not turn off.

1

Press and hold [

Í

/I] on the main unit for 5 seconds. (If still 

unable to turn the unit off, disconnect the AC mains lead, wait 
1 minute, then reconnect the AC mains lead.)

2

Reset the unit as follows:
While the unit is off, press and hold [+ VOLUME], 
[

<

OPEN/CLOSE] and [

Í

/I] on the main unit at the same 

time for more than 5 seconds.

The display is dim.

Change “Front Panel Display” in the Setup menu. (

>

43)

Do you have the latest firmware installed?

Firmware updates may be released to correct operating 
irregularities that are discovered with certain movies. (

>

24)

General operation

Power

Displays

SCBTT775_770_370_270EBEPGN_VQT3M06.book  48 ページ  2011年1月18日 火曜日 午後6時14分

Содержание SC-BTT270

Страница 1: ...purchasing this product For optimum performance and safety please read these instructions carefully Before connecting operating or adjusting this product please read the instructions completely Please keep this manual for future reference Model number suffix EB denotes UK model The illustration shows the image of SC BTT775 for the United Kingdom and Ireland ...

Страница 2: ...or place this unit in a bookcase built in cabinet or in another confined space Ensure this unit is well ventilated jDo not obstruct this unit s ventilation openings with newspapers tablecloths curtains and similar items jDo not expose this unit to direct sunlight high temperatures high humidity and excessive vibration Batteries Danger of explosion if battery is incorrectly replaced Replace only wi...

Страница 3: ...iver 2 Replace the fuse and close or attach the fuse cover CAUTION IF THE FITTED MOULDED PLUG IS UNSUITABLE FOR THE SOCKET OUTLET IN YOUR HOME THEN THE FUSE SHOULD BE REMOVED AND THE PLUG CUT OFF AND DISPOSED OF SAFELY THERE IS A DANGER OF SEVERE ELECTRICAL SHOCK IF THE CUT OFF PLUG IS INSERTED INTO ANY 13 AMPERE SOCKET Fuse cover Figure A Figure B Figure A Figure B Fuse 5 ampere Fuse 5 ampere Inf...

Страница 4: ...d or iPhone respectively and has been certified by the developer to meet Apple performance standards Apple is not responsible for the operation of this device or its compliance with safety and regulatory standards Please note that the use of this accessory with iPod or iPhone may affect wireless performance iPhone iPod iPod classic iPod nano and iPod touch are trademarks of Apple Inc registered in...

Страница 5: ...o contents 27 Other operations during play 27 Useful functions 28 Enjoying BD Live or picture in picture in BD Video 29 Regarding DivX 30 Playing music 30 Playing a track in another folder 30 Enjoying 3D video 31 3D settings 31 Useful functions 31 Playing still pictures 32 Useful functions 32 Radio Listening to the Radio 33 Presetting stations automatically 33 Presetting stations manually 33 Liste...

Страница 6: ...270 Surround speakers SB HS775 SB HS270 SB HS270 SB HS270 Subwoofer SB HW370 SB HW370 SB HW370 SB HW270 For Australia and New Zealand Wireless system with a digital transmitter SH FX71 BTT775 BTT770 BTT370 BTT270 1 Remote control N2QAYB000635 1 Remote control N2QAYB000635 1 Remote control N2QAYB000635 1 Remote control N2QAYB000630 2 Batteries for remote control 2 Batteries for remote control 2 Bat...

Страница 7: ...e from removed stickers or labels rented discs etc jDiscs that are badly warped or cracked jIrregularly shaped discs such as heart shapes To dispose or transfer this unit The unit may keep the user settings information in the unit If you discard this unit either by disposal or transfer then follow the procedure to return all the settings to the factory presets to delete the user settings 48 To ret...

Страница 8: ...etting To confirm the remaining time Press and hold the button again 13 TV operation buttons You can operate the TV through the unit s remote control Í Turn the television on and off AV INPUT Switch the input select i j VOL Adjust the volume 14 Adjust the volume of the main unit 15 Select audio 28 16 Mute the sound MUTE flashes on the unit s display while the function is on To cancel press the but...

Страница 9: ...ication Camera TY CC10W optional 38 BTT270 USB port for wireless adaptor 19 5 LAN port 19 6 HDMI AV OUT ARC terminal 17 7 BTT775 BTT770 BTT370 HDMI 1 IN CABLE SAT terminal 18 8 BTT775 BTT770 BTT370 HDMI 2 IN terminal 18 9 FM radio antenna terminal 20 10 DIGITAL AUDIO IN terminal 16 17 11 AUX terminal 16 12 VIDEO OUT terminal 16 13 BTT775 for Australia and New Zealand Digital transmitter dock for s...

Страница 10: ...D Video Video DVD R Video AVCHD DivX MKV MP3 JPEG MPO 3D still picture DVD R DL DVD RW Video AVCHD R RW R DL CD Music CD Music CD DA CD R CD RW DivX MKV Music CD DA MP3 JPEG MPO 3D still picture SD SD Memory Card from 8 MB to 2 GB SDHC Memory Card from 4 GB to 32 GB SDXC Memory Card 48 GB 64 GB Compatible with both mini and micro types as of January 2011 MPEG2 AVCHD JPEG MPO 3D still picture USB U...

Страница 11: ...n be used but must be used with an adaptor card These are usually supplied with such cards or otherwise customer provided To protect the card s contents move the record prevention tab on the SD card to LOCK This unit is compatible with SD Memory Cards that meet SD Card Specifications FAT12 and FAT16 formats as well as SDHC Memory Cards in FAT32 format Does not support long file name and SDXC Memor...

Страница 12: ...le REEX1268 GREEN 4 Screws B XYN5 J18FJK 2 Connector conversion cables RFA3317 BTT770 2 Front speakers 2 Bases RYK1610 K1 4 Screws A XTN5 10FFJK 2 Stands with cables RYK1609E K RED RYK1609D K WHITE 3 Speaker cables REEX1268 GREEN REEX1269 GREY REEX1270 BLUE 2 Screws B XYN5 J18FJK BTT370 2 Front speakers 2 Bases RYK1637 K 2 Screws A XTB4 12GFJK 5 Speaker cables REEX1266A RED REEX1267A WHITE REEX126...

Страница 13: ...by dropping the speaker when carrying BTT775 BTT770 BTT370 Preventing the speakers from falling Consult a qualified housing contractor concerning the appropriate procedure when attaching to a concrete wall or a surface that may not have strong enough support Improper attachment may result in damage to the wall or speakers Use a string of less than 2 0 mm which is capable of supporting over 10 kg e...

Страница 14: ...nd other electronic devices that use the same radio frequency 2 4 GHz band The wireless system will automatically seek a clear channel if any of these other devices interfere with its communication When this happens there is a brief interruption in audio coming from the surround speakers This is the normal operation of the product working to assure the best possible performance of your home theatr...

Страница 15: ...centre position Wireless system 6 PURPLE Subwoofer 5 GREEN Centre speaker 2 RED Front speaker Rch 1 WHITE Front speaker Lch 3 BLUE Surround speaker Lch 4 GREY Surround speaker Rch Connector conversion cable SUBWOOFER 3 6 5 2 1 4 3 3 3 R L R L Ω Ω Ω Ω 3 CENTER SURROUND FRONT Main unit 6 PURPLE Subwoofer 5 GREEN Centre speaker 2 RED Front speaker Rch 1 WHITE Front speaker Lch 4 GREY Surround speaker...

Страница 16: ...system s speakers when Off is selected in HDMI Audio Output 44 A Audio cable not supplied B Video cable For Australia and New Zealand supplied Except Australia and New Zealand not supplied A Optical digital audio cable not supplied B Video cable For Australia and New Zealand supplied Except Australia and New Zealand not supplied Connection to a TV Connection for the standard picture and audio AUX ...

Страница 17: ...ble not supplied Connection for the best picture and audio HDMI ARC HDMI AV OUT ARC TV What is ARC ARC is an abbreviation of Audio Return Channel also known as HDMI ARC It refers to one of the HDMI functions When you connect the unit to the terminal labeled HDMI ARC the optical digital audio cable that is usually required in order to listen to sound from TV is no longer required and TV pictures an...

Страница 18: ...an HDMI terminal A Refer to the operating instructions of the respective devices for the optimal connections B Optical digital audio cable not supplied C Set Top Box Cable Satellite etc BTT775 for Australia and New Zealand Connection with Set Top Box etc AV IN ARC AV OUT AV OUT HDMI IN 2 HDMI IN 1 CABLE SAT HDMI AV OUT ARC TV e g OPTICAL OUT OPTICAL TV e g To enjoy TV audio from this home theatre ...

Страница 19: ...t these devices to strong impacts Keep these devices away from moisture Do not disassemble or alter the device in any way Connection to a broadband network LAN cable connection Wireless LAN connection j BTT775 BTT770 BTT370 Wireless LAN is built in There is no need to connect a Wireless LAN Adaptor BTT270 Connect the Wireless LAN Adaptor DY WL10 optional A LAN Cable not supplied B Broadband router...

Страница 20: ...tor Red The wireless system is on and the wireless link is deactivated Green The wireless system is on and the wireless link is activated WIRELESS SPEAKERS LINKED is also displayed on the main unit s display by pressing and holding STATUS on the remote control Radio antenna connection Using an indoor antenna Using an outdoor antenna Use outdoor antenna if FM radio reception is poor A FM indoor ant...

Страница 21: ...If a digital transmitter is inserted it is required to specify the current settings Speakers position Specify the positioning of the surround speakers Speaker check Check if the connection to each speaker is valid Speaker Output Make surround sound setting for speaker output Cinema Surround Plus Effective when the surround layout is selected in Speakers position The function creates the sound of v...

Страница 22: ...thers select Setup select Network OK select Network Settings OK select Wireless Settings OK select Connection Setting OK select Manual setting OK If your wireless network is encrypted Encryption Key input screen will be displayed Input the encryption key of your network 1 An SSID Service Set IDentification is a name used by wireless LAN to identify a particular network Transmission is possible if ...

Страница 23: ...wing 1 LAN cable connection or Wireless Settings Fail Connectionof the LAN cables 19 2 IP address setting Fail 3 Connection to gateway Fail 1 LAN cable connection or Wireless Settings Pass Connection and settings of the hub and router Settings of IP Address DNS Settings 45 2 IP address setting Fail 3 Connection to gateway Fail 1 LAN cable connection or Wireless Settings Pass 2 IP address setting P...

Страница 24: ...roducts at once you will need to change the remote control code on one product to prevent this occurrence 45 Remote Control Inserting or removing media When inserting a media item ensure that it is facing the right way up While the reading indicator is displayed do not turn off the unit or remove the media Such action may result in loss of the media s contents When removing the SD card press on th...

Страница 25: ... TV AUDIO input 2 CABLE SATELLITE is displayed next to DIGITAL IN when set for CABLE SATELLITE AUDIO input Home Cinema HOME OK Videos Music Photos EXT IN FM Radio Sound Others iPod Network Videos Photos Music Disc Play back the contents 27 30 32 When multiple contents are recorded select the types of contents or the title SD card USB Network Internet Content Displays the Home screen of VIERA CAST ...

Страница 26: ...t RB Surround back speaker right LB Surround back speaker left LS Surround speaker left SW Subwoofer The channels not included in the playing audio will not be displayed subwoofer is displayed even if it is not included 3 Press 3 increase or 4 decrease to adjust the speaker level for each speaker s6 dB to r6 dB Changing the sound modes 1 Press SOUND several times to select the mode The selected mo...

Страница 27: ...ot possible It is not possible to playback AVCHD and MPEG2 video which have been dragged and dropped copied and pasted to the media These functions may not work depending on the media and contents Press STOP The stopped position is memorised Resume play function Press 1PLAY to restart from this position The position is cleared if the tray is opened or you press STOP several times to display STOP o...

Страница 28: ...ng subtitle text You can display subtitle text on the DivX and MKV video disc with this unit The operation might be different or it may not operate properly depending on the way the file was made or the state of this unit playing stopped etc Set Subtitle in Disc 40 DivX and MKV video files that do not display Text do not contain subtitle text If the subtitle text is not displayed correctly try cha...

Страница 29: ...econdary audio DISPLAY select Disc 1 select Signal Type OK set Soundtrack in Secondary Video to On or Off The usable functions and the operating method may vary with each disc please refer to the instructions on the disc and or visit their website Some BD Live content available on the Blu ray discs may require an Internet account to be created in order to access the BD Live content Follow the scre...

Страница 30: ... DivX VOD content that can only be played a set number of times Some DivX VOD contents can only be played a set number of times When you play this content the number of times already played and initially playable number of times is displayed The remaining number of plays decreases each time a programme is played However when playing from the point where play was previously stopped the remaining nu...

Страница 31: ...le viewing 3D images discontinue use and rest your eyes Depending on the connected TV the video being played back might switch to 2D video due to changes in resolution etc Check the 3D setting on the TV 3D video might not output the way it is set in HDMI Video Format or 24p Output 44 3D settings 3D BD Video Playback It is also possible to play back 3D discs in 2D conventional video 42 3D Type If 3...

Страница 32: ...ing is changed the display interval may not become shorter When a music CD a USB device with MP3 recorded and an iPod iPhone are inserted connected to this unit iPod iPhone has a priority to be played back as background music Still pictures displayed as cannot be played back with this unit Photo View SD card 42 XXXXXXXX XXXXXXXX XXXXXXXX XXXXXXXX XXXXXXXX XXXX 58 105 77 48 5 Previous Next Page01 0...

Страница 33: ...tored in the same channel preset 1 Press RADIO to select FM 2 Press the number buttons to select the channel To select a 1 digit number e g 1 1 B OK To select a 2 digit number e g 12 1 B 2 Alternatively press W X or 3 4 Except Australia and New Zealand If the station you are listening to is transmitting RDS signals programme service or programme type can be shown on the display While listening to ...

Страница 34: ... the remote control Select the actual TV audio connection on the main unit 1 Press HOME 2 Press 3 4 2 1 to select Others and press OK 3 Press OK to select Setup 4 Press 3 4 to select TV Device Connection 5 Press 3 4 to select TV Audio Input 6 Press 2 1 to switch AUX ARC or DIGITAL IN Select AUX or ARC 1 in TV Audio Input when the DIGITAL AUDIO IN terminal is used for the STB connection Whenever th...

Страница 35: ... is performed e g DIRECT NAVIGATOR screen Except Australia and New Zealand jBD Video DVD Video When playback stops the TV will automatically return to TV tuner mode When you switch the TV input to TV tuner mode this unit will automatically switch to AUX 2 ARC 1 2 or D IN DIGITAL IN 2 This function does not work when the iPod iPhone selector is chosen 37 Delay between audio and video is automatical...

Страница 36: ...hile the network functions or surround speakers on this unit are in use wirelessly About recharging the battery iPod iPhone will start recharging regardless of whether this unit is on or off IPOD will be shown on the main unit s display during iPod iPhone charging in main unit standby mode Once fully recharged additional recharging will not occur Name Memory size iPod touch 4th generation 8 GB 32 ...

Страница 37: ...operate the iPod iPhone menu The operation may vary among iPod iPhone models 3 4 To navigate menu items OK To go to the next menu RETURN To return to the previous menu 1 Press OPTION 2 Press 3 4 to select the item and press OK Play Mode Shuffle For music playback only Songs Play all songs on iPod iPhone in random order Albums Play all songs on an album in random order Repeat One Play a single song...

Страница 38: ... following cases settings are possible using Internet Content Settings 45 When restricting the use of VIERA CAST When the audio is distorted When wrong time is displayed If using slow Internet connection the video may not be displayed correctly A high speed Internet service with a speed of at least 6 Mbps is recommended Be sure to update the firmware when a firmware update notice is displayed on t...

Страница 39: ...his list can be updated by pressing the red button on the remote control 4 Press 3 4 to select the equipment to playback the contents and press OK 5 Press 3 4 2 1 to select the item to playback folder and press OK You may be able to use convenient functions depending on the content by pressing OPTION or DISPLAY Control Panel is displayed once the playback starts Operation can be performed with 3 4...

Страница 40: ...lected in 3D Type 43 Pop up position for the playback menu or message screen etc can be adjusted during 3D playback Mode Select the picture quality mode during play Advanced Settings Chroma Process The high resolution processing of HDMI chroma signals produces a high resolution picture with rich picture quality Detail Clarity The picture is sharp and detailed Super Resolution Pictures of normal im...

Страница 41: ...cessary The settings remain intact even if you switch the unit to standby 1 Press HOME 2 Press 3 4 2 1 to select Others and press OK 3 Press OK to select Setup 4 Press 3 4 to select the menu and press OK 5 Press 3 4 to select the item and press OK If there are any other items repeat these steps 6 Press 3 4 2 1 to select the option and press OK There may be differences in operation methods If this ...

Страница 42: ...ertificates Subtitle Text Select a suitable item according to the language used for DivX or MKV subtitles text 28 This item is displayed only after playing back a file Still Mode Select the type of picture shown when you pause playback Seamless Play The chapter segments in playlists are played seamlessly Select On when the picture freezes for a moment at the chapters segment in playlists NTSC Cont...

Страница 43: ... This is to prevent burn in on the screen When this is set to On If there is no operation for 5 minutes or more DIRECT NAVIGATOR screen switches to HOME menu automatically While playing and pausing etc this function is not available While playing music CD DA or MP3 after about 5 minutes DIRECT NAVIGATOR screen switches to a blank screen with Screen Saver message Front Panel Display Changes the bri...

Страница 44: ...ound to the TV Moreover you can switch the HDMI input terminal by pressing EXT IN on the remote control Sound will not be output from this unit s speakers VIERA Link Set to use HDAVI Control function when connected with an HDMI cable to a device that supports HDAVI Control Select Off when you do not want to use HDAVI Control Deep Colour Output This setting is for selecting whether to use Deep Colo...

Страница 45: ...elect Off when the audio is warped Time Zone By selecting the time zone it is possible to set the unit s time to match your location Some VIERA CAST contents require the time zone to be set Set the time zone if necessary Summer Time Select On when using Daylight Saving time MAC Address Displays the MAC address of this unit Remote Control Change the remote control code if other Panasonic products r...

Страница 46: ...rom the seating position 2 Set the delay time of the surround back speakers Volume Channel balance Effective when playing multi channel audio 1 Select Test and press OK A test signal is output 2 While listening to the test signal Press 3 4 to adjust the volume of each speaker The volume can be adjusted between r6 dB and s6 dB Set each speaker level according to the volume of the Front L and Front ...

Страница 47: ...low enough space for fitting the speaker BTT775 Front speaker Surround speaker BTT770 BTT370 Front speaker Attach to a wall without the base and the stand BTT770 BTT370 Surround speaker BTT270 Front speaker Surround speaker F 28 5 mm G 97 mm H 335 mm I 210 mm to 212 mm J 40 mm K 63 mm L 322 mm M 40 mm N 17 6 mm O 98 7 mm BTT775 BTT770 Centre speaker BTT370 BTT270 Centre speaker P 18 8 mm Q 117 mm ...

Страница 48: ...nd the blue button on the remote control at the same time for more than 5 seconds 00 RET is displayed on the unit s display 2 Repeatedly press 1 right on the remote control or Í I on the unit until 03 VL is displayed on the unit s display 3 Press OK on the remote control or OPEN CLOSE on the unit This unit does not recognize the USB connection correctly If USB device is connected to this unit whil...

Страница 49: ...n accordance with the settings of the TV A black band is displayed around the edge of the screen The aspect ratio of the screen is abnormal Confirm the TV Aspect is set properly 43 Adjust the aspect setting on the television Except Australia and New Zealand After choosing Home Cinema in Speaker Selection with the TV s remote control the TV s input selection also changes Disconnect the HDMI cable f...

Страница 50: ...ork connection and settings 19 22 44 Check the operating instructions for each device and connect accordingly When using Wireless LAN connection video or audio from the DLNA Certified media server is played back intermittently not played back or video frames are dropped during playback Higher transfer rate router such as 802 11n 2 4 GHz or 5 GHz Wireless router may solve the problem If you use 802...

Страница 51: ...s until the message disappears Select a position with good ventilation when installing the unit Do not block the ventilation hole on the rear and side of the unit HDMI ONLY Some BD Video discs can only be output with HDMI NET While connecting to a network No PLAY There is a viewing restriction on a BD Video or DVD Video 42 No READ The media is dirty or badly scratched The unit cannot play PLEASE W...

Страница 52: ...ound pressure 78 dB W 1 m Frequency range 100 Hz to 30 kHz j16 dB 130 Hz to 25 kHz j10 dB Dimensions WkHkD 255 mmk1024 mmk255 mm Mass Approx 2 3 kg BTT370 SB HF370 Type 2 WAY 2 SPEAKER Bass ref Woofer 6 5 cm CONE TYPE Tweeter 2 5 cm SEMI DOME TYPE Impedance 3 Output sound pressure 78 dB W 1 m Frequency range 85 Hz to 25 kHz j16 dB 105 Hz to 24 kHz j10 dB Dimensions WkHkD 135 mmk404 mmk135 mm Mass ...

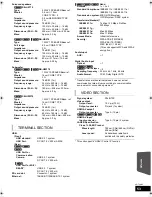
Страница 53: ...0 Hz j10 dB Dimensions WkHkD 145 mmk289 5 mmk258 mm Mass Approx 3 0 kg TERMINAL SECTION USB Front USB standard USB 2 0 1 system USB Port DC OUT 5 V 500 mA MAX Rear BTT775 BTT770 BTT370 USB Port for Communication Camera USB 2 0 1 system DC OUT 5 V 500 mA BTT270 USB Port for Wi Fi READY USB 2 0 1 system DC OUT 5 V 500 mA SD card slot Connector 1 system Ethernet 10BASE T 100BASE TX 1 system BTT775 BT...

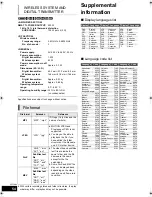
Страница 54: ...utch Swedish Norwegian Danish Portuguese Russian ARA HIN PER IND MRI BUL RUM GRE TUR JPN CHI KOR MAL VIE THA POL CES SLK HUN FIN Japanese Chinese Korean Malay Vietnamese Thai Polish Czech Slovak Hungarian Finnish Arabic Hindi Persian Indonesian Maori Bulgarian Romanian Greek Turkish Others Abkhazian 6566 Afar 6565 Afrikaans 6570 Albanian 8381 Amharic 6577 Arabic 6582 Armenian 7289 Assamese 6583 Ay...

Страница 55: ...ult Settings 45 DivX 30 DLNA 39 F File format 54 Firmware update 24 I iPod iPhone 36 L LAN 19 Language Audio 40 42 Menu 42 On Screen 43 Soundtrack 40 Subtitle 40 42 N Network Connection 19 Setting 22 44 P Playlists 28 Pop up menu 27 Q Quick Start 45 R Radio 33 Re master 41 Resume play function 27 S Subtitle 40 V VIERA CAST 38 VIERA Link HDAVI ControlTM 34 W Wireless LAN 19 24p 40 44 3D 31 ...

Страница 56: ...er care panasonic co uk Direct Sales at Panasonic UK For customers 0844 844 3856 Order accessory and consumable items for your product with ease and confidence by phoning our Customer Care Centre Monday Thursday 9 00 a m 5 30 p m Friday 9 30 a m 5 30 p m Excluding public holidays Or go on line through our Internet Accessory ordering application at www pas europe com Most major credit and debit car...

Отзывы: