


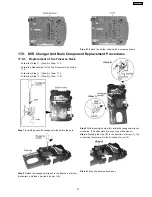


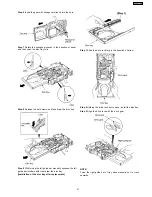
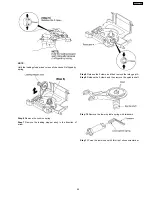


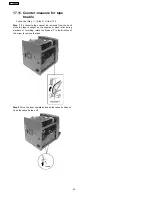


Step 4
Holding the disc tray manually, push the disc tray in the
direction of the arrow.
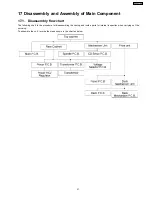
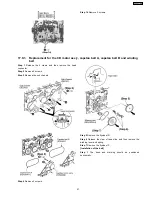
17.8.3. Disassembly and reassembly for
mechanism base drive unit
·
Follow the (Step 1) - (Step 9) of Item 17.8.2.
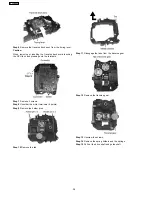
Step 1
Remove 3 screws.
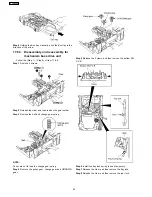
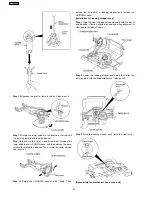
Step 2
Release the claw, and then remove the gear holder.
Step 3
Remove the belt and change gear spring.
NOTE:
Take care not to lose the change gear spring.
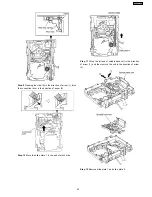
Step 4
Remove the pulley gear, change gear and UP/DOWN
gear.
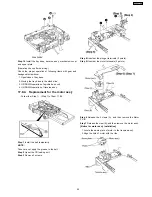
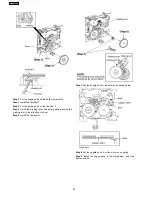
Step 5
Release the 2 claws, and then remove the bottom SW
P.C.B..
Step 6
Install the tray lock spring to hook temporary.
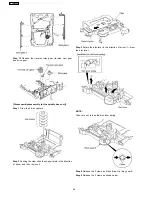
Step 7
Release the claw, and then remove the tray lock.
Step 8
Release the claw, and then remove the rear lock.
42
SA-VK61DGS
Содержание SB-VK61
Страница 10: ...10 Operation Procedures 10 SA VK61DGS ...
Страница 11: ...11 SA VK61DGS ...
Страница 12: ...11 Disc information 12 SA VK61DGS ...
Страница 13: ...13 SA VK61DGS ...
Страница 17: ...13 Procedure for repairing the set 17 SA VK61DGS ...
Страница 57: ...18 3 1 Cassette Deck Section 18 3 2 Adjustment Point 18 3 Alignment Points 57 SA VK61DGS ...
Страница 131: ...25 1 Deck Mechanism RAA3412 S 25 1 1 Deck Mechanism Parts Location 131 SA VK61DGS ...
Страница 132: ...132 SA VK61DGS ...
Страница 134: ...25 2 CD Loading Mechanism RD DAC036 S 25 2 1 CD Loading Mechanism Parts Location 134 SA VK61DGS ...
Страница 135: ...135 SA VK61DGS ...
Страница 136: ...136 SA VK61DGS ...
Страница 138: ...25 3 Cabinet 25 3 1 Cabinet Parts Location 138 SA VK61DGS ...
Страница 139: ...139 SA VK61DGS ...
Страница 140: ...140 SA VK61DGS ...
Страница 155: ...25 6 Packaging 155 SA VK61DGS PRT0406 D K J N L ...
Страница 156: ......