Version upgrade process: Renewal of firmware for improvement of operational range and performance
14.4. Using Recovery Disc
14.4.1. Recovery Process
1. Insert the recovery disc (RFKZD03R005) to the player to replay.
2. The recovery process automatically starts, and a message of completion prompts on the screen.
3. Remove the disc.
4. Turn off the power.
14.4.2. Version Upgrade Process
1. Insert the recovery disc to the player to replay.
2. The version of player is automatically checked and prompts if necessary.
3. Select version upgrade process using the cursor keys on the remote controller unit. (Select YES or NO)
4. a. If YES is selected, the process starts.
b. If NO is selected, only the recovery process is applied.
5. a. When the version upgrade process is complete, a message of completion appears on the screen. Remove the disc.
b. Follow the instruction appearing on the screen, and remove the disc.
6. Turn off the power.
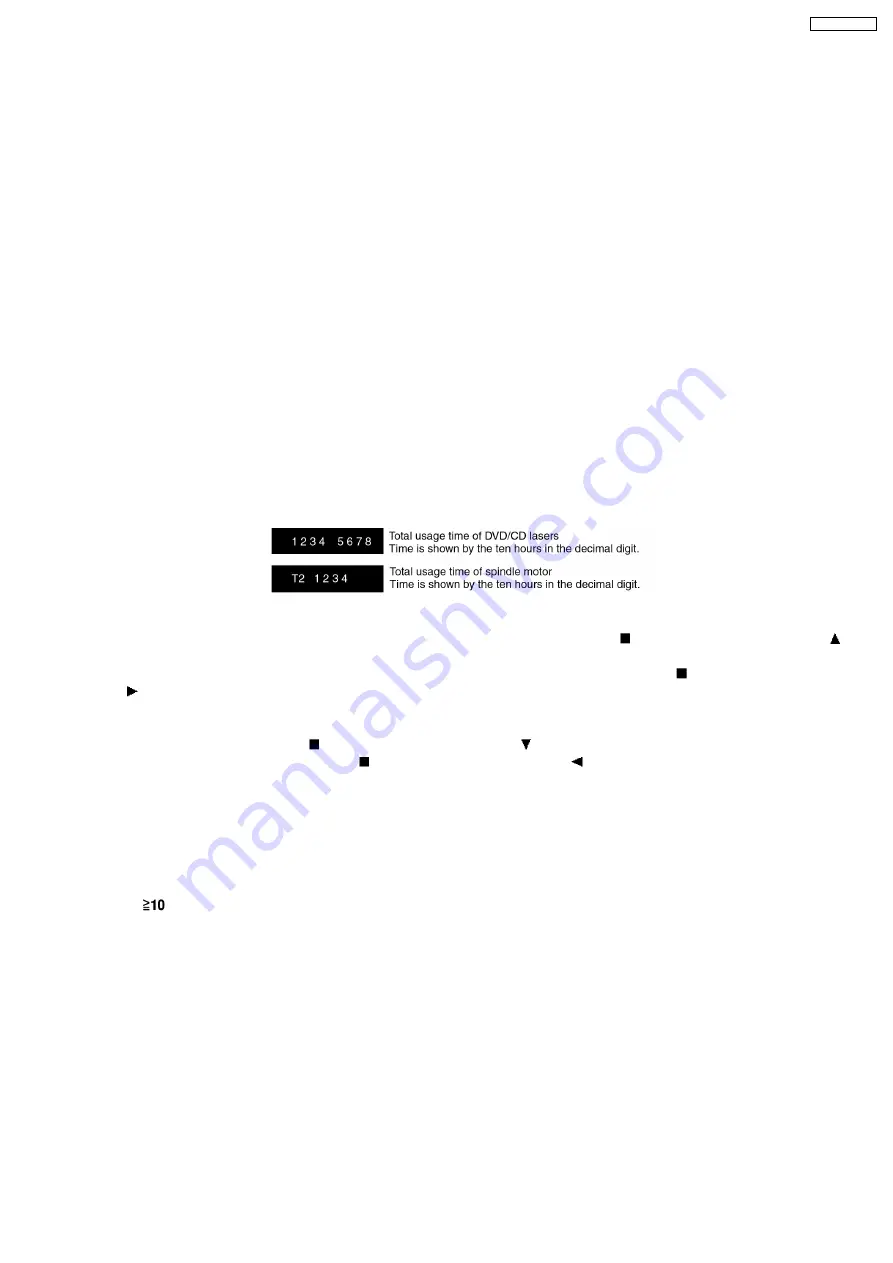
14.5. Total Usage Time Display
1. Details of Operation/Display
Keys for Operation:
Laser usage time: While the player is stopped and no disc is inserted, press both the
button on the player and the
button on the remote controller unit.
Spindle motor usage time: While the player is stopped and no disc is inserted, press both the
button on the player and
the
button on the remote controller unit.
To reset the usage time,
while the usage time is displayed:
Laser usage time: press both the
button on the player and the
button on the remote controller unit.
Spindle motor usage time: press both the
button on the player and the
button on the remote controller unit.
2. Purpose of Use
To obtain reference data of laser and spindle motor systems during failure diagnosis.
To check faulty parts during re-repair.
14.6. After replacement of DVD Module
Below steps is to be performed after changing of DVD Module
1. Press
on remote control while pressing “STOP” on main unit.
2. FL will display “INITIALIZE”.
3. Press “STOP” & “ENTER” on remote control (For reset of unit)
4. FL will display “DVD RESET” before change to TOC reading again.
5. Power off the set. Unplug AC cord & wait for few seconds.
6. Plug in AC cord & power on set.
25
SA-VK825DEE
Содержание SA-VK825DEE
Страница 9: ...8 Accessories Remote control AC cord FM antenna AM antenna Video cable Microphone 9 SA VK825DEE ...
Страница 10: ...9 Operation Procedures 10 SA VK825DEE ...
Страница 11: ...11 SA VK825DEE ...
Страница 12: ...10 Disc information 12 SA VK825DEE ...
Страница 13: ...13 SA VK825DEE ...
Страница 16: ...16 SA VK825DEE ...
Страница 40: ...40 SA VK825DEE ...
Страница 41: ...15 17 3 Replacement for the traverse deck Follow the Step 1 Step 10 of item 15 17 2 41 SA VK825DEE ...
Страница 43: ...43 SA VK825DEE ...
Страница 44: ...44 SA VK825DEE ...
Страница 46: ...46 SA VK825DEE ...
Страница 47: ...47 SA VK825DEE ...
Страница 48: ...48 SA VK825DEE ...
Страница 49: ...49 SA VK825DEE ...
Страница 50: ...50 SA VK825DEE ...
Страница 51: ...51 SA VK825DEE ...
Страница 52: ...52 SA VK825DEE ...
Страница 53: ...53 SA VK825DEE ...
Страница 54: ...54 SA VK825DEE ...
Страница 55: ...55 SA VK825DEE ...
Страница 56: ...56 SA VK825DEE ...
Страница 66: ...17 3 1 Cassette Deck Section 17 3 2 Adjustment Point 17 3 Alignment Points 66 SA VK825DEE ...
Страница 78: ...19 Voltage Measurement This section is not available at time of issue 78 SA VK825DEE ...
Страница 121: ...B0ACCK000005 MA2J72800L Cathode Anode Ca A B0JAPG000019 A Ca Cathode Anode 121 SA VK825DEE ...
Страница 125: ...25 1 Deck Mechanism RAA3413 S 25 1 1 Deck Mechanism Parts Location 125 SA VK825DEE ...
Страница 126: ...126 SA VK825DEE ...
Страница 128: ...25 2 DVD Loading Mechanism 25 2 1 DVD Loading Mechanism Parts Location 128 SA VK825DEE ...
Страница 129: ...129 SA VK825DEE ...
Страница 131: ...25 3 Cabinet 25 3 1 Cabinet Parts Location 131 SA VK825DEE ...
Страница 132: ...132 SA VK825DEE ...
Страница 133: ...133 SA VK825DEE ...
Страница 148: ...148 SA VK825DEE ...


