[PICTURE] menu
58 -
ENGLISH
Settings
■
[RGB/YC
B
C
R
]
,
[RGB/YP
B
P
R
]
Set this to [AUTO] under normal conditions. If images are
not displayed correctly when this is set to [AUTO], set
either [RGB] or [YC
B
C
R
], [YP
B
P
R
] in accordance with the
input signal.
Switch settings
Switch settings
The settings change as follows each time the button
is pressed.
[AUTO]
[RGB]
[YP
B
P
R
]
[YC
B
C
R
]
●
When using COMPUTER input
z
When using 480i, 480p, 576i, 576p, or VGA60 input:
Select from [AUTO], [RGB], [YC
B
C
R
].
z
When using a movie based signal input other than
described above:
Select from [AUTO], [RGB], [YP
B
P
R
].
●
When using an HDMI 1/2/3 input
z
When using a 480p or 576p input:
Select from [AUTO], [RGB], [YC
B
C
R
].
z
When using a movie based signal input other than
described above:
Select from [AUTO], [RGB], [YP
B
P
R
].
Note
z
See “List of compatible signals” for signal details.
(
page 100)
z
In some cases the projector may not operate correctly
with some connected devices.
z
These cannot be selected using COMPONENT input
terminals.
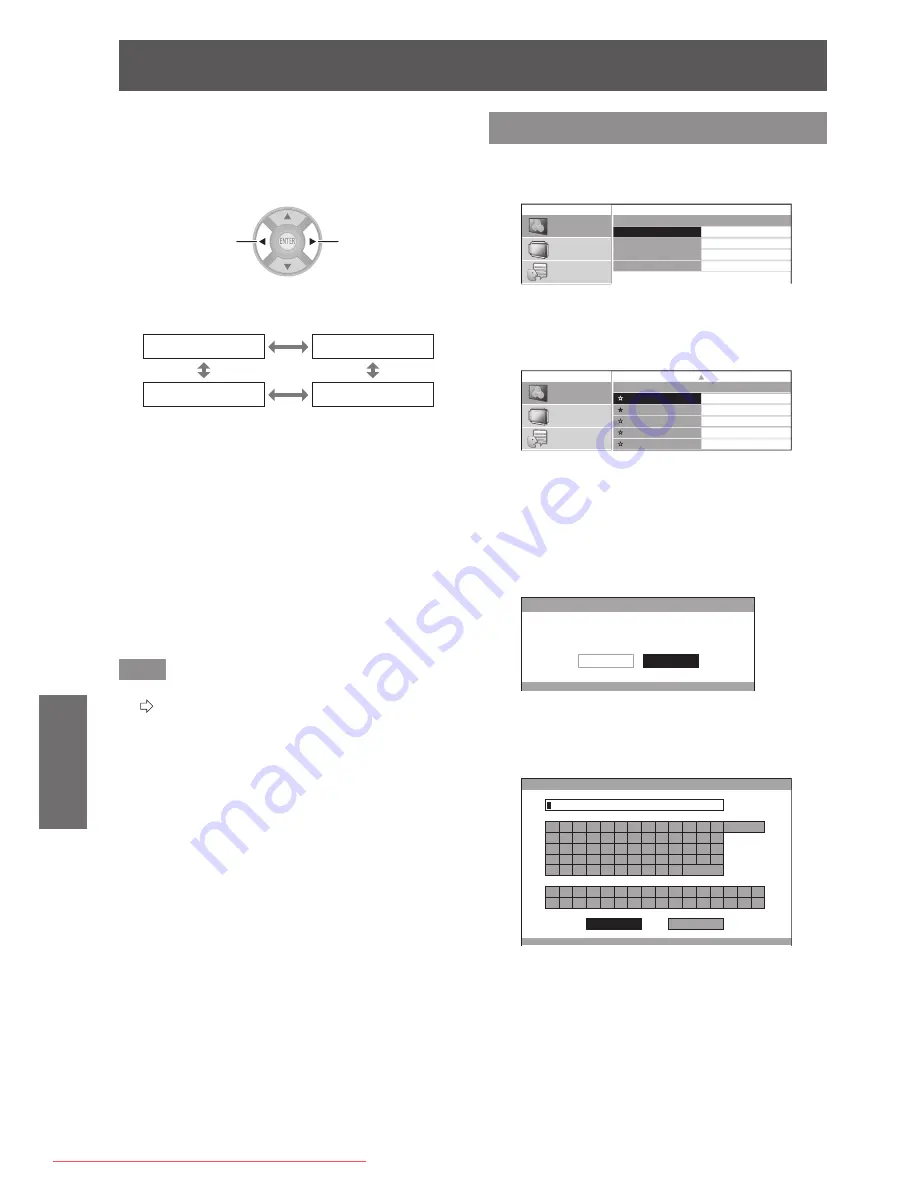
[PICTURE MEMORY]
Press the <ENTER> button.
z
The [PICTURE MEMORY] menu is displayed.
PICTURE MEMORY
MEMORY SAVE
MEMORY LOAD
MEMORY DELETE
MEMORY NAME CHANGE
PICTURE
POSITION
LANGUAGE
3D SETTINGS
LENS CONTROL
OPTION
■
[MEMORY SAVE]
Values set (adjustment values) for videos can be
saved as favorites.
MEMORY SAVE
MEMORY1
MEMORY2
MEMORY3
MEMORY4
MEMORY5
MEMORY6
MEMORY7
MEMORY8
MEMORY9
MEMORY10
MEMORY11
MEMORY12
MEMORY13
PICTURE
POSITION
LANGUAGE
3D SETTINGS
LENS CONTROL
OPTION
1/2
★
: Memory with data already stored
☆
: No data stored
1) Press the ▲▼ buttons to select the
number to be saved and press the
<ENTER> button.
z
The [MEMORY SAVE] confirmation message is
displayed.
MEMORY SAVE
SAVE THE ADJUSTED VALUE AS MEMORY 1.
CANCEL
OK
2) Select [OK] with the ▲ ▼ buttons.
3) Press the <ENTER> button.
z
[MEMORY NAME INPUT] screen is displayed.
MEMORY NAME INPUT
A
B
C
D
E
F
G
H
I
J
K
L
M
N
O
P
Q
R
S
T
U
V
W
X
Y
Z
a
b
c
d
e
f
g
h
i
j
k
l
m
n
o
p
q
r
s
t
u
v
w
x
y
z
1
2
3
4
5
6
7
8
9
0
!
"
#
$
%
&
'
*
+
-
/
=
?
@
\
^
_
`
|
~
(
)
<
>
[
]
{
}
,
.
:
;
ALL DELETE
SPACE
OK
CANCEL
4) Press the ▲▼◄► buttons to specify the
location of the required character and
press the <ENTER> button.
z
You can enter up to 16 characters.
z
Select [ALL DELETE] and press the <ENTER>
button to erase all input text. If you press the
<DEFAULT> button on the remote control, you can
erase the character currently selected by the cursor
in the input box.
Downloaded From projector-manual.com Panasonic Manuals


