Panasonic Palmcorder PV-S64, Руководство по эксплуатации
Panasonic Palmcorder PV-S64 - высококачественный видеокамера с компактным дизайном. Для использования необходимо скачать руководство по эксплуатации с manualshive.com бесплатно. Это позволит вам научиться пользоваться всеми функциями камеры и создавать потрясающие видеоролики без лишних сложностей.
Поделиться
Скачать


Отзывы:
Нет отзывов
Похожие инструкции для Palmcorder PV-S64

9710
Бренд: Earth Networks Страницы: 35
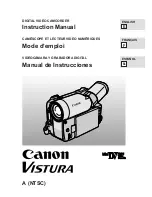
Vistura
Бренд: Canon Страницы: 56
VIXIA HF M50
Бренд: Canon Страницы: 110

VIXIA HF S10
Бренд: Canon Страницы: 13

VIXIA HF R40
Бренд: Canon Страницы: 116

VIXIA HF R30
Бренд: Canon Страницы: 226

Palmcorder VM-D52
Бренд: Quasar Страницы: 40

UVC-Micro
Бренд: Ubiquiti Страницы: 32

IK-HR1H
Бренд: Toshiba Страницы: 2

IK-1000 - Starlight Color Video Camera CCTV
Бренд: Toshiba Страницы: 2

IK-1000 - Starlight Color Video Camera CCTV
Бренд: Toshiba Страницы: 40

VJBK1T
Бренд: Sony Страницы: 2

VX-1000
Бренд: Sony Страницы: 6

VX-2000
Бренд: Sony Страницы: 11

VX-2100
Бренд: Sony Страницы: 16

XCG-C130
Бренд: Sony Страницы: 49

Video8 Handycam CCD-FX340
Бренд: Sony Страницы: 54

XCG-CG160
Бренд: Sony Страницы: 60


