background image

2

A

+

-

-

+

IMPORTANT

Your attention is drawn to the fact that
recording of pre-recorded tapes or discs
or other published or broadcast material
may infringe copyright laws.

WARNING

TO REDUCE THE RISK OF FIRE OR
SHOCK HAZARD, DO NOT EXPOSE
THIS EQUIPMENT TO RAIN OR
MOISTURE.

On Colour system

This unit is designed to play back
programmes based on the PAL (B/G and
D/K) and SECAM (B/G and D/K) colour
systems.
– Tapes recorded with the French SECAM

colour system can be played back on this
unit but the picture displayed will be black
and white.

As this equipment gets hot during use,
operate it in well ventilated place; do not
install this equipment in a confined
space such as a book case or similar
unit.

FOR YOUR SAFETY

DO NOT REMOVE OUTER COVER.

To prevent electric shock, do not remove
cover. No user serviceable parts inside. Refer
servicing to qualified service personnel.

Longrun Head System

This longrun head system enables
approximately 8,000 hours of recording/
playback with high quality images. Newly
developed head cylinder with narrower head
windows and tapered cylinder design
effectively protects heads from dust and
prevents head clogging. Plus, “Alumina” Head
Cleaner further enhanced cleaning efficiency.
– Based on in-house tests with Panasonic

video cassettes. Actual head life may vary
according to conditions of use, tape type,
temperature, humidity, etc.

Infrared Remote Control

Power Source for the Remote Control

The remote control is powered by 2 UM3 or R6
size batteries. The life of the batteries is about
one year, although this depends on the
frequency of use.

Precautions for Battery Replacement

– Load the new batteries with their polarity (

+

and 

-

) aligned correctly.

– Do not apply heat to the batteries, or an

internal short-circuit may occur.

– If you do not intend to use the remote control

for a long period of time, remove the batteries
and store them in a cool and dry place.

– Remove spent batteries immediately and

dispose of them.

– Do not use an old and a new battery together,

and never use an alkaline battery with a
manganese battery.

– Do not use rechargeable batteries.

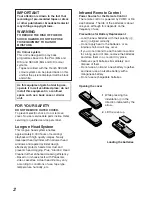
Opening the cover

1

While pressing the
indentation 

A

 in the

direction indicated by the
arrow...

2

Lift the cover up.

Loading the batteries

Содержание NV-SJ3MK2AM

Страница 1: ...tions 4 Tuning the TV to your VCR Line Recording 4 Menu Setting 5 Playback 6 Play Off Timer 8 Recording and Editing 9 One Touch Recording OTR 11 Other Functions 12 Before Requesting Service 14 Specifications 15 Before attempting to connect operate or adjust this product please read these instructions completely ...

Страница 2: ...oped head cylinder with narrower head windows and tapered cylinder design effectively protects heads from dust and prevents head clogging Plus Alumina Head Cleaner further enhanced cleaning efficiency Based on in house tests with Panasonic video cassettes Actual head life may vary according to conditions of use tape type temperature humidity etc Infrared Remote Control Power Source for the Remote ...

Страница 3: ...ine Recording in a horizontal position Keep the VCR Line Recording TV and other equipment switched off until you have finished all connections Condensation may form in the following cases The VCR Line Recording is brought from cold surroundings into a well heated room The VCR Line Recording is suddenly brought from cool surroundings such as an air conditioned room or car to a place which is hot an...

Страница 4: ...layback channel not used for any TV station L Channel E3 H Channel E4 4 Select the TV channel on which the playback picture is viewed 5 Stop playback POWER Í Í Í Í Í I Button Press to switch the VCR Line Recording from on to the standby mode or vice versa In the standby mode the VCR Line Recording is still connected to the mains When the VCR Line Recording is turned off the STANDBY indicator on th...

Страница 5: ...e remaining tape time may not be displayed correctly depending on the tape used 4 Press MENU to make the on screen display disappear SYSTEM 1 Press MENU 2 Select SYSTEM 3 Select AUTO PAL MESECAM or B W AUTO Allows PAL or MESECAM signals to be distinguished automatically Normally set at this position If the picture lacks colour when AUTO is set set to PAL or MESECAM PAL Use when recording or playba...

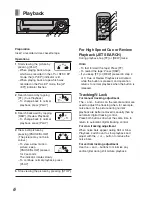
Страница 6: ...wly To continue normal playback press PLAY 5 Stop viewing the picture by pressing STOP For High Speed Cue or Review Playback JET SEARCH During playback tap FF or REW twice Hints To fast forward the tape Press FF To rewind the tape Press REW If you keep FF or REW pressed in step 2 or 3 Cue or Review Playback is activated while the button is pressed and operation returns to normal playback when the ...

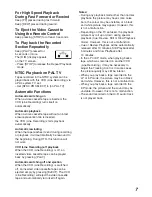
Страница 7: ...video cassette tape can be played back by pressing PLAY Automatic switching off and ejection When the VCR Line Recording is switched off an inserted video cassette tape can be ejected simply by pressing EJECT The VCR Line Recording will eject the video cassette tape and automatically turn itself off again Notes During any playback mode other than normal playback the picture may have some noise bar...

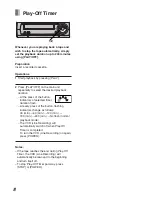
Страница 8: ...unit repeatedly to select the desired playback duration At the press of the button indicators of selected timer duration flash At every press of the button flashing indicators change as follows 30 min 60 min 120 min 180 min 240 min No flash normal playback mode The VCR Line Recording will automatically switch off when Play Off Timer is completed To turn the VCR Line Recording on again press POWER ...

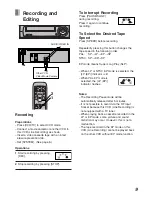
Страница 9: ...Repeatedly pressing this button changes the tape speed in the following order PAL SP LP EP SP NTSC SP EP SP EP mode means Super Long Play SLP When LP or NTSC EP mode is selected the LP EP indicator is lit When PAL EP mode is selected the LP EP indicator flashes Notes The Recording Pause mode will be automatically released after 5 minutes It is not possible to record via the RF input Socket because...

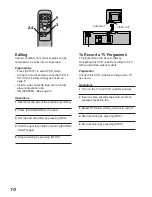
Страница 10: ...MENU REW INDEX STOP REC OSD FF PLAY RESET TRACKING V LOCK SPEED 5 3 2 4 Editing Various contents from other sources can be recorded as a series into a single tape Preparations Press VCR TV to select VCR mode Connect a movie camera or another VCR to this VCR Line Recording as shown on page 9 Insert a video cassette tape with an intact erasure prevention tab Set SYSTEM See page 5 Operations 1 Search...

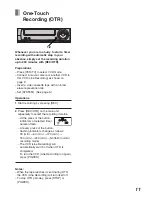
Страница 11: ...tte tape with an intact erasure prevention tab Set SYSTEM See page 5 Operations 1 Start recording by pressing REC 2 Press REC OTR on the main unit repeatedly to select the recording duration At the press of the button indicators of selected timer duration flash At every press of the button flashing indicators change as follows 30 min 60 min 120 min 180 min 240 min No flash normal recording mode Th...

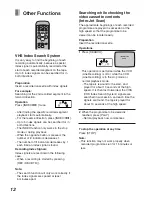
Страница 12: ...h time an index signal is found Recording Index Signals Index signals are recorded in the following case When a recording is started by pressing REC REC OTR Note The search function will only work correctly if the index signals are spaced at least 5 minutes apart Searching while checking the video cassette contents Intro Jet Scan The approximate beginnings of each recorded programme are played in ...

Страница 13: ...ed when inserting a cassette The remaining tape time may not be displayed correctly 2 Tape running display 3 Tape counter OTR indication Index search Play Off Timer Press RESET to reset the tape counter elapsed time to 0 00 00 The tape counter is automatically reset to 0 00 00 when a video cassette is inserted 4 Tape speed indicator SP LP EP 5 Cassette in indicator 6 Colour system indicator Inform...

Страница 14: ...y be faulty and play back for a few minutes If fault does not clear consult your dealer for further advice Tape defective due to surface damage or wear Check another tape to see if noise free and replace defective tape VCR Line Recording rewinds automatically during playback Tape end detector works during playback due to damaged tape Replace defective tape Remote control does not operate correctly...

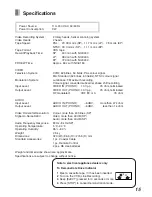
Страница 15: ... 0 Vp p 75 ohm terminated RF modulated VHF E3 or 4 75 ohm AUDIO Input Level AUDIO IN PHONO j6 dBV more than 47 kohm Output Level AUDIO OUT PHONO j6 dBV less than 1 kohm Video Horizontal Resolution Colour more than 240 lines SP Signal to Noise Ratio Video more than 43 dB SP Audio more than 43 dB SP Audio Frequency Response 80 Hz 8 kHz SP Operating Temperature 5 oC 40 oC Operating Humidity 35 80 Wei...

Страница 16: ...Matsushita Electric Industrial Co Ltd Web Site http www panasonic co jp global ...

Отзывы: